Lubrication
239
Figure 4
-
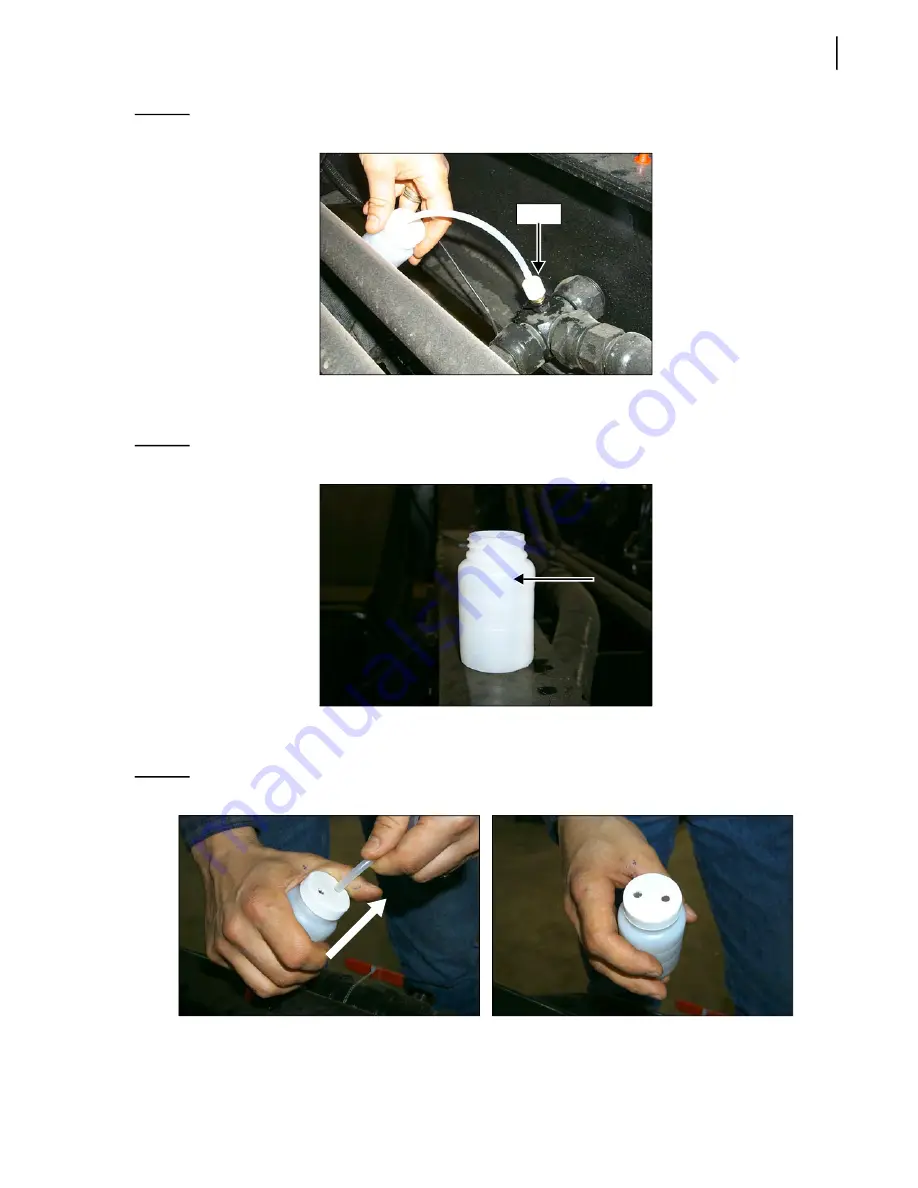
5 Installing probe on coupler
4.
Fill the bottle to the level mark (the pump must be engaged to do this). Remove excess oil
through the vent.
D
O
NOT
OPEN
THE
BOTTLE
!
Figure 4
-
6 Recommended oil level
5.
Once the sample is taken, remove the probe from the coupler and pull out the probe to remove it
from the bottle (see Figure 4
7).
Figure 4
-
7 Pulling out probe from bottle
6.
Put the seal cover over the bottle cap.
Probe
Содержание EXPERT
Страница 1: ...EXPERT TM MAINTENANCE MANUAL...
Страница 2: ......
Страница 3: ...EXPERT MAINTENANCE MANUAL...
Страница 10: ...viii Table of Contents...
Страница 18: ...8 Introduction...
Страница 244: ...234 General Maintenance...
Страница 251: ...Lubrication 241 Figure 4 11 Glass compartment lubrication chart optional...
Страница 252: ...242 Lubrication Figure 4 12 EXPERT lubrication chart...
Страница 261: ...Lubrication 251 Figure 4 27 Packer lubrication points 2 Grease fitting LH side front cylinder pin...
Страница 263: ...Lubrication 253 Pump Drive Shaft U Joint Figure 4 30 Pump drive shaft lubrication points Grease fittings...
Страница 264: ...254 Lubrication...
Страница 320: ...310 Hydraulic System...
Страница 357: ...Troubleshooting 349...
Страница 358: ...350 Troubleshooting...
Страница 386: ...378 Multiplexing...
Страница 388: ...380 Lifting Arms Figure 10 1 Mounting bolts Figure 10 2 Wear pads Figure 10 3 Helping Hand gripper...


