Labrie Automizer Versa Hand Скачать руководство пользователя страница 20

14

Safety

Labels on Tailgate

32307

79835

79839

Содержание Automizer Versa Hand

Страница 1: ...AUTOMIZER VERSA HANDTM OPERATOR MANUAL...

Страница 2: ......

Страница 3: ...AUTOMIZER VERSA HANDTM OPERATOR MANUAL...

Страница 4: ...on contained in this document All risks and damages incidental or otherwise arising from the use or misuse of the information contained herein are entirely the responsability of the user Although care...

Страница 5: ...ning Labels 9 Labels on Body 9 Labels on Tailgate 14 Labels on Cab Console 15 Labels outside Cab 16 Labels inside Cab 17 Safety Features 21 Global Motion Sensors Optional 21 Troubleshooting and Mainte...

Страница 6: ...53 Temporary Handbrake 53 Operating the AUTOMIZER VERSA HANDTM 55 Daily Inspection 55 Approaching the Vehicle 55 Visual Inspection 56 Starting the Vehicle 56 Body Inspection Procedure 57 Arm Inspectio...

Страница 7: ...d recycling materials in narrow streets and alleys Product Overview This zero grab and zero swing out automated arm is the lifting mechanism for narrow streets and alleys Its reach facilitates bin col...

Страница 8: ...e du Pont St Nicolas QC G7A 2T3 Toll Free 1 877 831 8250 Telephone 1 418 831 8250 Service Fax 1 418 831 1673 Parts Fax 1 418 831 7561 Parts and warranty During business hours 8 00 AM to 5 00 PM Easter...

Страница 9: ...t that the safe use of the vehicle remains the user s responsibility He must heed all safety notions explained in this manual and on the labels found on the vehicle Danger Indicates a hazardous situat...

Страница 10: ...tandards and recommendations For help or for more information please contact the manufacturer or any of its authorized representatives To keep records of all vehicle breakdowns and malfunctions as wel...

Страница 11: ...is clear of any people or possible obstructions IMPORTANT Be extremely cautious in areas where small children may be present Wear safety glasses and footwear gloves and any other safety equipment whe...

Страница 12: ...on the parking brake before leaving the driving position When the vehicle is parked the parking brake must be applied Before activating the automated arm operators shall make sure that people and obs...

Страница 13: ...lure to do so may result in unit and or property damages personal injury or death Warning Make sure there is enough clearance between raised container and overhead power lines The automated arm or the...

Страница 14: ...ntenance facility preferably away from traffic surface drains and ditches AUTOMIZER VERSA HAND TM vehicles are equipped with a 5 lb fire extinguisher which is found inside the cab A 20 lb fire extingu...

Страница 15: ...safety and warning labels while working in and around the AUTOMIZER VERSA HANDTM Keep your labels clean and in good condition at all times For replacement labels please call LabriePlus Labels may vary...

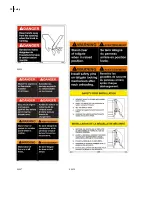
Страница 16: ...10 Safety 79986 84010 84014...

Страница 17: ...Safety 11 84272 84321...

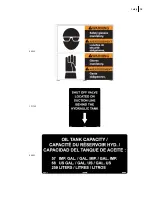
Страница 18: ...12 Safety 84456 84458 84467...

Страница 19: ...Safety 13 84469 84485 121349...

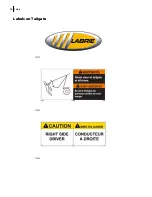
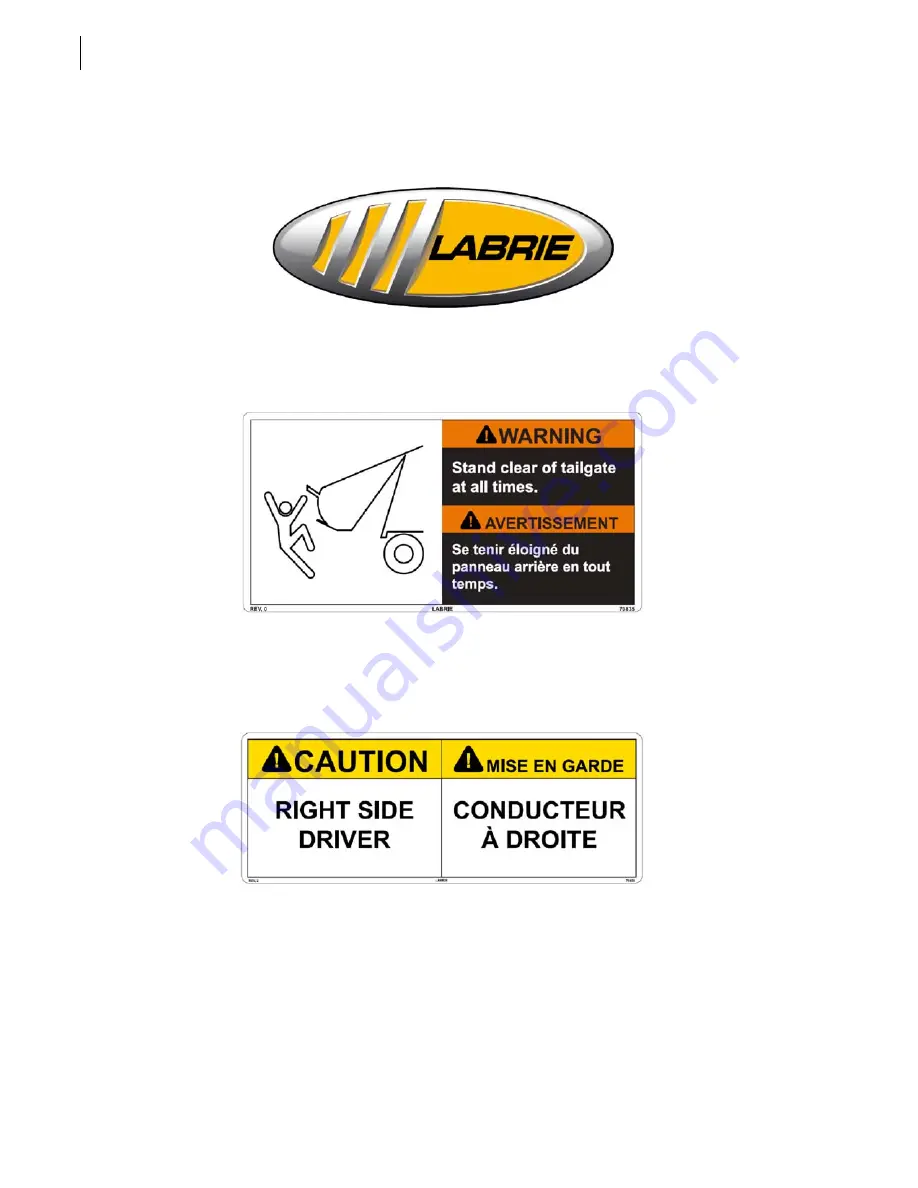
Страница 20: ...14 Safety Labels on Tailgate 32307 79835 79839...

Страница 21: ...Safety 15 Labels on Cab Console 43862 43878 43880 43900 43934 47451 47622 47877 97755...

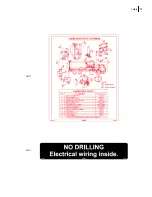
Страница 22: ...16 Safety Labels outside Cab 47878 47981 79844 79847 79850 79851 79865...

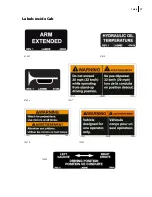
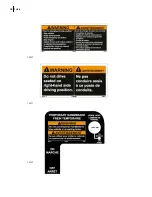
Страница 23: ...Safety 17 Labels inside Cab 43882 47418 47426 79817 79818 79822 79824...

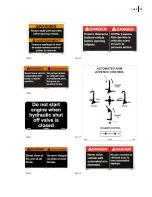
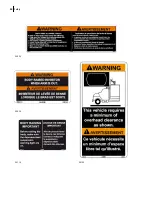
Страница 24: ...18 Safety 79823 79831 79832...

Страница 25: ...Safety 19 79840 79843 79855 79877 84010 84012 84273...

Страница 26: ...20 Safety 84020 84024 84114 84188...

Страница 27: ...atures Global Motion Sensors Optional This OPTIONAL safety system is used to detect objects located behind the truck This system is turned on by placing the transmission in reverse Warning The operato...

Страница 28: ...es can be disabled by pressing the AUTO BRAKE OFF switch on the control box This will cause a red warning light to turn on indicating the brakes will not automatically engage The yellow light and audi...

Страница 29: ...g Guide of Global Sensor Systems Inc NOTE Above illustrations taken from the Installation Manual of Global Sensor Sytems Inc Back Up Alarm The back up alarm sounds when the truck is in reverse the tai...

Страница 30: ...1 Make sure that there is enough clearance above the body to raise it safely 2 Start the engine 3 Raise the body until the safety prop is free to tilt under it 4 Release the safety prop using the safe...

Страница 31: ...1 Make sure that there is enough clearance above the body to raise it safely 2 Start the engine 3 Raise the body until the safety prop can move freely 4 Put the safety prop back in its place 5 Lower...

Страница 32: ...rop To set the tailgate safety prop 1 Make sure that the body is empty 2 Remove the tailgate locking mechanism safety pins Figure 2 5 Safety pin 3 Start the engine Danger The safety prop shall be set...

Страница 33: ...ng the safety prop upward left and setting it down right 7 Lower the tailgate onto the safety prop Putting the Tailgate Safety Prop Back in Place To put the tailgate safety prop back in its home posit...

Страница 34: ...ntrol lever on the cab control panel completely close the tailgate The TAILGATE OPEN light indicator should turn off 7 Put the safety pins back in place Camera System optional AUTOMIZER VERSA HAND TM...

Страница 35: ...or monitor installed in the cab Refer to the camera manufacturer s manual for more information Figure 2 9 Camera inside the hopper Figure 2 10 Camera on the tailgate Tailgate Holding Valve Located und...

Страница 36: ...e ball valve on the hydraulic tank is fully open before starting the vehicle see Figure 2 12 NOTE The hydraulic tank model can vary according to the options installed on the vehicle 3 Engage the hydra...

Страница 37: ...times Use the hoe to rake dirt out of clean out traps on each side of the vehicle Figure 2 13 Removing debris through the clean out trap Locking Out and Taging Out the Vehicle For any inspection repai...

Страница 38: ...master switch 6 Chock all wheels IMPORTANT The battery set of the AUTOMIZER VERSA HANDTM is equipped with a master switch see Figure 2 15 that must be turned off Figure 2 15 Master switch 7 Put an OFF...

Страница 39: ...be equipped with two 2 steering wheels one on the left and one on the right The right hand side steering wheel makes waste collection easier by a single person It is provided along with an accelerato...

Страница 40: ...vironmental Group and that are equipped with dual driving position Some units are designed only with a single driving position If the cab has been modified by the chassis manufacturer the operator MUS...

Страница 41: ...All the electrical accessories of the right hand side driving position are then enabled Figure 2 18 Driving position switch 7 Enable the right hand side joystick by moving the joystick selector switc...

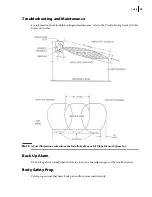
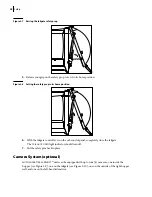
Страница 42: ...36 Safety 8 Adjust mirrors properly see Figure 2 21 Figure 2 21 Adjusting mirrors...

Страница 43: ...uring collection and operation Here is a description of the controls and buttons found on this console Figure 3 1 Cab console Pump Switch This switch which is also called PTO switch engages and diseng...

Страница 44: ...tant not to let the pump run dry or without oil Otherwise the pump will be seriously damaged or even destroyed Figure 3 2 Main valve on suction line IMPORTANT In case of a leak in the hydraulic system...

Страница 45: ...itch located on the cab console allows the operator to choose between the right tailgate and the left tailgate Both tailgates are controlled by the same control switch Figure 3 3 TAILGATE control swit...

Страница 46: ...DY RAISED warning lamp see Figure 3 4 goes on and a buzzer sounds Figure 3 5 BODY RAISE control switch Joystick Selector Switch In units equipped with two arm control joysticks a JOYSTICK SELECTOR swi...

Страница 47: ...ol switch IMPORTANT The packer must be fully retracted to allow the crusher panel to move down The crusher panel needs to be in the parked position to let the arm dump a cart To raise the crusher pane...

Страница 48: ...onds after the grabber is closed This gives the arm enough time to reach the hopper and dump the cart before the packer starts to pack If the unit is equipped with the multi cycle function refer to Mu...

Страница 49: ...in it It also allows to pick up elevated carts To enable the gripper auto close override function push on the GRIPPER AUTO CLOSE OVERRIDE button on the cab console see Figure 3 10 The gripper auto clo...

Страница 50: ...tivate the auto neutral function turn the AUTO NEUTRAL control switch to the right To deactivate the auto neutral function turn the AUTO NEUTRAL control switch to the left Light Bar Control Pad option...

Страница 51: ...tation Stop Push Button red The Emergency Stop button will stop all hydraulic functions on the truck tailgate body hoist etc By pressing the red button the packer and the automated arm will stop where...

Страница 52: ...the packer is necessary to bring back the packer Figure 3 16 Return Push Button Multi Cycle Control Switch This function allows the packer to cycle a preset number of cycles from 2 to 8 3 being the s...

Страница 53: ...ment of the gripper the right button is used to open the gripper the left button to close the gripper The buttons on the front are used to control the Auto DumpTM feature optional NOTE The Auto Dump f...

Страница 54: ...ber down and arm extend lettering to lower the grabber and extend the arm Shift the joystick toward the streetside at 90 to the arm retract lettering to retract the arm only Shift the joystick backwar...

Страница 55: ...hand side seat These arm controls may vary according to truck model Figure 3 20 Auxiliary arm controls Auxiliary arm controls have the same functions as does the joystick They allow the operator to co...

Страница 56: ...rols Figure 3 21 Auxiliary arm control label Cab Dashboard The following is a description of the controls and buttons found on the dashboard Parking Brake The parking brake must be used every time the...

Страница 57: ...up to turn on the work lights Shift the switch down to turn off the work lights Figure 3 23 Work light switch NOTE On some units this switch is found on the console Flashing Light Switch This switch...

Страница 58: ...ivates and deactivates the strobe light mounted on the tailgate Shift the switch up to turn on the strobe light Shift the switch down to turn off the strobe light Figure 3 25 Strobe light switch left...

Страница 59: ...d repetitive stops you do during door to door refuse collection This handbrake is in the form of a toggle switch located near the right hand side door and must be switched on only when you have used t...

Страница 60: ...tion stop only slight pressure on the brake pedal and shifting the temporary handbrake and or the parking brake are required to engage the transmission and move the vehicle This careful sequence helps...

Страница 61: ...MIZER VERSA HAND TM You must complete the daily inspection before starting the vehicle It is your responsibility to report any malfunctions or concerns to your supervisor and maintenance personnel Con...

Страница 62: ...lve is fully open Ensure there is no mechanical problem structure rollers hinges door locks wear items etc Report any defective system to maintenance personnel Ensure there are no leaks cracks or othe...

Страница 63: ...properly 4 As you walk along the side of the truck clean all safety labels 5 Check the frame area fuel tank and air tanks air tanks must be drained every day cleaning traps and wheels for leaks cracks...

Страница 64: ...intenance purposes see Locking Out and Taging Out the Vehicle on page 31 3 Start the engine and engage the hydraulic pump PTO ON 4 Fully extend the arm Figure 4 2 Extended arm 5 Turn off the hydraulic...

Страница 65: ...Operating the AUTOMIZER VERSA HANDTM 59 Rollers and bearings Bolt locks Chains and sprockets Roller and bearings Bolt locks Chains Sprocket teeth...

Страница 66: ...ting the AUTOMIZER VERSA HANDTM Grabber Hoses and connections Cylinders 7 Check for loose nuts and bolts 8 Check limit switches Refer to the Maintenance Manual for more details Grabber Hoses Connectio...

Страница 67: ...intenance personnel To inspect the right hand side driving controls do the following 1 Test the steering wheel by turning it left and right as you are slowly moving the truck forward 2 Move forward an...

Страница 68: ...ts Cab horn Low oil pressure Exterior back up horn Low oil warning light buzzer Windshield cracks Seat and seat belt Windshield wipers Clutch free play Juggler Heat Defrost License registration papers...

Страница 69: ...igh as the packer and then press the green button to get a complete packer cycle Be careful of explosive projectile objects and watch for overspills See Pack on the Go on page 65 While collecting roll...

Страница 70: ...the operator what was left in the hopper in the previous stroke of the packer will be pushed into the body Loading Procedure To load refuse into the hopper 1 Stop the vehicle so that the arm is lined...

Страница 71: ...tenance personnel Pack on the Go It may be useful to expedite the collection process and be more efficient The AUTOMIZER VERSA HAND TM gives you the possibility to pack on the go or allow the packer t...

Страница 72: ...e unloading process Unloading Procedure The following is the standard unloading procedure 1 Drive the vehicle to the landfill 2 Ensure the vehicle is on safe stable and level ground 3 Check the overhe...

Страница 73: ...10 Put safety pins back in place 11 Drive away from the unloading site 12 Perform end of the day inspection See End of the Day Cleaning and Inspection on page 69 Unloading Corrective Actions As you u...

Страница 74: ...Lower the body onto the chassis before moving the vehicle Unloading Emergency Actions If the truck starts to sink on one side as you unload If the body does not raise 1 Ensure the hydraulic system is...

Страница 75: ...c tank is fully open and that there is sufficient oil in the hydraulic tank End of the Day Cleaning and Inspection Daily Hopper Cleaning Cleanliness is a key part of safety and critical to the proper...

Страница 76: ...the safety prop is free to tilt under it 3 Release the safety prop using the prop handle 4 Apply the lockout tagout procedure see Locking Out and Taging Out the Vehicle on page 31 5 Clean with pressu...

Страница 77: ...4 8 3 section proportional valve Danger Stay clear of the path of the arm at all times and do not open the grabber in mid air when performing this procedure Danger Never drive this vehicle if the aut...

Страница 78: ...gure 4 10 5 section proportional valve Crusher panel down Crusher panel up Grabber open Grabber close Grabber down Grabber up Arm retract Arm extend Crusher panel down Crusher panel up Grabber open Gr...

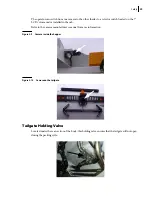
Страница 79: ...Operating the AUTOMIZER VERSA HANDTM 73...

Страница 80: ...31 1673 Sales Fax 1 920 232 2498 Parts Fax 1 418 831 7561 Mailing Address Mailing Address P O Box 2785 175 Route du Pont Oshkosh WI 54903 2785 St Nicolas QC G7A 2T3 Parts and Warranty Parts and Warran...

Отзывы: