
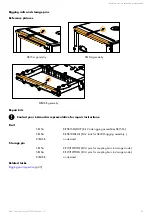


Rigging procedures
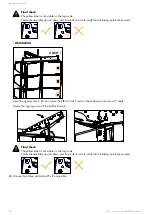
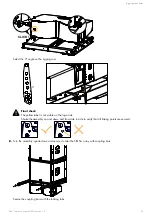
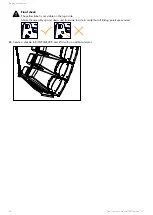
Final check
The yellow label is not visible on the logo side.
Shake the assembly up and down and from side to side to verify that all linking points are secured.
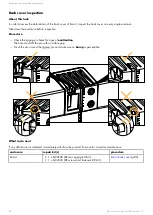
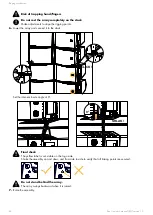
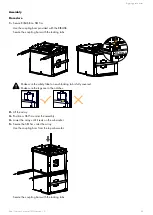
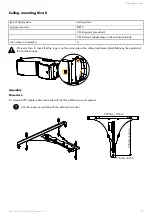
- With KIBU II
CLICK !
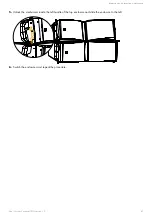
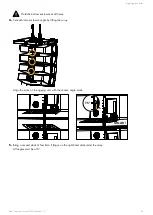
Insert the rigging arm in the slot. Lower the KIBU II until it rests on the enclosure to ensure a 0° angle.
Secure the rigging arm with the ball-locking pin.
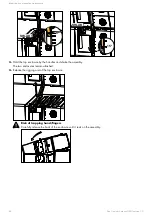
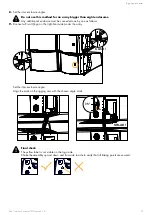
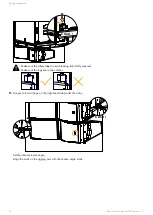
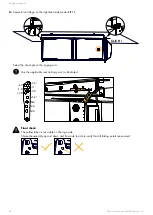
Final check
The yellow label is not visible on the logo side.
Shake the assembly up and down and from side to side to verify that all linking points are secured.
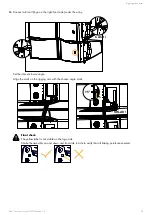
3.
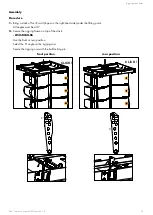
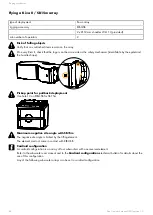
Choose the pickup point(s) and y the assembly.
54
Kiva II owner's manual (EN) version 1.0
Содержание KIVA II
Страница 1: ...KIVA II owner s manual EN ...
Страница 115: ...Corrective maintenance 4 Secure the plate x10 T30 Kiva II owner s manual EN version 1 0 115 ...
Страница 135: ...Speci cations SB15m dimensions 520 mm 20 5 in 439 mm 17 3 in 580 mm 22 8 in Kiva II owner s manual EN version 1 0 135 ...
Страница 137: ...Speci cations SB18 dimensions 750 mm 29 5 in 707 mm 27 8 in 553 mm 21 8 in Kiva II owner s manual EN version 1 0 137 ...
Страница 139: ...Speci cations SB18i dimensions 700 mm 27 6 in 543 mm 21 4 in 713 mm 28 1 in Kiva II owner s manual EN version 1 0 139 ...
Страница 141: ...Speci cations SB18m dimensions 717 mm 28 2 in 543 mm 21 4 in 759 mm 29 9 in Kiva II owner s manual EN version 1 0 141 ...