background image

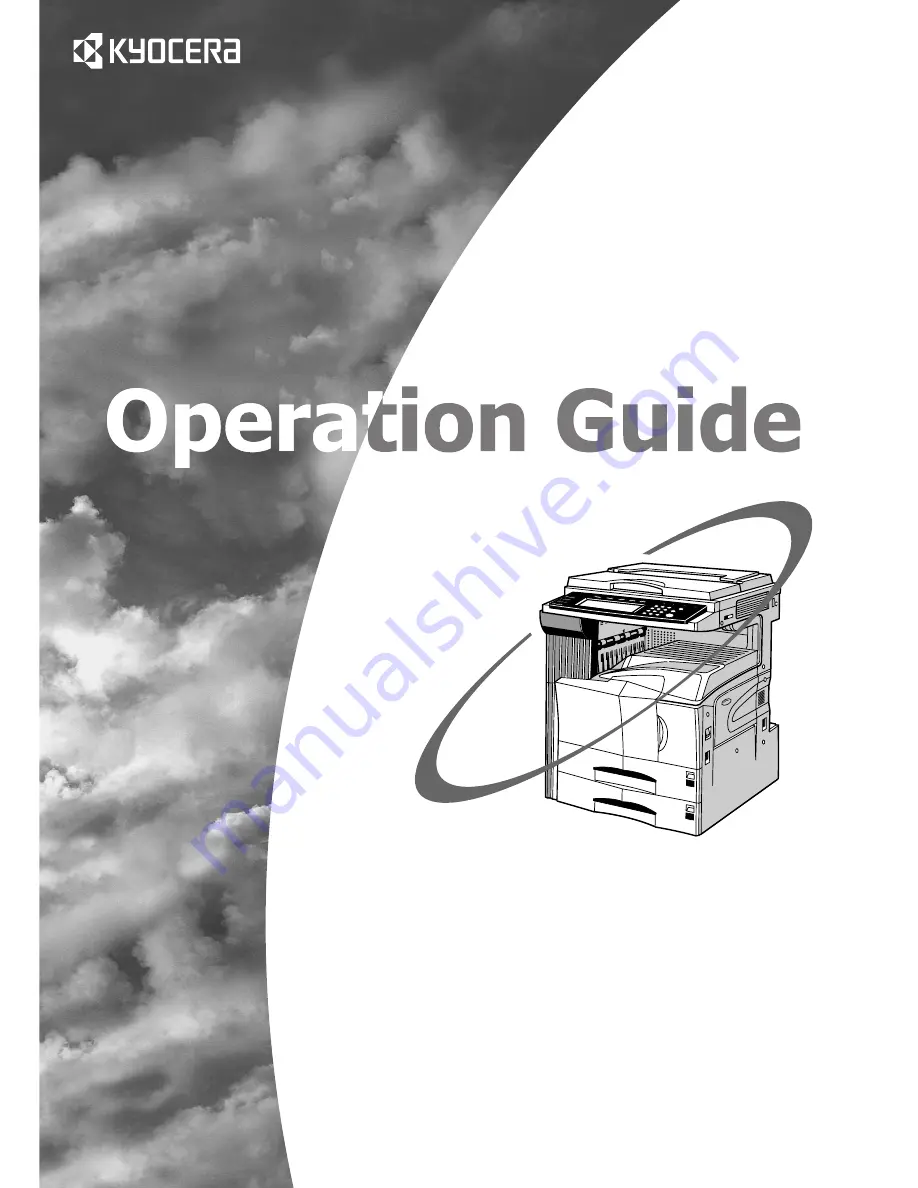
Please read the Operation Guide before using the copier

Keep it close to the copier for easy reference

KM-3035
KM-4035
KM-5035

* The above illustration includes the optional original cover.

Содержание KM-3035

Страница 1: ...Please read the Operation Guide before using the copier Keep it close to the copier for easy reference KM 3035 KM 4035 KM 5035 The above illustration includes the optional original cover...

Страница 2: ...indicated messages by listing that for the inch version followed in brackets by the corresponding information for the metric version However when a message is essentially the same or when the differen...

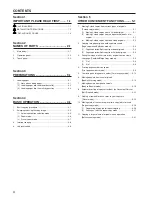
Страница 3: ...the copier and its operation panel Section 3 PREPARATIONS This section contains explanations on procedures for loading copy paper Section 4 BASIC OPERATION This section contains explanations on the b...

Страница 4: ...aking 2 sided copies from one sided originals 5 2 2 Copying two page originals onto separate sheets Page separation Split copy modes 5 4 1 Page separation Split copy from book originals 5 4 2 Page sep...

Страница 5: ...lt settings 6 40 3 Multi bypass tray paper settings 6 44 1 Paper size and type 6 44 2 Selecting other standard sizes 6 45 4 Drum refresh 6 47 5 Checking the total counter and printing out the counter...

Страница 6: ...ards Low Power Mode The device automatically enters Low Power Mode when 15 minutes have passed since the device was last used The amount of time of no activity that must pass before Low Power Mode is...

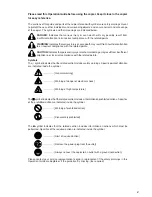
Страница 7: ...tion to or incorrect compliance with the related points Symbols The m symbol indicates that the related section includes safety warnings Specific points of attention are indicated inside the symbol Ge...

Страница 8: ...vi...

Страница 9: ...ove these labels Section 1 IMPORTANT PLEASE READ FIRST Label 3 Moving parts inside May cause personal injury Do not touch moving parts Label 2 Do not incinerate toner and toner container Dangerous spa...

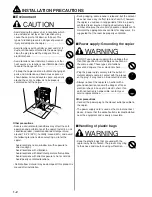
Страница 10: ...he plastic may cling to their nose and mouth causing suffocation INSTALLATION PRECAUTIONS Environment CAUTION Avoid placing the copier on or in locations which are unstable or not level Such locations...

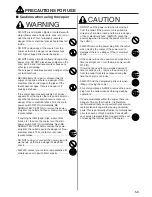
Страница 11: ...er flower vases flower pots cups etc on or near the copier This of situation presents a danger of fire or electrical shock should they fall inside DO NOT remove any of the covers from the copier as th...

Страница 12: ...toner container or the waste toner box Other precautions After use ALWAYS dispose of the toner container and the waste toner box in accordance with Federal State and Local rules and regulations Store...

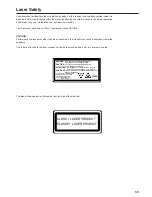
Страница 13: ...rdous radiation exposure This label is attached to the laser scanner unit inside the machine and is not in a user access area The labels shown below is attached on the right side of the machine DANGER...

Страница 14: ...only functional switches and are not suitable for isolating the equipment from the power source VORSICHT Der Netzstecker ist die Hauptisoliervorrichtung Die anderen Schalter auf dem Ger t sind nur Fu...

Страница 15: ...ts and methods of measurement for radio interference characteristics of information technology equipment EN55022 Class B Limits for harmonic currents emissions for equipment input current 16A per phas...

Страница 16: ...1 8...

Страница 17: ...t originals here for copying Place originals face down with the edges aligned with the size scales on the left and rear sides of the platen 6 Original size scales Be sure to align the original with th...

Страница 18: ...or when copy images become soiled with toner Front cover Open to replace the toner container or waste toner box Main power switch Turn ON I before starting to make copies Main power switch cover only...

Страница 19: ...icator to the right of the key will light when the machine is in the printer operation mode The lamp to the left of the key will either light green or orange or will flash one of those colors dependin...

Страница 20: ...the initial mode from the manual exposure mode to the auto exposure mode Auto clear function Once a designated amount of time has passed after copying stops between 10 and 270 seconds the auto clear f...

Страница 21: ...Sort Off Sort On Basic User choice Program Function 11x81 2 81 2x11 11x81 2 11x81 2 11x81 2 Recycled 3 6 5 0 2 1 8 9 7 4 Merge copy AMS Reduce Enlarge APS Image quality Reduce Enlarge Exposure mode Au...

Страница 22: ...o copy the original image at its actual size 100 Sort OFF key Touch this key when you want to make copies without sorting them Sort ON key Touch this key when you want to make copies in the sort mode...

Страница 23: ...r key Touch this key when you want to register the currently selected function or mode under a registration key Back key Touch this key when you want to return the settings for the currently selected...

Страница 24: ...Section 2 NAMES OF PARTS 2 8...

Страница 25: ...6 44 respectively Among the special paper that can be use with this copier there is a wide range in paper quality and construction especially in those types of paper noted below For that reason there...

Страница 26: ...d paper length 4 Set the paper flush against the left hand wall of the drawer cassette IMPORTANT Make sure that there are no folds etc in the paper when it is set in a drawer cassette Such paper may b...

Страница 27: ...5 sheets Standard paper 120 g m2 130 sheets Standard paper 160 g m2 100 sheets IMPORTANT When copying onto OHP transparencies be sure to fan through them a few times to separate the sheets before sett...

Страница 28: ...rinter scanner Kit is installed on your copier and you attempt to print from a computer onto envelopes that are wider than they are tall be sure to leave the flap closed and set the envelopes with the...

Страница 29: ...5 1 Copying each image of open faced books magazines etc or 2 sided originals onto separate sheets Page 5 4 Fitting the image of either two or four originals onto a single copy page Page 5 6 Printing...

Страница 30: ...posure level selected automatically It is also possible for you to adjust the copy exposure by touching the Exposure mode key to access the Exposure Mode screen Copy exposure adjustment can then be pe...

Страница 31: ...ric specifications 7 Setting the number of copies to be made Use the keypad to change the number of copies to be made that is displayed on the touch panel to the actual number that you want to make Up...

Страница 32: ...again in that location and try to copy again CAUTION If the copier will not be used for a short period of time overnight etc turn the main power switch OFF O If it will not be used for an extended per...

Страница 33: ...Plain Plain Plain 3 Press the Start key to begin the copying procedure 1 Auto magnification selection mode With this mode the original image is enlarged reduced automatically according to the selected...

Страница 34: ...tio to the desired setting The desired magnification ratio can also be entered directly by touching the keys Keys key and then using the keypad Inch specifications Reduce Enlarge Standard Zoom Ready t...

Страница 35: ...x81 2 Recycled Metric specifications Merge copy AMS Reduce Enlarge APS Image quality Reduce Enlarge Exposure mode Auto Exposure Ready to copy Set Paper Size Bypass Colour Recycled Plain Plain Plain So...

Страница 36: ...copying is useful if during one copy job you want to copy other originals at different settings Once the rush job is completed the interrupted copy job can be resumed at the same settings as before 1...

Страница 37: ...n Plain Plain Sort Finished Sort Off Sort On Basic User choice Program Function Ready to copy Jobreservation Set Paper Size Job resrv finished 4 Press the Start key Scanning of the originals will star...

Страница 38: ...Section 4 BASIC OPERATION 4 10...

Страница 39: ...aced books etc or 2 sided originals 1 Making 2 sided copies from a 2 sided original With this mode a 2 sided original is copied and the front and back sides of the copy paper are used so that the copy...

Страница 40: ...Orig image quality Ready to copy Select orig size Auto Selection Batch scanning Up Down Set Paper size 11x81 2 Metric specifications Select paper 2 sided Split Merge copy Reduce Enlarge Margin Imag sh...

Страница 41: ...ster Original Left Right binding Top binding Left Right binding Top binding Back Paper s Register Original Finished Left binding Right binding d d BookR Book BookR Duplex ed Ba Che Se sid copy Open fr...

Страница 42: ...iginals the image will be enlarged or reduced to fit the size of the copy paper 2 Page separation Split copy from 2 sided originals With this mode the two sides of a 2 sided original are each copied o...

Страница 43: ...n faced originals Metric specifications for 1 sided or 2 sided originals for open faced originals 7 Press the Start key Scanning of the originals will start If you set the originals in the optional Do...

Страница 44: ...in 1 Use this mode when you want to copy two originals onto one sheet This mode can also be used in conjunction with the 2 sided copy modes in order to copy four originals onto one sheet When setting...

Страница 45: ...t orig size Auto Selection Batch scanning Up Down Set Paper size 11x81 2 Metric specifications Select paper 2 sided Split Merge copy Reduce Enlarge Margin Imag shift Page numbering Function Basic User...

Страница 46: ...ll start automatically If you set an original on the platen a message will appear telling you to set the next original In this case go to the next step 8 Replace the first original with the next one a...

Страница 47: ...ou want to use The screen to make settings for that style will be displayed Inch specifications None Page Register Page can be added on bottom of copy Ready to copy Set Paper size Back Close 11x81 2 M...

Страница 48: ...r 7 Touch the Close key The touch panel will return to the screen in step 5 8 If you want the first page number that is printed to be something other than 1 touch the Setting start Setting Start page...

Страница 49: ...k Edge Left top corner 13 Touch the key or the key to select counting from the final copy how many pages you do NOT want to have page numbers printed on Inch specifications Last page Manual Page Setti...

Страница 50: ...r Check direction of original top side keys Metric specifications Auto Manual Setting denominator Check direction Check direction of original Back Close Ready to copy Set Paper size Back Edge Left top...

Страница 51: ...erlay Up Down Set Paper size 3 Touch the On key The screen to set the shading level of the form image will be displayed Inch specifications On Off Forms Overlay Register Overlay first scanned image on...

Страница 52: ...Form 004 Form 003 Form 002 Form 001 Back Close Up Down 11x81 2 11x81 2 81 2x11 11x81 2 11x81 2 Metric specifications Back Close Form selection Form Scan form once The arrow means direction of registe...

Страница 53: ...pier you will be able to select center binding stapling and folding Only A4R B4 and A3 size copy paper can be center folded and stapled 1 If Left is selected as the binding direction Copying will be p...

Страница 54: ...hing Off None Stitching Front cvr Saddle Stitch None Booklet 1 sided 2 sided Left Right 2 sided Top Bottom Open from left Open from right Open from top Register Set Paper size Back Close 11x81 2 Origi...

Страница 55: ...nch specifications Pape Set 100 Saddle Stitch Back Close Off Bind Fold 81 2x11 2 sided mode Metric specifications Duplex Mode Saddle Stitch Bind Fold Back Close Set Paper size Off 9 If you want to add...

Страница 56: ...ll start automatically If you set an original on the platen a message will appear telling you to set the next original In this case go to the next step 12 Replace the first original with the next one...

Страница 57: ...x 11 and 11 x 17 size copy paper can be center folded and stapled Metric specifications If the optional Document Finisher with Center Bind Fold Unit is installed on your copier you will be able to se...

Страница 58: ...Press Start key Register Set Paper size Back Close 11x81 2 Copy front Off None Saddle Stitch Book Right Book Left Open from right Open from left Original Finishing Check direction Set the book origin...

Страница 59: ...e you have finished scanning all of the originals touch the Scanning finished key Copying will start 7 Touch the Bind Fold key It is possible for you to center staple and fold up to 10 copy sheets 40...

Страница 60: ...ver Mode Booklet Sort Finished Border Erase Exposure mode Orig image quality Ready to copy Select orig size Auto Selection Batch scanning Up Down Set Paper size 11x81 2 Metric specifications Select pa...

Страница 61: ...front and back covers to be copied onto or to have either or both of them left completely blank Select also whether or not you even want to include a back cover at all The illustrations above show th...

Страница 62: ...d paper cassette No cover Back Close Ready to copy Register Set Paper size 5 Select the desired settings for the front cover Inch specifications Rear cover No cover Cover Blank Front copy 2 sided copy...

Страница 63: ...ll start automatically If you set an original on the platen a message will appear telling you to set the next original In this case go to the next step 9 Replace the first original with the next one a...

Страница 64: ...the Function tab will be displayed 3 Touch the Down key The content of the next portion of the Function tab will be displayed 4 Touch the Modify Copy key The Modify Copy screen will be displayed Inch...

Страница 65: ...inting out with the repeat copy mode Once you press the Repeat Copy key the Modify copy list will be displayed so that you can verify the copy jobs that are registered for repeat copying It is possibl...

Страница 66: ...y code when you registered the copy job for repeat copying the code input screen will be displayed In this case go to the next step If you did NOT designate a security code when you registered the cop...

Страница 67: ...ave finished checking the content of the copy job touch the Close key The touch panel will return to the screen in step 2 6 If you want to check the contents of another registered copy job repeat step...

Страница 68: ...ou really want to delete Yes No Stop 117 If you selected Yes the selected copy job will be canceled and the touch panel will return to the screen in step 2 If you selected No the touch panel will retu...

Страница 69: ...Merge copy Reduce Enlarge Margin Imag shift Page numbering Function Basic User choice Program Cover Mode Booklet Erase Mode Exposure mode Image quality Sort Finished Ready to copy Select size orig Aut...

Страница 70: ...Section 5 OTHER CONVENIENT FUNCTIONS 5 32...

Страница 71: ...r all department ID codes as a whole or by each individual department Set copy limits to any 1 page increment up to 999 999 Clear the copy counts for all department ID codes at one time or for each in...

Страница 72: ...sponding ID code Change restrictions for use Perform this procedure when you want to change the restrictions for using the copier under each department ID code Check all departments Perform this proce...

Страница 73: ...justment Default setting Counter 3 Use the numeric keys on the keypad to enter the 4 digit management code The factory default management code for 30 cpm copiers is 3000 for 40 cpm copiers is 4000 and...

Страница 74: ...cations Close Each Mgt Total Management total Managem Total Default setting Register Sett Management Def Set Management edit Off On Management Management 3 Touch the Register key The New register scre...

Страница 75: ...panel will return to the screen in step 4 Inch specifications End Stop Name to display 1st Sales Dept Limit 32 letters including AllDel Del prev 1 2 3 4 5 6 7 8 9 0 q w e r t y u i o p a s d f g h j k...

Страница 76: ...ng item Copy limitation Printer limitation On No limit Output limitation No limit Scanner limitation No limit Fax Transm Limitation No limit Metric specifications Job cancel 0007 1st Sales Dept Defaul...

Страница 77: ...management setting See Copy Printer output management on page 6 30 The following settings are available If All is selected as the Copy Printer output management setting All is the factory default set...

Страница 78: ...t Management edit 2 Select Copy limitation under the Setting item column on the left side of the touch panel and then touch the Change key The Copy limitation screen will be displayed Inch specificati...

Страница 79: ...partment Default setting Management Management edit 2 Select Printer limitation under the Setting item column on the left side of the touch panel and then touch the Change key The Printer limitation s...

Страница 80: ...02 0001 0014 00000015 00000016 00000017 001 010 1st Sales Dept 2nd Sales Dept 3rd Sales Dept 4th Sales Dept 5th Sales Dept 6th Sales Dept 7th Sales Dept Close Department Default setting Management Man...

Страница 81: ...6 20 Inch specifications Up Down Order of indication Mgt Inf correction Delete Register Limit in use 01 02 0001 0014 00000015 00000016 00000017 001 010 1st Sales Dept 2nd Sales Dept 3rd Sales Dept 4t...

Страница 82: ...corresponding department ID code when the optional Fax Kit is installed in your copier NOTE This setting will only be available when On is selected as the Fax function management ON OFF setting 1 Acc...

Страница 83: ...he maximum number of copies that can be made under the corresponding department ID code NOTES This setting will only be available when On is selected as the Copier function management ON OFF setting 1...

Страница 84: ...gister Copy limitation No limit Counter limit Is not permited Clear 999 999 1 999 999 Limited value 5 Touch the Close key The touch panel will return to the screen in step 2 Printing restrictions Perf...

Страница 85: ...to cancel printing privileges completely touch the Is not permitted key and proceed to step 5 Inch specifications Close Back Management Management edit New register Printer limitation No limit Counter...

Страница 86: ...nagement Metric specifications Close Each Mgt Total Management total Managem Total Default setting Register Sett Management Def Set Management edit Off On Management Management 3 Select the department...

Страница 87: ...menu screen See 2 Accessing the copy management menu screen on page 6 3 Inch specifications Default setting Copy default Machine default Language Management End BOX Management Bypass setting Document...

Страница 88: ...isplayed To so touch the Order of indication key and then touch the Sort by code key and select either 1 9 or 9 1 or the Sort by Name key and select either A Z or Z A as appropriate 4 Select ID code u...

Страница 89: ...8 Touch the AllDel key to delete the old department name then enter the new name Inch specifications End Stop Name to display 1st Sales Dept Limit 32 letters including AllDel Del prev 1 2 3 4 5 6 7 8...

Страница 90: ...gement Def Set Management edit Off On Management Management 3 Select the department ID code for which you want to change the restrictions and then touch the Limit in use key The Limit in use screen wi...

Страница 91: ...codes as a whole print out a copy management report and clear the copy counts for all of the registered department ID codes 1 Access the copy management menu screen See 2 Accessing the copy management...

Страница 92: ...f any of the Total size 1 through Total size 5 settings is selected under the copy management default settings the total size report will also be printed out 4 To clear all of the copy counts touch th...

Страница 93: ...f Set Management edit Off On Management Management 3 Select the department ID code for which you want to check the copy counts and then touch the Total key Inch specifications Up Down Order of indicat...

Страница 94: ...clear all of the copy counts for that ID code touch the Counter clear key Inch specifications Close Each Management Total Default setting Management 0007 1st Sales Dept Counter clear Number print Numb...

Страница 95: ...et Management edit Off On Management Management 3 Touch the Close key 6 Changing the copy management default settings Perform the following procedure when you want to change the default settings for t...

Страница 96: ...OFF Perform the following procedure when you want to turn copy management ON or OFF for the copier functions of this machine 1 Select Copy management under the Setting item column on the left side of...

Страница 97: ...Printer output mgt All Scanner Managem On Fax Management On Metric specifications Close Change Value Setting item Default setting Management Managem Def set Managem Def Set Copy management Print manag...

Страница 98: ...or report On Others mgt Reg print On Copy Printer output mgt All Scanner Managem On Fax Management On 2 To have a printer error report printed out touch the On key If you do not want the printer error...

Страница 99: ...gt Reg print On Copy Printer output mgt All Scanner Managem On Fax Management On Metric specifications Close Change Value Setting item Default setting Management Managem Def set Managem Def Set Copy m...

Страница 100: ...mgt All Scanner Managem On Fax Management On Metric specifications Close Change Value Setting item Default setting Management Managem Def set Managem Def Set Copy management Print managem On On Print...

Страница 101: ...output mgt All Scanner Managem On Fax Management On Metric specifications Close Change Value Setting item Default setting Management Managem Def set Managem Def Set Copy management Print managem On On...

Страница 102: ...ize 2 81 2x11 No specif Total size 3 81 2x11 No specif Metric specifications Close Change Value Setting item Default setting Management Managem Def set Managem Def Set Scanner Managem Fax Management O...

Страница 103: ...e 1 81 2x11 No specif Total size 2 81 2x11 No specif Total size 3 81 2x11 No specif Metric specifications Close Change Value Setting item Default setting Management Managem Def set Managem Def Set Sca...

Страница 104: ...ng Management Managem Def set Managem Def Set Scanner Managem Fax Management On On Excess of limit Setting You cannot use Def Val of coun limit 999999 Total size 1 A3 No specif Total size 2 B4 No spec...

Страница 105: ...n On Excess of limit Setting Unable to use Def Val of coun limit 999999 Total size 1 81 2x11 No specif Total size 2 81 2x11 No specif Total size 3 81 2x11 No specif Metric specifications Close Change...

Страница 106: ...per size Paper type With no specif A4 6 Touch the key that corresponds to the desired paper type and then touch the Close key Inch specifications Thick paper Close Back Select paper type Management Ma...

Страница 107: ...ect ID code If an invalid unregistered department ID code is entered an error alarm will sound Enter the correct ID code If you enter your department ID code and touch the Each Mgt Total key you can c...

Страница 108: ...of paper select Standard sizes If you select Auto Detection You can also select the desired unit of measurement Inch or Centimeter If you select Standard sizes You can then select the paper size The s...

Страница 109: ...management code The factory default setting for 30 cpm copiers is 3000 for 40 cpm copiers is 4000 and for 50 cpm copiers is 5000 Inch specifications Enter the administrator number Close Metric specif...

Страница 110: ...ault setting Counter Metric specifications Machine default Auto cassette switching Paper size 1st cassette Paper size 2nd cassette Paper size 3rd cassette Paper size 4th cassette On All types of paper...

Страница 111: ...n On 2001 10 30 14 02 GMT 08 00 5000 Default menu Down Change Setting mode Up Machine default Close Metric specifications Machine default Key sound ON OFF Silent mode Date Time Time difference Change...

Страница 112: ...sound ON OFF Silent mode Date Time Time difference Management code change Default setting Counter On On 2001 10 30 14 02 GMT 08 00 5000 Default menu Down Change Setting mode Up Machine default Close...

Страница 113: ...ment code change Auto sleep Energy Saver key setting Default setting Counter 2001 10 30 14 02 GMT 08 00 5000 On Low power mode Default menu Down Change Setting mode Up Machine default Close Metric spe...

Страница 114: ...etting Counter A4 Back Close Auto Metric specifications Bypass setting Paper size Unit Paper type Select paper type Auto Detection Input size Centimeter Inch Others Standard Default setting Counter Ba...

Страница 115: ...rd Default setting Counter Back Close Auto Auto NOTE If you selected Auto the designated paper type will be automatically changed in accordance with the selected paper size 6 Touch the key that corres...

Страница 116: ...Default setting Counter Paper Size Back Close Auto Auto Metric specifications Bypass setting Paper size EX Paper type Select paper type Auto Detection Input size Select size Others Standard Default s...

Страница 117: ...ons Default setting Copy default Machine default Language Management End BOX Management Bypass setting Document Management Register orig size Print report Counter check User Adjustment Default setting...

Страница 118: ...ti bypass tray to execute drum refreshing Inch specifications Orig page Count Set 1 sided Sort Now drum refreshing Output Inner tray 11x81 2 1 sided Rear Metric specifications Original Count Set 1 sid...

Страница 119: ...Register orig size Print report Counter check User Adjustment Default setting Counter 3 The total number of copies and printouts made will be displayed If you want to print out a counter report touch...

Страница 120: ...to enter the 4 digit management code The factory default setting for 30 cpm copiers is 3000 for 40 cpm copiers is 4000 and for 50 cpm copiers is 5000 If the entered code matched the registered one the...

Страница 121: ...ete invalid data Delete invalid deta from the HDD Item Free Space Capacity 18 569 MB 19 092 MB Setting mode Metric specifications HDD management mode On Close HDD management Default setting Delete inv...

Страница 122: ...ting Document Management Register orig size Print report Counter check User Adjustment Default setting Counter Metric specifications Default setting Copy default Machine default Language Management En...

Страница 123: ...tput Cancel Plain Metric specifications Original Count set 1 sided Sort Printing report Output Cancel Plain Inner tray NOTE If you want to cancel print out of the corresponding report touch the Cancel...

Страница 124: ...layed Inch specifications Default setting Copy default Machine default Language Management End BOX Management Bypass setting Document Management Register orig size Print report Counter check User Adju...

Страница 125: ...se is out of order and cannot be used Contact your service representative immediately Continue copying using another drawer cassette No paper that can be used in the selected mode is loaded Check the...

Страница 126: ...iginals that can be scanned Standard memory 64MB approximately 322 pages When the optional Hard Disk is installed 20GB approximately 70 000 pages When using our standard original A4 original 6 text Th...

Страница 127: ...r to the Operation Guide for your Document Finisher and dispose of the waste hole punch chads The hole punch chad container in the optional Document Finisher is not set properly Refer to the Operation...

Страница 128: ...n left cover1 2 Remove paper 3 Close cover JAM 30 Paper misfeed Careful for Drum Inch specification Metric specification WARNING High voltage is present in the charger section Take sufficient care whe...

Страница 129: ...Metric specifications 1 Open left cover1 2 Remove paper 3 Close cover JAM 30 Paper misfeed Careful for Drum NOTE The drum area inside the copier is extremely sensitive to dirt and damage When removin...

Страница 130: ...or Drum NOTE The drum area inside the copier is extremely sensitive to dirt and damage When removing the jammed paper be sure not to touch the drum area that is located inside the machine with your ha...

Страница 131: ...Main switch off on APS Bypass Colour Recycled Plain Plain Plain 1 Sided Sort 9 When the optional Fax Kit is installed the message below appears Perform the appropriate action by following the message...

Страница 132: ...ht the green knob 6 Remove paper 7 Close the cover Metric specifications Paper misfeed 1 Remove paper in bypass 2 Open left cover 1 3 Remove paper 4 Open front cover if you can not remove paper 5 Turn...

Страница 133: ...ion 8 Remove the misfed paper If the misfed paper cannot be removed go to the next step 9 Pull out the internal tray 10 Open the internal tray cover to remove the misfed paper 11 If the paper has been...

Страница 134: ...Raise reverse unit up 3 Turn dial left 4 Remove original s 5 Close Document processor JAM 73 1 If the original is on the original table remove it 2 Open the Document Processor original cover 3 If the...

Страница 135: ...d 1 Remove any paper in output part of Finisher 2 Put Finisher tray down 3 Remove any paper 4 Set tray back JAM 84 1 Put inner tray of Finisher down 2 Remove any paper 3 Remove output tray open left c...

Страница 136: ...fed paper 8 Install the tray 9 Close the left cover 1 4 4 4 4 4Misfed in Document Finisher optional JAM 80 to 89 If a misfeed has occurred in the Document Finisher remove the misfed paper referring to...

Страница 137: ...e display Are the originals set correctly Is the copier in the auto exposure mode Is the copier in the manual exposure mode Is the add toner message displayed Is paper wet Procedure Connect the plug t...

Страница 138: ...exposure perform the auto exposure adjustment Adjust the exposure to the correct degree using the copy exposure adjustment keys To change the overall exposure perform the exposure adjustment for the e...

Страница 139: ...organic solvents or alcohol NOTE When the slit glass becomes dirty Clean the slit glass for original fed from DP Clean the slit glass for original fed may appear In this case perform the cleaning oper...

Страница 140: ...eted return the cleaning brush to the copier and close both the left cover 1 and the front cover Cleaning the transfer roller 1 Open the front cover 2 Remove the blue cleaning brush 3 Pull up the left...

Страница 141: ...User choice Program Function 11x81 2 81 2x11 11x81 2 11x81 2 11x81 2 Recycled Add toner to resume copying Adding toner Metric specifications Merge copy AMS Reduce Enlarge APS Image quality Reduce Enl...

Страница 142: ...Grasp the handle on the toner container and insert the toner container along the rail of the copier 7 Hold the toner container by hands and fully insert it into the copier 8 Remove the waste toner bo...

Страница 143: ...r in this step as that may result in problems appearing in the printed images 14 With the electrostatic section pulled out about 2 inches 5 cm remove the grid cleaner and then push the electrostatic s...

Страница 144: ...th Federal State and Local rules and regulations 19 Clean the separator by moving the cleaning brush from left and right several times along the separator as shown in the illustration 20 Once the clea...

Страница 145: ...ers From 3 5 seconds 11 x 8 1 2 A4 Zoom ratio Any ratio between 25 and 400 in increments of 1 Alternatively standard ratios Standard amount of memory 64 MB Resolution Reading 600 x 600 dpi Writing 600...

Страница 146: ...5 2 5 D x 29 1 3 H 585 mm W x 646 mm D x 745 mm H Weight Approx 165 lbs Approx 82 kg Noise emission 70dB A Required space 23 W x 25 2 5 D 585 mm W x 646 mm D Optional equipment Document Processor Pape...

Страница 147: ...mode Inch specifications 670 wh or less 175 wh or less 75 wh or less 12 seconds or less 0 1 wh or less 15 minutes 60 minutes 0 1 wh or less Metric specifications 670 wh or less 200 wh or less 75 wh or...

Страница 148: ...MEMO...

Страница 149: ...MEMO...

Страница 150: ...MEMO...

Страница 151: ...achine performance we recommend that you use only KYOCERA MITA original supplies for your KYOCERA MITA copier Toner KYOCERA MITA Corporation www kyoceramita com Item No Toner KYOCERA MITA Corporation...

Страница 152: ...2003 is a trademark of Kyocera Corporation 2006 3 302FD80105 Rev 6 0...

Отзывы: