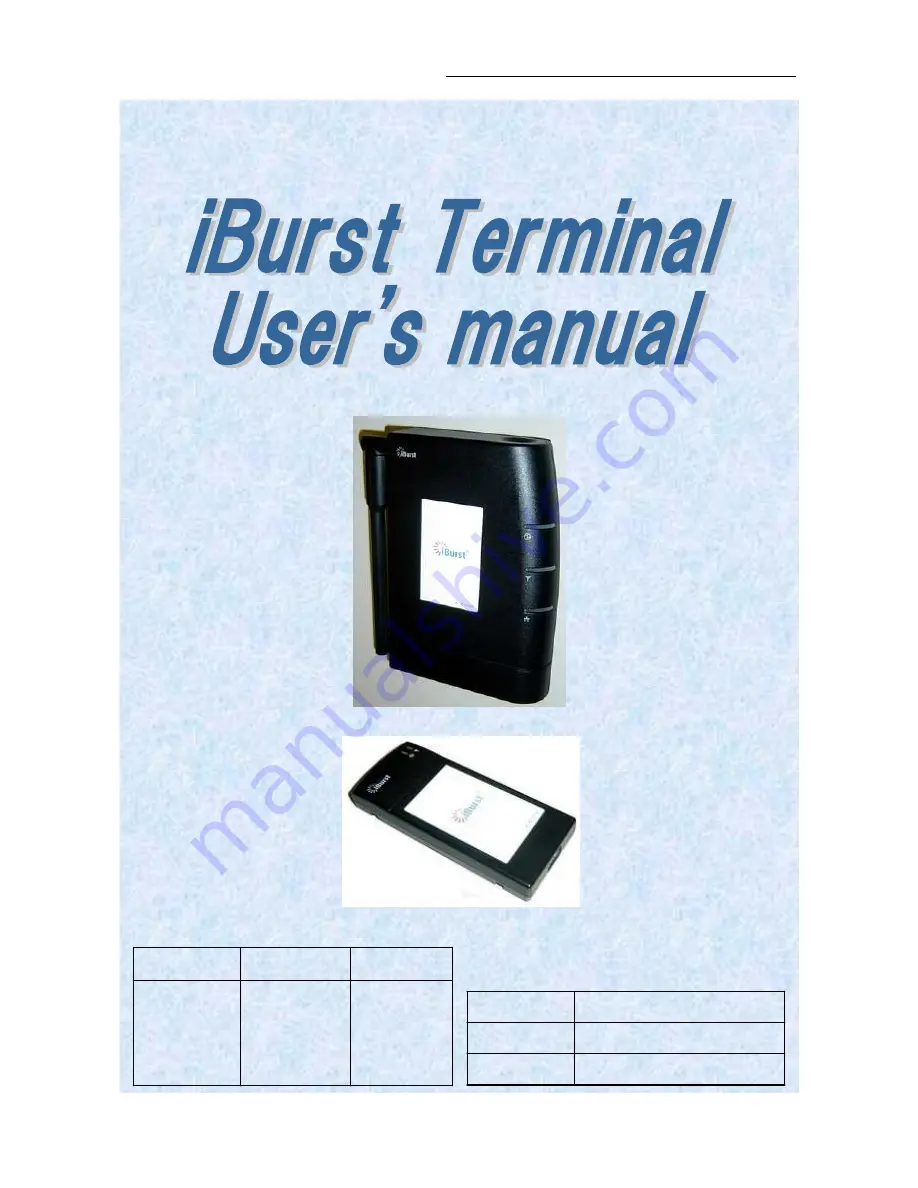
iBurst Terminal, Desktop Model (UTD) Manual
Kyocera Corporation Revision 1.02 --- Feb.17.2009
- 1 -
Hirao
Yamamoto
Koyama
Designed
Checked
Approved
Feb.17.2009
Date:
1.02
Revision:
QS13T-EE-001
Reference:
Страница 1: ...iBurst Terminal Desktop Model UTD Manual Kyocera Corporation Revision 1 02 Feb 17 2009 1 Hirao Yamamoto Koyama Designed Checked Approved Feb 17 2009 Date 1 02 Revision QS13T EE 001 Reference...
Страница 2: ...ion 1 02 Feb 17 2009 2 Revision Record Revision Author Date Detail 1 00 Hirao May 10 2006 First Release 1 01 Miyasaka June 08 2006 Correct some writings 1 02 Honma Feb 17 2009 Add FCC Part24 required...
Страница 3: ...2000 Me 98SE 68 Connection Establishment for Mac OS X 70 Chapter 3 Utility Software 74 Using Utility Software 75 Using Utility Software for Windows 75 Using Utility Software for Mac OS X 81 Status Ind...
Страница 4: ...company does not take any responsibility about the damage produced by use under the conditions such as natural disasters earthquake flood fires misuse by intent or carelessness or other than the resp...
Страница 5: ...urrent does not exceed the capacity of the power supply Otherwise may cause fire or electrical shock Do not damage break modify bend pull twist or bundle the AC cord In addition if a heavy material is...
Страница 6: ...ce and tumble or fall and cause injury When the thunder occurs in near do not use the product and its peripheral equipment It may become the cause of an electric shock If the air vents are blocked the...
Страница 7: ...y magnetism or electronic noise Putting the product near TV or radio may cause RF receive error The product lifetime may shorten if used at places with hydrogen sulfide such as at a hot spring Data co...
Страница 8: ...iBurst Terminal Desktop Model UTD Manual Kyocera Corporation Revision 1 02 Feb 17 2009 8 Chapter 1 Introduction 7 This chapter describes what should be confirmed before using iBurst Terminal...
Страница 9: ...the package Component Notes Q ty iBurst Terminal Unit of UTD model Refer to the pictures shown in next page 1 AC DC Adapter Input 100 240V AC 50 60Hz 0 6A Output 9V DC 1 7A Cable Length of output sid...
Страница 10: ...l Kyocera Corporation Revision 1 02 Feb 17 2009 10 Outlook of iBurst Terminal USB port 10Base T port only on UTD model Back side view Antenna Power Indicator Link Communication Indicator PC Connection...
Страница 11: ...Indicator State Meaning Power Indicator OFF Turned OFF Blue Turned ON Blinking Fault Link Communication Indicator OFF Turned OFF Amber No signal receiving Yellow Weak signal receiving Blinking when co...
Страница 12: ...n with a UTD model Outlook to use the iBurst Terminal A UTD model has 1 USB port and 1 10Base T Ethernet port The USB port or 10Base T Ethernet port shall be connected with your PC Before connecting t...
Страница 13: ...UTD Manual Kyocera Corporation Revision 1 02 Feb 17 2009 13 Chapter 2 Setup Procedure This chapter describes how to install iBurst software then guides you how to make a network connection so as to u...
Страница 14: ...d to install uninstall any iBurst software In such case you can skip this section and you need only to create a dial up connection setting described at from page 62 You can see indications of the iBur...
Страница 15: ...ion 1 02 Feb 17 2009 15 5 Select I accept the terms the license agreement click the Next button 6 Click the Next button after appearing dialog window as shown below NOTE To install to a different fold...
Страница 16: ...dialog window shown below will appear Select Yes I want to restart my computer now and click the Finish button in the dialog window 10 After finish of restarting connect the iBurst Terminal with your...
Страница 17: ...ION Don t connect the iBurst Terminal with your PC through a USB cable until completion of installation 2 Turn your PC on 3 Insert the Software Utility CD provided by the network operator into your CD...
Страница 18: ...1 02 Feb 17 2009 18 6 Click the Next button after appearing dialog window as shown below NOTE To install to a different folder click Browse and specify another folder 7 Click the Next button 8 The fo...
Страница 19: ...Select Yes I want to restart my computer now and click the Finish button in the dialog window 10 After finish of restarting connect the iBurst Terminal with your PC s USB port The iBurst Terminal will...
Страница 20: ...r PC for it 1 Make sure to disconnect the iBurst Terminal with your PC ATTENTION Don t connect the iBurst Terminal with your PC through a USB cable until completion of installation 2 Turn your PC on 3...
Страница 21: ...1 02 Feb 17 2009 21 6 Click the Next button after appearing dialog window as shown below NOTE To install to a different folder click Browse and specify another folder 7 Click the Next button 8 The fo...
Страница 22: ...If you are going to connect the iBurst Terminal with your PC only through an Ethernet cable not through a USB cable you can skip from hear to step 18 and continue from step 19 in this section You can...
Страница 23: ...Select Specify the location of the driver Advanced and click the Next button in the dialog window 13 Select Search for the best driver for your device Recommended then check Specify a location and cl...
Страница 24: ...odel UTD Manual Kyocera Corporation Revision 1 02 Feb 17 2009 24 15 Click the Next button 16 Confirm that the device name iBurst Terminal is displayed in the dialog window then click the Next button 1...
Страница 25: ...og window shown below will appear click the Yes button and restart your PC NOTE If the PC doesn t shutdown itself try to press Alt Ctrl Del keys several times 19 Click the Start Settings Control Panel...
Страница 26: ...oration Revision 1 02 Feb 17 2009 26 21 Click the Next button NOTE If the dialog window shown below appears select No the device isn t in the list and click the Next button 22 Select No I want to sele...
Страница 27: ...iBurst Terminal Desktop Model UTD Manual Kyocera Corporation Revision 1 02 Feb 17 2009 27 23 Select Ports COM LPT and click the Next button 24 Click the Have Disk button 25 Click the Browse button...
Страница 28: ...2 Feb 17 2009 28 26 Select C Program Files iBurst Terminal bin and click the OK button NOTE You don t have to select a file name Windows will find an appropriate file automatically 27 Click the OK but...
Страница 29: ...n 1 02 Feb 17 2009 29 29 Click the Next button 30 Click the Finish button 31 The dialog window shown below will appear click the Yes button to SHUTDOWN your PC NOTE If the PC doesn t shutdown itself t...
Страница 30: ...Manual Kyocera Corporation Revision 1 02 Feb 17 2009 30 33 Click the Start Settings Control Panel to open Control Panel as shown below and then double click Modems NOTE If the dialog window as shown b...
Страница 31: ...Desktop Model UTD Manual Kyocera Corporation Revision 1 02 Feb 17 2009 31 34 Check Don t detect my modem I will select it from a list and click the Next button 35 Click the Have Disk button 36 Click t...
Страница 32: ...02 Feb 17 2009 32 37 Select C Program Files iBurst Terminal bin and click the OK button NOTE You don t have to select a file name Windows will find an appropriate file automatically 38 Click the OK b...
Страница 33: ...Burst Terminal Virtual COM Port COM X and click the Next button NOTE The X in COM X above is a COM port number assigned automatically NOTE If the dialog window as shown below appears type a dummy numb...
Страница 34: ...inal Desktop Model UTD Manual Kyocera Corporation Revision 1 02 Feb 17 2009 34 42 Click the OK button 43 Click the Start Settings Control Panel to open Control Panel as shown below and then double cli...
Страница 35: ...st Terminal Desktop Model UTD Manual Kyocera Corporation Revision 1 02 Feb 17 2009 35 44 Click the Add button on Configuration tab 45 Select Protocol and click the Add button 46 Click the Have Disk bu...
Страница 36: ...poration Revision 1 02 Feb 17 2009 36 47 Click the Browse button 48 Select C Program Files iBurst Terminal bin and click the OK button NOTE You don t have to select a file name Windows will find an ap...
Страница 37: ...6 is popped up again cancel once and repeat from step 44 51 Click the OK button NOTE For USB connection with iBurst Terminal NDIS PPPoE User mode I O Protocol for iBurst Terminal iBurst Terminal must...
Страница 38: ...ration Revision 1 02 Feb 17 2009 38 52 The dialog window shown below will appear click the Yes button and restart your PC NOTE If the PC doesn t shutdown itself try to press Alt Ctrl Del keys several...
Страница 39: ...our PC for it 1 Make sure to disconnect the iBurst Terminal with your PC ATTENTION Don t connect the iBurst Terminal with your PC through a USB cable until completion of installation 2 Turn your PC on...
Страница 40: ...1 02 Feb 17 2009 40 6 Click the Next button after appearing dialog window as shown below NOTE To install to a different folder click Browse and specify another folder 7 Click the Next button 8 The fo...
Страница 41: ...If you are going to connect the iBurst Terminal with your PC only through an Ethernet cable not through a USB cable you can skip from hear to step 19 and continue from step 20 in this section You can...
Страница 42: ...cera Corporation Revision 1 02 Feb 17 2009 42 12 Click the Next button in the dialog window 13 Select Search for the best driver for your device Recommended and then check the Next button 14 Check Spe...
Страница 43: ...a Corporation Revision 1 02 Feb 17 2009 43 15 Select C Program Files iBurst Terminal bin and click the OK button 16 Click the Next button 17 Confirm that the device name iBurst Terminal is displayed i...
Страница 44: ...f the dialog window as shown below appears insert Windows 98SE CD ROM into your PC and enter the directory of your Windows 98SE CD ROM click the OK button xxxxxxxx in the picture below is a file name...
Страница 45: ...UTD Manual Kyocera Corporation Revision 1 02 Feb 17 2009 45 20 Click the Start Settings Control Panel to open Control Panel as shown below and then double click Add New Hardware 21 Click the Next but...
Страница 46: ...on 1 02 Feb 17 2009 46 NOTE If the dialog window as shown below appears select No the device isn t in the list and click the Next button 23 Select No I want to select the hardware from a list and clic...
Страница 47: ...ation Revision 1 02 Feb 17 2009 47 25 Click the Have Disk button 26 Click the Browse button 27 Select C Program Files iBurst Terminal bin and click the OK button NOTE You don t have to select a file n...
Страница 48: ...rst Terminal Desktop Model UTD Manual Kyocera Corporation Revision 1 02 Feb 17 2009 48 28 Click the OK button 29 Select iBurst Terminal Virtual COM Port and click the Next button 30 Click the Next but...
Страница 49: ...f the dialog window as shown below appears insert Windows 98SE CD ROM into your PC and enter the directory of your Windows 98SE CD ROM click the OK button xxxxxxxx in the picture below is a file name...
Страница 50: ...ra Corporation Revision 1 02 Feb 17 2009 50 33 Turn your PC on again 34 Click the Start Settings Control Panel to open Control Panel as shown below and then double click Modems NOTE If the dialog wind...
Страница 51: ...Model UTD Manual Kyocera Corporation Revision 1 02 Feb 17 2009 51 35 Select Other and click the Next button 36 Check Don t detect my modem I will select it from a list and click the Next button 37 Cli...
Страница 52: ...9 52 38 Click the Browse button 39 Select C Program Files iBurst Terminal bin and click the OK button NOTE You don t have to select a file name Windows will find an appropriate file automatically 40 C...
Страница 53: ...Burst Terminal Virtual COM Port COM X and click the Next button NOTE The X in COM X above is a COM port number assigned automatically NOTE If the dialog window as shown below appears type a dummy numb...
Страница 54: ...inal Desktop Model UTD Manual Kyocera Corporation Revision 1 02 Feb 17 2009 54 44 Click the OK button 45 Click the Start Settings Control Panel to open Control Panel as shown below and then double cli...
Страница 55: ...st Terminal Desktop Model UTD Manual Kyocera Corporation Revision 1 02 Feb 17 2009 55 46 Click the Add button on Configuration tab 47 Select Protocol and click the Add button 48 Click the Have Disk bu...
Страница 56: ...poration Revision 1 02 Feb 17 2009 56 49 Click the Browse button 50 Select C Program Files iBurst Terminal bin and click the OK button NOTE You don t have to select a file name Windows will find an ap...
Страница 57: ...7 is popped up again cancel once and repeat from step 45 53 Click the OK button NOTE For USB connection with iBurst Terminal NDIS PPPoE User mode I O Protocol for iBurst Terminal iBurst Terminal must...
Страница 58: ...wn below appears insert Windows 98SE CD ROM into your PC and enter the directory of your Windows 98SE CD ROM click the OK button xxxxxxxx in the picture below is a file name that can not be found 54 T...
Страница 59: ...E The installation software are applied to Mac OS X 10 1 5 10 2 10 3 10 4 except Mac Intel models Make sure OS version on your PC and a corresponding installation software package for iBurst Terminal...
Страница 60: ...7 2009 60 4 In case of version 10 3 or later the confirmation message shown below will appear Click Continue button 5 In case of version 10 2 or older Authenticate dialog will appear Enter an administ...
Страница 61: ...ktop Model UTD Manual Kyocera Corporation Revision 1 02 Feb 17 2009 61 7 Click the Continue button 8 The following dialog will appear click the Agree button 9 Select a destination disk and then click...
Страница 62: ...stall button after appearing dialog window as shown below NOTE In case of version 10 4 Authentication dialog will appear at here 11 Click the Continue installation button 12 When finish installing the...
Страница 63: ...ion Establishment for Windows XP 1 Make sure to connect the iBurst Terminal with your PC via USB cable or Ethernet cable 2 Click the Start button followed by selecting Control Panel as shown below 3 C...
Страница 64: ...eb 17 2009 64 5 When the Internet Properties dialog window appears click the Setup button 6 New Connection Wizard will begin and the dialog window as shown below will appear Click the Next button in t...
Страница 65: ...connection manually and click the Next button 9 Select Connect using a broadband connection that requires a user name and password and click the Next button 10 Fill in ISP Name edit box with an ISP N...
Страница 66: ...d make sure that the Make this the default Internet connection check box is checked Click the Next button 12 Click the Finish button 13 When the Network and Internet Connection window pane appears aga...
Страница 67: ...nfiguration is completed When you open Internet Explorer the Dial up Connection dialog window as shown below will appear Click the Connect button to connect to the network 16 When the connection estab...
Страница 68: ...l with your PC via USB cable or Ethernet cable 2 Double click the shortcut icon on the PC desktop or click Start Programs iBurst Terminal iBurst_Terminal Connect UTL 3 Enter user name and password and...
Страница 69: ...D Manual Kyocera Corporation Revision 1 02 Feb 17 2009 69 4 While connecting to network the following connection status window is displayed 5 When logging on successfully a network connection icon wil...
Страница 70: ...Make sure to connect the iBurst Terminal with your PC via USB cable or Ethernet cable 2 Select System Preferences on the Apple menu 3 Click Network in the System Preferences window 4 After the 1st con...
Страница 71: ...t for example NOTE The X in the en X is the port number and it shall be the biggest one among them when 1st connection Additionally set as follows Select the PPPoE tab Check Connect using PPPoE Enter...
Страница 72: ...utton 8 At this point the connection configuration is completed When you open any internet application software e g a web browser the internet connectivity will be activated automatically NOTE If you...
Страница 73: ...ernet Connect 10 Click on drop down menu of Configuration and select Ethernet Adaptor en X The configuration of Ethernet Adaptor en X will be displayed click the Connect button NOTE In case of version...
Страница 74: ...rst Terminal Desktop Model UTD Manual Kyocera Corporation Revision 1 02 Feb 17 2009 74 Chapter 3 Utility Software This chapter describes the features and usage of the Utility Software for iBurst Termi...
Страница 75: ...utility dialog 1 To open the utility dialog click the icon on the computer s task tray or click Start Programs iBurst Terminal iBurst_Terminal UTL When the dialog opens the Link Info pane will be dis...
Страница 76: ...maintenance support 2 Link Status This indicates current link status between the iBurst Terminal and the access point Connect The link is connected No Connect The iBurst Terminal is connected with you...
Страница 77: ...s No Signal 0 Poor In the range of 1 to 24 Fair In the range of 25 to 49 Good In the range of 50 to 74 Excellent In the range of 75 to 100 6 Current Data Rate This indicates current throughputs on bot...
Страница 78: ...lowing descriptions are about each item on the pane 1 Selecting ON enables the corresponding indicator on the Link Info pane All are ON as the default 2 Selecting OFF disables the corresponding indica...
Страница 79: ...n about software hardware and copyrights The following descriptions are about each item on the pane 1 This shows the version number and the build date of this Utility Software 2 This shows the firmwar...
Страница 80: ...minal The table below shows icons with status descriptions Pointing on the iBurst icon on the task tray a baloon indicates Link Status Total Byte Received Total Byte Sent and Signal Strength as shown...
Страница 81: ...D Manual Kyocera Corporation Revision 1 02 Feb 17 2009 81 Using Utility Software for Mac OS X To open the utility dialog 1 Click the iBurst Terminal UTL icon on the Dock 2 The iBurst_Terminal UTL dial...
Страница 82: ...maintenance support 2 Link Status This indicates current link status between the iBurst Terminal and the access point Connect The link is connected No Connect The iBurst Terminal is connected with yo...
Страница 83: ...s No Signal 0 Poor In the range of 1 to 24 Fair In the range of 25 to 49 Good In the range of 50 to 74 Excellent In the range of 75 to 100 6 Current Data Rate This indicates current throughputs on bot...
Страница 84: ...bling disabling to show each indicator on the Link Info pane The following descriptions are about each item on the pane 1 Selecting ON enables the corresponding indicator on the Link Info pane All are...
Страница 85: ...t software hardware and copyrights The following descriptions are about each item on the pane 1 This shows the version number and the build date of this Utility Software 2 This shows the firmware vers...
Страница 86: ...active 1 iBurst_Terminal UTL menu The menu is used to quit the iBurst Terminal utility or to perform other operations 2 DisplaySetup menu The menu is used to control enabling disabling to show each i...
Страница 87: ...e iBurst Terminal The table below shows icons with status descriptions Icon Activities on iBurst Terminal iBurst Terminal is not connected with your PC iBurst Terminal is connected with your PC but No...
Страница 88: ...minal you have to change IP address of your PC In case Windows XP 1 Click Start Control Panel to open that 2 Click Network and Internet Connections to open that 3 Click Network Connections to open tha...
Страница 89: ...ttings shown below are recommended as an example IP address 192 168 250 1 Subnet mask 255 255 255 0 Default gateway blank 6 Click OK to close the TCP IP properties 7 Click OK to close the Ethernet Con...
Страница 90: ...network plan In case of connecting directly between the iBurst Terminal and your PC the settings shown below are recommended as an example IP address 192 168 250 1 Subnet mask 255 255 255 0 Router bl...
Страница 91: ...rporation Revision 1 02 Feb 17 2009 91 IP Address Setting This page shows current IP address of the iBurst Terminal You can change the IP address on this page To change it type new IP address and clic...
Страница 92: ...on This page indicates similar information described in page 75 of iBurst Terminal utility software All information will be updated every 5 seconds Configuration This page indicates similar informatio...
Страница 93: ...sktop Model UTD Manual Kyocera Corporation Revision 1 02 Feb 17 2009 93 Chapter 4 MTU Optimizer Software Network Property This chapter describes the features and usage of the MTU Optimizer Software fo...
Страница 94: ...rt of Kyocera PPPoE dialer and it is available on Windows 98SE ME and 2000 NOTE You need to make a Internet connection through the iBurst Terminal prior to start this procedure 1 While your PC is bein...
Страница 95: ...o change MTU size manually type a value in the MTU field and click the Update button Your PC may request to restart it 6 If you want to optimize MTU size automatically A type a target URL or an IP add...
Страница 96: ...a result of the optimized MTU size in the MTU field D Click the Update button to memorize into your PC Your PC may request to restart it NOTE Monitor to revoke the result and show the current memorize...
Страница 97: ...iBurst Terminal Desktop Model UTD Manual Kyocera Corporation Revision 1 02 Feb 17 2009 97 Chapter 5 Uninstallation This chapter describes how to uninstall iBurst software...
Страница 98: ...00 NOTE All screen copies in this section are examples on Windows XP 1 Close all programs that are currently running 2 Disconnect the iBurst Terminal with your PC 3 Click the Start button followed by...
Страница 99: ...after appearing dialog window as shown below 6 The following dialog window will appear and select to delete or not to delete installation history files before uninstallation then click the Next butto...
Страница 100: ...iBurst Terminal Desktop Model UTD Manual Kyocera Corporation Revision 1 02 Feb 17 2009 100 8 Click the Finish button after appearing dialog window as shown below...
Страница 101: ...on for Windows Me 98SE 1 Close all programs that are currently running 2 Disconnect the iBurst Terminal with your PC 3 Click the Start Settings Control Panel to open Control Panel as shown below and t...
Страница 102: ...on when appearing the message as shown below 6 The following dialog window will appear and select to delete or not to delete installation history files before uninstallation then click the Next button...
Страница 103: ...103 8 Click the Finish button after appearing dialog window as shown below NOTE In case that the uninstaller shows a selection of restarting your PC it is recommended to restart it 9 Click the Start S...
Страница 104: ...TD Manual Kyocera Corporation Revision 1 02 Feb 17 2009 104 10 Select iBurst Terminal Virtual MODEM on Device Manager tab then click the Remove button 11 Click the OK button NOTE In case Windows 98 SE...
Страница 105: ...2 Select iBurst Terminal Virtual COM Port COMx on Device Manager tab then click the Remove button NOTE The X in COM x above is a COM port number assigned automatically 13 Click the OK button NOTE COM3...
Страница 106: ...al Desktop Model UTD Manual Kyocera Corporation Revision 1 02 Feb 17 2009 106 14 Click the Close button 15 Click the Start Settings Control Panel to open Control Panel as shown below and then double c...
Страница 107: ...ration tab then click the Remove button Repeat the above steps if the other NDIS PPPoE Usermode I O Protocol for iBurst Terminal components are installed 17 Click the OK button to close Network dialog...
Страница 108: ...S X 1 Close all programs that are currently running 2 Disconnect the iBurst Terminal with your PC 3 Open the folder Applications iBurst Terminal Uninstall then double click the script file uninst_ibur...
Страница 109: ...ion 1 02 Feb 17 2009 109 5 Press y or n key and Press Enter key 6 Press y and Enter key to restart your computer ATTENTION Don t change any properties of MAC Terminal while uninstallation Otherwise yo...
Страница 110: ...iBurst Terminal Desktop Model UTD Manual Kyocera Corporation Revision 1 02 Feb 17 2009 110 Chapter 6 Trouble shooting This chapter describes how to solve the trouble when you use iBurst...
Страница 111: ...e 98SE Windows Me 98SE may need a couple seconds or maximally 1 minute to detect iBurst Terminal through USB connection If you find this phenomenon you can avoid it by following procedure 1 Open Netwo...
Страница 112: ...Model UTD Manual Kyocera Corporation Revision 1 02 Feb 17 2009 112 3 Open the IP Address tab 4 Select the Specify an IP address then type a private IP address for example 192 168 250 11 and type 255 2...
Страница 113: ...iBurst Terminal Desktop Model UTD Manual Kyocera Corporation Revision 1 02 Feb 17 2009 113 5 Click the OK button 6 Click the Yes button and restart your PC...
Страница 114: ...r may hang up in worst case after iBurst Terminal device driver installation This case is from Windows OS and competition with other devices The following gives you the procedure to fix this problem 1...
Страница 115: ...Feb 17 2009 115 3 On the General tab check the box labeled the Disable in this hardware profile and then click the OK button 4 Connect iBurst Terminal to USB port 5 On the General tab uncheck the box...
Страница 116: ...ay hang up in worst case after iBurst Terminal Virtual COM Port driver installation This case is from Windows OS and competition with other devices The following gives you the procedure to fix this pr...
Страница 117: ...x labeled the Disable in this hardware profile and then click the OK button 4 Re install iBurst Terminal Virtual COM Port driver according to installation procedure chapter 2 Installation for Windows...
Страница 118: ...ort Windows 98SE basically does not support hot plug out for USB interface You might find a problem that your PC hang up itself when you eject iBurst Terminal from USB port during PC running In this c...
Страница 119: ...ration Revision 1 02 Feb 17 2009 119 Mac Data rate iBurst Terminal would not perform maximum data rate when it connects with Mac PC This is obviously caused by Mac OS And typical data rate connecting...
Страница 120: ...iBurst Terminal Desktop Model UTD Manual Kyocera Corporation Revision 1 02 Feb 17 2009 120 Chapter 7 Information...
Страница 121: ...an be determined by turning the equipment off and on the user is encouraged to try to correct the interference by one or more of the following measures Reorient or relocate the receiving antenna Incre...
Страница 122: ...of radio frequency energy RF in the microwave range while being used Whereas high levels of RF can produce health effects by heating tissue exposure to low level RF that does not produce heating effe...