


10-57
Troubleshooting > Adjustment/Maintenance
Tone Curve Adjustment
After prolonged use, or from the effects of surrounding temperature or humidity, the printed output tone may differ from
the original. Perform this function to ensure consistency with the original tone. Before executing Tone Curve Adjustment,
execute calibration.
If calibration does not improve the tones, perform Tone Curve Adjustment.
A total of 3 pattern pages (No. 1 to 3) are printed during adjustment. The printed patterns are read sequentially during
the adjustment.
1
Load paper.
2
Display the screen.
1
[
System Menu/Counter
] key > [
Adjustment/Maintenance
] > "Image Adjustment" [
Tone
Curve Adjustment
]
2
Select [
Copy/Print (600dpi)
] or [
Print (1200dpi)
].
3
Adjust the tone curve.
1
Select [
Start
]. A pattern is printed.
Check that the number "1" is printed at the bottom of the pattern.
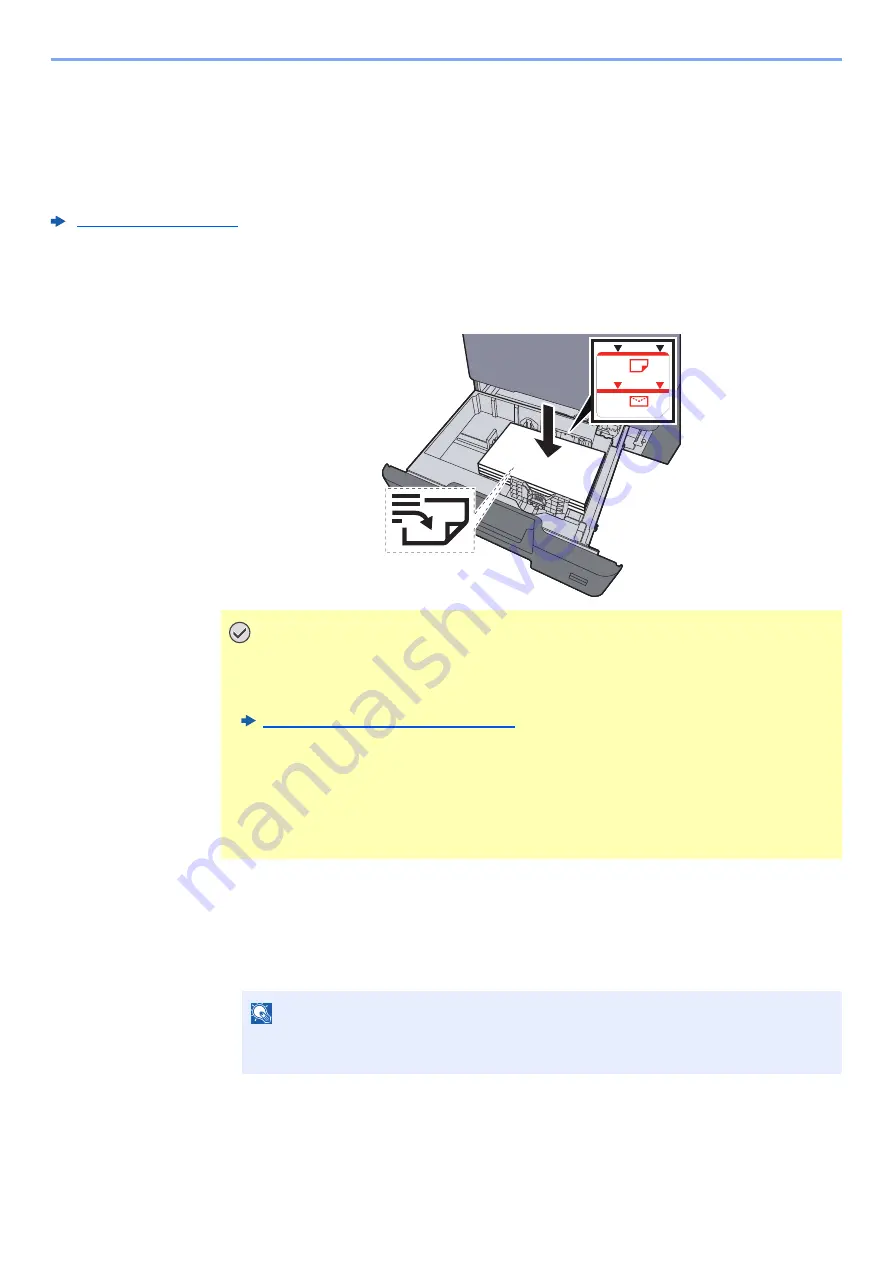
IMPORTANT
• Load the paper with the print side facing up.
• After removing new paper from its packaging, fan the paper before loading it in the
cassettes.
Loading in the Cassettes (page 3-5)
• Before loading the paper, be sure that it is not curled or folded. Paper that is curled
or folded may cause paper jams.
• Ensure that the loaded paper does not exceed the level indicator (see illustration
above).
• If paper is loaded without adjusting the paper length guide and paper width guide,
the paper may skew or become jammed.
NOTE
Select [
Print (1200dpi)
] if you want to adjust the printed output tone in printer resolution
1200 dpi.
Содержание 358ci
Страница 1: ...kyoceradocumentsolutions com Operation Guide 508ci 408ci 358ci...
Страница 83: ...2 13 Installing and Setting up the Machine Touch Panel Example System Menu Screen Move the screen up and down...
Страница 233: ...5 23 Operation on the Machine Sending Document via E mail 6 Press the Start key Sending starts...
Страница 539: ...10 20 Troubleshooting Regular Maintenance 3 Empty the Punch Waste Box 4 Install the Punch Waste Box 5 Close the cover...
Страница 541: ...10 22 Troubleshooting Regular Maintenance 4 Install the Punch Waste Box 5 Close the cover...
Страница 586: ...10 67 Troubleshooting Clearing Paper Jams 4 Remove any jammed paper 5 Push Right Cover 2 and Cassette 3 back in...
Страница 592: ...10 73 Troubleshooting Clearing Paper Jams 8 Remove any jammed paper 9 Push Right Cover 1...
Страница 611: ...10 92 Troubleshooting Clearing a Staple Jam 4 Install the Staple Cartridge Holder 5 Close the front cover...
Страница 613: ...10 94 Troubleshooting Clearing a Staple Jam 4 Install the Staple Cartridge Holder 5 Close the front cover...
Страница 657: ...Index 10 X XPS Fit to Page 6 85 Default 8 34 Z Zoom 6 42 Default 8 32...
Страница 658: ......
Страница 661: ...is a trademark of KYOCERA Corporation 2019 KYOCERA Document Solutions Inc 2019 7 2WHKDEN200...


