background image

PREFACE 


This Service Manual describes the 
technical features and servicing 
procedures for the KYMCO 

MX’er 

125/150. 


Section 1 contains the precautions for 
all operations stated in this manual. 
Read them carefully before starting any 
operation. 


Section 2 is the removal/installation 
procedures for the frame covers which 
are subject to higher removal/installation 
frequency during maintenance and 
servicing operations. 


Section 3 describes the inspection/ 
adjustment procedures, safety rules and 
service information for each part, starting 
from periodic maintenance. 


Sections 4 through 17 give instructions 
for disassembly, assembly and 
inspection of engine, chassis frame and 
electrical equipment. 


Most sections start with an assembly or 
system illustration and troubleshooting 
for the section. The subsequent pages 
give detailed procedures for the section.

KWANG YANG MOTOR CO., LTD.


OVERSEAS SALES DEPARTMENT


OVERSEAS SERVICE SECTION


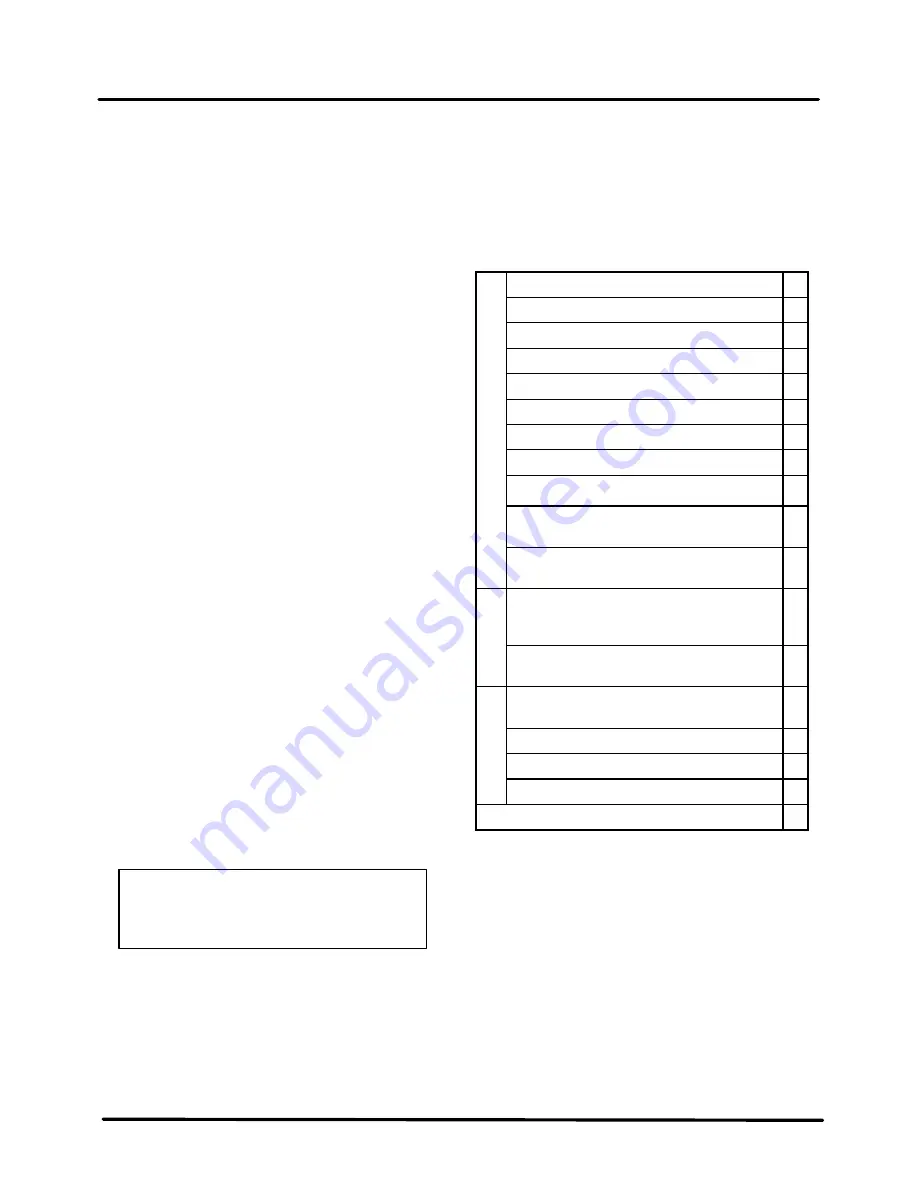
TABLE OF CONTENTS


GENERAL INFORMATION 


FRAME COVERS/EXHAUST MUFFLER 


INSPECTION/ADJUSTMENT 


LUBRICATION SYSTEM 


FUEL SYSTEM 


ENGINE REMOVAL/INSTALLATION 


CYLINDER HEAD/VALVES 


CYLINDER/PISTON 


DRIVE AND DRIVEN PULLEYS 


FINAL REDUCTION/TRANSMISSION 
SYSTEM 

10 


CRANKCASE/CRANKSHAFT/  
BALANCE SHAFT 

11 


FRONT WHEEL/FRONT BRAKE/ 
FRONT SUSPENSION/STEERING 
SYSTEM 

12 


REAR WHEEL /SWING 
ARM/HYDRAULIC BRAKE 

13 


BATTERY/CHARGING SYSTEM/A.C. 
GENERATOR 

14 


IGNITION SYSTEM 

15 


STARTING SYSTEM 

16 


LIGHTS/SWITCHES 

17 

     ONLY ATV ON ROAD AVAILABLE 

18 


The information and contents included 
in this manual may be different from 
the motorcycle in case specifications 
are changed.

CHASSIS


ELECTRICAL 

EQUIPMENT


ENGINE


Содержание LA30AA

Страница 1: ...with an assembly or system illustration and troubleshooting for the section The subsequent pages give detailed procedures for the section KWANG YANG MOTOR CO LTD OVERSEAS SALES DEPARTMENT OVERSEAS SER...

Страница 2: ..._______________________________________________________ GENERAL INFORMATION SERIAL NUMBER 1 1 SPECIFICATIONS 1 2 SERVICE PRECAUTIONS 1 4 TORQUE VALUES 1 12 SPECIAL TOOLS 1 14 LUBRICATION POINTS 1 15 C...

Страница 3: ...1 GENERAL INFORMATION 1 1 MX er SYSTEM SERIAL NUMBER Location of Engine Serial Number Location of Frame Serial Number...

Страница 4: ...cold mm Exhaust 0 06 Idle speed rpm 1700rpm Lubrication type Forced pressure wet sump Oil pump type Inner outer rotor type Oil filter type Full flow filtration Oil capacity 1 0 liter Oil exchanging ca...

Страница 5: ...old mm Exhaust 0 06 Idle speed rpm 1700rpm Lubrication type Forced pressure wet sump Oil pump type Inner outer rotor type Oil filter type Full flow filtration Oil capacity 1 0 liter Oil exchanging cap...

Страница 6: ...htening bolts or nuts begin with larger diameter to smaller ones at several times and tighten to the specified torque diagonally n Use genuine parts and lubricants n When servicing the motorcycle be s...

Страница 7: ...mutual working safety n Disconnect the battery negative terminal before operation n When using a spanner or other tools make sure not to damage the motorcycle surface n After operation check all conne...

Страница 8: ...fied capacity n After operation terminal caps shall be installed securely n When taking out the connector the lock on the connector shall be released before operation n Hold the connector body when co...

Страница 9: ...ed terminal cover or loose negative terminal n Check the double connector cover for proper coverage and installation n Insert the terminal completely n Check the terminal cover for proper coverage n D...

Страница 10: ...make sure that it is not interfering with any moving or sliding parts n When fixing the wire harnesses do not make it contact the parts which will generate high heat n Route wire harnesses to avoid sh...

Страница 11: ...tact a sharp edge or corner n When rubber protecting cover is used to protect the wire harnesses it shall be installed securely n Do not break the sheath of wire n If a wire or harness is with a broke...

Страница 12: ...re with adjacent or surrounding parts in all steering positions n When a testing device is used make sure to understand the operating methods thoroughly and operate according to the operating instruct...

Страница 13: ...sent the servicing methods and cautions included in this service manual Apply engine oil to the specified points Use designated engine oil for lubrication Apply grease for lubrication Transmission Gea...

Страница 14: ...ud bolt Oil filter screen cap Seat ball stopper bolt Bearing hold L cover Stud bolt Cam holder Tappet ADJ nut Pivot tensioner Lifter tensioner Lifter tensioner MISTON oil drive bolt Driver face Clutch...

Страница 15: ...e kgf m Remarks Steering stem nut Swing arm nut Rear wheel nut Frontwheelnut Rearshockabsorberuppermountbolt Frontshockabsorberuppermountbolt Frontshockabsorberlowermountbolt Rear fork axle Rear hub n...

Страница 16: ...ller E003 Lock nut wrench E009 Valve adjuster E012 Valve spring compressor E040 Oil seal and bearing install E014 Universal holder E017 Flywheel holder E021 Clutch spring compressor E027 Bearing pulle...

Страница 17: ...oundings and piston ring grooves Piston pin surroundings Cylinder inside wall Connecting rod piston pin hole Connecting rod big end Crankshaft right side oil seal Crankshaft one way clutch movable par...

Страница 18: ...ot specified This will avoid abnormal noise and rise the durability of the motorcycle Steering knuckle Thrust Cover Bush Collar Steering Column Upper Rear Brake Cable Front Brake camshaft Oil Seal O r...

Страница 19: ...1 GENERAL INFORMATION 1 17 MX er SYSTEM Sprocket hub Rear Axle Hub Collar Oil Seal Bearing Rear Brake Cam Axle Hub Collar Oil Seal Bearing Driven Sprocket Swing arm Thrust Cover...

Страница 20: ...1 GENERAL INFORMATION 1 18 MX er SYSTEM CABLE HARNESS ROUTING Throttle Cable Rear Brake Cable Right Front Brake Cable Handlebar Switch Lead Front Brake Cable Left Front Brake Cable...

Страница 21: ...1 GENERAL INFORMATION 1 19 MX er SYSTEM Main Switch Inlet Hose Breather Hose Crankcase Breather Hose CYL Head Cover...

Страница 22: ...1 GENERAL INFORMATION 1 20 MX er SYSTEM Wire Harness Fuse Breather Hose Rectifier Regulator Ignition Coil Outlet Hose...

Страница 23: ...1 GENERAL INFORMATION 1 21 MX er SYSTEM Battery Negative Cable Change Gear Control A C G Wire Connector Battery Starter Relay Positive Cable CDI Unit Fuse Breather Hose CYL Head Cover...

Страница 24: ...1 GENERAL INFORMATION 1 22 MX er SYSTEM WIRING DIAGRAM...

Страница 25: ...piston and piston rings Leaking cylinder head gasket Air leaking through intake pipe Leaking intake manifold Incorrect ignition timing Incorrectly adjusted air screw Flooded carburetor Clogged air cle...

Страница 26: ...bustion chamber Poor quality fuel Clutch slipping Mixture too lean Ignition timing too early Start engine and accelerate lightly for observation Inspection Adjustment Symptom Probable Cause Engine spe...

Страница 27: ...k plug Faulty CDI unit Faulty A C generator Faulty ignition coil Broken or shorted spark plug wire Faulty ignition switch Remove spark plug and install it into spark plug cap to test spark by connecti...

Страница 28: ...aligning marks not aligned Faulty spring POOR CHARGING BATTERY OVER DISCHARGING OR OVERCHARGING Inspection Adjustment Symptom Probable Cause Check ignition timing Check carburetor jets for clogging Ch...

Страница 29: ...ctifier coupler red wire and battery wire to engine ground and test Symptom Inspection Adjustment Probable Cause Inspection Adjustment Symptom Symptom Probable Cause Probable Cause Normal voltage Batt...

Страница 30: ...Faulty change gear control unit Faulty ignition coil Replace with a new spark plug and inspect again Check CDI unit coupler for looseness Normal Abnormal Normal Abnormal Normal Abnormal Abnormal Measu...

Страница 31: ...er SYSTEM 2 __________________________________________________________________________________ FRAME COVERS EXHAUST MUFFLER SERVICE INFORMATION 2 2 TROUBLESHOOTING 2 2 FRAME COVERS 2 3 HEADLIGHT REMO...

Страница 32: ...2 FRAME COVERS EXHAUST MUFFLER 2 1 MX er SYSTEM...

Страница 33: ...nt claws may be damaged Make sure to route cables and harnesses according to the Cable Harness Routing TORQUE VALUES Exhaust muffler lock bolt 3 2 3 8kgf m Exhaust muffler joint lock nut 0 8 1 2kgf m...

Страница 34: ...two bolts attaching the left rear fender Remove the left rear fender under bolt Remove the left rear fender RIGHT REAR FENDER REMOVAL Remove seven screws and two bolts attaching the right rear fender...

Страница 35: ...r FRONT COVERS REMOVAL Remove the two screws on the front cover Remove the left and right front fender under bolt Remove the front cover FRONT FENDER REMOVAL Remove the left and right front fender und...

Страница 36: ...haust muffler Remove the two exhaust muffler joint lock nuts Remove the exhaust muffler joint packing collar When installing first install the exhaust muffler packing collar onto the engine and then i...

Страница 37: ...N AIR CLEANER 3 3 AIR FILTER FOR DRIVE BELT 3 4 SPARK PLUG 3 5 VALVE CLEARANCE CARBURETOR IDLE SPEED 3 6 IGNITION TIMING CYLINDER COMPRESSION 3 7 ENGINE OIL FINAL REDUCTION GEAR OIL 3 8 DRIVE BELT BRA...

Страница 38: ...parks near the working area or fuel storage area SPECIFICATIONS ENGINE Throttle grip free play 1 4mm Spark plug gap 0 6 0 7mm Spark plug Standard NGK CR8E Valve clearance IN 0 06mm EX 0 06mm Idle spee...

Страница 39: ...r clearance Clean Replace if necessary Carburetor Check idle speed starter operation Adjust if necessary Fuel line Check fuel hose for cracks or damage Replace if necessary Engine oil Replace Warm eng...

Страница 40: ...djustment is made with the adjusting nut at the throttle to swing above Slide the rubber cover out and adjust by loosening the lock nut and turning the adjusting nut AIR CLEANER AIR CLEANER REPLACEMEN...

Страница 41: ...dusty or rainy areas AIR FILTER FOR DRIVE BELT Remove the front cover Remove the screw air filter case and air filter element Inspect the air filter element Replace if damage Clean air filter element...

Страница 42: ...SPARK PLUG Remove the spark plug Check the spark plug for wear and fouling deposits Clean any fouling deposits with a spark plug cleaner or a wire brush Specified Spark Plug NGK CR8E Measure the spar...

Страница 43: ...nut Tappet adjuster E012 CARBURETOR IDLE SPEED Warm up the engine before this operation Start the engine and connect a tachometer Turn the throttle stop screw to obtain the specified idle speed Idle S...

Страница 44: ...fully and push the starter button to test the compression Compression 16kg cm If the compression is low check for the following Leaky valves Valve clearance too small Leaking cylinder head gasket Worn...

Страница 45: ...ined Install the oil drain plug bolt Torque 2 0 3 0kgf m Recommended Oil SAE30 FINAL REDUCTION GEAR OIL Recommended Oil GEAR OIL SAE90 GEAR OIL CHANGE Remove the oil filler bolt Removes the oil drains...

Страница 46: ...place the drive belt if out of specification BRAKE SHOE Replace the brake shoes if the arrow on the wear indicator plate aligns with the punch mark on the brake panel when the brake is fully applied B...

Страница 47: ...uts REAR BRAKE Measure the rear brake lever free play Free Play 10 20mm If the free play do not fall within the limit adjust by turning the adjusting nut HEADLIGHT AIM Turn the ignition switch ON and...

Страница 48: ...ightly move the handlebar from left to right Replace the tie rod ends if tie rod end has any vertical play Raise the front end of the machine so that there is no weight on the front wheels Check ball...

Страница 49: ...iven to both tie rods right and left until the specified toe in is obtained so that the lengths of the rods will be kept the same Torque 2 5 3 5kgf m WHEELS TIRES Check the tires for cuts imbedded nai...

Страница 50: ...6 0 8 0kgf m WHEEL INSPECTION Inspect the tire surfaces Replace if wear or damage Tire wear limit 3 0mm Inspect the wheel Replace if damage or bends Always balance the wheel when a tire or wheel has b...

Страница 51: ...chain slack Adjust if out of specification Drive chain slack Approximately 30mm Adjust drive chain slack Elevate the rear wheels by placing a suitable stand under the rear of frame Loosen four bolts...

Страница 52: ...cation While pushing up or down on the chain to zero slack Torque 6 0 8 0kgf m Tighten the adjuster Torque 1 8 2 5kgf m CABLE INSPECTION AND LUBRICATION Inspect the cable sheath Adjuster Adjuster Bolt...

Страница 53: ...mooth operation LEVER LUBRICATION Lubricate the pivoting parts of each lever FRONT SUSPENSION LUBRICATION Inject grease into the nipples using a grease gun until slight over flow is observed from the...

Страница 54: ...SYSTEM 4 0 MX er SYSTEM 4 __________________________________________________________________________________ LUBRICATION SYSTEM SERVICE INFORMATION 4 2 TROUBLESHOOTING 4 2 ENGINE OIL OIL FILTER 4 3 O...

Страница 55: ...4 LUBRICATION SYSTEM 4 1 MX er SYSTEM LUBRICATION SYSTEM Oil Pump Oil Filter Screen Crankshaft Rocker Arm Shaft...

Страница 56: ...mp must be replaced as a set when it reaches its service limit After the oil pump is installed check each part for oil leaks SPECIFICATIONS Item Standard mm Service Limit mm Inner rotor to outer rotor...

Страница 57: ...amage and replace if necessary Install the oil filter screen spring and filter screen cap Torque 1 0 2 0kgf m Fill with the specified SAE15W40 API SG engine oil to the proper level Oil Capacity At dis...

Страница 58: ...arter clutch Lock nut socket wrench E009 Remove the two bolts and oil separator cover Remove the oil pump driven gear nut to remove the oil pump driven gear and drive chain Remove the oil pump mountin...

Страница 59: ...Screw Remove the screw and disassemble the oil pump INSPECTION Measure the pump body to outer rotor clearance Service Limit 0 12mm Measure the inner rotor to outer rotor clearance Service Limit 0 12mm...

Страница 60: ...ure the pump cover Make sure that the pump shaft rotates freely without binding INSTALLATION Install the oil pump into the crankcase After the oil pump is installed tighten the two mounting bolts Inst...

Страница 61: ...Install the oil separator cover and tighten the bolts Install the starter idle gear and starter clutch Install the starter clutch nut and tighten it to specified torque Torque 9 5 kgf m Install the ga...

Страница 62: ...__________________________________________________ FUEL SYSTEM SERVICE INFORMATION 5 2 TROUBLESHOOTING 5 3 THROTTLEVALVEDISASSEMBLY CARBURETOR REMOVAL 5 4 FLOAT FLOAT VALVE JETS 5 5 CARBURETOR INSTALL...

Страница 63: ...5 FUEL SYSTEM 5 1 MX er SYSTEM...

Страница 64: ...ts the O rings and diaphragm must be removed first to avoid damage Then clean with compressed air When the motorcycle is not used for over one month drain the residual gasoline from the float chamber...

Страница 65: ...ets Improper throttle operation Float level too low Intake air leak Engine idles roughly stalls or runs poorly Clogged fuel tank cap breather hole Excessively used choke Kinked or restricted fuel line...

Страница 66: ...off the needle retainer and remove the jet needle Check the throttle valve and jet needle for wear or damage CARBURETOR REMOVAL Switch the fuel valve OFF Loosen the drain screw to drain the gasoline...

Страница 67: ...SSEMBLY Remove the float chamber attaching three screws and remove the float chamber Remove the float pin float and float valve FLOAT FLOAT VALVE INSPECTION Inspect the float valve seat for wear or da...

Страница 68: ...air through all passages of the carburetor body SLOW MAIN JET INSTALLATION Be careful not to damage the jets and jet holder when removing them Before removal turn the throttle stop screw and air scre...

Страница 69: ...the carburetor and measure the float level with the float level gauge while the float pin just contacts with float valve Float Level MX er 150 14 8mm MX er 125 When adjusting carefully bend the float...

Страница 70: ...carburetor cap and throttle valve spring Connect the throttle cable to the throttle valve Install the throttle valve into the carburetor body Connect the accelerating pump cable Fully open the throttl...

Страница 71: ...el valve OFF Disconnect the fuel tube and remove two bolts on the end of the fuel tank Remove the fuel tank FUEL VALVE REMOVAL Remove the fuel valve and fuel cup Remove the screw on the fuel valve con...

Страница 72: ...an if necessary Replace the O rings with new ones if they are damaged or deteriorated AIR CLEANER REMOVAL Remove the seat Remove the four screws on the air cleaner case cover and the cover Remove the...

Страница 73: ...AL INSTALLATION 6 0 MX er SYSTEM 6 __________________________________________________________________________________ ENGINE REMOVAL INSTALLATION SERVICE INFORMATION 6 1 ENGINE REMOVAL 6 2 ENGINE INST...

Страница 74: ...jack or other adjustable support is required to support and maneuver the engine Be careful not to damage the machine body cables and wires during engine removal Use shop towels to protect the motorcyc...

Страница 75: ...over Disconnect the engine negative cable Disconnect the A C G wire connector Disconnect the starter motor cable from the starter relay Disconnect the oil recycle tube at the engine body Disconnect th...

Страница 76: ...e Remove the rear drive chain gear on the bolts Remove the drive chain gear Remove the two bolts and two joint lock nuts attaching the exhaust muffler Remove the exhaust muffler ENGINE REMOVAL Remove...

Страница 77: ...eft engine hanger bracket Remove the left engine hanger bracket Remove the engine ENGINE INSTALLATION Install the engine and tighten the engine mounting bolts Torque 3 5 4 5kgf m Install the removed p...

Страница 78: ...______________________________________________ CYLINDER HEAD VALVES SERVICE INFORMATION 7 2 TROUBLESHOOTING 7 3 CAMSHAFT REMOVAL 7 4 CYLINDER HEAD REMOVAL 7 7 CYLINDER HEAD DISASSEMBLY 7 8 CYLINDER HE...

Страница 79: ...7 CYLINDER HEAD VALVES 7 1 MX er SYSTEM...

Страница 80: ...ssembly clean the removed parts and dry them with compressed air before inspection After removal mark and arrange the removed parts in order When assembling install them in the reverse order of remova...

Страница 81: ...formance at idle speed White smoke from exhaust muffler Compression too low Worn valve stem or valve guide Damaged valve stem seal Compression too low Incorrect valve clearance adjustment Abnormal noi...

Страница 82: ...oner cap bolt and the O ring Turn the cam chain tensioner screw clockwise to tighten it Turn the flywheel counterclockwise so that the T mark on the flywheel aligns with the index mark on the crankcas...

Страница 83: ...ve the camshaft CAMSHAFT INSPECTION Check each cam lobe for wear or damage Measure the cam lobe height Service Limits IN 31 40mm replace if below EX 31 13mm replace if below Check each camshaft bearin...

Страница 84: ...AMSHAFT HOLDER INSPECTION Inspect the camshaft holder valve rocker arms and rocker arm shafts for wear or damage Measure the I D of each valve rocker arm Measure each rocker arm shaft O D Measure arm...

Страница 85: ...the cylinder head Remove the dowel pins and cylinder head gasket Remove the cam chain guide Remove all gasket material from the cylinder mating surface CYLINDER HEAD DISASSEMBLY Cylinder Head Dowel Pi...

Страница 86: ...lve areas for cracks Check the cylinder head for warpage with a straight edge and feeler gauge Service Limit 0 05mm repair or replace if over VALVE VALVE GUIDE Inspect each valve for bending burning s...

Страница 87: ...springs Inner 39 4mm replace if below Outer 45 5mm replace if below Measure compressed force valve spring and installed length Replace if out of specification Service limits IN 7 7 8 9kg at 33 7mm EX...

Страница 88: ...mes to firmly seat the cotters CYLINDER HEAD INSTALLATION Install the dowel pins and a new cylinder head gasket Install the cam chain guide Install two cylinder head bolts do not tighten completely In...

Страница 89: ...head surface Position the intake and exhaust cam lobes down and install the camshaft onto the cylinder head Install the cam chain over the camshaft gear Install the dowel pins Install the camshaft hol...

Страница 90: ...lt Install a new cylinder head cover O ring and install the cylinder head cover Install and tighten the cylinder head cover bolts Nut Washer Tensioner Screw Camshaft Holder Cylinder Head Cover Bolt Ap...

Страница 91: ...__________________________________________________________________________________ CYLINDER PISTON SERVICE INFORMATION 8 2 TROUBLESHOOTING 8 2 CYLINDER REMOVAL 8 4 PISTON REMOVAL 8 4 PISTON INSTALLAT...

Страница 92: ...8 CYLINDER PISTON 8 1 MX er SYSTEM...

Страница 93: ...check the crankcase breather for white smoke If white smoke is found it means that the piston rings are worn stuck or broken Compression too low or uneven compression Excessive smoke from exhaust muf...

Страница 94: ...in clearance 0 002 0 014 0 02 Connecting rod small end I D bore 15 016 15 034 15 06 Mx er 125 Standard mm Service Limit mm I D 56 53 56 545 Warpage 0 05 Cylindricity 0 05 True roundness 0 05 Ring to g...

Страница 95: ...cylinder gasket and dowel pins Clean any gasket material from the cylinder surface PISTON REMOVAL Remove the piston pin clip Press the piston pin out of the piston and remove the piston Inspect the pi...

Страница 96: ...m replace if over Remove the piston rings and insert each piston ring into the cylinder bottom Measure the piston ring end gap Service Limit 0 5mm replace if over Measure the piston pin hole I D Servi...

Страница 97: ...5mm MX er 150 56 53 56 545mm MX er 125 Measure the cylinder to piston clearance Service Limit 0 1mm repair or replace if over The true roundness is the difference between the values measured in X and...

Страница 98: ...rings onto the piston Apply engine oil to each piston ring PISTON INSTALLATION Remove any gasket material from the crankcase surface Second Side Rail Top Side Rail Oil Ring Be careful not to damage or...

Страница 99: ...the piston by compressing the piston rings Install the cam chain tension Tighten the cam chain tension bolts Gasket Cylinder Be careful not to drop foreign matters into the crankcase Piston Pin Pisto...

Страница 100: ...9 DRIVE AND DRIVEN PULLEYS 9 0 MX er SYSTEM 9 DRIVE AND DRIVEN PULLEYS SERVICE INFORMATION 9 2 TROUBLESHOOTING 9 2 LEFT CRANKCASE COVER 9 3 DRIVE PULLEY 9 3 CLUTCH DRIVEN PULLEY 9 3 9...

Страница 101: ...9 DRIVE AND DRIVEN PULLEYS 9 1 MX er SYSTEM 5 5kg m 5 5kg m 5 5kg m...

Страница 102: ...Clutch lining thickness 2 0 Clutch outer I D 130 0 130 2 130 5 Driven face spring free length 83 2 Driven face O D 33 965 33 485 33 94 Movable driven face I D 34 000 34 025 34 06 Weight roller O D 20...

Страница 103: ...holder and remove the drive face nut and starting ratchet Remove the drive pulley face Universal Holder E017 CLUTCH DRIVEN PULLEY Remove the drive pulley and drive belt Hold the clutch outer with the...

Страница 104: ...wear Measure the drive belt width Service Limit 17 0mm replace if below Remove the movable drive face assembly Remove the drive pulley collar DISASSEMBLY Remove the ramp plate Remove the weight rolle...

Страница 105: ...Measure each weight roller O D Service Limit 20 42mm replace if below Measure the movable drive face bushing I D Service Limit 27 06mm replace if over Check the drive pulley bushing for wear or damage...

Страница 106: ...9 DRIVE AND DRIVEN PULLEYS 9 6 MX er SYSTEM ASSEMBLY Install the weight rollers into the movable drive face Install the ramp plate Weight Roller Ramp Plate...

Страница 107: ...ble drive face INSTALLATION Install the movable drive face onto the crankshaft INSPECTION Inspect the clutch outer for wear or damage Measure the clutch outer I D Service Limit 130 5mm replace if over...

Страница 108: ...compressor and disassemble the clutch driven pulley assembly Remove the seal collar Check the driven face for wear or damage Measure the clutch lining thickness Service Limit 2 0mm replace if below P...

Страница 109: ...face spring free length Service Limit 83 2mm replace if below Check the driven face for wear or damage Measure the driven face O D Service Limit 33 94mm replace if below Check the movable driven face...

Страница 110: ...ler E008 Seat the snap ring in its groove Apply grease to the driven face bore areas Press a new needle bearing into the driven face Oil Seal And Bearing Install E014 CLUTCH DISASSEMBLY Remove the cir...

Страница 111: ...9 DRIVE AND DRIVEN PULLEYS 9 11 MX er SYSTEM CLUTCH DRIVENPULLEYASSEMBLY Circlip Clutch Lining...

Страница 112: ...tall them onto the moveable driven face Install the movable driven face onto the driven face Apply grease to the guide rollers and guide roller pins and then install them into the holes of the driven...

Страница 113: ...der E017 Install the drive belt Install the drive pulley face starting ratchet and drive face nut T orque 5 5 6 5kgf m UniversalHolder Drive Pulley Driven Pulley Driven Face Clutch Spring Compressor L...

Страница 114: ...DRIVE AND DRIVEN PULLEYS 9 14 MX er SYSTEM Install the left crankcase cover and tighten the cover bolts diagonally Connect the drive belt air tube and tighten the band screw Left Crankcase Cover Scre...

Страница 115: ...9 DRIVE AND DRIVEN PULLEYS 9 15 MX er SYSTEM...

Страница 116: ..._________________________________________________________ FINAL REDUCTION TRANSMISSION SYSTEM SERVICE INFORMATION 10 2 TROUBLESHOOTING 10 2 FINAL REDUCTION DISASSEMBLY 10 3 FINAL REDUCTION INSPECTION...

Страница 117: ...10 FINAL REDUCTION TRANSMISSION SYSTEM 10 1 MX er SYSTEM...

Страница 118: ...SPECIFICATIONS Specified Oil GEAR OIL SAE 90 Oil Capacity At change 0 2 liter At disassembly 0 4 liter TORQUE VALUES Transmission case cover bolt 0 8 1 2kgf m SPECIAL TOOLS Flywheel holder E021 Flywh...

Страница 119: ...ner Remove the engine Remove the right crankcase cover Remove the shift gear spindle Remove the flywheel and starter clutch Remove the balance gear oil pump and starter motor Remove the left case bolt...

Страница 120: ...TEM Remove gasket and two dowel pins FINAL REDUCTION TRANSMISSION INSPECTION Inspect the change gear shaft for wear damage or seizure Check the transmission operation Repair if unsmooth operation Remo...

Страница 121: ...and shift cam stopper Remove the transmission fork shaft and transmission fork Measure the transmission fork shaft O D Service Limit 11 936 Measure the transmission fork shaft hole I D Service Limit 1...

Страница 122: ...shift cam gear Replace if wear or damage TRANSMISSION GEARS CRANKSHAFT REMOVAL Remove the final gear and main shaft GEAR SHAFT COLLAR INSPECTION Check each gear and gear teeth for wear damage or poor...

Страница 123: ...the right crankcase bearings for excessive play and inspect the oil seal for wear or damage FINAL REDUCTION INSTALLATION Install the final gear and final shaft into the left crankcase Install the coun...

Страница 124: ...ission fork shaft into the left crankcase Install the change gear shaft by aligning the punch mark between with the punch mark of the shift cam gear Install shift cam stopper spring washer and plug an...

Страница 125: ...balance gear oil pump starter clutch and flywheel Install and tighten the right case cover bolt Install the shift gear spindle Install the cylinder Specified Gear Oil KYMCO SIGMA GEAR OIL 90 Oil Capac...

Страница 126: ...__________________________________________________________________________________ CRANKCASE CRANKSHAFT BALANCE SHAFT SERVICE INFORMATION 11 2 TROUBLESHOOTING 11 2 CRANKCASE SEPARATION 11 3 CRANKSHAF...

Страница 127: ...11 CRANKCASE CRANKSHAFT BALANCE SHAFT 11 1 MX er SYSTEM...

Страница 128: ...ston Section 8 Drive and driven pulleys Section 9 A C generator Section 4 Carburetor air cleaner Section 5 Starter motor Section 16 Oil pump Section 4 SPECIFICATIONS Item Standard mm Service Limit mm...

Страница 129: ...the left and right crankcase attaching bolts Section 10 Separate the left and right crankcase halves Remove the gasket and dowel pins Remover balance shaft from the left crankcase Dowel Pins Crankcas...

Страница 130: ...kcase Clean off all gasket material from the crankcase mating surfaces CRANKSHAFT INSPECTION Measure the connecting rod small end I D Service Limit 15 06 mm replace if over Measure the connecting rod...

Страница 131: ...if over Radial 0 05mm replace if over Measure the crankshaft run out Service Limit 0 10mm replace if over CRANKCASE BALANCE SHAFT ASSEMBLY Install the cam chain into the left crankcase Install the cra...

Страница 132: ...CRANKSHAFT BALANCE SHAFT 11 6 MX er SYSTEM Align the mark on the balance gear with the mark on the crankshaft gear Install the right and left case cover Install the cylinder Mark Right Crankcase Righ...

Страница 133: ...11 CRANKCASE CRANKSHAFT BALANCE SHAFT 11 7 MX er SYSTEM...

Страница 134: ...TEM 12 __________________________________________________________________________________ FRONT WHEEL FRONT BRAKE FRONT SUSPENSION STEERING SYSTEM SERVICE INFORMATION 12 2 TROUBLESHOOTING 12 3 FRONT W...

Страница 135: ...12 FRONT WHEEL FRONT BRAKE FRONT SUSPENSION STEERING SYSTEM 12 1 MX er SYSTEM...

Страница 136: ...ease off the brake drum and brake linings Inspect the brake system before riding SPECIFICATIONS Item Standard mm Service Limit mm Radial 2 0 Axial 2 0 Front brake drum I D 110 111 Front brake lining t...

Страница 137: ...ne side or does not track straight Improperly tightened axle nut Uneven front shock absorbers Soft front shock absorber Bent front arm Weak shock springs Bent steering knuckle Insufficient damper oil...

Страница 138: ...efer to the FRONT BRAKE ADJUSTMENT section in the CHAPTER 3 Disconnect the front brake cable from brake cam lever and remove the brake panel Remove the brake shoes REMOVE Remove brake shoes and spring...

Страница 139: ...b Replace if cracks or damage Inspect the front brake drum Measure the front brake drum I D Service limits 111mm FRONT WHEEL BEARING Remove the side collar Remove the dust seal Turn the inner race of...

Страница 140: ...k all bearing cavities with grease Drive in the left bearing Install the distance collar Drive in the right bearing Oil seal and bearing install E014 FRONT BRAKE FRONT BRAKE LINING INSPECTION Measure...

Страница 141: ...brake shoe plate Brake Lining Apply the grease onto the o ring oil seal lips pivot pin of brake shoe and camshaft Install the camshaft to the brake shoe plate with the slot of the camshaft placing at...

Страница 142: ...BRAKE ADJUSTMENT section in the CHAPTER 3 Brake cable free play 10 20mm at lever pivot FRONT SUSPENSION REMOVAL Elevate the front wheels by placing a suitable stand under the frame Do not loosen the...

Страница 143: ...knuckle Remove cotter pin nut washer and bolt then remove the steering knuckle covers collar and bush from the front arm INSPECTION Check the front arm brackets of the frame If bent cracked or damage...

Страница 144: ...lace the inner collar bushings and thrust covers as a set Remove the two nut and two bolt attaching the front arm then remove the front arm INSPECTION Inspect the shock absorber rod Replace the shock...

Страница 145: ...he front arm nut onto the frame and tighten the nuts Torque 4 0 5 0kgf m Apply the grease onto the bush collars and covers then install the steering knuckle onto the front arm and tighten the nut Torq...

Страница 146: ...er pin Install the shock absorber and tighten the upper and lower bolts Torque 3 5 4 5kgf m Install the brake shoe plate wheel hub and front wheel Refer to the FRONT WHEEL INSTALLATION section STEERIN...

Страница 147: ...m the bracket of the brake lever Remove the two screws to remove the cover of the throttle housing Disconnect the throttle cable from the lever Remove the two screws and remove the handlebar switch Br...

Страница 148: ...bar Remove the cotter pins and nuts attaching the tie rods then remove tie rods Remove the cotter pin and nut attaching the steering column then remove steering column and collar Remove the two bolts...

Страница 149: ...mage Inspect the steering column Replace if bends or damage Inspect the steering brackets and oil seal Replace if wear or damage Inspect the tie rod Replace if bend or damage Bolts Do not attempt to s...

Страница 150: ...ng both tie rod ends Tie rod length 266 5mm Set the rod end steering column side in an angle where the indentation surface of the tie rod is parallel to the rod end shaft and then tighten the lock nut...

Страница 151: ...REMOVAL procedures Assembly the steering column and tighten the two bolts Torque 1 8 2 5kgf m Band the lock washer tabs Install the steering column and collar then tighten the nut Torque 6 0 8 0kgf m...

Страница 152: ...ighten the four bolts Torque 1 8 2 5kgf m Be sure that the rod end on the indentation surface side is connected to the steering column Always use a new cotter pin Be sure the upper handlebar holder ma...

Страница 153: ...nto the end of the throttle cable and end of the brake cable Refer to the TOE IN ADJUSTMENT section in the CHAPTER 3 to adjust toe in Refer to the FRONT BRAKE ADJUSTMENT section in the CHAPTER 3 to ad...

Страница 154: ...0 MX er SYSTEM 13 __________________________________________________________________________________ REAR WHEEL SWING ARM HYDRAULIC BRAKE SERVICE INFORMATION 13 2 TROUBLESHOOTING 13 3 REAR WHEEL 13 4...

Страница 155: ...13 REAR WHEEL SWING ARM HYDRAULIC BRAKE 13 1 MX er SYSTEM...

Страница 156: ...ith a clean towel Do not wipe the motorcycle with a towel contaminated by brake fluid Make sure to use recommended brake fluid Use of other unspecified brake fluids may cause brake failure Inspect the...

Страница 157: ...uid level too low Clogged hydraulic brake system Hydraulic brake system leakage Smooth or worn brake pad Hard braking Poor brake performance Seized hydraulic brake system Contaminated brake pad surfac...

Страница 158: ...s Remove Remove four nuts attaching the wheel panel and rear wheel Remove nut attaching the wheel hub and washer Remove the wheel hub Inspection Measure the wheel runout Service Limit Vertical 2 0 mm...

Страница 159: ...ut of specification Remove two nuts of the rear axle outer and inner Remove five bolts attaching left and right lower guard Loosen the lock nut for the adjuster of the drive chain slack Loosen four bo...

Страница 160: ...lts attaching brake drum cover Remove brake drum cover and rubber spacer Inspection Inspect the inner surface of the brake drum is scratches polish brake drum lightly and evenly with emery cloth Measu...

Страница 161: ...cable from the camshaft lever Remove the brake shoes INSPECTION Measure lining thickness of the brake shoes Service limit 2 0 mm Replace if it is out of specification Remove the rear axle from left s...

Страница 162: ...age Replace if splines and threads of the rear axle is wear or damage Measure the rear axle run out Service limit less than 1 5mm Replace if it is out of specification DRIVE CHAIN INSPECTION Remove re...

Страница 163: ...Then remove the chain from the kerosene and dry the chain Inspect rear axle hub Replace if bearings allow play in the axle hub or the bearing turns roughly Replace if oil seals is wear or damage Repla...

Страница 164: ...l the brake drum Install the rubber spacer and brake drum cover Torque 0 8 1 2kgf m Place a wood block against the outer edge to protect this edge Do not strike the center race or balls of the bearing...

Страница 165: ...djust drive chain slack Approximately 30 mm Tighten the bolts Torque 6 0 8 0kgf m Torque 6 0 8 0kgf m Tighten the lock nut Torque 1 8 2 5kgf m Tighten the two nuts with the nut wrench Nut wrench F010...

Страница 166: ...e the rear wheels by placing a suitable stand under the rear of frame Cotter Pin Axle Nut Washer Support the machine securely so there is no danger of it falling over Do not loosen the axle nut after...

Страница 167: ...shock absorber Check the tightening torque of the pivot shaft swingarm securing nut Torque 6 0 8 0kgf m Check the swing arm side play by moving it from side to side If side play noticeable check the i...

Страница 168: ...bearing bushing and thrust cover or adjust the shim Remove the nut and pivot shaft then remove swing arm Remove the thrust covers INSPECTION Inspect the shock absorber rod Replace the shock absorber a...

Страница 169: ...e pivot shaft Replace if bends Inspect the thrust cover chain guard collar and bush Replace if wear or damage INSTALLATION Reverse the REMOVAL procedure Apply grease onto the collar bush pivot shaft a...

Страница 170: ...djust the drive chain slack Refer to the DRIVE CHAIN SLACK ADJUSTMENT section in the CHAPTER 3 Approximately 30 mm HYDRAULIC BRAKE BRAKE FLUID CHANGE AIR BLEED Place the motorcycle on its main stand o...

Страница 171: ...en tighten the bleed valve nut Torque 0 4 0 7kg m Recommended Brake Fluid DOT 4 HYDRAULIC BRAKE BRAKE SYSTEM BLEEDING Connect a transparent hose to the bleed valve and fully apply the brake lever afte...

Страница 172: ...der and then remove brake pad Remove the other brake pad and pad springs ASSEMBLY Assemble the brake pads in the reverse order of removal BRAKE DISK Measure the brake disk thickness Service Limit 3 0m...

Страница 173: ...emove the piston rubber cover and snap ring from the brake master cylinder Remove the washer main piston and spring Do not splash brake fluid onto any rubber plastic and coated parts When working with...

Страница 174: ...master cylinder for scratches or cracks Service Limit 12 75mm replace if over Measure the brake master cylinder piston O D Service Limit 12 64mm replace if below ASSEMBLY Before assembly apply brake f...

Страница 175: ...system Refer to 13 17 Place the brake master cylinder on the handlebar and install the master cylinder holder with the UP mark facing up aligning the tab on the holder with the hole in the handlebar F...

Страница 176: ...out the pistons through the brake fluid inlet opening and place a shop towel under the caliper to avoid contamination caused by the removed pistons Push the piston oil seals inward to remove them Cle...

Страница 177: ...the brake caliper pistons with the grooved side facing out Wipe off excessive brake fluid with a clean shop towel Apply silicon grease to the brake caliper holder pin and caliper inside Install the br...

Страница 178: ...REAR WHEEL SWING ARM HYDRAULIC BRAKE 13 24 MX er SYSTEM Washer Fluid Tube Bolt Aligning The Fluid Tube With Groove Install the brake caliper onto rear axle hub and tighten the bolts Torque 2 4 3 0kg...

Страница 179: ..._______________________________________________________________________________ BATTER CHARGING SYSTEM A C GENERATOR SERVICE INFORMATION 14 2 TROUBLESHOOTING 14 3 BATTERY REMOVAL 14 4 CHARGING SYSTEM...

Страница 180: ...14 BATTERY CHARGING SYSTEM A C GENERATOR 14 1 MX er SYSTEM CHARGING CIRCUIT Fuse Battery Regulator Rectifier A C Generator Ignition Switch...

Страница 181: ...ng to the sequence specified in the Troubleshooting Do not disconnect and soon reconnect the power of any electrical equipment because the electronic parts in the regulator rectifier will be damaged T...

Страница 182: ...ort circuit in Faulty ignition switch lighting system Low power Charging system failure Weak battery Loose broken or shorted wire or connector Loose battery connection Faulty regulator rectifier Charg...

Страница 183: ...d 5 10 hours Quick 30 minutes Aftercharging Opencircuitvoltage 12 8Vmin CHARGING SYSTEM SHORT CIRCUIT TEST Disconnect the ground wire from the battery and connect an ammeter across the battery negativ...

Страница 184: ...it voltage and current Limit Voltage Current 13 5 15 5V 0 5A max 5000rpm max If the limit voltage is not within the specified range check the regulator rectifier LIGHTING SYSTEM LIMIT VOLTAGE INSPECTI...

Страница 185: ...SPECTION Regulator Rectifier The inspection of A C generator charging coil can be made with the engine installed Yellow Red Green Pink Black Do not touch the tester probes with your finger because hum...

Страница 186: ...14 7 MX er SYSTEM Disconnect the A C generator pink and yellow wires and measure the resistance between the pink and yellow wires Resistance 0 2 at 20 Replace the A C generator charging coil if the r...

Страница 187: ...MX er SYSTEM 15 __________________________________________________________________________________ IGNITION SYSTEM SERVICE INFORMATION 15 2 TROUBLESHOOTING 15 3 CDI UNIT INSPECTION 15 4 IGNITION COIL...

Страница 188: ...15 IGNITION SYSTEM 15 1 MX er SYSTEM IGNITION CIRCUIT Ignition Switch CDI Unit Change Gear Control ntrol A C Generator Pulser Coil Spark Plug Ignition Coil PULSER COIL...

Страница 189: ...ormance The inspections in this section are focused on maximum voltage The inspection of ignition coil resistance is also described in this section Inspect the ignition switch according to the continu...

Страница 190: ...y pulser coil Faulty ignition coil connector Normal high voltage but no spark at plug Faulty pulser coil Faulty spark plug Electric leakage in ignition secondary circuit Faulty ignition coil Good spar...

Страница 191: ...ings Use a Sanwa Electric Tester or Kowa Electric Tester In this table Needle swings then returns indicates that there is a charging current applied to a condenser The needle will then remain at unles...

Страница 192: ...The readings in this table are taken with a Sanwa Tester Unit K IGNITION COIL INSPECTION CONTINUITY TEST Remove the front cover Remove the spark plug cap Disconnect the ignition coil wires Probe Probe...

Страница 193: ...st the performance with a CDI tester If the spark is weak inspect the spark plug and CDI unit If both of them are normal replace the ignition coil with a new one PULSER COIL INSPECTION Remove the fron...

Страница 194: ...15 IGNITION SYSTEM 15 7 MX er SYSTEM EXCITER COIL INSPECTION Disconnect the exciter coil wire coupler and measure the resistance between the black red wire terminal and ground Resistance 100 120...

Страница 195: ...YSTEM 16 0 MX er SYSTEM 16 __________________________________________________________________________________ STARTING SYSTEM SERVICE INFORMATION 16 2 TROUBLESHOOTING 16 2 STARTER MOTOR 16 3 STARTER R...

Страница 196: ...16 STARTING SYSTEM 16 1 MX er SYSTEM STARTING CIRCUIT Fuse Battery Starter Relay Starter Button Starter Motor Stop Switches Ignition Switch...

Страница 197: ...brush length 12 5 8 5 TROUBLESHOOTING Starter motor won t turn Lack of power Fuse burned out Weak battery Weak battery Loose wire or connection Faulty ignition switch Foreign matter stuck in starter...

Страница 198: ...ecessary Clean the commutator if there is metal powder between the segments Check for continuity between pairs of the commutator segments and there should be continuity Also make a continuity check be...

Страница 199: ...etween the wire terminal and each brush Replace if necessary Measure the length of the brushes Service Limit 8 5mm replace if below Check for continuity between the brushes If there is continuity repl...

Страница 200: ...it Check for continuity between the starter relay yellow red and green red wire terminals STARTER RELAY VOLTAGE INSPECTION Connect a 12V battery across the starter relay yellow red and green red wire...

Страница 201: ...er SYSTEM Check the O ring for wear or damage and replace if necessary Apply grease to the O ring and install the starter motor Tighten the two mounting bolts O ring The starter motor cable connector...

Страница 202: ...__________________________________________________ LIGHTS SWITCHES SERVICE INFORMATION 17 2 TROUBLESHOOTING 17 2 HEADLIGHT 17 3 INSTRUMENTS STOP LIGHT TAILLIGHT 17 4 IGNITION SWITCH 17 5 STOP SWITCH 1...

Страница 203: ...17 LIGHTS SWITCHES 17 1 MX er SYSTEM ELECTRICAL EQUIPMENT LAYOUT Stop Switches Ignition Switch Headlight Switch Starter Button Headlight Taillight Stop Light...

Страница 204: ...of electrical equipment After installation of each switch a continuity check must be performed A continuity check can usually be made without removing the part from the motorcycle TROUBLESHOOTING Lig...

Страница 205: ...connect the headlight wire coupler Remove the two headlight case attaching screws and disconnect the headlight Check the bulb for damage and replace with a new one if necessary Disconnect the headligh...

Страница 206: ...g screws and disconnect the headlight Remove the light shell rubber boot and bulb socket Check the bulb for damage and replace with a new one if necessary INSTALLATION The installation sequence is the...

Страница 207: ...en the wires indicated below Color Position Black Red Black White Green OFF ON STOP SWITCH Disconnect the front stop switch wire coupler Check for continuity between the front stop switch wires Brake...

Страница 208: ...e the center cover Disconnect the headlight switch wire coupler Check for continuity between the headlight switch wires Color Position Black Brown White Blue ENGINE STOP SWITCH Remove the center cover...

Страница 209: ...r SYSTEM 18 __________________________________________________________________________________ ONLY ATV ON ROAD AVAILABLE WARING DIAGRAM 18 1 BRAKE PEDAL ADJUSTMENT 18 2 INSTRUMENT 18 3 INDICATOR LIGH...

Страница 210: ...18 ONLY ATV ON ROAD AVAILABLE 18 1 MX er SYSTEM WIRING DIAGRAM...

Страница 211: ...o page 3 9 Loosen the lock nut Turn the adjusting bolt until the front lower brake cable is tensed Apply the front brake lever and check front bake cam lever to make sure that the brake does not drag...

Страница 212: ...tery cover on instrument back to replace battery SENSOR WHEEL If the sensor is lost or wore the speed will be not calculated on the instrument INDICATOR LIGHT REMOVAL Remove the screw and disconnect t...

Страница 213: ...TION The installation sequence is the reverse of removal HAZARD SWITCH Check for continuity between the wires indicated below Color Position Yellow Black Black HORN REMOVAL Disconnect the horn switch...

Отзывы: