background image

Service Manual

5

For internal use only

2.

Introduction

2.1

General information

Depressurised steam cooking involves cooking food with a combination of steam and hot air. Gentle

steam cooking at temperatures of between 40°C and 100°C optimally preserves vitamins and minerals

as well as maintaining colours and natural aromas. Food does not dry out and nor will it burn or stick.

Since only a relatively small amount of water needs to be heated, steam cooking means that a great deal

of time and energy can be saved.

Depressurised steam cooking takes place at temperatures of between 40°C and 100°C, thus making it

easy to cook food just as it is required. The humidity sensor steams the food in just the right conditions,

irrespective of the quantity of food being cooked. Instead of being destroyed, vitamins and minerals are

largely preserved. Flavour, colour and consistency are maintained – food does not lose its structure.

There is therefore almost no need to add salt and spices.

To sum up:

 cooking with steams makes conscious, healthy eating possible without any extra effort. The

steam cooker provides excellent possibilities in combination with the ökotherm

®

 cooker or oven.

The oven can become soiled through spattering fat, especially when meat is being roasted. Dirt which

has become dried can be removed more easily if the cooker, prior to cleaning, is operated with the

“steam” cooking mode at a temperature of 100°C for approximately 30 minutes. 

This will soften the stains. The interior of the oven will take on a golden colour when it has been used for

some time. 

2.2

Technical data

Appliance dimensions

Oven dimensions

Niche dimensions

Height

38.6cm

18.2cm

38.0cm

Width:

59.5cm

38.5cm

56.0cm minimum

Depth:

40.5cm

33.5cm

55.0cm minimum

Oven:

23.5l

Water tanks

removable, for approx. 1 litre of water

Electric connection

Mains voltage

220-240V ~50Hz

Power requirement

1.77kW

Heating output

Hot-air output

2.2kW

Steam generator:

1.4kW

Floor heater:

0.14kW

Содержание EDG 6500.0

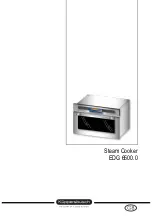
Страница 1: ...Steam Cooker EDG 6500 0...

Страница 2: ...e Manual H3 63 02 Responsible Dieter Rutz K PPERSBUSCH HAUSGER TE AG Email dieter rutz kueppersbusch de Phone 0209 401 733 Kundendienst Fax 0209 401 743 Postfach 100 132 Date 23 10 2006 45801 Gelsenki...

Страница 3: ...5 User settings and functions 10 5 1 Setting the time of day 10 5 2 Characteristics 10 5 3 Lock child safety device 10 5 4 Cleaning the water channel 10 6 Cooking cycle 11 7 Structure subassembly stru...

Страница 4: ...nd wire resistance must not exceed that specified in the standard It is of vital importance for ensuring the safety of people and the functioning of the appliance On completion of repairs an inspectio...

Страница 5: ...re maintained food does not lose its structure There is therefore almost no need to add salt and spices To sum up cooking with steams makes conscious healthy eating possible without any extra effort T...

Страница 6: ...fuse Should the plug not be accessible subsequent to installation a universal disconnection device with a contact clearance of at least 3mm must be available at the installation point in order to ful...

Страница 7: ...ough this cut out 2 Position the appliance and align it horizontally 3 Slide the oven right into the cabinet niche Do not jam the lead of the appliance 4 Check to ensure that the appliance has been pr...

Страница 8: ...system The principle is not the same as for cooking in a pressure cooker since here the internal pressure exceeds the atmospheric pressure The steam oven firstly fills up with steam and the temperatur...

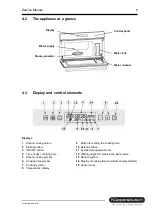
Страница 9: ...time 5 Steam cooking symbol 6 Cooking time symbol 7 Cooking symbol 8 Temperature display 9 Button for setting the cooking time 10 Selector button 11 Symbol for separate timers 12 Warning signal for fa...

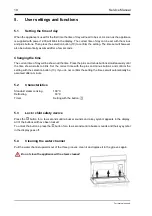
Страница 10: ...time shown starts to blink Set the correct time with the plus and minus buttons and confirm the setting with the selection button 10 If you do not confirm the setting the time set will automatically b...

Страница 11: ...s the heating element The thermistor the electric heating pad and the cross flow fan are still live Step 3 Steam dissipation and temperature reduction The thermistor and the electric valve are switche...

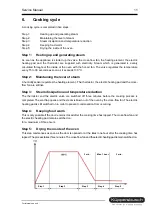
Страница 12: ...12 Service Manual For internal use only Air circulation steps 1 to 4...

Страница 13: ...with food 7 2 Electric valve The electric valve supplies the steam generator with water Technical data 220 240V 2l min 3 7k 7 3 Steam generator The steam generator converts water to steam The condensa...

Страница 14: ...hermistor keeps the vent flap closed while the oven is in operation Technical data 220 240V 5W 1k 7 7 Door switch The door switch enables the cooking cycle to be changed when the door is open Door ope...

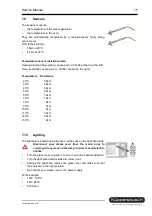
Страница 15: ...ance 20 C 58k 30 C 39k 40 C 32k 50 C 25k 60 C 18k 70 C 12k 80 C 9k 90 C 7k 100 C 5k 110 C 3 5k 120 C 2 5k 130 C 2k 7 10 Lighting The light bulb is located inside the oven at the back on the right hand...

Страница 16: ...gram sequence Press any button apart from the plus and minus buttons to exit the test program If no button is pressed the program will automatically be exited after 3 minutes Step 1 The display will a...

Страница 17: ...element with water If this process has not yet been completed VANN ON will appear in the display If the display shows VANN OFF open the door of the oven and check the water Attention The oven door wi...

Страница 18: ...ace card and the display card If error code E1 appears all of the power elements will be switched off E2 Sensor off or short circuited E3 Problems with the water cycle Power elements will be switched...

Отзывы: