


Kramer Electronics Ltd.
VIA Capmus², VIA Campus² PLUS
– For Web Administrator: Configuring Settings – Gateway Management
Pages
55
2. Click and drag feature icons to a new position as needed.
3. Click the switch next to a feature icon.
The switch turns black, showing that the feature is now hidden.
Changes are reflected in the menu after the new template is published.
Hidden features move to the bottom of the list.
Recording a Meeting
Activating Recording Feature
VIA Capmus², VIA Campus² PLUS
enables you to record all activity on the main display
during the course of a meeting (see
). Before using the
recording feature, you must activate it in the Gateway Management Pages.
To activate the recording feature:
1. On the VIA Settings Template (see
Configuring VIA Settings Template
),
Select
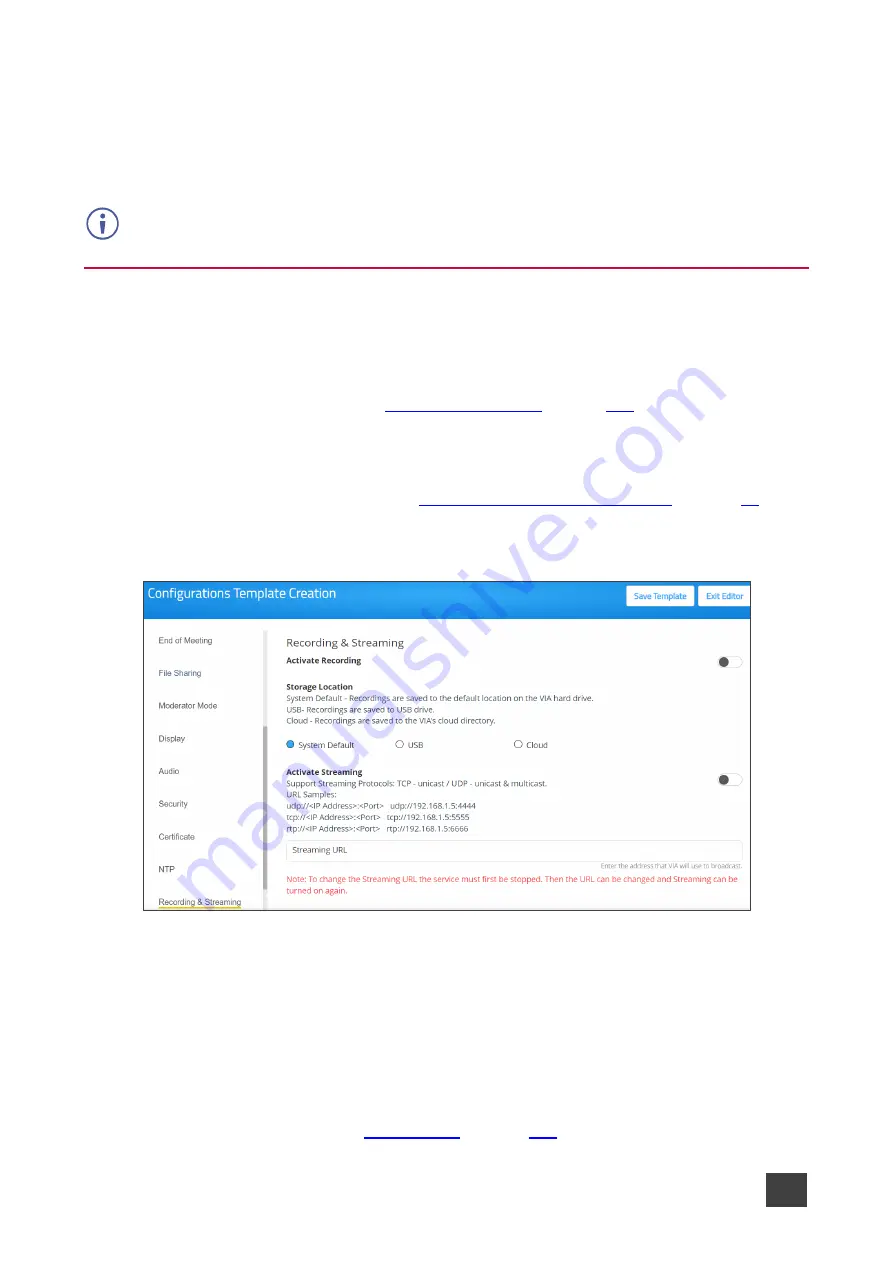
Recording & Streaming
tab.
The Recording & Streaming tab appears.
Figure 56: Recording & Streaming Settings
2. Enable
Activate Recording
switch.
3. Select one of the following locations to save the meeting recordings:
▪
System Default
– Default location on the VIA hard drive. Recordings are retrieved
from the
Recording > Recording List
page.
▪
USB
– External drive connected to the USB connector on the
VIA Capmus²
, VIA
Campus² PLUS
.
▪
Cloud
The recording feature is activated.