Basic Guide
19
Introduction
Front and rear panel
Connections
Playing
Editing
c. Select a parameter
If Global mode Page 2C: Memory “Page Jump” is turned
ON
, operating a front panel knob in LCD Edit mode will
cause the LCD screen to jump automatically to that param-
eter. (With the factory settings, this is ON.)
●
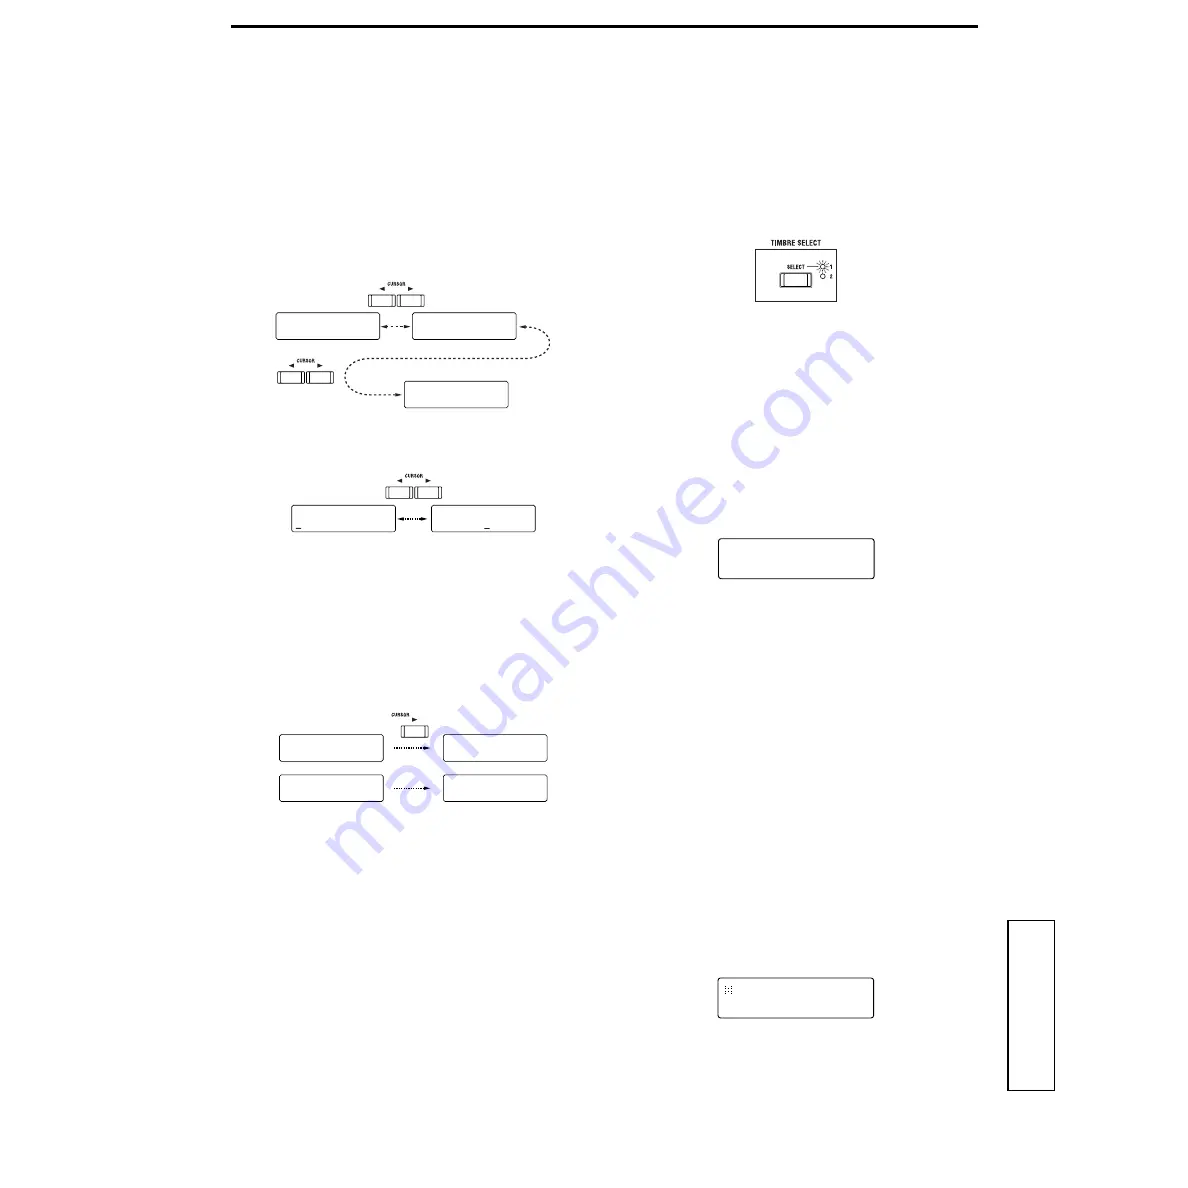
Press the CURSOR [
√
] or [
®
] key.
When you press the key, the parameter will change. The
cursor will blink at the beginning of the parameter
value.
If the parameter no longer changes when you press the
CURSOR [
®
] key, you have reached the last parameter
in that page.
If there are two parameters in a single screen, use the
CURSOR[
√
][
®
] keys to move the cursor to the parame-
ter that you wish to modify.
In some cases, the setting of one parameter may cause
the number of parameters in the page to change.
For example if the Page 01A: COMMON “Mode”
parameter is set to Split instead of Single, there will be
two additional parameters: “Timbre Voice” and “Split
Point.” In conjunction with this, the alphabetical charac-
ter following the page number will also change. (In the
case of Single, Page 01B: COMMON will be “Scale.” In
the case of Split, Page 01B: COMMON will be “Timbre
Voice.”)
d. Input the value
●
Use the front panel knobs or keys, or the [+/YES]
[–/NO] keys to input the value.
Normally you will use the front panel knobs and keys.
If the parameter has no corresponding knob or key, or if
you wish to edit the setting in detail, you can use the [+/
YES] [–/NO] keys.
Each time you press the [+/YES] [–/NO] keys, the value
will increase or decrease in steps of one.
If you hold down the [+/YES] key and press the [–/NO]
key, the value will increase in steps of ten.
If you hold down the [–/NO] key and press the [+/YES]
key, the value will decrease in steps of ten.
e. Return to Program Play mode
●
Press the [EXIT] key.
You will return to Program Play mode.
3. Switching timbres
For a program whose voice mode is Dual/Split, you can
select the timbre that you wish to edit.
●
Press the TIMBRE SELECT [SELECT] key.
The LED of the selected timbre will light. Each time you
press the key, the timbre will change.
The front panel knobs and keys and the parameters
shown in the LCD screen will apply to the selected tim-
bre.
4. Returning to the state before editing
(Compare)
While editing a program, you can temporarily return to the
settings that were written before you edited them.
1
While holding down the [EDIT] key, press the [EXIT]
key.
The lower line of the LCD screen will indicate “COM-
PARE” and you will return to the state of the settings
before they were edited. The upper line of the display
will indicate the program number and program name.
2
Press the [EXIT] key.
You will return to Program Play mode.
5. Writing (saving) an edited program
If you turn off the power or change to a different program
without saving your edited program or arpeggiator set-
tings, they will be lost. To save a program, you must per-
form the Write operation.
Before you begin the Write process, turn the Global mode
Page 2A: Memory “Protect” setting OFF (with the factory
settings this is ON). (
p.30 “1. Defeat memory protect”)
1
In Program Play mode or LCD Edit mode, press the
[WRITE] key.
The upper line of the LCD will continue to show what
had been displayed when you pressed [WRITE] key. (In
the figure below, the [WRITE] key was pressed in LCD
Edit mode Page 01A: COMMON.)
The lower line of the LCD will indicate the writing desti-
nation program number (the number of the program
that you edited).
If you decide to cancel the Write operation, press the
[EXIT] key.
2
Use the [+/YES] [–/NO] keys to select the writing desti-
nation program number.
If you do not need to change the writing destination,
proceed to step
3
.
01B COMMON
Scale:Equal Temp
01A COMMON
Mode: Single
01C COMMON
Scale Key: C
14A PATCH1
EG 1 >Pitch
14A PATCH1
EG 1 >Pitch
01A COMMON
Mode: Single
01B COMMON
Scale:Equal Temp
01A COMMON
Mode: Split
01B COMMON
Timbre Voice:2+2
A01:MS2000/R
== COMPARE ==
01A COMMON
WR Prog:
A01
OK?


