106
4
Other F
unctions
2
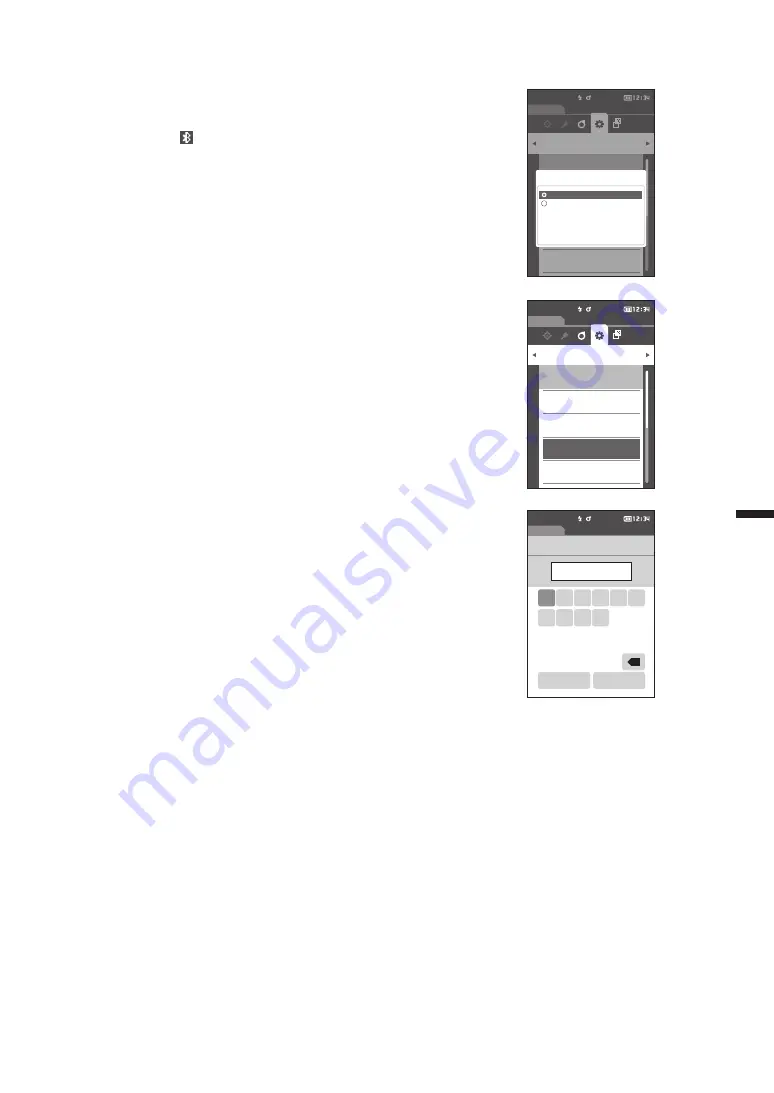
Use [
] or [
] to move the cursor to “ON”, and then
press the [Confirmation] key.
The instrument’s USB host is turned ON, and the display
will return to
the <Communication setup> screen
. The
Bluetooth icon will be displayed in the status bar.
To configure the Bluetooth PIN code, go to step 3.
3
Use [
] or [
] to move the cursor to “Meter PIN
code”, and then press the [Confirmation] key.
The <Meter PIN code> screen
is displayed.
•
The initial value of the PIN code is “0000”.
4
and
are displayed above and below the PIN.
Use [
] or [
] to specify a value. Use [
] or [
] to
move between digits.
•
The personal identification number (PIN) should consist
of between four and eight numbers (0 to 9).
5
After inputting the value, press the [Confirmation]
key.
The display will return to
the <Communication setup>
screen
.
Communication setup
Sample
Setting
0002 TARGET-2
USB host
OFF
Meter PIN code
00000000
Printer address
000000000000
Auto print
OFF
USB host
OFF
ON
Communication setup
Sample
Setting
0002 TARGET-2
USB host
OFF
Meter PIN code
0000
Printer address
000000000000
Auto print
OFF
Sample
0002 TARGET-2
01234567
Meter PIN code
0 1 2 3 4 5
6
OK
Cancel
7 8 9
×
Содержание CM-M6
Страница 1: ...Instruction Manual Please read before using the instrument...
Страница 18: ...15 Names and Functions of Parts 1 8 9 4 6 5 2 3 10 11 12 14 13 7...
Страница 102: ...99...
Страница 119: ...116 5 Troubleshooting Chapter 5 Troubleshooting Message List 117 Troubleshooting 119...
Страница 123: ...120 6 Appendix Chapter 6 Appendix Main Specifications 121 Dimensions 122...
Страница 125: ...122 6 Appendix Dimensions Unit mm 50 M6 1 0 DEPTH 6 M6 1 0 DEPTH 6 55 33 152 3 49 5 81 239...
Страница 126: ...123...
Страница 128: ...En 9222 A9DT 13 2016 KONICA MINOLTA INC BIFCGK...


