


bizhub C754/C654
2-105
2.6
Setting items in the printer driver
2
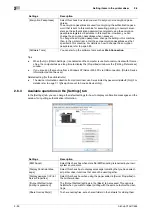
Tips
-
To use [Staple], the optional
Finisher
is required.
-
To use [Center Staple and Fold], the optional
Finisher
and
Saddle Kit
are required.
-
To use [Punch], the optional
Finisher
and
Punch Kit
are required.
-
The number of punched holes varies depending on the country you are in.
-
To use Half-Fold or Tri-Fold of [Fold], the optional
Finisher
and
Saddle Kit
are required.
-
To use Z-Fold of [Fold], the optional
Finisher
and
Z-Fold Unit
are required.
-
To use Z-Fold of [Fold], specify the paper size described at the setting you selected from the drop-down
list ([Z-Fold (A3, B4, 11
e
17, 8K)], [Z-Fold (8 1/2
e
14)] at "Paper Size" of the application software or
printer driver.
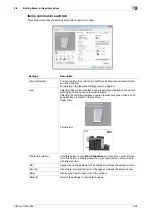
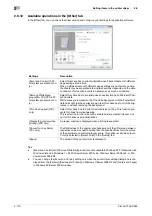
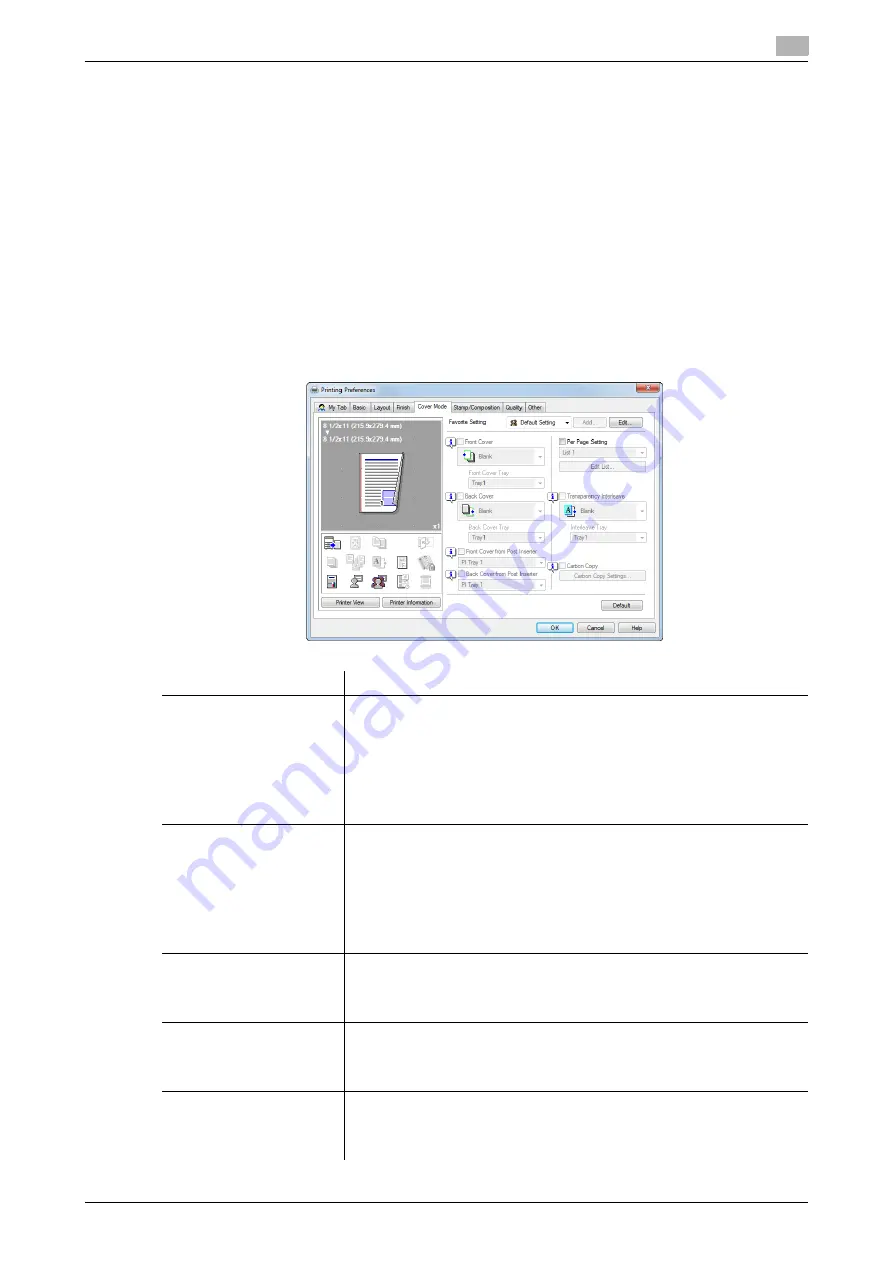
2.6.9
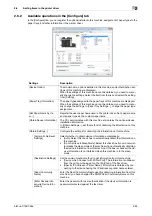
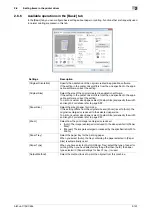
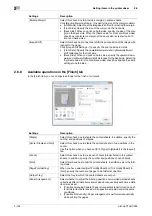
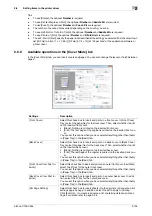
Available operations in the [Cover Mode] tab
In the [Cover Mode] tab, you can insert covers and pages. You can also change the layout or finish between
pages.
Settings
Description
[Front Cover]
Select this check box to insert and print on a front cover. In [Front Cover
Tray], select the paper tray for the front cover. Then, select whether to print
on the inserted front cover.
•
[Blank]: Nothing is printed on the inserted front cover.
•
[Print]: The first page of the original is printed on the inserted front cov-
er.
You can set this option when you have selected anything other than [Auto]
in [Paper Tray] in the [Basic] tab.
[Back Cover]
Select this check box to insert and print on a back cover. In [Back Cover
Tray], select the paper tray for the back cover. Then, select whether to print
on the inserted back cover.
•
[Blank]: Nothing is printed on the inserted back cover.
•
[Print]: The last page of the original is printed on the inserted back cov-
er.
You can set this option when you have selected anything other than [Auto]
in [Paper Tray] in the [Basic] tab.
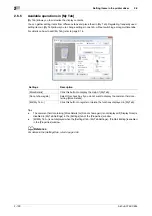
[Front Cover from Post In-
serter]
Select this check box to insert and print on an outer front cover. In addition,
select the PI tray for the outer front cover.
You can set this option when you have selected anything other than [Auto]
in [Paper Tray] in the [Basic] tab.
[Back Cover from Post In-
serter]
Select this check box to insert and print on an outer back cover. In addi-
tion, select the PI tray for the outer back cover.
You can set this option when you have selected anything other than [Auto]
in [Paper Tray] in the [Basic] tab.
[Per Page Setting]
Select this check box to insert sheets into the original or change the print
settings page by page. In addition, select the list to apply to printing.
Click [Edit List...] to create in advance a list containing detailed print set-
tings. For details, refer to page 2-58.
Содержание bizhub C654
Страница 2: ......
Страница 10: ...Contents 8 bizhub C754 C654 8 Index 8 1 Index by item 8 3 8 2 Index by button 8 5 ...
Страница 11: ...1 Printer Functions ...
Страница 12: ......
Страница 16: ...Cable connection locations on this machine 1 1 6 bizhub C754 C654 1 3 ...
Страница 17: ...2 Printing in the Windows Environment ...
Страница 18: ......
Страница 145: ...3 Printing in a Mac OS Environment ...
Страница 146: ......
Страница 243: ...4 Printing in a NetWare Environment ...
Страница 244: ......
Страница 248: ...Installing the printer driver 4 4 6 bizhub C754 C654 4 3 ...
Страница 249: ...5 Printing without Using the Printer Driver ...
Страница 250: ......
Страница 254: ...Directly printing from a Bluetooth device 5 5 6 bizhub C754 C654 5 3 ...
Страница 255: ...6 Description of Setup Buttons User Settings ...
Страница 256: ......
Страница 263: ...7 Description of Setup Buttons Administrator Settings ...
Страница 264: ......
Страница 278: ...7 7 16 bizhub C754 C654 ...
Страница 279: ...8 Index ...
Страница 280: ......
Страница 284: ...Index by button 8 8 6 bizhub C754 C654 8 2 ...