FOREWORD
MAINTENANCE STANDARD TERMINOLOGY
00-8
WA470-6, WA480-6
12
MAINTENANCE STANDARD TERMINOLOGY
00
The maintenance standard chapter explains the criteria for replacing or reusing products and parts in the machine maintenance
work. The following terms are used to explain the criteria.
1.
Standard size and tolerance
•
To be accurate, the finishing size of parts is a little different from one to another.
•
To specify a finishing size of a part, a temporary standard size is set and an allowable difference from that size is indi-
cated.
•
The above size set temporarily is called the “standard size” and the range of difference from the standard size is called
the “tolerance”.
•
The tolerance with the symbols of + or – is indicated on the right side of the standard size.
•
•
The tolerance may be indicated in the text and a table as [stan-
dard size (upper limit of tolerance/lower limit of tolerance)].
Example) 120 (–0.022/–0.126)
•
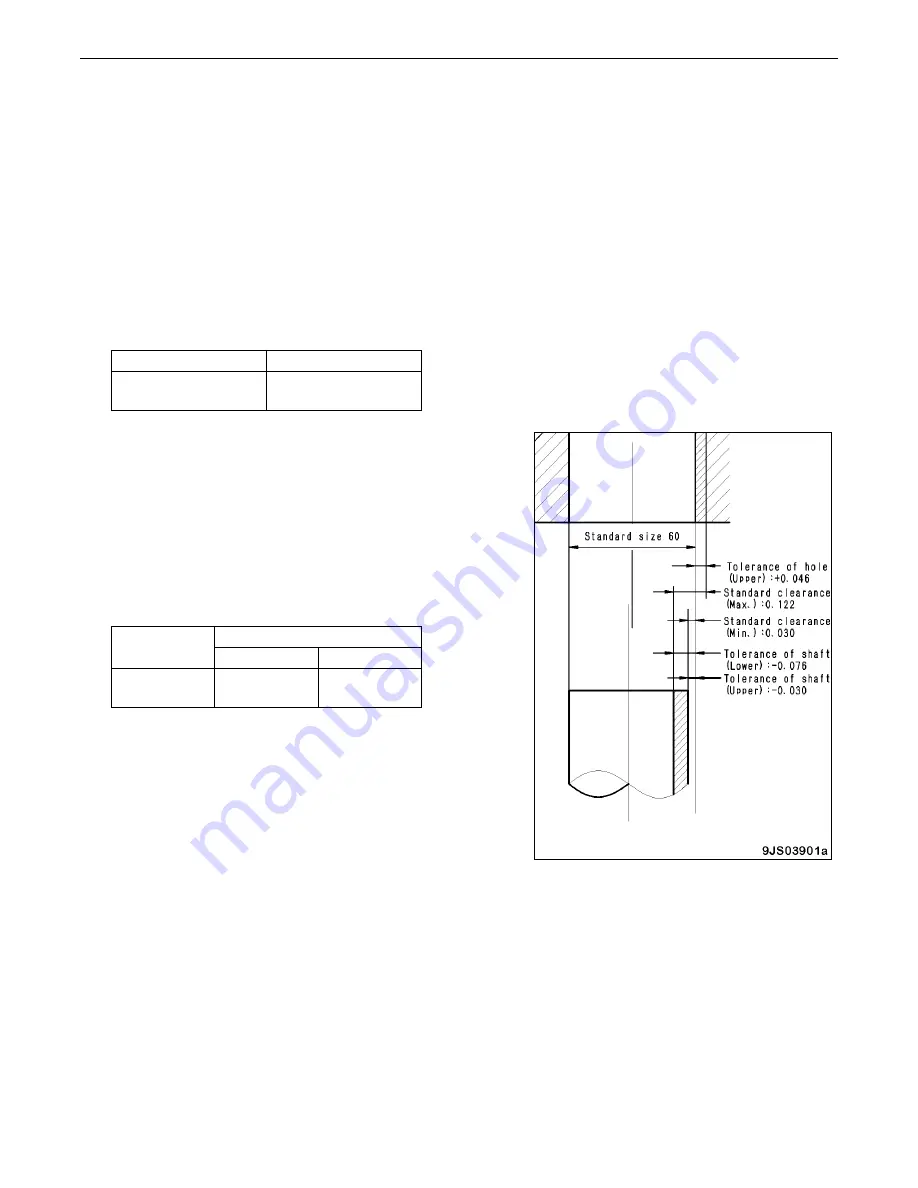
Usually, the size of a hole and the size of the shaft to be fitted to
that hole are indicated by the same standard size and different
tolerances of the hole and shaft. The tightness of fit is decided
by the tolerance.
•
Indication of size of rotating shaft and hole and relationship
drawing of them.
•
Example:
Standard size
Tolerance
120
–
0.022
–0.126
Example:
Standard size
Tolerance
Shaft
Hole
60
–0.030
–0.076
+0.046
+
0


