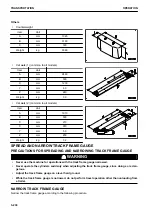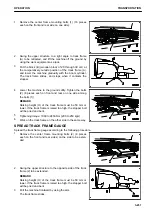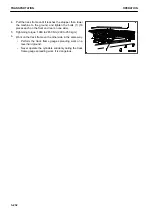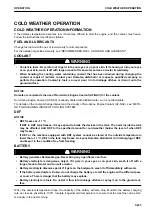
HANDLING RADIO
• To ensure safety, always keep the volume to a level where you can hear the outside sounds during opera-
tion.
• If water gets into the speaker case or radio, it may lead to failure. Take care not to let water get on them.
• Do not wipe the display or buttons with solvent such as benzene or thinner. Wipe with a dry soft cloth.
• When the battery disconnect switch is turned to OFF position or the power for the machine is turned off for
the replacement of the battery, the clock may be initialized. In such a case, set it again.
EXPLANATION OF RADIO EQUIPMENT
(1) Power button
(2) Band/AUX selector button
(3) Volume control button
(4) Tuning/time adjustment button
(5) Preset button
(6) Display selector button
(7) Sound control button
(8) Display
POWER BUTTON
Press the power button to supply the power to the radio and the frequency is shown on display. As long as AUX
is selected, display indicates AUX on it. Press the button again to turn the power off.
BAND/AUX SELECTOR BUTTON
Press band/AUX selector button to select the desired band or AUX.
Each time the button is pressed, the band changes FM → AM → AUX → FM...
VOLUME CONTROL BUTTON
Use the volume control button to control the volume.
Press the
△
button, and the volume increases. Press the
▽
button, and the volume decreases. The range for
the volume is 0 to 32.
Hold down this button, and you can change the volume continuously.
TUNING/TIME ADJUSTMENT BUTTON
Use the tuning/time adjustment button to select frequency and step for sound adjustment and to adjust time.
PRESET BUTTON
If you register desired stations to the preset button beforehand, you can select each station by touching this but-
ton once.
It is possible to preset 6 stations each for both AM and FM.
OPERATION
HANDLING RADIO
3-219
Содержание PC700LC-11
Страница 2: ......
Страница 23: ...LOCATION OF SAFETY LABELS 5 SAFETY SAFETY LABELS 2 3...
Страница 66: ......
Страница 67: ...OPERATION Please read and make sure that you understand the SAFETY section before reading this section 3 1...
Страница 73: ...REMARK The above figure does not show all of the caution lamp symbols OPERATION GENERAL VIEW 3 7...
Страница 316: ......
Страница 317: ...MAINTENANCE Please read and make sure that you understand the SAFETY section before reading this section 4 1...
Страница 331: ...Fuel main fil ter cartridge Replace Replace Replace Replace MAINTENANCE MAINTENANCE SCHEDULE 4 15...
Страница 375: ...A Important inspection part F Front Revolving frame Center frame MAINTENANCE MAINTENANCE PROCEDURE 4 59...
Страница 396: ......
Страница 397: ...SPECIFICATIONS 5 1...
Страница 401: ...For 7 6m Boom SPECIFICATIONS SPECIFICATIONS 5 5...
Страница 402: ...SPECIFICATIONS SPECIFICATIONS 5 6...
Страница 426: ......
Страница 427: ...REPLACEMENT PARTS 7 1...
Страница 434: ......
Страница 442: ...PC700LC 11 HYDRAULIC EXCAVATOR Form No UENAM01321 2017 KOMATSU All Rights Reserved Printed in Belgium 09 2017...


