background image

44

7. Operation 

7.7  Changing the finned brushes of the deburring unit

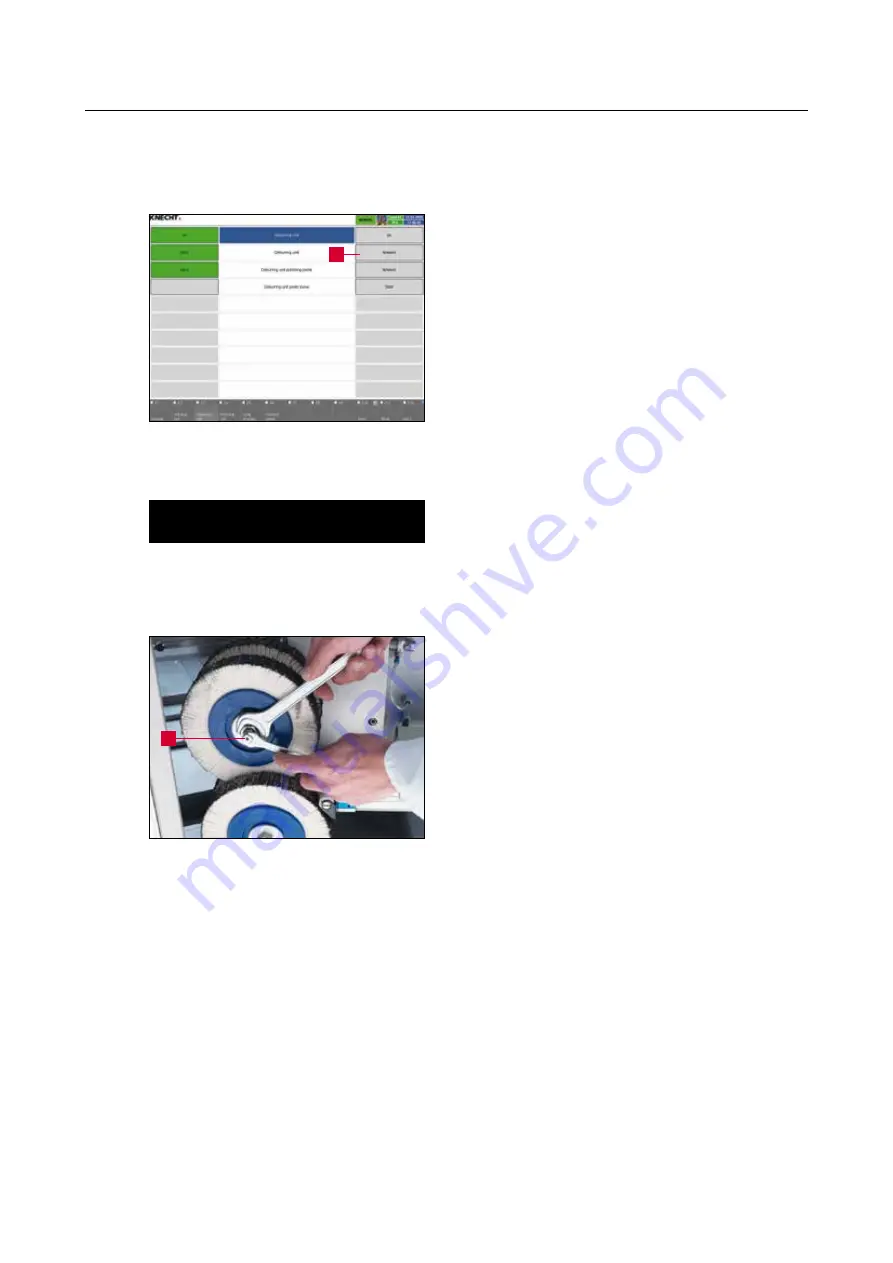
Use the main menu option “F8 Settings” (3-7/35), 
followed by “F8 Manual Functions” (8-1/18), and 
“F3 Deburring Unit” (8-6/8) to access the manual 
functions of the deburring unit. Swivel the deburr-
ing unit forward using the “Forward” touchscreen 
option (7-16/1). 

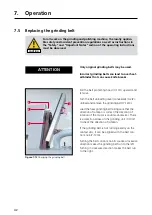
ATTENTION

Set the “Setting Mode” key switch (3-6/9)
to Position “1” (1 h.) so that the deburr-
ing unit remains in front when the safety 
doors open.

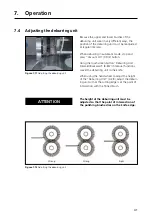
Open the protective hood and loosen the upper 
nut (7-17/1) in counter-clockwise direction using 
the SW22 flat wrench. Loosen the lower nut in 
clockwise direction.

Remove the finned brushes and flange and mount 
the new finned brushes in reverse sequence. 
Tighten the nuts (7-17/1) back again.

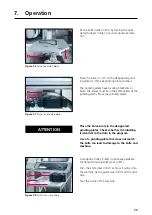
Figure 7-16

 Manual functions “Deburring 

Unit”

1

Figure 7-17

 Changing the finned brushes of 

the deburring unit

1

Содержание 450458600

Страница 1: ...Automatic Grinding and Polishing Machine Status 05 2020 Version 2 0 Translation Operating Instructions B 600 ...

Страница 2: ...tructions Date of issue of the operating instructions May 7 2020 Copyright The copyright for these operating instructions as well as other documents for the machine operator is held by KNECHT Maschinenbau GmbH These documents will be delivered only to our customers and to opera tors of our products and are a part of the machine These documents may neither be reproduced nor made accessible to third...

Страница 3: ...s 12 2 4 4 Selection and qualifications of the personnel 12 2 4 5 Machine control system 13 2 4 6 Safety measures in normal operation 13 2 4 7 Dangers due to electrical power 13 2 4 8 Particular danger zones 13 2 4 9 Servicing maintenance repair and fault rectification 14 2 4 10 Structural alterations to the grinding machine 14 2 4 11 Cleaning the grinding machine 14 2 4 12 Oils and greases 14 2 4...

Страница 4: ...rinding of cutter knives 36 7 3 1 Loading the grinding program 36 7 3 2 Grinding 38 7 4 Adjusting the deburring unit 41 7 5 Replacing the grinding belt 42 7 6 Changing the finned brushes of the polishing unit 43 7 7 Changing the finned brushes of the deburring unit 44 7 8 Changing the polishing pastes 45 8 Control system 46 8 1 Overview of control sub programs 46 8 1 1 F8 Settings 46 8 1 2 F10 Edi...

Страница 5: ...e 63 9 1 1 Cooling lubricant maintenance plan 63 9 2 Lubrication and Maintenance 64 9 2 1 Lubrication schedule and lubricant table 65 9 3 Cleaning 66 9 4 Maintenance Plan 67 10 Disassembly and disposal 68 10 1 Disassembly 68 10 2 Disposal 68 11 Service spare parts and accessories 69 11 1 Postal Address 69 11 2 Service 69 11 3 Spare parts 69 11 4 Accessories 70 11 4 1 Abrasives used 70 12 Appendix ...

Страница 6: ...s flow as well as Servicing maintenance repair In addition to the operating instructions and the binding accident prevention regulations applica ble in the country and place of use of the machine the generally acknowledged rules of technol ogy with regard to safe and professional work practices are to be observed 1 2 Warnings and symbols in the operating instructions Heeding the following safety a...

Страница 7: ...rinding machine must be separated from the mains supply before carrying out servicing maintenance and repair jobs on it CAUTION RISK OF INJURY FROM KNIFE warning notice on the polishing unit Work on the grinding machine involves the sharpening of knives which could cause serious cut injuries due to their sharpness Protective gloves must be worn when carrying out such work in particular when placin...

Страница 8: ...component of the machine that is shown in a figure is described in the text it is followed by a figure or item number in brackets Example 3 13 1 denotes figure number 3 13 item 1 The SP 114 3 13 1 knife holder is fixed to the cross table using a quick clamping device 3 13 2 Vacuum suction is used to draw and fix the knives to the knife holder 1 Important notes Figure 3 13 SP 114 knife holder Figur...

Страница 9: ...ons particularly the Safety section and have read and understood the warning notes They have given a signed confirmation of this in writing It is also checked at regular intervals as to whether the worker is fulfilling his employee obligation to observe safety at work 2 1 3 Obligations on the part of the personnel All the personnel working on the grinding machine shall be obliged to observe the ba...

Страница 10: ...ty for damages resulting from improper use The user alone bears the risk in such cases Use as intended includes the observance of all the instructions in the operating instructions The grinding machine is being used improperly if e g devices are not fastened properly work pieces other than flat machine cutting knives are ground 2 3 Warranty and liability Warranty and liability claims in case of pe...

Страница 11: ...n secured against accidental restarting of the grinding machine When delivering spare parts the protective equipment must be attached by the operator as stipu lated 2 4 3 Informal safety measures The operating instructions must be permanently available at the place of use of the grinding machine In addition to the operating instructions the generally applicable as well as the locally relevant acci...

Страница 12: ...ly and secure against restarting Before switching on the grinding machine ensure that no one is exposed to any risk from the start up of the machine If there are any functional faults immediately stop the machine and secure against restarting Have the faults eliminated immediately 2 4 7 Dangers due to electrical power The switch cabinet must always remain secured against access Only authorised per...

Страница 13: ...on Use only original replacement and wear parts If parts are purchased from external suppliers it cannot be guaranteed that they will be constructed and manufactured to withstand the stresses and provide the level of safety required for operating the grinding machine 2 4 11 Cleaning the grinding machine Cleaning agents and materials used must be handled properly and disposed of in an environmen ta...

Страница 14: ... the operating instructions attachment points for hoisting equipment etc Only use suitable transport vehicles with sufficient load bearing capacity Attach the load securely Use suitable attachment points When putting in operation again proceed only as instructed in the operating instructions ...

Страница 15: ...0 Hz Output 11 0 kW Energy consumption 10 5 A Back up fuse 25 A Control voltage 24 V DC Pneumatic connection 6 5 bar Measured A evaluated emission sound pressure level 74 dB A at workstation LpA Air consumption max 50 l min Operating noise at the grinding wheel optional 72 dB A Wet grinding belt 2200 x 60 mm Flap brushes d 180x30 mm This data may vary depending on the electrical power supply Noise...

Страница 16: ...ar and convex flat cutter knives in knife size of maximum 600 x 400 mm The knife magazine can hold up to eight knives can be optionally extended to hold up to 16 knives The knives are fed automatically and guided along the wet grinding wheel or the finned brushes precisely according to their shape The grinding angles of the wet grinding belt can be infinitely adjusted between 10 and 35 In case of ...

Страница 17: ...s concealed 5 Protective hood of the grinding compartment 6 Belt filter coolant unit 7 Hand wheel for height adjustment of Polishing Unit 8 Flow gauge 9 Suction unit 10 Control panel 11 Switch cabinet concealed 12 Hinged doors of the knife magazine only needed for extending the magazine 13 Adjustable machine feet Figure 3 2 General view of the grinding machine 3 2 6 5 4 1 10 13 12 11 9 7 8 ...

Страница 18: ...he left for knife blade 3 Knife 4 SP 114 knife holding fixture optionally SP 115 3 way knife holder 5 Guard plate 6 Grinding unit 7 Work lamp 8 Air blow nozzle 9 Polishing unit for knife profile 10 Cross table Figure 3 3 Interior view 2 1 3 4 5 9 10 7 8 6 ...

Страница 19: ...ng machine on off The main switch 3 5 1 is disposed on the switch cabinet in the rear of the machine Turning the main switch from 0 to I switches on the grinding machine Turning the main switch from I to 0 switches off the grinding machine Figure 3 4 Interior view of knife changer Figure 3 5 Main switch 1 1 2 3 3 ...

Страница 20: ...tarts flashing 4 Start button Starts the grinding program 5 Stop button Stops the grinding program 6 Abort Program Aborts a running program 7 Stop at cycle end 8 Vacuum On button Switches on the vacuum pump 9 Setting mode key switch Position 1 for setting mode 3 Description 1 2 3 4 5 6 7 8 9 Figure 3 6 Control panel ...

Страница 21: ... individual machining steps on off highlighted in grey switched off 10 Name of machining step stored in the grinding program 11 Segment stored in the grinding program 12 Feed sub program 13 Touching position stored in the grinding program 14 Current machining step 15 Current feed number Y value set cycles actual cycles 16 Current operating time of the wet grinding belt in min 17 Override 100 perfo...

Страница 22: ...nactive 27 Compensation for knife wear knife is additionally moved a certain distance closer to the polishing unit for back of the blade highlighted in yellow active 28 Magazine change highlighted in white active red checkmark inactive 29 Magazine trolley optional highlighted in white active red checkmark inactive 30 F1 Automatic START Starts the grinding program 31 F2 STOP Stops the grinding prog...

Страница 23: ...to the water tank The grinding machine has a flow gauge 3 9 1 which automatically interrupts the program flow if there is no coolant flow The flow gauge 3 9 1 is located on the machine and must be cleaned regularly The coolant volume can be regulated using the coolant tap 3 10 1 NOTICE Turning down the tap too far interrupts the program flow Figure 3 9 Flow gauge Figure 3 10 Coolant tap Figure 3 8...

Страница 24: ...ife Holder The knives are clamped onto a knife holder for machining Knives may only be ground using SP 114 or SP 115 knife holders Knife holders for new knife types can be obtained from KNECHT Maschinenbau GmbH on request The SP 114 3 13 1 knife holder is fixed to the cross table using a quick clamping device 3 13 2 Vacuum suction is used to draw and fix the knives to the knife holder 3 Descriptio...

Страница 25: ...ust be deselected using the Holder On Off func tion 8 1 2 3 4 7 Grinding Unit The wet grinding belt 3 15 1 is moved to rest position using the polishing units 3 15 2 and 3 15 3 It is lowered onto the knife 3 15 4 for grinding The grinding angle is stored in the product file and is automatically adjusted 3 Description Figure 3 15 Grinding compartment Figure 3 14 SP 115 knife holder 1 2 4 3 ...

Страница 26: ...polishing unit 3 16 2 swivels forward to pol ish the knife profile The position of the polishing deburring unit rela tive to the knives can be adjusted with the help of the hand wheels 3 2 3 and 3 2 7 The polishing paste is applied automatically in each case via a pneumatic cylinder 3 4 9 Magazine Extension The knife magazine can hold up to eight knives The number can be optionally increased to 16...

Страница 27: ...ntre of gravity CoG is shown in figure 3 1 4 2 Transport damage If damage is detected on unloading after acceptance of the delivery inform KNECHT Maschinen bau GmbH and the freight forwarder about it immediately If required consult an independent expert immediately Remove the packaging and shipping straps Remove the shipping straps on the grinding machine Dispose of the packaging in an environment...

Страница 28: ...29 4 Transport Installations on the electrical system may only be performed by an authorized specialist Observe the locally applicable safety and accident prevention regulations CAUTION ...

Страница 29: ...he grinding machine can be connected upon delivery using the corresponding plug 32 A for the power supply and a compressed air hose 5 m Confirm that the machine is correctly connected to the current supply CAUTION 5 4 Settings The various components and the electrics are adjusted by KNECHT Maschinenbau GmbH before delivery ATTENTION Unauthorised changes to set values are not permitted and may dama...

Страница 30: ...ll the power supply Completely install and check the safety devices before commissioning Have all the protective devices checked for proper functioning by authorised specialists before initial operation of the machine CAUTION Have a qualified specialist on site install the compressed air supply Confirm that the machine is correctly connected to the compressed air supply If the machine is connected...

Страница 31: ...ee Chapter 9 1 Connect the power plug to the power socket provided on site 3x 400 V Plug in the compressed air hose at the compressed air port 6 2 1 Close the belt protective hood 3 2 1 rear doors 3 2 4 and protective hood 3 2 5 Set the main switch 3 5 1 to I Wait for the controls to initialise Switch on the control unit with the Control On button 6 3 1 when the Control On button 6 3 1 starts flas...

Страница 32: ... to check the direction of rotation of the wet grinding belt for the first time The Settings 6 5 screen appears Change to the Manual Functions 6 6 screen with the F8 Manual Functions touch panel field 6 5 1 Change to the Grinding Belt 6 7 screen with the F2 Grinding Belt touch panel field 6 6 1 6 Commissioning 1 1 1 ...

Страница 33: ...el to check the direc tion of rotation of the wet grinding belt The direction arrow 6 8 1 indicates the direction of rotation of the wet grinding belt Where necessary switch the pole changer plug Go back to the main screen with F12 Back after ensuring that the direction of rotation is the prescribed direction NOTICE Buttons highlighted in green are active Buttons highlighted in grey are inactive 1...

Страница 34: ...heoretical service life In practice however the cutting edge breaks off and is therefore no longer sharp when the cutting edge angle is too small The cutting edge angles must therefore lie between 15 and 35 If the cutting edge angles are less than 15 the blade becomes so unstable that it breaks at the slightest resistance If the cutting edge angle is greater than 35 the blade is extremely stable b...

Страница 35: ... Open 7 2 button appears The grinding pro grams are located in the product data folder Select the desired grinding program by double clicking on the file in question grinding programs have the ending mes Alternatively you can single click on the product file and then press the Open button 7 2 1 The relevant grinding program is now loaded and the Open screen is closed ATTENTION Use the grinding pro...

Страница 36: ... the knife holder matching the grinding program appears on the main screen under Holder Number 7 3 2 This number is engraved on the knife holder The Plate Number 7 3 3 indicates the grinding plate matching the knife The num ber is engraved on a label on the grinding plate 7 Operation Figure 7 3 Main screen 1 2 3 ...

Страница 37: ...5 1 on the cross table 7 5 2 ATTENTION Cross table and bearing surface of the grinding plate must be clean Check whether the labelling on the knife holder is identical to the labelling on the knife Use of a knife holder that does not match the knife can lead to damage to the knife and machine 7 Operation Figure 7 5 Placing the SP 114 knife holder Figure 7 4 Main screen 1 ...

Страница 38: ... only in the designated grinding plates Check whether the labelling is identical to the data in the program Use of a grinding plate that does not match the knife can lead to damage to the knife and machine A magazine trolley 7 8 2 is optionally available for transporting the knife stack 7 8 1 Push the knife stack 7 8 1 as far as it will go into the machine via the guide rails 7 8 3 on the right si...

Страница 39: ... magazine are ground polished and deburred fully automatically The machine need not be supervised as it shuts down automatically in case of faults The finish machined knife stack is now deposited on the left side of the knife changer The knives can be removed Figure 7 10 Removing the knives Figure 7 9 Starting the grinding program 1 ...

Страница 40: ...orward Backward 8 8 2 in manual functions swivel the deburring unit to the knife When using the hand wheel to adjust the height of the Deburring Unit 3 2 3 adjust the deburr ing unit so that the cutting edge is at the point of intersection with the finned brush ATTENTION The height of the deburring unit must be adjusted so that the point of intersection of the polishing brushes lies on the knife e...

Страница 41: ...ve Turn the belt unloading lever concealed 3 2 2 unload and remove the grinding belt 7 13 3 Load the new grinding belt taking care that the direction of rotation is correct the direction of rotation of the motor is counter clockwise There is a direction arrow on the grinding unit 7 13 2 to check the direction of rotation If the grinding belt is not running exactly on the contact disc it can be ali...

Страница 42: ...g Mode key switch 3 6 9 to Position 1 1 h so that the polish ing unit remains in front when the safety doors open Open the protective hood and insert the bar 7 15 1 in the hole in the clamping flange behind the finned brush Insert the tap wrench 7 15 2 in the holes of the clamping flange and unscrew in clockwise direc tion Exchange the finned brush and screw back the clamping flange in counter clo...

Страница 43: ... Set the Setting Mode key switch 3 6 9 to Position 1 1 h so that the deburr ing unit remains in front when the safety doors open Open the protective hood and loosen the upper nut 7 17 1 in counter clockwise direction using the SW22 flat wrench Loosen the lower nut in clockwise direction Remove the finned brushes and flange and mount the new finned brushes in reverse sequence Tighten the nuts 7 17 ...

Страница 44: ...1 back again ATTENTION A new polishing paste must initially be supported with a plate underneath This pre vents the paste from breaking off The sup porting paste must be removed as soon as approximately half of the polishing paste has been used up Tighten the clamping claw only lightly until the pyramidal tips are pressed all the way into the paste Use only original polishing pastes as the knives ...

Страница 45: ...46 8 1 Overview of control sub programs 8 1 1 F8 Settings 8 1 2 F10 Edit Product Data 8 1 3 F11 Select Knife Type 8 Control system 8 3 8 7 2 8 9 8 2 8 4 8 7 3 8 5 8 7 4 8 6 8 7 5 8 7 8 7 6 ...

Страница 46: ...esired number Concerns the entire knife stack Inputs are temporary 4 Holder Belt pressure enter desired grinding pressure Concerns the entire knife stack Inputs are temporary 5 Magazine Belt repeat For additional grinding runs enter the desired number The num ber of grinding runs can be configured individually for each knife The top knife in stack is no 1 the second knife is no 2 etc Inputs are te...

Страница 47: ...orary 10 Change position transfer position of knife from knife changer to cross table and reverse 11 Gripper number of knife changer cycles 12 Approach grinding angle The angle entered is approached by the machine Function is only necessary for servicing purposes 13 Knife counter number of knives ground 14 F3 Axes Status display of machine axes option of manual control 15 F5 Magazine data Calls up...

Страница 48: ...ntinuously Jog machine moves step by step 5 Velo traverse speed for Tip traverse type in mm s The keyboard for changing the value is automatically opened 6 Distance distance that is traversed in each step for the Jog traverse type 7 F1 Traverse Distance The selected axis traverses backwards continuously or step by step depending upon the traverse type 8 F2 Rapid Traverse Activates the rapid traver...

Страница 49: ...50 8 Control system 12 F11 Keyboard Keyboard is shown 13 F12 Back Goes back to the previous screen ...

Страница 50: ... Maschinenbau GmbH ATTENTION Changes to the coordinate data can lead to damage to the knife or the machine 1 Magazine data selected grinding plate is marked with a green arrow 2 Description of the knife 3 X value knife holder 1 from drawing 4 Y value knife holder 1 from drawing 5 X value knife holder 2 from drawing 6 Y value knife holder 2 from drawing 7 Angle 8 F3 Load Load values from the machin...

Страница 51: ...52 8 Control system 10 F9 Apply Transfer changed values to the machine control unit 11 F12 Back Goes back to the previous screen ...

Страница 52: ...l parameters of the machine here However you may do this only in consultation with KNECHT Maschinenbau GmbH ATTENTION Changes can lead to damage to the knife or the machine 1 Machine data data highlighted in blue are displayed 2 Options 3 General 4 Magazine 5 Rotary table 6 Tools 7 Tools Grinding belt 8 Tools Grinding belt Utilisation time Figure 8 4 Machine data 13 14 15 16 1 2 4 6 8 10 12 3 5 7 ...

Страница 53: ...ishing unit 11 Tools Grinding wheel optional 12 Tools Knife shortening optional 13 F3 Load Load programs with machine data 14 F4 Save as Save changed machine data 15 F9 Apply Transfer machine data to the machine 16 F12 Back Goes back to the previous screen ...

Страница 54: ... may do this only in consultation with KNECHT Maschinen bau GmbH ATTENTION Changes can lead to damage to the knife or the machine 1 Holder number 2 Description of the knife 3 X value knife holder 1 from drawing 4 Y value knife holder 1 from drawing 5 X value knife holder 2 from drawing 6 Y value knife holder 2 from drawing 7 Number of knives 8 F3 Load Load values from the machine control unit Figu...

Страница 55: ...56 8 Control system 9 F4 Save as Save changed values 10 F9 Apply Transfer changed values to the machine control unit 11 F12 back Goes back to the previous screen ...

Страница 56: ... Buttons highlighted in grey are inactive NOTICE Manual functions are not needed in normal operation During maintenance work e g when changing the finned brushes the in dividual machine components can be moved to a more easily accessible position using the manual functions 8 7 1 General When the F8 Manual Functions sub menu 8 1 18 is called the screen initially switches to the general manual funct...

Страница 57: ...nge the display mode This is not needed 14 F12 back Goes back to the previous screen 8 7 2 Grinding Belt 1 Switch the grinding belt On Off 2 Water deflector Forward Backward 3 Switch coolant valve On Off 4 Switch the coolant pump On Off 5 Switch grinding On Off grinding belt and coolant valve are automatically switched on and the water deflector is moved for ward 6 Move grinding belt Forward Backw...

Страница 58: ... polishing unit auto matically moves backwards when the safety doors open Switch on Pos 1 1 h The polishing unit remains in front 8 7 5 Knife Changer 1 Switch gripper air On Off 2 Switch circuit 1 gripper vacuum On Off 3 Switch circuit 2 gripper vacuum On Off 4 Move knife changer Forward Backward left position transfer knife to cross table right position knife pickup 5 Lock unlock centre locking 6...

Страница 59: ...60 8 Control system 8 7 6 Grinding Disk optional 1 Move grinding wheel Forward Backward 2 Switch grinding wheel On Off 3 Switch coolant valve On Off 1 2 3 Figure 8 11 Grinding Disk manual functions ...

Страница 60: ...dering the operation of the machine at a particular moment Furthermore the sub menu informs as to which errors have occurred and since when they have been active NOTICE No settings can be performed in the Message Texts sub menu The errors are also dis played in the top half of the main screen 3 7 1 8 9 Options 1 F1 Sysinfo 2 F3 Settings 3 F5 Language Change language 4 F12 back For going back to th...

Страница 61: ...re settings and load or edit new grinding programs An active internet connection is required to estab lish the connection NOTICE During commissioning configure the VPN router according to the specified IT infrastruc ture so that the machine communicates exclu sively with KNECHT Maschinenbau GmbH via the VPN server There is no communication within the customer network In this way the network is opt...

Страница 62: ...f necessary top up with cooling lubricant Check cooling lubricant concentration weekly Cooling lubricant Colometa SBF PN Refractometer Brix 3 5 Date BRIX Conc Remarks etc Signature The value read off in Brix multiplied by 1 8 is the concentration in The concentration must always lie between 3 5 Brix corresponds to between 5 and 9 concentration Check the cooling lubricant regularly for odour and ap...

Страница 63: ... give two pumps from the grease gun on the respective lubrication nipples NOTICE Relubricate the deburring unit 9 1 2 only if there is an increased level of noise Too much grease makes the system sluggish The flow gauge 9 2 1 must be removed and cleaned semi annually For this purpose disconnect the connector 9 2 2 and turn the flow gauge in counter clockwise di rection by hand Clean the measuring ...

Страница 64: ... After each grinding operation Paraffinum Perliquidum 16L Shell Risella 917 Marcol 82 Lubricate parts except for deburring unit with lubrica tion nipple see figure 9 1 Semi annually L2 multipur pose grease Gadus S2 V 100 2 Mobilith SHC 100 Lubricate thread of star handles and flow gauge Semi annually L2 multipur pose grease Gadus S2 V 100 2 Mobilith SHC 100 ...

Страница 65: ...olant pump with the On touch panel button and wash the machine with the scrubber ATTENTION Flap brushes must not get wet since they can only absorb polishing paste and can only cor rectly deburr a knife in dry state After washing shut off the water supply to the scrubber to avoid flooding After cleaning lightly grease the machine with non corrosive oil also refer to lubrication schedule in Chapter...

Страница 66: ...ing brush After cleaning reapply the polishing paste to the brushes Rotary table Remove and clean the plates Remove the bellows Clean and oil the guides Clear the water drain holes in the X and Y axis Check the seals and O rings of SP 114 Retighten the nuts of the clamping lever rotary table Knife changer Check gripper seal Extraction Clean the hose socket Remove filter and clean housing Monthly G...

Страница 67: ...rried out by a qualified specialist company 10 2 Disposal At the end of the machine service life it must be disposed of by a qualified specialist company In exceptional cases and in agreement with KNECHT Maschinenbau GmbH the machine can be returned Operating materials e g grinding belts finned brushes grinding wheels coolant etc must also be disposed of correctly ...

Страница 68: ...ed spare parts please use the spare parts list provided with the machine Please place your order as shown below Please always include the following information Example Machine type B600 Machine serial number 450458600 Designation of assembly 013B600 0130 X axis Designation of individual part oblique groove ball bearing Item number 27 Drawing No 405A 50 320 Quantity 1 pc Please feel free to contact...

Страница 69: ...2J 02 0180 Assembled on delivery Polishing paste left 250x40x140 412R 06 0140 Assembled on delivery Wet grinding wheel A d 200x60xd 50 80 412B 11 10162 Woven filter medium VL 02 35 042 418P 11 0420 Included in the scope of delivery Coolant additive Kamasol SLA 852 5 ltr Package 417C 25 0010 Included in the scope of delivery ATTENTION No other abrasives may be used without the approval of KNECHT Ma...

Страница 70: ...ut our consent Designation of the machine Automatic Grinding and Polishing Machine Type designation B 600 Applicable harmonised standards DIN EN ISO 12100 1 in particular DIN EN ISO 12100 2 DIN EN ISO 60204 1 DIN EN 13218 DIN EN 349 Responsible for the documentation Peter Heine Dipl Ing Mechanical Engineering Phone 49 7527 928 15 Manufacturer KNECHT Maschinenbau GmbH Witschwender Straße 26 88368 B...

Страница 71: ...KNECHT Maschinenbau GmbH Witschwender Straße 26 88368 Bergatreute Germany T 49 0 7527 928 0 F 49 0 7527 928 32 mail knecht eu www knecht eu ...

Отзывы: