71
8. Designing
8.1 Adding Guidelines to the Sign Blank
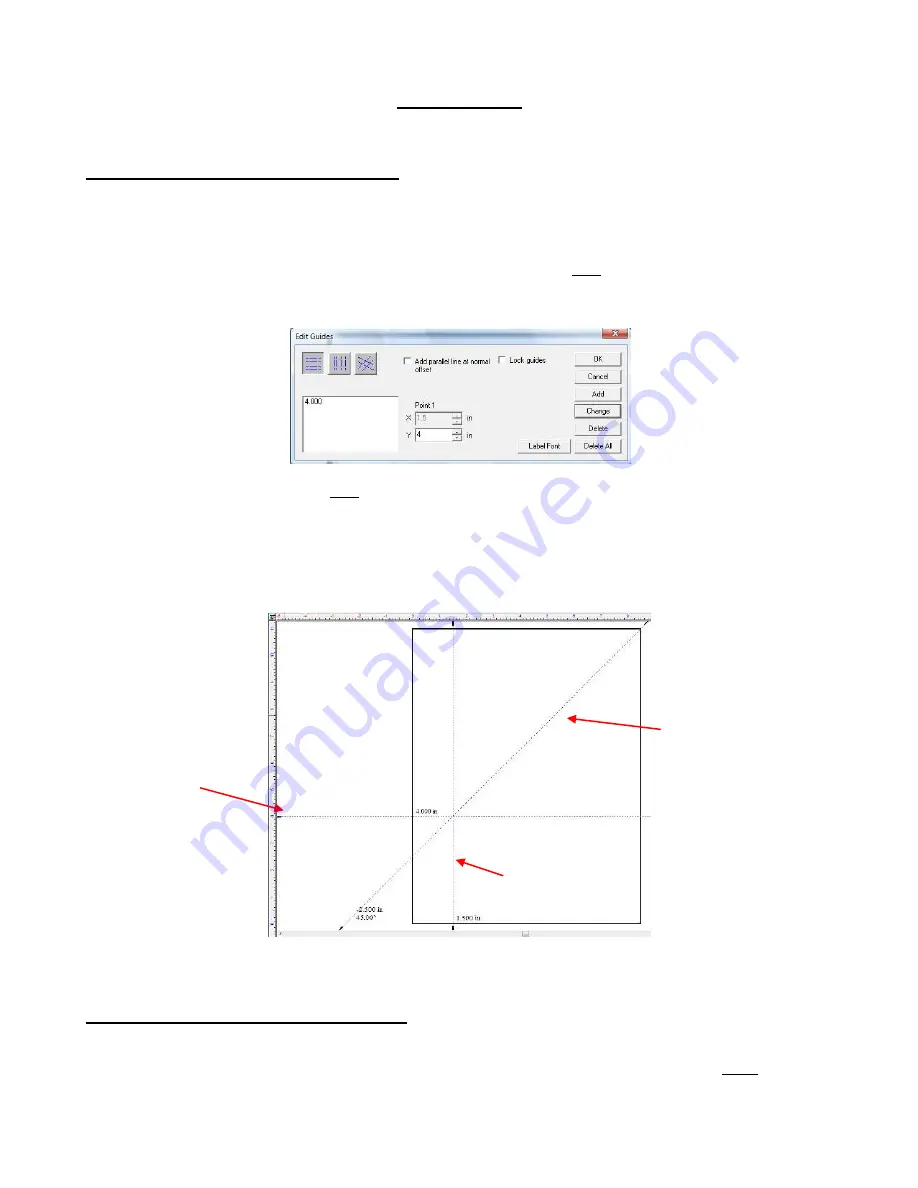
In KNK Studio, not only can the user add vertical and horizontal guidelines, but also guidelines at any specified
angle. Note that the guidelines have magnetic properties; images will snap to them as you move the images
close.
To access this feature, first make sure no objects are selected. Then right click in any blank area of the
screen and the
Edit Guides
window will open. Within that window, guidelines can be added, deleted,
changed, and locked.
You can also add a guideline by right clicking anywhere along either ruler. Unless the guidelines have been
locked within the
Edit Guides
window, you can drag them to other locations with your mouse. To delete a
guideline from outside the
Edit Guides
window, hold down the
Shift
key and right click on the guidelines.
To turn on labeling, go to
View>Show Guide Labels.
Every guideline will now show the location of that
guideline, relative to the origin. To change the size and specific font, go to the
Edit Guides
window and click
on
Label Font
(see button in diagram above).
8.2 Drawing and Modifying Basic Shapes
The following features are briefly presented. With each feature, the before-and-after results (or several
examples) are shown with instructions for the menu location. Note that in most cases, there are many more
variations that could have been created. Use these samples to help you learn the feature, but then soar with it!
Horizontal
guideline at
Y = 4.0”
Vertical guideline at
X = 1.5”
Diagonal guideline at
45
0
, through X = 1.5, Y
= 4.0


