38
(10) Once satisfied with the accuracy, you can switch back from mm to inches, if desired, by going to
Options>Toggle Units
.
Performing a Print and Cut
(1) After tracing your image (refer to
Chapter 6 Tracing
), you may wish to use
Transform>Outline
to set an
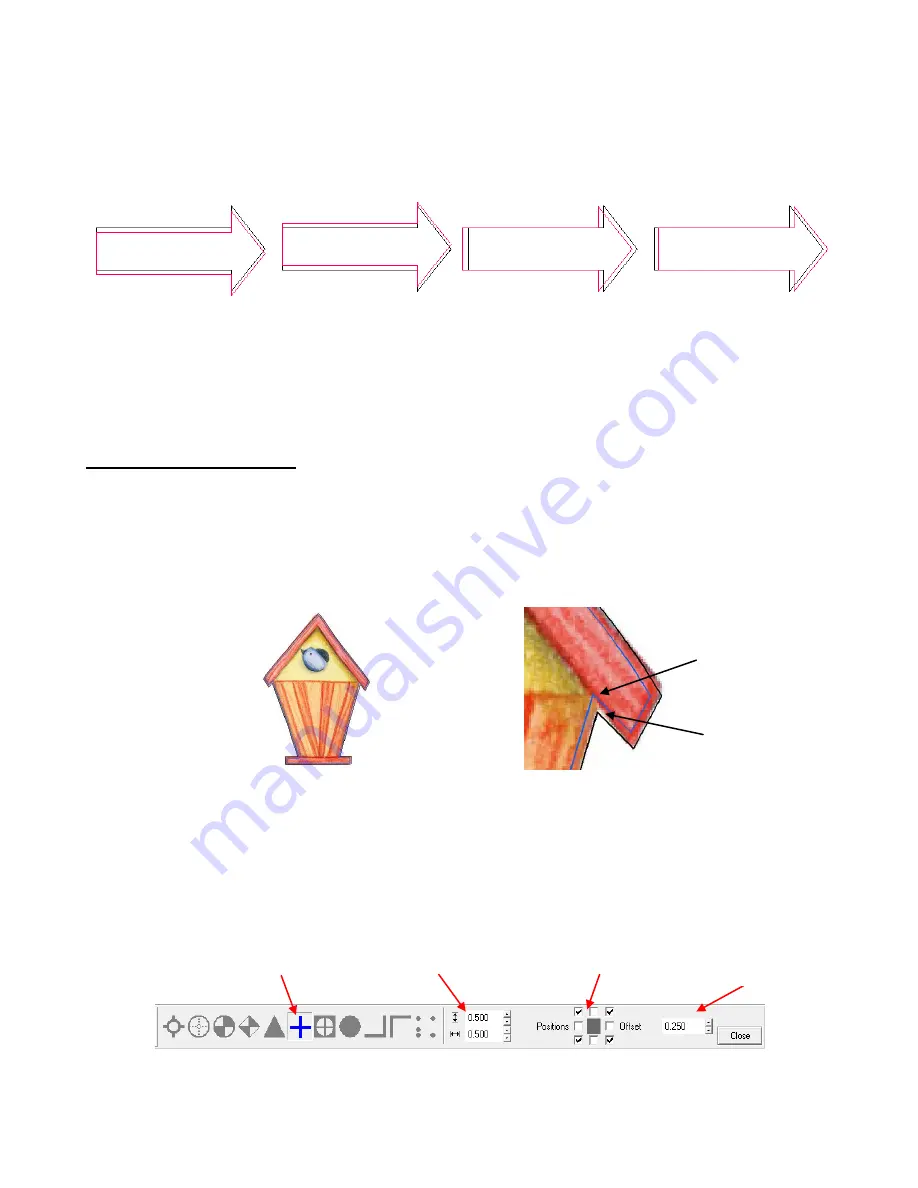
inline so that the cut will be slightly inside the outer edges of your printed image. This will help prevent any
white from showing due to slight inaccuracies in setting the registration marks. Note in the following
example, an inline of 0.02 has been applied. While this figure shows both the original trace line and the
inline, you will want to delete the original line and only use the inline in your print and cut. Refer to
Section
5.5 Outline and Inline.
Print and Cut Sample
Close Up of Right Side of Roofline
(2) While you can use either a portrait or a landscape orientation and either check or uncheck
Axis Swap
, in
this example we will use
Portrait
and
Letter
under
Layout>Blank Size
and check
Axis Swap
under
Cut>Plotting Defaults
. Also check
Sign Blank
.
Click on Apply
and then
OK
to close this window.
(3) Select the image and, from the
Shapes Tool
icon on the
Tools
toolbar, click on the
Multi-Registration
Mark
icon (third from the right). In the Smart Bar will be a menu choice of marks to use. Pick the
“+”
symbol
(6
th
from the left side). On the right, you can select how far to offset the marks. Enter a relatively small value
(say, 0.25” or 6
mm):
(4) Four registration marks will appear around the image. Click on
Close
.
Original trace line is
slightly outside graphic.
Inline is set at 0.02” and
moves cut line safely
inside graphic.
Select
Size of Marks
Check all 4 even though
only 3 are needed.
Enter offset of marks
from original.
If the red cut line is
below the black print
line, then decrease the
value of X.
If the red cut line is
above the black print
line, then increase the
value of X.
If the red cut line is left
of the black print line,
then increase the
value of Y. (Note: Y is
a negative number)
If the red cut line is right
of the black print line,
then decrease the value
of Y. (Note: Y is a
negative number)
Red line is 1mm lower
than black line: change
X from 15.2 to 14.2.
Red line is 1mm higher
than black line: change
X from 15.2 to 16.2.
Red line is 1mm left of
black line: change Y from
-9.2 to
–
8.2 (an increase
to a negative number).
Red line is 1mm right of
black line: change Y from
-9.2 to -10.2 (a decrease
to a negative number).


