19
3. KNK Studio Basics
3.1 Main KNK Studio Screen
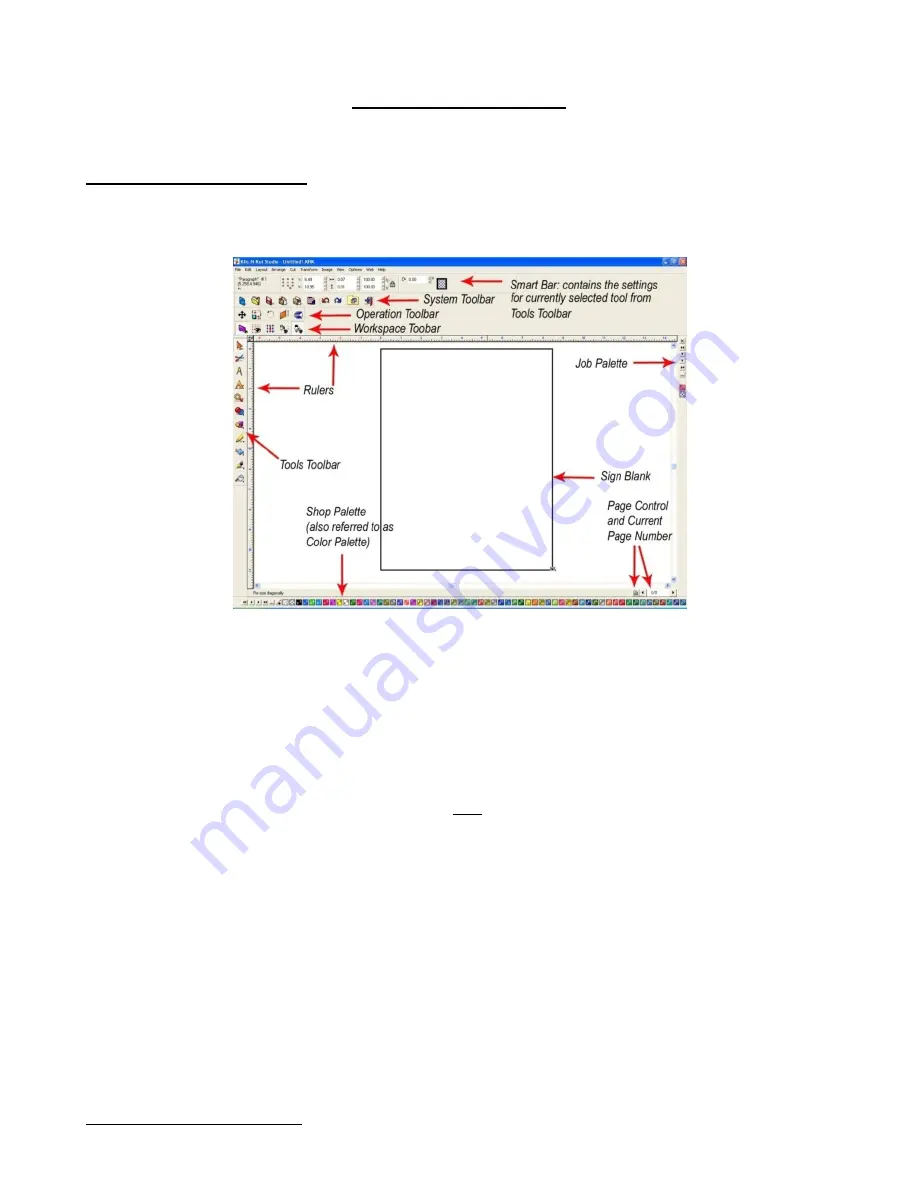
Below is a screen shot of the main screen in Klic-N-Kut Studio, identifying the major parts. Note the specific
names of the items shown below, as they will be referenced throughout this user manual:
The
Smart Bar
will always appear on the screen and will show all the parameters and settings for any
given mode. In the figure above, the select mode is shown. If you go into the text mode, then the Smart Bar
will show a different set of tools and settings, such as the currently selected font, font height, character
picker and kerning.
The
Sign Blank
is the basic document area and can be turned on by going to
View>Show Sign Blank
. To
edit the dimensions of the Sign Blank, go to
Layout>Blank Size
. For more information, refer to
Opening a
New Document (Sign Blank Setup)
under
Section 3.3 Managing Files
.
There are four
Toolbars
which can be turned on and off by going to
View>Toolbars
and checking or un-
checking the toolbar from the menu. You can also right click on any toolbar and check/uncheck any of the
toolbars from the menu. By resting your mouse over any of the toolbar icons, a popup will appear indicating
that icon’s name/function. More information about the Tool
s toolbar is presented in
Section 3.2 Tools
Toolbar.
Similarly, there are three palettes which can be turned on and off by going to
View>Palettes
. Only the
Shop Palette and Job Palette are shown, as they are the most useful to paper crafters. Use the
Shop
Palette
to select colors for the objects
2
in the Sign Blank. Use the
Job Palette
to track which colors have
been used in your current file. This makes it easier to keep using the same colors rather than having to
remember which particular shades you previously chose.
Any of the toolbars or palettes can be dragged to a different location. On the horizontal ones, hold down the
left mouse button on the gray dots on the left side and drag. On the vertical ones, drag the gray dots at the
top.
To create your own custom tool bar, go to
View>Toolbars>Customize
and click on
New
. In this window,
you can also select to have large sized icons on the screen. If you make changes, then be sure to save
your configuration:
View>Toolbars>Save.
2
Throughout this manual, the terms “image” and “object” are used interchangeably to refer to vector images.


