background image

12

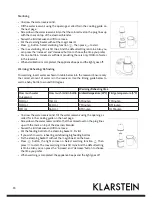
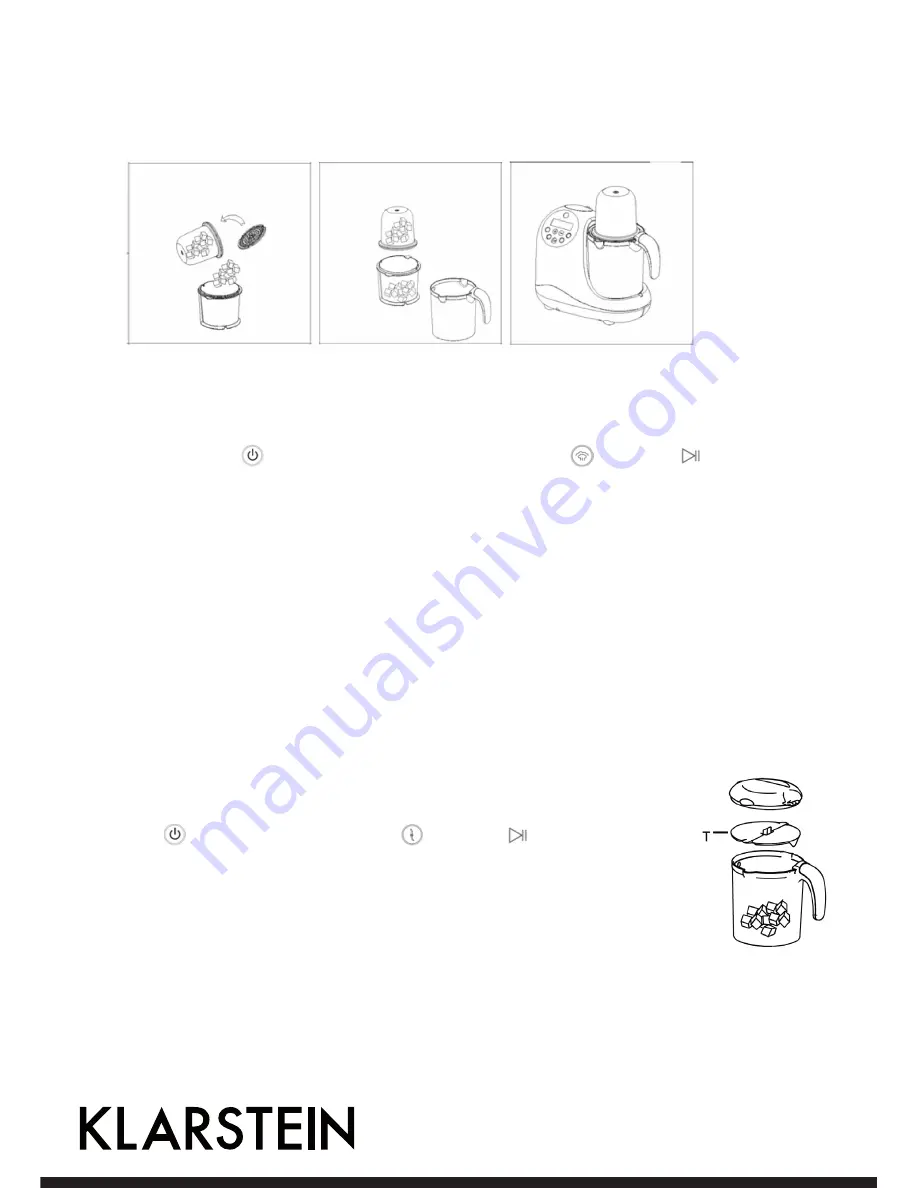
•  If you wish to separate types of food in order to blend them separately (and avoid mixing flavors): Place the 

magic board, so that it fits flush with the corresponding ridges on the steaming basket and separates the 2 
steaming baskets giving you multiple compartments. Place the food separately in each compartment.

•  Place the steaming basket 1 over the blending jar as shown above and fit the jar lid snugly. Check that there 

are no gaps.

•  Place the blending jar on the base and lock into place. It is not necessary to remove the blade.
•  Plug in the appliance.
•  Press the button 

, the light comes on. Select steaming button 

. Then press 

 to start the cooking 

process. There are two different speeds for steaming. 

•  Steaming speed I and Steaming speed II. Press the button , Speed I. Press the same button again, it is swit-

ched over to Speed II.

•  The max cooking time is 30mins; and the default setting is 20 mins; Also you can press the “increase” and 

“decrease” button to choose the time you prefer.

•  When cooking is completed, the appliance beeps and the light goes off.
•  Unplug the appliance. Remove the lid.
•  Remove the steaming basket by using the handle on it. Keep the stock and use the
•  required quantity for your puree.
•  To remove the blending jar from its base, unscrew it taking it by the handle and turning it clockwise.

Blending

•  Place the cooked food from the steaming basket(s) directly into the blending jar.
•  Place the splash lid (T)and close the jar lid. Warning: This lid can NOT be used during 

the steaming process. The splash lid is located in the draw on the underside of the 
unit.

•  Place the blending jar on the base and lock into place. Plug in the appliance.
•  Press 

 button. Select blending button 

. Then press 

 for approximately 13” 

on, 2 off for 5 cycles. Smooth texture: just press the button (speed I). Texture with 
small pieces: press the button again(speed II).

•  If blending does not take place, check that the bowl is fastened onto the base and 

that the lid is properly closed.

•  Repeat the previous stage until the required consistency has been obtained.
•  Unplug the appliance.
•  Unscrew the blending jar using the handle.
•  Open the jar lid and remove the puree obtained. The spatula may be used to scrape 

the bowl.

Содержание 10028611

Страница 1: ...10028611 10028612 Dampfgarer Mixer...

Страница 2: ...en Sie das Ger t nur an Steckdosen an die der angegebenen Spannung entsprechen Stellen Sie das Ger t auf eine trockene ebene Arbeitsfl che au erhalb der Reichweite von Kindern auf Schalten Sie das Ger...

Страница 3: ...darauf dass das Messer nicht mit Nahrung bedeckt ist bis Sie die D mpf Funktion einschalten Bewegen Sie das Ger t nicht w hrend der Benutzung Bef llen Sie den Wassertank nicht w hrend dem D mpfen ande...

Страница 4: ...fest Ziehen Sie an der Messerbasis um zu berpr fen on das Messer fest sitzt Dampfgaren Nehmen Sie den Deckel vom Wassertank Bef llen Sie den Tank mit der ben tigten Wassermenge siehe Garen Aufw rmen...

Страница 5: ...nd die Kontrollleuchte geht aus Ziehen Sie den Stecker aus der Steckdose und ffnen Sie den Deckel Entnehmen Sie den D mpfeinsatz am Griff und stellen ihn zum P rieren beiseite Entfernen Sie den Mixbec...

Страница 6: ...geben Sie die in der Tabelle empfohlene Wassermenge in den Wassertank Ver wenden Sie m glichst genau die angegebene Wassermenge und halten Sie sich an die angegebene Zeit um ein Babyfl schchen auf etw...

Страница 7: ...fel 15 Minuten Tomate 15 Minuten Fleisch Huhn Rind Lamm Schwein 20 Minuten Fisch Lachs Dorsch Forelle 15 Minuten Reinigung und Pflege Reinigen Sie das Ger t nach jedem Gebrauch Ziehen Sie immer zuerst...

Страница 8: ...Entsorgung Befindet sich die linke Abbildung durchgestrichene M lltonne auf R dern auf dem Pro dukt gilt die Europ ische Richtlinie 2002 96 EG Diese Produkte d rfen nicht mit dem normalen Hausm ll en...

Страница 9: ...appliance Always place the steamer blender on a dry flat surface out of the reach of children Never switch the appliance on without having filled the reservoir with the required quantity of water Lea...

Страница 10: ...ny damage caused Always empty the water reservoir after use Take care that the blades are not covered with food before acti vating the steam function Do not lift or move the appliance when in use Neve...

Страница 11: ...turn anticlockwise Important Pull on the flower part to check that the blade is properly screwed in Steam cooking Unplug the water reservoir lid Fill the water reservoir using the opening as called f...

Страница 12: ...is completed the appliance beeps and the light goes off Unplug the appliance Remove the lid Remove the steaming basket by using the handle on it Keep the stock and use the required quantity for your p...

Страница 13: ...in the reservoir Use the timing guide below to warm a baby bottle to around 38 degrees Warming Reheating time How much water in reservoir How much milk in bottle Ambienttemperature 22 C Fridge tempera...

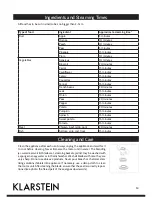
Страница 14: ...Sweet potato 15 minutes Tomato 15 minutes Meat Chicken beef lamb pork 20 minutes Fish Salmon sole cod trout 15 minutes Cleaning and Care Clean the appliance after each use Always unplug the appliance...

Страница 15: ...ean waste regulation 2002 96 EC this symbol on the product or on its packaging indicates that this product may not be treated as household waste Instead it should be taken to the appropriate collectio...

Страница 16: ...e di sicurezza Leggere attentamente tutte le avvertenze di sicurezza e conservare il presente libretto d istruzioni per consul tazioni future Lasciare raffreddare 15 minuti il dispositivo tra un utili...

Страница 17: ...tilizzo Non riempire il serbatoio mentre il dispositivo in funzione altrimenti l acqua calda e il vapore potrebbero fuoriuscire Prima di aprire il coperchio per aggiungere ingredienti assicurarsi che...

Страница 18: ...urarsi che la lama sia fissata correttamente Cottura a vapore Togliere il tappo dal serbatoio Riempire il serbatoio con la quantit di acqua necessaria vedere cottura riscaldamento scongelamento Avvita...

Страница 19: ...e la spina dalla presa e aprire il coperchio Estrarre il cestello utilizzando l impugnatura e metterlo da una parte per fare il pur Rimuovere il contenitore afferrandolo tramite l impugnatura e svitan...

Страница 20: ...congelare Per riscaldare gli alimenti attenersi alle quantit di acqua da mettere nel serbatoio riportate nella tabella Fare riferimento ai tempi indicati sotto per riscaldare un biberon a circa 38 gra...

Страница 21: ...pinaci 15 minuti patate dolci 15 minuti pomodori 15 minuti Carne pollo manzo agnello maiale 20 minuti Pesce salmone merluzzo trota 15 minuti Pulizia e manutenzione Pulire il dispositivo dopo ogni util...

Страница 22: ...ergenti per la pulizia del dispositivo Smaltimento Se sul prodotto presente la figura a sinistra il cassonetto mobile sbarrato si applica la diret tiva europea 2002 96 CE Questi prodotti non possono e...

Страница 23: ...uelles consultations ul t rieures L appareil doit tre branch une prise dont la tension correspond la tension support e par l appareil Placer l appareil sur un plan de travail sec et plat hors de la po...

Страница 24: ...activer la fonction de cuisson vapeur Ne pas d placer l appareil lorsqu il est en fonctionnement Ne pas remplir le r servoir d eau pendant la cuisson Il est possible que de l eau br lante et de la va...

Страница 25: ...ur s assurer que le couteau soit bien fix Cuisson la vapeur Retirer le bouchon du r servoir d eau Remplir le r servoir d eau selon vos besoins voir section Cuire r chauffer d congeler Replacer le bouc...

Страница 26: ...etentit et le t moin lumineux s teint D brancher l appareil et retirer le couvercle Retirer le panier cuisson l aide de la poign e Retirer le contenu et utiliser la quantit souhait e pour votre pur e...

Страница 27: ...e de la nourriture verser les quantit s d eau appropri es dans le r servoir d eau Utiliser les quantit s d eau conseill es et indiqu es continuation et respecter le temps indiqu pour r chauffer les bi...

Страница 28: ...inard 15 minutes Patate douce 15 minutes Tomate 15 minutes Viande Volaille b uf agneau porc 20 minutes Poisson Saumon morue truite 15 minutes Nettoyage et entretien Nettoyer l appareil apr s chaque ut...

Страница 29: ...formations sur le recyclage Vous trouverez sur le produit l image ci contre une poubelle sur roues barr e d une croix ce qui indique que le produit se trouve soumis la directive europ enne 2002 96 CE...

Страница 30: ...el aparato a tomas de corriente que se adecuen a la tensi n estipulada en el mismo Coloque el aparato en un lugar seco plano y fuera del alcance de los ni os Encienda el aparato solamente cuando el de...

Страница 31: ...unci n de cocci n al vapor No mueva el aparato mientras est en funcionamiento No llene el dep sito de agua durante la cocci n al vapor de lo contrario podr a salir agua y vapor caliente del aparato An...

Страница 32: ...e de la base de la cuchilla para asegurarse de que esta est bien colocada Cocer al vapor Retire la tapa del dep sito de agua Llene del dep sito con la cantidad de agua necesaria consultar secci n coce...

Страница 33: ...do y los pilotos de iluminan Desenchufe el aparato y abra la tapa Retire la vaporera vali ndose del asa Use la cantidad necesaria de comida para su pur y conserve el resto Retire el vaso desenrosc ndo...

Страница 34: ...comendada en la siguiente tabla Utilice en la medida de lo posible la cantidad exacta de agua y at ngase al tiempo estipulado para calentar el biber n de su beb a una temperatura de 38 C Tiempo de cal...

Страница 35: ...utos Calabaza 15 minutos Espinaca 15 minutos Batata 15 minutos Tomate 15 minutos Carne Pollo ternera cordero cerdo 20 minutos Pescado Salm n lenguado bacalao trucha 15 minutos Limpieza y cuidado Limpi...

Страница 36: ...o lleva adherida la ilustraci n de la izquierda el contenedor de basura tachado entonces rige la normativa europea directiva 2002 96 CE Este producto no debe arrojar se a un contenedor de basura com n...

Отзывы: