background image

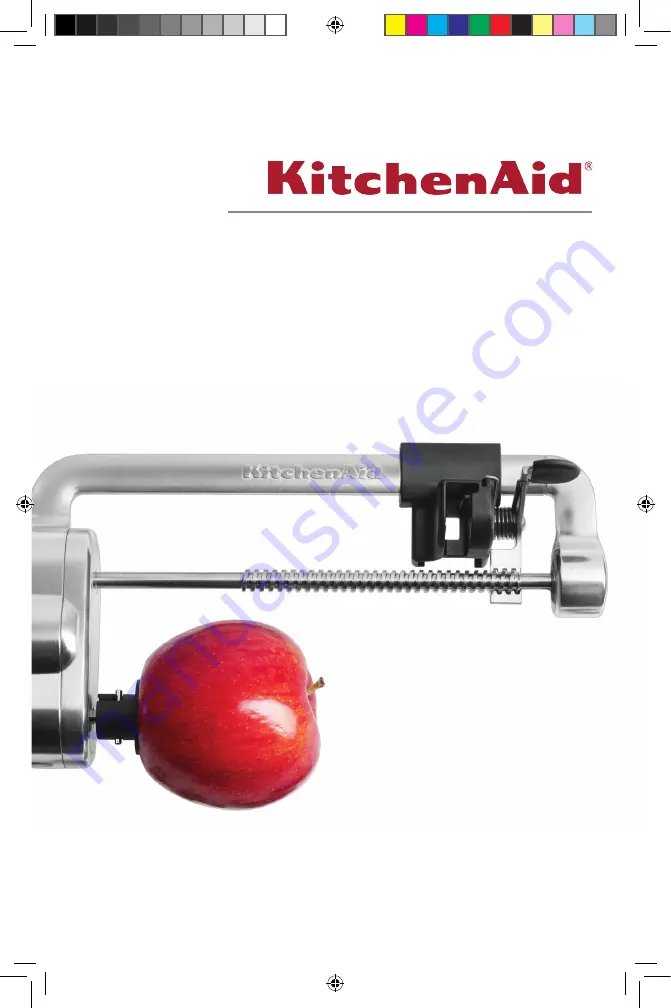
KSM1APC 

KSM2APC

W10767027B_ENv12.indd   1

11/19/15   5:01 PM

Содержание KSM2APC

Страница 1: ...KSM1APC KSM2APC W10767027B_ENv12 indd 1 11 19 15 5 01 PM ...

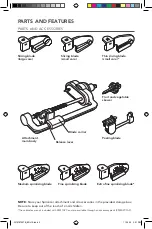
Страница 2: ... vegetable skewer PARTS AND FEATURES PARTS AND ACCESSORIES NOTE Store your Spiralizer attachment and all accessories in the provided storage box Be sure to keep out of the reach of small children Attachment main body Release lever Blade carrier These blades are not included with KSM1APC and are available through an accessory pack KSMAPC1AP W10767027B_ENv12 indd 2 11 19 15 5 01 PM ...

Страница 3: ...hand Always use the provided skewer 6 If food becomes lodged in any blade or the skewer turn the motor off and disassemble Spiralizer attachment to remove the remaining food 7 Avoid contacting moving parts 8 The use of attachments not recommended or sold by KitchenAid may cause fire electric shock or injury 9 Do not use outdoors 10 Close supervision is necessary when any appliance is used by or ne...

Страница 4: ...ILED INFORMATION ON USING THE SPIRALIZER ATTACHMENT Visit kitchenaid com quickstart for additional instructions with videos inspiring recipes and tips on how to use your Spiralizer attachment NOTE Cut the ends off food items to ensure that the food will properly fit on the Spiralizer and to create flat surfaces for best spiralizing slicing and coring results Food should be 1 5 3 75 inches 3 81 9 5...

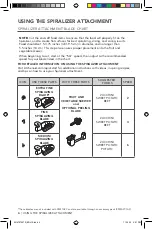
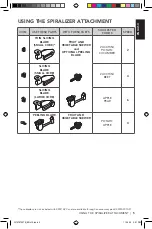
Страница 5: ...ck KSMAPC1AP ICON USE THESE PARTS WITH THESE PARTS SUGGESTED FOODS SPEED THIN SLICING BLADE SMALL CORE FRUIT AND VEGETABLE SKEWER and OPTIONAL PEELING BLADE ZUCCHINI POTATO CUCUMBER 2 SLICING BLADE SMALL CORE ZUCCHINI BEET 4 SLICING BLADE LARGE CORE APPLE PEAR 6 PEELING BLADE FRUIT AND VEGETABLE SKEWER POTATO APPLE 4 W10767027B_ENv12 indd 5 11 19 15 5 01 PM ...

Страница 6: ...ent shaft housing into the attachment hub making certain that the power shaft fits into the square hub socket Rotate the Spiralizer attachment back and forth if necessary The pin on the shaft housing will slip fully into the notch on the hub rim when it s in the proper position 3 Tighten the attachment knob until the Spiralizer attachment is completely secured to the Stand Mixer Visit kitchenaid c...

Страница 7: ...PTIONAL If using the peeler install by sliding into the bottom of the blade carrier until it clicks into place 3 Install the desired blade 4 Pull the release lever then push the blade carrier towards the Stand Mixer to align the blade core with the center of the food 5 Press blade core into food for added stability before operating the Stand Mixer IMPORTANT When finished remove the blade before re...

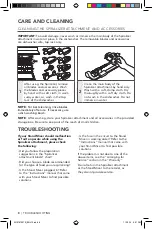
Страница 8: ...der Refer to the Instructions manual that came with your Stand Mixer to find possible solutions If the problem is not due to one of the above items see the Arranging for Service section in the Warranty Do not return the Spiralizer attachment or the Stand Mixer to the retailer as they do not provide service NOTE After washing store your Spiralizer attachment and all accessories in the provided stor...

Отзывы: