background image

4

M9186A Startup Guide

Keysight M9186A PXI Voltage/Current Source

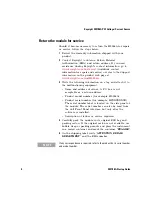
Return the module for service

Should it become necessary to return the M9186A for repair 
or service, follow the steps below:

1

Review the warranty information shipped with your 
product.

2

Contact Keysight to obtain a Return Material 
Authorization (RMA) and return address. If you need 
assistance finding Keysight’s contact information, go to 

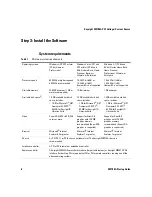
www.keysight.com/find/assist

 (worldwide contact 

information for repair and service) or refer to the Support 
information on the product web page at 

www.keysight.com/find/M9186A

.

3

Write the following information on a tag and attach it to 
the malfunctioning equipment.

Name and address of owner. A P.O. box is not 
acceptable as a return address.

Product model number (for example, M9186A).

Product serial number (for example, MYXXXXXXXX). 
The serial number label is located on the side panel of 
the module. The serial number can also be read from 
the Soft Front Panel interface, but only after the 
software is installed.

Description of failure or service required.

4

Carefully pack the module in its original ESD bag and 
packing carton. If the original carton is not available, use 
bubble wrap or packing peanuts and place the instrument 
in a sealed container and mark the container “

FRAGILE

”.

5

On the shipping label, write “

ATTENTION REPAIR 

DEPARTMENT

” and the RMA number.

N O T E

If any correspondence is required, refer to the product by its serial number 
and model number.

Содержание M9186A

Страница 1: ...Keysight M9186A PXI Voltage Current Source Startup Guide ...

Страница 2: ......

Страница 3: ...M9186A Startup Guide I ...

Страница 4: ...his document that conflict with these terms the warranty terms in the separate agreement shall control Restricted Rights Legend If software is for use in the performance of a U S Government prime contract or subcon tract Software is delivered and licensed as Commercial computer software as defined in DFAR 252 227 7014 June 1995 or as a commercial item as defined in FAR 2 101 a or as Restricted com...

Страница 5: ... possible wear cracks or breaks before each use When installing equipment where access to the main power cord is restricted such as rack mounting a separate main input power disconnect device must be provided in closed proximity to the equipment and within easy reach of the operator For maximum safety do not touch the prod uct test cables or any other instruments while power is applied to the circ...

Страница 6: ...EU law as of August 13 2005 All electric and electronic equipment are required to be separated from normal waste for disposal Reference WEEE Direc tive 2002 96 EC This symbol indicates the time period during which no hazardous or toxic substance elements are expected to leak or deteriorate during nor mal use Forty years is the expected useful life of the product Cleaning Precautions WARNING To pre...

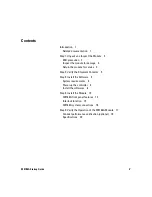
Страница 7: ...for service 4 Step 2 Verify the Shipment Contents 5 Step 3 Install the Software 6 System requirements 6 Power up the controller 8 Install the softwares 8 Step 4 Install the Module 10 M9186A front panel features 14 Interlock function 15 M9186A system connections 16 Step 5 Verify the Operation of the M9186A Module 17 Conduct performance verification optional 19 Specifications 20 ...

Страница 8: ...VI M9186A Startup Guide THIS PAGE HAS BEEN INTENTIONALLY LEFT BLANK ...

Страница 9: ...keysight com find M9186A Related documentation A softcopy of this Startup Guide and the documentation listed below can be found on the CD ROM that is shipped with this product You can also download them for free through our Web site at www keysight com find M9186A Check the manual revision on the first page of each manual Startup Guide This manual Printed copy for outdoor use included with shipmen...

Страница 10: ...at a static safe work station The following figure shows an example of a static safe work station using two types of ESD protection Figure 1 Static safe work station example CAUTION The M9186A is shipped in materials which prevent damage from static The module should only be removed from the packaging in an anti static area after ensuring that correct anti static precautions are taken Store all mo...

Страница 11: ...must provide at least 1 Ω of isolation from ground Inspect the module for damage After unpacking the M9186A carefully inspect the unit for any shipping damage Report any damage to the shipping agent immediately as such damage is not covered by the warranty warranty information can be found at the beginning of this manual WARNING These techniques for a static safe work station should not be used wh...

Страница 12: ... attach it to the malfunctioning equipment Name and address of owner A P O box is not acceptable as a return address Product model number for example M9186A Product serial number for example MYXXXXXXXX The serial number label is located on the side panel of the module The serial number can also be read from the Soft Front Panel interface but only after the software is installed Description of fail...

Страница 13: ...ontains software drivers and all product documentation in PDF format Printed copy of this document M9186A Startup Guide Calibration certificate NOTE Every PXI module is shipped with a Software and Product Information CD ROM The M9186A CD1 option provides the M9186A Software and Product Information CD ROM M9186 10001 All of the files contained on the CD are available for free download at the Keysig...

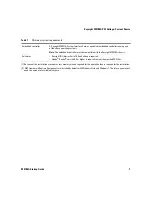
Страница 14: ...ht IO Libraries Suite 1 5 GB available hard disk space includes 1 GB for Microsoft NET Framework 2 0 SP2 2 65 MB for Keysight IO Libraries Suite 1 5 GB available hard disk space includes 1 GB for Microsoft NET Framework 2 0 SP2 2 65 MB for Keysight IO Libraries Suite Video Super VGA 800 600 256 colors or more Support for DirectX 9 graphics with 128 MB graphics memory recommended Super VGA graphics...

Страница 15: ...018A chassis Softwares Keysight IO Libraries Suite 16 0 and above is required Adobe Reader version 6 0 or higher is required to view the provided PDF files 1 Because of the installation procedures less memory may be required for the operation than is required for the installation 2 NET Framework Runtime Components are installed by default with Windows Vista and Windows 7 Therefore you may not need...

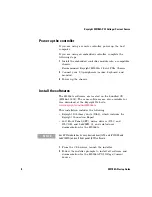
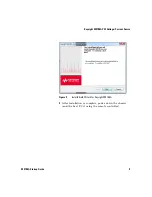
Страница 16: ...ares are located on the bundled CD M9186 10001 The same softwares are also available for free download at the Keysight Web site www keysight com find M9186A This installation includes the following Keysight IO Library Suite IOLS which includes the Keysight Connection Expert Soft Front Panel SFP device drivers IVI C and IVI COM and LabVIEW G and related user documentation for the M9186A 1 From the ...

Страница 17: ... M9186A PXI Voltage Current Source M9186A Startup Guide 9 Figure 2 InstallShield Wizard for Keysight M9186A 3 After installation is complete power down the chassis and the host PC if using the remote controller ...

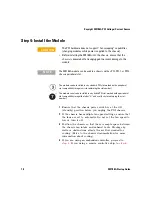
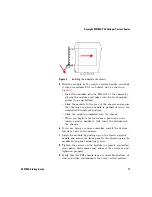
Страница 18: ... cooling 4 If you are using an embedded controller proceed to step 5 If you using a remote controller skip to step 6 CAUTION The PXI hardware does not support hot swapping capabilities changing modules while power is applied to the chassis Before installing the M9186A into the chassis ensure that the chassis is powered off and unplugged to prevent damage to the module NOTE The M9186A module can be...

Страница 19: ...unlatched downward position Slide the module completely into the chassis When you begin to feel resistance push up on the injector ejector handle to fully inject the module into the chassis 6 If you are using a remote controller install the System Interface Card in the chassis 7 Latch the module by pulling up on the injector ejector handle and secure the front panel to the chassis using the module...

Страница 20: ...y air circulation in the chassis 11 If you are using a remote controller connect the System Interface Card in the chassis to host computer 12 Plug in and power up the PXI chassis 13 If you are using a remote controller reboot the host PC WARNING Tighten the screws on the module front panel Protection provided by the equipment could be impaired if the screws are not tightened properly ...

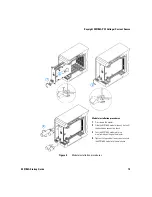
Страница 21: ...ocedures Module installation procedures 1 Press down the ejector 2 Slide the M9186A module into any slot until the backplane connectors touch 3 Seat the M9186A module into the mainframe by pulling up the ejector 4 Tighten the top and bottom screws to secure the M9186A module to the mainframe 1 2 3 4 ...

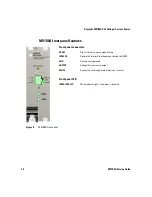
Страница 22: ...l Front panel connectors DCOM Digital circuits common ground return INTRLCK Disable the interlock function when shorted to DCOM GND Floating analog ground OUTPUT Voltage Current source output SENSE Current sense through internal precision resistors Front panel LED INTERLOCK LED When indicator lights the output is disabled ...

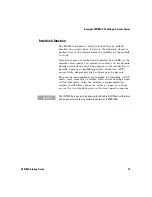
Страница 23: ...uring an interlock event The purpose of the interlock is to provide a means of prohibiting device under test DUT access while dangerously high voltages may be present This can be accomplished for example by installing a DUT safety cover secured by a fixture screw and activating a limit switch Internally when the module is programmed for output it will always sense for either an open or a short acr...

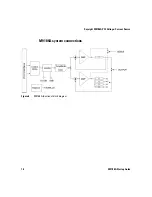
Страница 24: ...16 M9186A Startup Guide Keysight M9186A PXI Voltage Current Source M9186A system connections Figure 6 M9186A functional block diagram ...

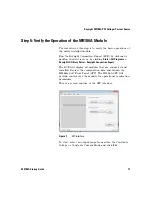
Страница 25: ...by clicking Start All Programs Keysight IO Library Suite Keysight Connection Expert The KCE will display all modules that are connected and installed Review the configuration data and launch the M9186A Soft Front Panel SFP The M9186A SFP will provide control over the module for operational verification procedures This is a screen capture of the SFP interface Figure 7 SFP interface To start select ...

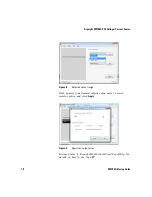
Страница 26: ...Current Source Figure 8 Select an output range Next specify your desired output value select a sense resistor value and click Apply Figure 9 Specify an output value You may refer to Keysight M9186A Soft Front Panel Help for details on how to use the SFP ...

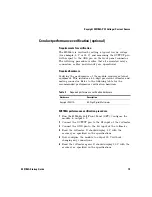
Страница 27: ...ion voltmeter and mating connector Refer to the following table for the recommended performance verification hardware M9186A performance verification procedure 1 Run the M9186A Soft Front Panel SFP Configure the module to output 5 V 2 Connect the OUTPUT pin to the HI input of the voltmeter 3 Connect the GND pin to the LO input of the voltmeter 4 Read the voltmeter It should display 5 V with the ac...

Страница 28: ...ge measurement range and that cable is properly connected 3 Check that the INTERLOCK LED is not lit up 4 If the problem persists refer to Return the module for service on page 4 for details on sending the module to Keysight Technologies for service Specifications Complete specifications for the M9186A M9186A Data Sheet 5990 6655EN are included on the Keysight M9186A Software and Product Informatio...

Страница 29: ...ope tel 31 20 547 2111 Japan tel 81 426 56 7832 fax 81 426 56 7840 Korea tel 080 769 0800 fax 080 769 0900 Latin America tel 305 269 7500 Taiwan tel 0800 047 866 fax 0800 286 331 Other Asia Pacific Countries tel 65 6375 8100 fax 65 6755 0042 Or visit Keysight World Wide Web at www keysight com find assist Product specifications and descriptions in this document are subject to change without notice...

Страница 30: ...This information is subject to change without notice Keysight Technologies 2010 2015 Edition 3 June 2015 M9186 90001 M9186 90001 www keysight com ...

Отзывы: