


Keysight Instrument Rack E7950A-1.3m E3661B-1.6m E3662B-2.0
37
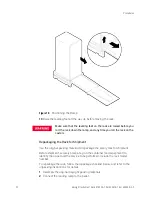
Leveler or Caster Replacement
1
With the rack on its side, screw in the leveler, or place the castor over the four
mounting studs and attach with the four mounting nuts.
2
Carefully lift the rack to the upright position.
3
Install all equipment components.
4
Return the rack to its install site.
5
Reconnect AC power.
Ballast Removal
Remove the two screws holding the ballast on the rear rack columns. Use
caution not to drop the ballast when removing these screws.
Ballast Replacement
Attach the ballast to the rear columns using the two screws. Ballast should be
installed at the bottom of the rack, resting adjacent to the rear base. If ballast
cannot be installed at the base of the rack, it can be installed using the rack
shelf.
Install additional ballast adjacent to each other so that they provide support for
each other.
Door Bumper
The rear and front door bumpers are self-adhesive rubber bumpers stuck to the
door. Remove by prying off with a flat bladed screwdriver. Apply by peeling off
the adhesive cover and pressing into place.
The ballast weighs 30 lbs and can damage equipment or cause
personal injury if dropped
.
If ballast cannot be installed at the bottom of the rack, it can be
installed using the plain rack shelf. The plain rack shelf can
support up to four ballast (120 lbs) units. Remove ballast before
moving or shipping a rack
.