


Keysight Instrument Rack E7950A-1.3m E3661B-1.6m E3662B-2.0
33
3
Raise the leveling feet.
4
Push the rack up the ramp, front first.
5
Secure the rack to the pallet with the shipping clamps, shipping block, and
rear door support.
6
Place the anti-static bag over the rack.
7
Place the top cap packing material and loading/unloading ramp on top of the
rack.
8
Place the corrugated wrap around the rack.
9
Put the box top on the box.
10
Secure the top to the pallet with top-to-bottom plastic bands.
Removal and Replacement
This section provides removal and replacement procedures for the standard
assembly.
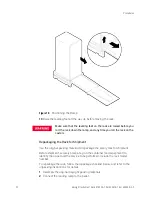
Rear Door Removal
1
Open rear door.
2
Disconnect the bonding wire from the door.
3
Grasp the rear door support and lift the door straight up and away from the
cabinet.
Rear Door Replacement
1
Hold the rear door by the support column.
2
Align the door hinge pins over the rack hinge holes.
3
Lower the door onto the rack hinge.
4
Reconnect the door onto the rack hinge.
Top Cap Removal
1
Open the rear door all the way.
2
Remove the two outside mounting screws at the top-rear of the rack.
3
From the rear of the rack, pull the top cap toward the back a few inches.
4
Lift the top cap from the rack.
Top Cap Replacement
1
Open the rear door all the way.
2
From the rear of the rack, place the top cap between the side covers and slide
it forward until it stops.