background image

Содержание 790.75602

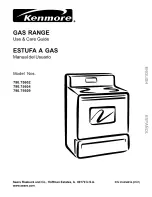
Страница 1: ... GAS RANGE Use Care Guide ESTUFA A GAS Manual del Usuado Model Nos 790 75602 790 75604 790 75609 Sears Roebuck and Co Hoffman Estates IL 60179 U S A P N 316258016 0107 www sears com ...

Страница 2: ...vate family use the above warranty is effective for only 90 days WARRANTY SERVICE IS AVAILABLE BY CONTACTING THE NEAREST SEARS SERVICE CENTER IN THE UNITED STATES This warranty gives you specific legal rights and you may also have other rights which vary from state to state Sears Roebuck and Co Dept 817WA Hoffman Estates IL 60179 WE SERVICE WHAT WE SELL Your purchase has added value because you ca...

Страница 3: ...ized Sears repair service Know how to disconnect the power to the range at the circuit breaker or fuse box in case of an emergency User servicingiDo not repair or replace any part of the appliance unless specifically recommended in the manuals All other servicing should be done only by a qualified technician This may reduce the risk of personal injury and damage to the range Never modify or alter ...

Страница 4: ...ward and does not extend over adjacent surface burners Never Leave Surface Burners Unattended at High Heat Settings Boilovers cause smoking and greasy spillovers that may ignite or a pan that has boiled dry may melt Protective Liners Do not use aluminum foil to line surface burner pans or oven bottom except as suggested in this manual Improper installation of these liners may result in risk of ele...

Страница 5: ...the power cord must be plugged into an electrical outlet that is correctly polarized and properly grounded If a 2 prong wall receptacle is the only available outlet it is the personal responsibility of the consumer to have it replaced with a properly grounded 3 prong wall receptacle installed by a qualified _ electrician IMPORTANT SAFETY NOTICE _ cf The California Safe Drinking Water and Toxic Enf...

Страница 6: ...ntrol WarmerDrawer Controlend Indicator Light withSpeed BakeTM Clean Cooktop Burner Controls Door Latch g Oven Interior Interior Oven Rank s Piece Door Handle stylevaries withmodel Oven Doorwith Window Gas Cooktop LevelingLegsand Anti tipBracket included 9 500 BTU Sealed Burner LP convertible Removable SurfaceBurnerGrates colorwillvaW by model 9 500 BTU Sealed Burner LPconvertible 5 000 BTU Simmer...

Страница 7: ...nite 3 Visually check that the burner has lit 4 Push the control knob in and turn counterclockwise to the desired flame size The control knobs do not have to be set at a particular setting Use the guides and adjust the flame as needed DO NOT cook with the surface control knob in the LITE position The electronic ignitor will continue to spark if the knob is left in the LITE position Setting Proper ...

Страница 8: ...ntil it stops Lift up front of rack and slide out To replace fit the rack onto the guides on the oven walls Tilt the front of the rack upward and slide the rack back into place Arranging Oven Racks with 6 Rack Positions To bake on a single rack place the rack on position 3 or 4 To bake on 2 racks place the racks on positions 3 and 5 Rack RECOMMENDED RACK POSITIONS FOR BROILING BAKING ROASTING Food...

Страница 9: ...ese light to show which feature is in use COOK TIME PAD Used to enter the length of the baking time if equipped STOP TIME PAD Used to set the desired stop time for baking Can be used with COOK TIME to program a delayed bake cycle if equipped TIMER ON OFF PAD Used to set or cancel the minute timer The minute timer does not start or stop cooking Also TIMER ON OFF pad is used to set the Continuous Ba...

Страница 10: ...imer will advance to 11 hours and 59 minutes 3 The display shows the timer count down in minutes until one minute remains Then the display will count down inseconds 4 When the set time has run out the timer will beep 3 times Itwill then continue to beep 3 times every 60 seconds until is pressed Note The minute timer does not start or stop cooking It serves as an extra timer inthe kitchen that will...

Страница 11: ... this feature for continuous baking To set control for continuous baking 1 Press i 0 00 will appear in the display 2 Press and hold down for 5 seconds until tone is heard hr will appear in display for continuous cooking The current time of day will return to the display 3 To ca ncel the Continuous Bake function press _ and hold for 5seconds until tone is heard 12hr will appear indisplay indicating...

Страница 12: ...t work during a clean cycle Also the oven cannot be set lower than 280 F General Convection Cooking Instructions 1 When using Convection decrease your normal cooking times as shown in Figure 1 Adjust the cook time for desired doneness as needed Time reductions will vary depending on the amount and type of food to be cooked Cookies and biscuits should be baked on pans with no sides or very low side...

Страница 13: ...0 F 177 C By holding the _ or v the temperature can then be adjusted in 5 F 1 C increments 5 Press _ 0 00 will flash in the display 6 Press the _ or v untilthe desired baking time appears 7 Press _ The earliest possible stop time will flash in the display 8 Press the _ or v until the desired stop time appears in the display 9 Once the controls are set the control calculates the time when baking wi...

Страница 14: ...he display Press the for HI broil or the v for LO broil Most foods can be broiled atthe HI broil setting Select the LO broil setting to avoid excess browning or drying of foods that should be cooked to the well done stage 4 Place the insert on the broiler pan then place the food on the insert DO NOT use the broiler pan without the insert or cover the insert with aluminum foil The exposed fat could...

Страница 15: ...ld food in the warmer drawer All food placed inthe warmer drawer should be covered with a lid or aluminu m foil to maintain quality Do not use plastic wrap to cover food Plastic may melt onto the drawer and be very difficult to clean Use only dishware utensils and cookware recommended for oven use in the warmer drawer Always use potholders or oven mitts when removing food from the warmer drawer as...

Страница 16: ... lever see figure 1 5 Pull the drawer away from the range Push down with finger Figure 1 To Replace Warmer Warm Ready TM Drawer 1 Pull the bearing glides to the front of the chassis glide see figure 2 2 Align the glide on each side of the drawer with the glide slots on the range 3 Push the drawer into the range until levers click approximately 2 Pull the drawer open again to seat bearing glides in...

Страница 17: ...the self cleaning oven DO NOT clean the oven door gasket The woven material of the oven door gasket is essential for a good seal Care should be taken not to rub damage or remove the gasket DO NOT use any cleaning materials on the oven door gasket Doing so could cause damage Remove the broiler pan and insert all utensils and any aluminum foil These items cannot withstand high cleaning temperatures ...

Страница 18: ... the oven temperature has cooled When the Self Clean Cycle is Completed 1 The time of day or End will appear in the display window and the Clean and LOCK light will continue to glow 2 Once the oven has cooled down for about 1 HOUR and the LOCK light has gone out the oven door can be opened 3 If End is in the display and the Clean indicator remains on press _ The time of day will appear in the disp...

Страница 19: ...over difficult spots with an ammonia soaked paper towel for 30 40 minutes Rinse with clean water and a damp cloth then scrub with a soap filled scouring pad Rinse and wipe dry with a clean cloth Remove all cleaners orthe porcelain may become damaged during furture heating DO NOT use spray oven cleaners on the range top Clean with hot soapy water and a dishcloth Rinse with clean water and a cloth D...

Страница 20: ...e burner DO NOT ALLOW SPILLS FOOD CLEANING AGENTS OR ANY OTHER MATERIAL TO ENTER THE GAS ORIFICE HOLDER OPENING ALWAYS keep the surface burner cap and surface burner head in place whenever a surface burner is in use THE COOKTOP IS NOT REMOVABLE Do not attempt to remove or lift the cooktop Use caution when replacing the burner cap so the electrode is not damaged This may ca use a delayed ignition o...

Страница 21: ...arance of stainless parts Refer to the Care Cleaning table for detailed cleaning instructions Adjusting Your Oven Temperature Your oven control has been precisely set at the factory This setting may differ from you rprevious oven however so your recipe times may not give you the results you expect If you think that the oven is cooking too hot or too cool for your recipe times you can adjust the co...

Страница 22: ... ignites and then turn control knob to desired flame size Burner ports are clogged With the burner off use a smalPgauge wire or needle to clean ports See Surface Burners in the Care Cleaning table for additional cleaning instructions Range power cord is disconnected from outlet electric ignition models only Be sure cord is securely plugged into the outlet Electrical power outage electric ignition ...

Страница 23: ... detected a fault condition Push OFF CANCEL to clear the display _I_ _ and stop beeping Repregram oven If fault recurs record fault number Push OFF 2_ CANCEL and contact a Sears Service Center Many factors affect baking results Make sure the proper rack position is used Center _ o_ food in the oven and space pans to allow air to circulate Allow the oven to preheat to _f_ the set temperature before...

Страница 24: ...0 366 PART 6 a m 11 p m CST 7 days a week 1 800 366 7278 U S A only www sears com partsdirect To purchase or inquireabouta Sears ServiceAgreement or Sears MaintenanceAgreement 1 800 827 6655 U S A 1 800 361 6665 Canada 7 a m 5 p m CST Mon Sat 9 a m 8 p m EST M F 4 p m Sat Para pedirserviciode reparaci6n a Au Canada pourserviceen frane ais dornicilio y para ordenarpiezas 1 800 LE FOYER ic 1 888 SU ...

Отзывы: