MY-A Series (10kVA-20kVA) UPS
User Manual
3 Installation
31
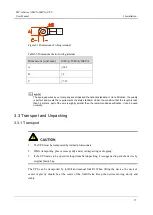
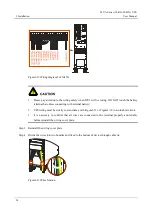
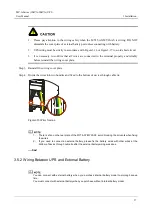
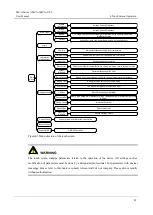
Bolt
Spring gasket
Flat gasket
Expansion tube
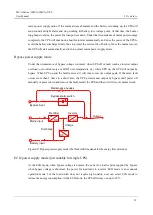
1. Drill holes on the installation ground by hammer drill.
2. Tighten the expansion bolts mildly, and put it to the
hole vertically, and then knock the expansion bolt by
rubber hammer till all the expansion tube into the hole.
3. Pre tighten the expansion bolt.
4.Screw out the bolt , take down the spring gasket and
flat gasket.
Figure3-7
Expansion bolt structure and installation
The exposed height of expansion bolt must be within 50mm.
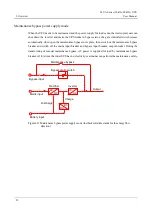
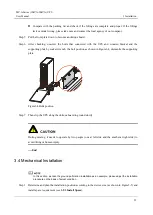
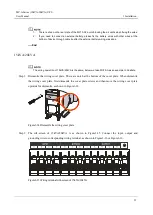
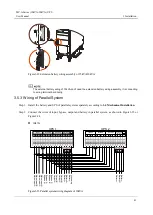
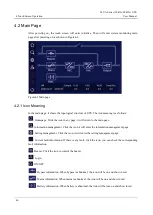
Step 3
Move the UPS above the holes, pre-lock the supporting plate (not fully locked, leave one-third to
two-thirds of the screws). Move and align the bottom installation hole of the supporting plate with the
expansion bolt. Install the flat gasket (Φ8), spring gasket (Φ8) and screw the bolts. Tighten the UPS
and the six unlocked screws of supporting plate.
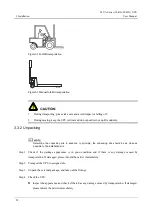
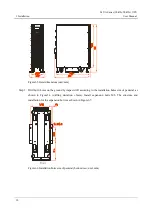
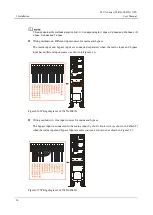
Step 4
Then screw down the supporting feet anticlockwise of the UPS to parallel with ground.
Figure3-8
Screw down the supporting feet brackets
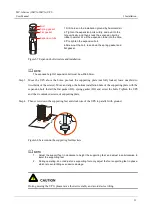
1.
Adjust the support feet in clockwise to height the supporting feet, and adjust in anticlockwise to
lower the supporting feet.
2.
During operating, do not adjust one supporting foot only, adjust the four supporting feet in phase,
which is to avoid tilting even device damage.
During moving the UPS, please move the device stably and avoid device tilting.
Содержание MY-A Series
Страница 1: ...User Manual MY A Series 10kVA 20kVA UPS...
Страница 2: ......
Страница 83: ...MY A Series 10kVA 20kVA UPS User Manual 4 Touch Screen Operation 75 Figure4 52 Confirm to turn off page...
Страница 109: ...4402 03311 002...


