English
7
Operation
Note
The extension tubes can be used with all Kärcher ac-
cessories.
Note
For optimum cleaning results, do not operate the high-
pressure cleaner in the Eco mode.
Cleaning floors
Remove coarse dirt from the surface to be cleaned (e.g.
by sweeping) before using the device to avoid damage
to the T-Racer.
ATTENTION
Damage to the rotor arm
The rotor arm can be damaged if it hits edges and cor-
ners.
Do not move the device over free-standing corners and
edges.
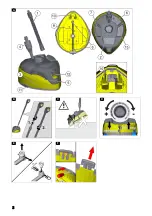
Illustration C
Note
●
The T-Racer is not suitable for scraping or scrub-
bing.
●
Test the device on an inconspicuous area before us-
ing on sensitive surfaces, e.g. wood.
●
Do not allow it to remain in one area, but keep it in
motion.
1. Attach the T-Racer to the high-pressure gun using
the extension tube.
Illustration B
a Press the extension tube onto the bayonet con-
nector of the high-pressure gun.
b Turn the extension tube by 90° until it latches into
place.
c If necessary, repeat the procedure for further
connections.
2. Adjust the rotor arm height adjustment. according to
the surface to be cleaned.
3. Unlock the lever of the trigger gun.
4. Pull the lever of the trigger gun.
The device switches on.
5. Clean the floor surface by guiding the T-Racer over
the floor surface without exerting excessive pres-
sure.
Cleaning wall surfaces
1. Attach the T-Racer directly to the high-pressure gun.
a Press the bayonet connector of the T-Racer into
the connection on the high-pressure gun and
then turn by 90° until it latches into place.
b Tighten the union nut if present.
2. Clean the wall surface.
Rotor arm height adjustment
The clearance of the high-pressure nozzles to the sur-
face to be cleaned can be adjusted via the rotor arm
height adjustment.
Adjust the rotor arm height adjustment. according to the
surface to be cleaned.
Illustration D
For powerful cleaning of stubborn soiling on dura-
ble surfaces, e.g. tiles, concrete, stone:
1. Set the rotor arm height adjustment to "HARD".
For cleaning sensitive surfaces:
2. Set the rotor arm height adjustment to "SOFT".
Surface cleaning foot switch
For cleaning larger areas
:
1. Press the surface cleaning foot switch.
A water jet is emitted from the two high-pressure
nozzles in the rotor arm.
Edge and corner cleaning foot switch
Note
Guide the T-Racer along the corner area to achieve op-
timum cleaning results.
For cleaning corners and edges:
1. Press the edge and corner cleaning foot switch.
A water jet is emitted from the front high-pressure
nozzle.
Rinsing function foot switch
Note
The device has a rinsing function for pre-wetting or rins-
ing the cleaned surface.
For rinsing:
1. Press the rinsing function foot switch.
A strong jet, but not a high-pressure water jet is
emitted from the rinsing nozzle.
After use
Rinse off the device with a gentle water stream after
use.
Detach the T-Racer and any extension tubes from
the high-pressure gun.
Rinse off the T-Racer with the high-pressure gun
(without accessories) or wipe down with a damp
cloth.
Storage
Store the device in a frost-protected place.
Care and service
Removing/installing the nozzles
The described procedure applies to all nozzles on the
device.
Illustration E
1. Remove the clip.
2. Pull the high-pressure nozzle out.
3. Fit the high-pressure nozzle.
4. Fit the clip.
Cleaning the high-pressure nozzle
1. Remove the high-pressure nozzle.
2. Flush the high-pressure nozzle with clear water in
both directions. Replace a damaged high-pressure
nozzle where necessary.
3. Install the high-pressure nozzle.
Replacing the skids
Worn or damaged skids can be easily replaced:
Illustration F
1. Press the skid gently upwards and out of the latch
using a suitable tool such as a screwdriver.
2. Pull the skid upwards and out.
3. Press the new skid gently into the support until it
latches into place.
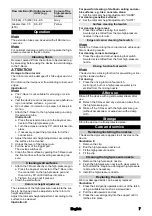
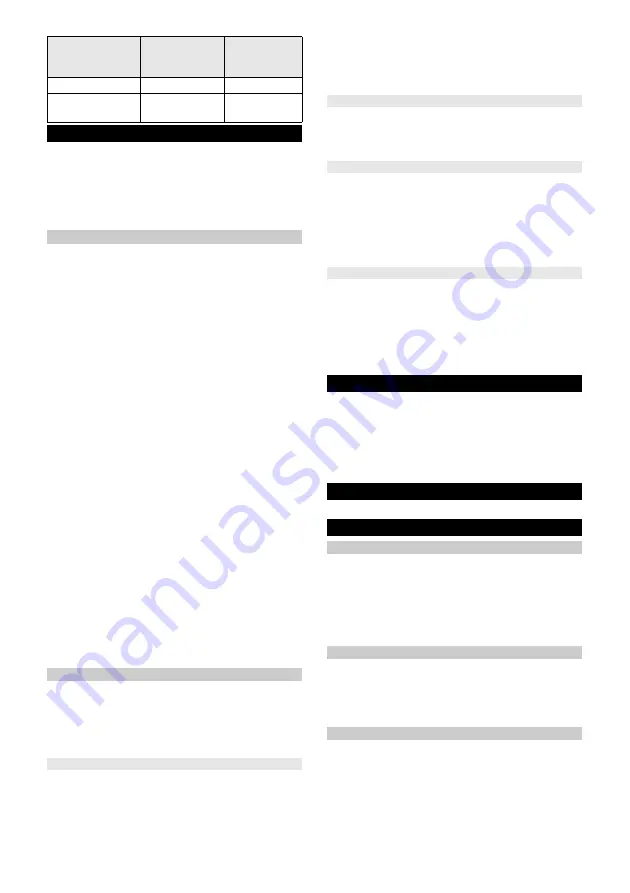
Flow rate l/min (l/h) High pressure
class (e.g.)
Colour of the
high-pressure
nozzles
5.8 (348) - 7.5 (450) K4 - K5
Grey
Greater than 7.5
(450)
K6 - K7
Yellow
Содержание T 7 Plus
Страница 2: ...A B C D E F 2...
Страница 76: ...76 1 2...
Страница 79: ...79 1 2 3 4 T Racer 5 1 2...
Страница 82: ...82 E 1 2 3 4 1 2 3 F 1 2 3 1 2 3 4 T 5 1 2...
Страница 83: ...83 T Racer T Racer E 1 2 3 4 1 2 3 F 1 2 3 1 2 3 4 T Racer 5 1 2...
Страница 86: ......
Страница 87: ......


