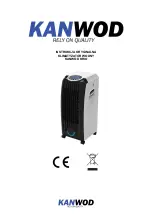
Kanwod Krio Скачать руководство пользователя страница 12

BEFORE FIRST USE

1. Unpack the components from the package. Place the air conditioner on a flat surface. 
2. Mount the wheels: install the wheels into the holes in the base of the air conditioner. (Fig.1)
3. Filling the water tank: Slide out the tank and fill it with clean tap water. Make sure the water level
does not exceed the 'MAX' level (Fig.4)

DEVICE OPERATION

Plug the power cord into the power outlet. Use the 'On-Off' button to turn on the unit. The LED
display   will   automatically   indicate   the   temperature   and   the   air   conditioner   will   set   the   fan   to
standby. The unit can be controlled by panel or remote control.

Cooling function - panel + remote control:

1. On/Off

Pressing the 'On' button on the control panel or On/Off button on the remote control will

turn on the unit and put it into standby mode.

2. Speed:

 Pressing this button will change the fan speed between low, medium and high. The top

panel will indicate the currently set fan speed.

3. Timer

Pressing the button will set the auto fan off from 1 to 7.5 hours in 0.5h increments. The

panel will indicate the selected time and the air conditioner will run for the indicated period of time.
To deactivate the auto shutdown, make all the LEDs of TIMER function turn off.

4. Swing:

 Pressing the button will turn on the horizontal air oscillation mode. Pressing it again will

turn off the mode. Adjusting the vertical angle of blowing is done by manually adjusting the plates.

5. Humidify

Pressing this button will turn on the humidify mode. The running pump will force

water onto the cooling pad, and the fan will start spreading water particles to increase humidity.

6. Mode

: Press this button to activate one of the two ventilation modes: Standard mode or Night

mode.

Fig. 1

Fig. 2

Fig. 3

Fig. 4

Содержание Krio

Страница 1: ...INSTRUKCJA ORYGINALNA KLIMATYZATOR WODNY KANWOD KRIO...

Страница 2: ...chowaj czujno uwa aj na wykonywane ruchy oraz sytuacj dooko a podczas korzystania z urz dzenia Nie u ywaj sprz tu je li jeste zm czony pod wp ywem narkotyk w alkoholu b d lek w Chwila nieuwagi podczas...

Страница 3: ...rz dzenia nale y sprawdzi czy charakterystyka pr du w sieci zgadza si z t na tabliczce znamionowej urz dzenia Pod czenie urz dzenia do sieci o innej charakterystyce pr du mo e skutkowa uszkodzeniem ur...

Страница 4: ...mer Naciskanie przycisku pozwala ustawi auto wy czenie wentylatora od 1 do 7 5 godzin co 0 5h Panel wskazuje wybrany czas a klimator b dzie dzia a przez wskazany okres czasu Aby zdezaktywowa auto wy c...

Страница 5: ...unkcje Ch odzenie nawil anie oczyszczanie CZYSZCZENIE I KONSERWACJA Na filtrze i padzie ch odz cym mo e osadza si kurz kt ry mo e wp ywa na dzia anie urz dzenia Zaleca si regularne czyszczenie klimato...

Страница 6: ...rz dzenia za pomoc szorstkich i r cych rodk w czysto ci 4 Wyczy obudow urz dzenia wilgotn cierk i osusz suchymi r cznikami 5 Podczas wykonywania czynno ci konserwacyjnych nale y u ywa r kawic roboczyc...

Страница 7: ...ictwem adresu mailowego serwis kt 24 eu gdzie nasi konsultanci ch tnie odpowiedz na Pa stwa pytania Firma KT 24 Sp z o o udziela gwarancji e urz dzenia s wolne od wad materia owych monta owych Terytor...

Страница 8: ...kowity czas realizacji reklamacji 9 Gwarant za po rednictwem autoryzowanego zak adu serwisowego ustosunkuje si do zg aszanych przez reklamuj cego roszcze w terminie 14 dni a usuni cie wady w przypadku...

Страница 9: ...ngi zawory c elementy skrzyni bieg w przek adni ko a z bate a cuchy pompy hydrauliczne d inne elementy piasty no a kliny zabezpieczaj ce amortyzatory o yska panewki ko a z bate bezpieczniki przeci eni...

Страница 10: ...tallic agents to the water tank These are harmful and may cause damage to the machine 6 If it is necessary to use the unit in humid conditions use a ground fault circuit interrupter 7 Be alert and pay...

Страница 11: ...tended use appropriate to the type of equipment taking into account its operating conditions and the type of task to be performed Use of the equipment for purposes other than those for which it is int...

Страница 12: ...and put it into standby mode 2 Speed Pressing this button will change the fan speed between low medium and high The top panel will indicate the currently set fan speed 3 Timer Pressing the button will...

Страница 13: ...he switch located on the unit casing To increase the cooling efficiency of the air conditioner it is recommended to use the frozen cartridge included in the kit Before using it place it in the freezer...

Страница 14: ...cause malfunction or permanent damage Cleaning and Maintenance 1 Disconnect the unit from the power supply before cleaning 2 Never immerse the base and power cord in water or rinse it under running wa...

Страница 15: ...due to defects in materials or installation 3 The warranty period begins on the date of purchase release of the product and is 24 months for all devices in case of consumer purchase 12 months for com...

Страница 16: ...aused by the user as a result of improper storage transportation improperly performed maintenance and repair actions caused by operating or storing the device in extremely adverse conditions i e high...

Страница 17: ...dard equipment clean with legible rating plate and prints We hereby declare that the device described below complies with the relevant basic safety directives both with regard to the basic design and...

Отзывы: