8
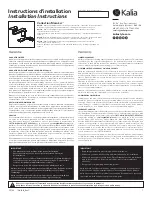
Step 4 - Floor Fixation
Install the
mounting base
on the floor using the provided
screws
. Use the
anchors
as required (fig. 4).
Etape 4 - Fixation au plancher
Fixer la
base montage
au sol à l’aide des
vis
fournies. Utiliser
les
chevilles
au besoin (fig. 4).
Step 3 - Water Supply hoses
Connection
Drill a 50 mm (2”) hole in the floor.
Connect and firmly tighten the
supply hoses
of the faucet to the
water supplies (fig. 3).
Note : The supply hose with a red identification on it should be
connected to the hot water supply and the other to cold water.
Etape 3 - Raccordement des
tuyaux d’alimentation
Percer un trou de 50 mm (2”) à l’endroit approprié dans le
plancher.
Connecter et serrer fermement les
tuyaux d’alimentation
du
robinet aux entrées d’eau chaude et froide (fig. 3).
Note : Le tuyau d’alimentation ayant une identification rouge
se connecte à l’arrivée d’eau chaude et l’autre à l’eau froide.
CHAUD
HOT
FROID
COLD
fig. 4
fig. 3
Содержание KONTOUR BF1288
Страница 12: ...12 Notes...
Страница 13: ...13 Notes...


