Page 31
KACO blueplanet 3.0 NX3 M2 KACO blueplanet 5.0 NX3 M2 KACO blueplanet 8.0 NX3 M2 KACO blueplanet 10.0 NX3 M2
KACO blueplanet 15.0 NX3 M2 KACO blueplanet 20.0 NX3 M2
Note:
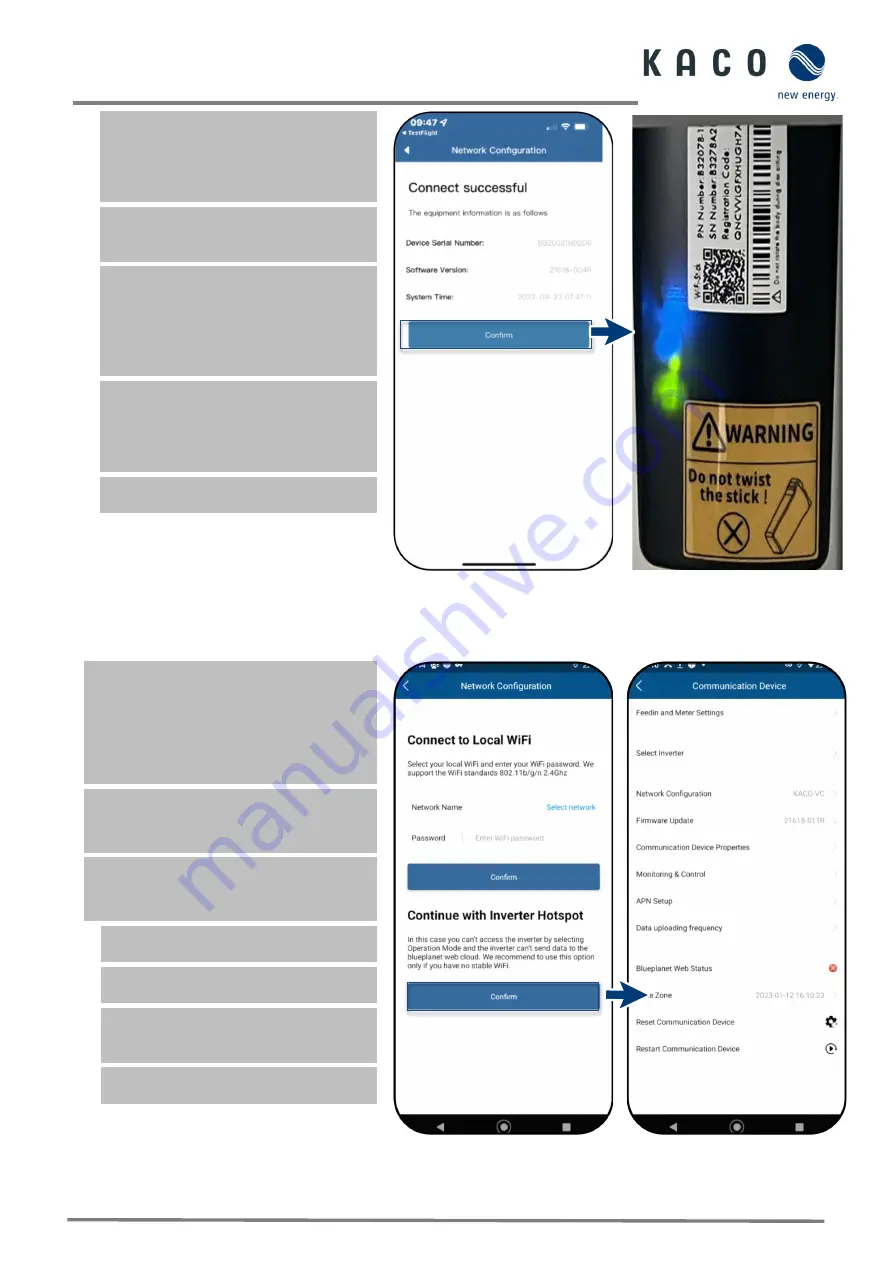
<Network configuration> displays
information on the device serial number,
software version and system time.
If the system time is different, you can set
it under <Timezone>.
8. <Confirm> that the communication unit
has been successfully connected to the
customer's WLAN network.
Note:
After a successful connection, the
green LED on the communication unit
lights up continuously and the blue LED
flashes. Please also refer to the description
of the signal elements in Chapter 9.4 on
page 27
Note:
The software version is the firmware
version of the
communication unit
. You
can update these as described in Chapter
9.14 on page 52 to bring the device up to
the current functional status.
»
The communication unit is registered on
the customer’s WLAN network.
Fig. 49.
Status when connection is
successful
Fig. 50.
Connection established –
blue LED flashes.
9.6.2
Connecting the device via a hotspot (alternative)
Note:
We recommend connecting the
communication unit to the customer’s WLAN
network.
However, if the signal quality of the network
is insufficient or non-existent, you can
connect the unit using a hotspot connection.
The “KACO NX Setup” APP from the
Android/iOS Store has been installed and
opened on your mobile end device.
A password is not required. However, you
must be standing right next to the device
to establish a connection.
1. Carry out action steps 1- 4 from Chapter
2. Establish the hotspot connection by
pressing <Confirm>.
Note:
If no communication unit is found,
your mobile end device may not be close
enough to the inverter.
»
The communication unit is connected to
your mobile end device.
Fig. 51.
Confirm inverter hotspot
connection
Fig. 52.
Connection to the
communication unit
established.


