KACO blueplanet 3.0 NX1 M2 KACO blueplanet 3.7 NX1 M2 KACO blueplanet 4.0 NX1 M2
KACO blueplanet 5.0 NX1 M2
Page 12
3
Additional functions
3.1
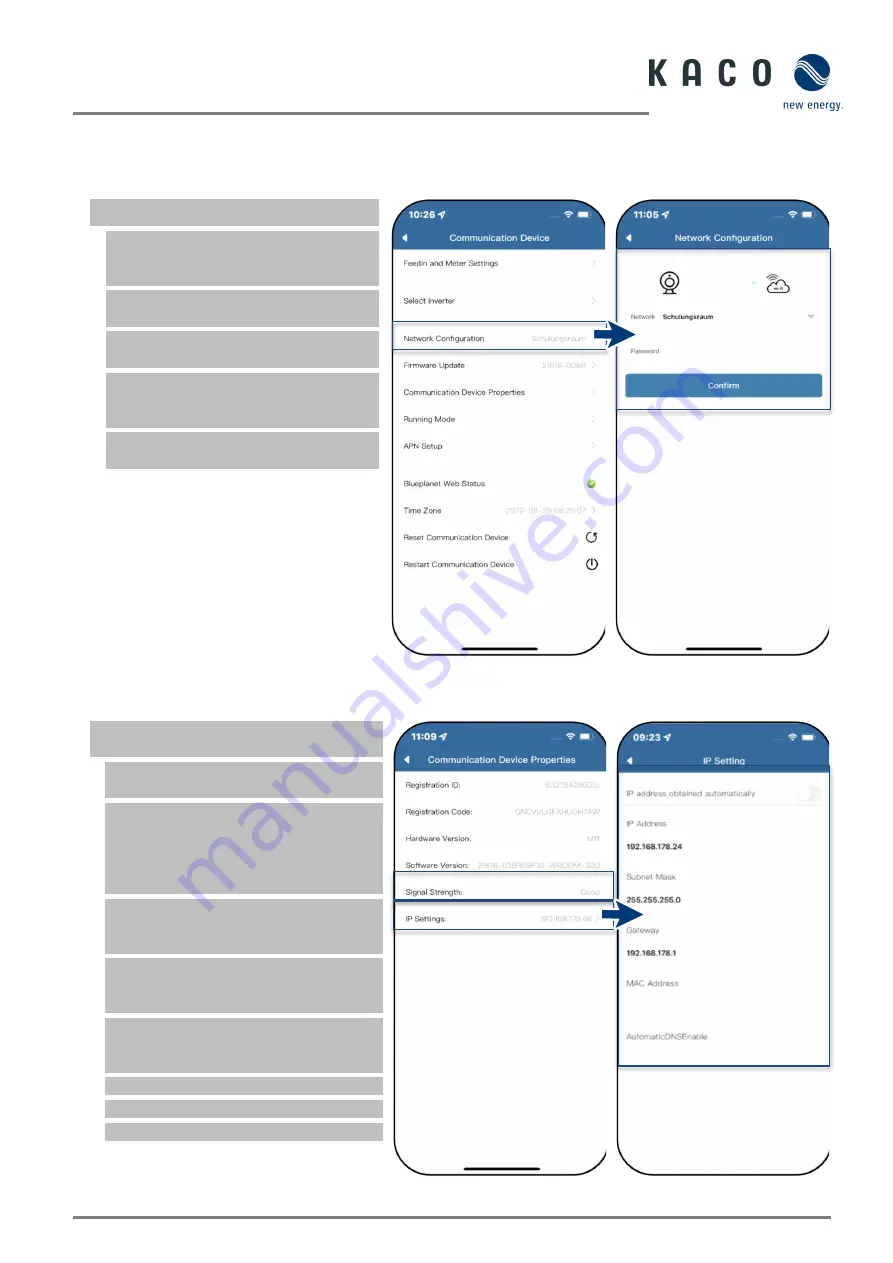
Changing the WLAN configuration
Open <Communication Device> menu.
Note:
You can change the WLAN
configuration easily when you replace the
device, router or mobile device.
1. Select the menu item <Network
Properties>.
2. Via the drop-down menu field, select
network in the field <Network Name>.
3. Enter password for Network and
confirm the change with <Confirm>
Button.
Note:
Data is transferred after approx. 30-
60 minutes.
Fig. 40.
Network Configuration
Fig. 41.
Change network
3.2
Displaying details of the WLAN connection
<Communication device Properties>
opened via <Communication device>.
1. First check the quality via <Signal
Strength> of the WLAN connection.
Note:
Interference-free communication
can only be ensured if the signal quality is
good. If necessary, improve the quality by
shortening the distance to the device and
removing interfering objects.
2. View the software version number of
the communication device and the
hardware version.
3. Option: Switch on DHCP if automatic IP
and subnet mask are to be used. (Only
possible via hotspot connection.)
4. If necessary, view or change the IP
address and subnet mask and check them
on the router.
5. Enter the IPv4 address of the gateway.
6. Assign DNS server address.
»
View details of the WLAN connection.
Fig. 42.
Viewing details of the WLAN
connection
Fig. 43.
Set static IP address


