Getting Started
21
2 Getting Started
2.1 Connecting the USB-62401 Module
1. Turn on the computer.
2. Connect the USB-62401 module to one USB 2.0 port on the
computer using the included USB cable.
3. The first time the USB-62401 module is connected, a New
Hardware message appears. It will take around 6 seconds to
load the firmware. When loading is complete, the LED indica
-
tor on the rear of the USB DAQ module changes from amber
to green and the New Hardware message closes.
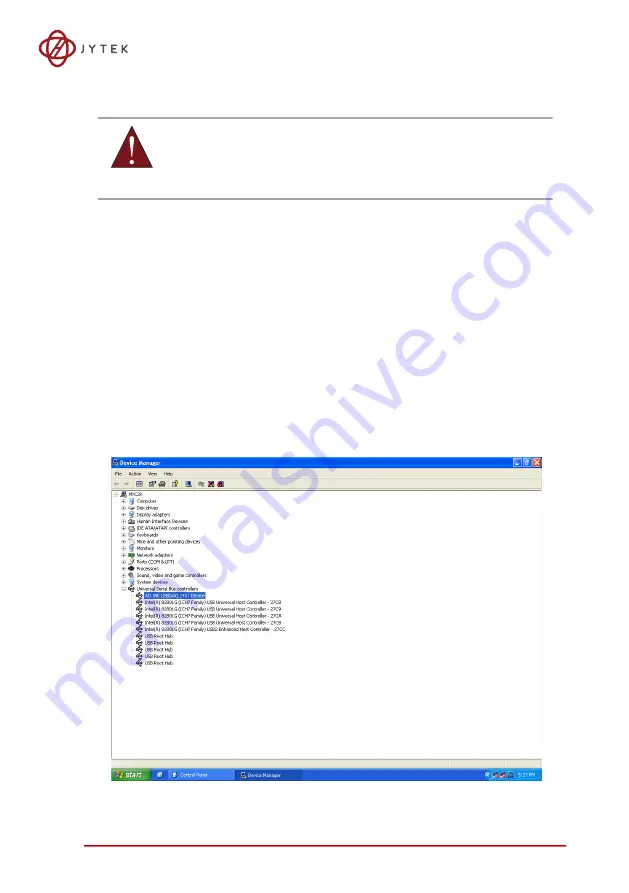
4. The USB-62401 module can now be located in the hardware
Device Manager, as shown.
Figure 2-1: USB-62401 Module in Windows Device Manager
WARNING:
The appropriate driver must be installed before you can connect the
USB DAQ to the computer system. Refer to Section 1.6: Driver Sup
port for Windows for driver support information.
Содержание USB-62401
Страница 2: ...ii...
Страница 8: ...viii List of Figures This page intentionally left blank...
Страница 10: ...x List of Tables This page intentionally left blank...
Страница 21: ...Introduction 11 Figure 1 3 USB 62401 Module Side View...
Страница 22: ...12 Introduction Figure 1 4 USB 62401 Module Front View...
Страница 24: ...14 Introduction Figure 1 7 Module In Stand Front View...
Страница 25: ...Introduction 15 Figure 1 8 Module Stand Top View 20 4 20 4 B 26...
Страница 29: ...Introduction 19...
Страница 30: ...20 Introduction This page intentionally left blank...
Страница 34: ...24 Getting Started Figure 2 4 Module Pre Rail Mounting Figure 2 5 Module Rail Mounted...
Страница 36: ...26 Getting Started This page intentionally left blank...
Страница 43: ...Operation 33 Figure 3 7 4 Wire RTD Connection Figure 3 8 3 Wire RTD Connection...
Страница 56: ...46 Calibration This page intentionally left blank...
Страница 62: ...52 Getting Service...


