1-8 (No.MB215)
SECTION 3
DISASSEMBLY
3.1
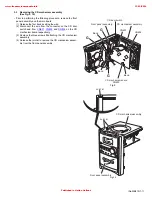
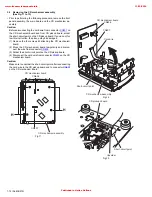
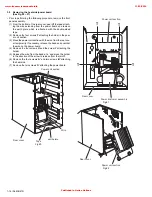
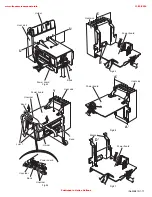
Removing the front panel assembly
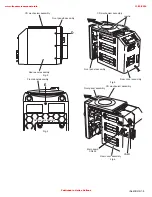
(See Fig.1 to 6)
(1) From the back of the body, remove the two screws
A
, the
two screws
B
and the two screws
H’
attaching the front
panel assembly.
(2) Remove the six screws
D
on both sides of the body.
(3) Remove the screw
E
on the bottom of the body.
(4) Move the front panel assembly in the direction of the arrow
and remove. Disconnect connector
CN402
,
CN801
on the
main board.
Caution:
When reassembling the front panel assembly, fit the right and
left tabs
a
to the notch.
Fig.1
Fig.2
CD mechanism assembly
Rear cover assembly
B
H'
A
Front panelh assembly
CD mechanism assembly
Rear cover assembly
D
www.freeservicemanuals.info
13/10/2016
Published in Heiloo Holland
Содержание UX-H300
Страница 37: ...3 15 MEMO www freeservicemanuals info 13 10 2016 Published in Heiloo Holland ...
Страница 50: ...2 9 Display section www freeservicemanuals info 13 10 2016 Published in Heiloo Holland ...
Страница 53: ...2 12 forward side reverse side CD board www freeservicemanuals info 13 10 2016 Published in Heiloo Holland ...
Страница 54: ...2 13 Trans board www freeservicemanuals info 13 10 2016 Published in Heiloo Holland ...


