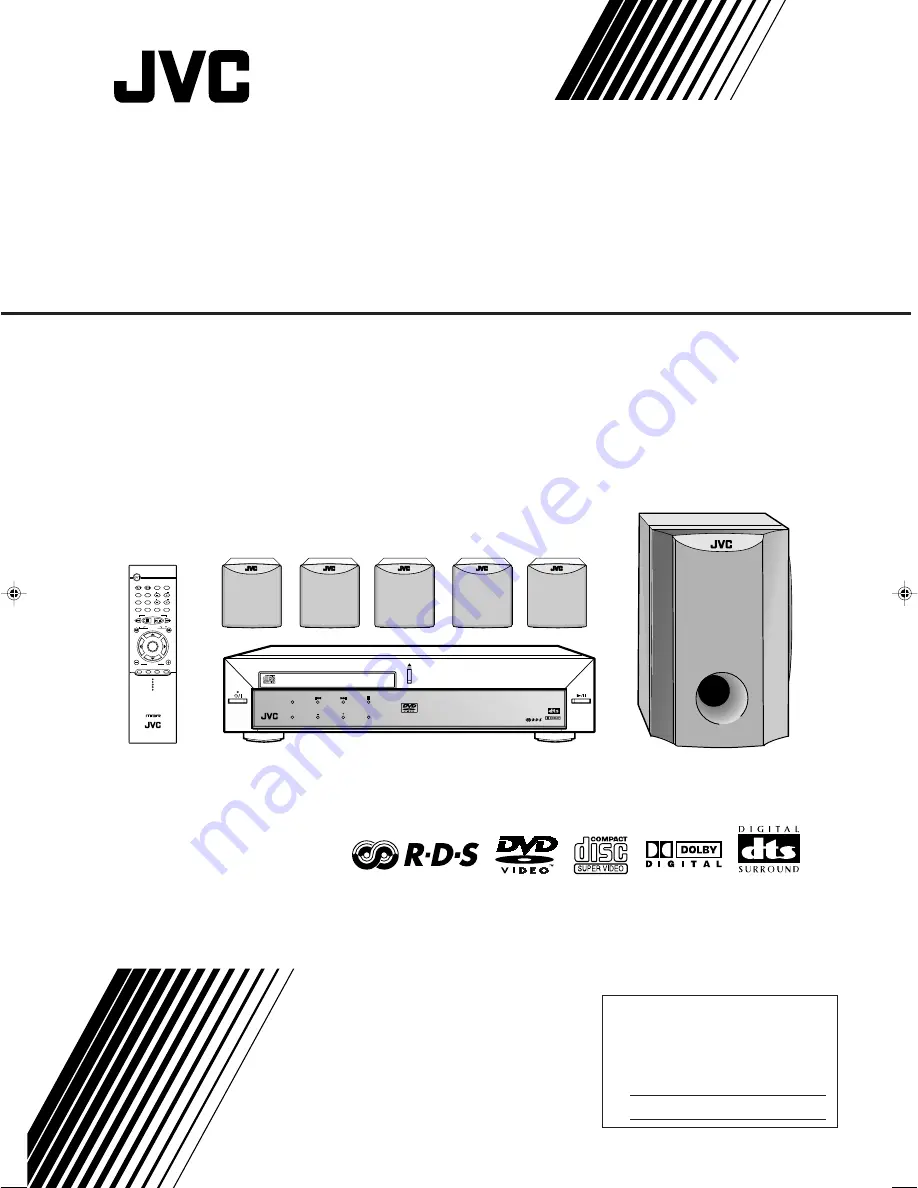
JVC SP-WA30 Скачать руководство пользователя страница 1

For Customer Use:

Enter below the Model No. and Serial 
No. which are located either on the rear, 
bottom or side of the cabinet. Retain this 
information for future reference.

Model No.

Serial No.

LVT0945-010B

[B]

INSTRUCTIONS

DVD DIGITAL CINEMA SYSTEM

TH-A30R

D I G I T A L

S U R R O U N D

D I G I T A L

STANDBY

AUDIO/FM MODE

DSP

VOLUME

SOURCE

DVD DIGITAL CINEMA SYSTEM TH-A30R

STANDBY/ON

DISPLAY

TV/VIDEO

TOP MENU

AUDIO

TUNING

ENTER

RDS

VCR CHANNEL

TUNER PRESET

DVD

FM/AM

AUX

MUTING

STANDBY/ON

VCR

VCR 

CONTROL

MENU

TV

AUDIO/

FM MODE SUBTITLE

RETURN

STEP

TV VOLUME

TV CHANNEL

VOLUME

B.SEARCH

F.SEARCH

DOWN

UP

REW

FF

RM-STHA30R

DVD CINEMA SYSTEM

DISPLAY

Consists of XV-THA30R, SP-XA30, SP-XSA30 and SP-WA30

TH-A30R[B]cover_ff.pm6

02.7.3, 11:58 AM

1

Содержание SP-WA30

Страница 1: ...30R D I G I T A L S U R R O U N D D I G I T A L STANDBY AUDIO FM MODE DSP VOLUME SOURCE DVD DIGITAL CINEMA SYSTEM TH A30R STANDBY ON DISPLAY TV VIDEO TOP MENU AUDIO TUNING ENTER RDS VCR CHANNEL TUNER PRESET DVD FM AM AUX MUTING STANDBY ON VCR VCR CONTROL MENU TV AUDIO FM MODE SUBTITLE RETURN STEP TV VOLUME TV CHANNEL VOLUME B SEARCH F SEARCH DOWN UP REW FF RM STHA30R DVD CINEMA SYSTEM DISPLAY Cons...

Страница 2: ...terminals in your plug proceed as follows The wire which is coloured blue must be connected to the terminal which is marked with the letter N or coloured black The wire which is coloured brown must be connected to the terminal which is marked with the letter L or coloured red IF IN DOUBT CONSULT A COMPETENT ELECTRICIAN CAUTION To reduce the risk of electrical shocks fire etc 1 Do not remove screws...

Страница 3: ...d XV THA30R Front Spacing 15 cm or more Floor Stand height 15 cm or more Wall or obstructions IMPORTANT FOR LASER PRODUCTS REPRODUCTION OF LABELS 1 CLASS 1 LASER PRODUCT 2 CAUTION Invisible laser radiation when open and interlock failed or defeated Avoid direct exposure to beam 3 CAUTION Do not open the top cover There are no user serviceable parts inside the Unit leave all servicing to qualified ...

Страница 4: ...equipment switched on when it is unattended unless it is specifically stated that it is designed for unattended operation or has a standby mode Switch off using the switch on the equipment and make sure that your family know how to do this Special arrangements may need to be made for infirm or handicapped people DON T use equipment such as personal stereos or radios so that you are distracted from...

Страница 5: ...ting the Subtitles 28 Selecting the Audio Languages 28 Selecting the Multi Angle Views 28 Checking the Remaining Time 29 Disc Menu Driven Playback 29 Moving to a Particular Portion Directly 29 Searching for a Particular Point 30 Repeating Playback 30 7 Repeat Play 30 7 A B Repeat 30 Programming the Playing Order of the Chapters Program Play 31 DVD Special Effect Playback 33 7 Still Picture Frame b...

Страница 6: ...channel indicators Indicates audio channels currently being played back p Main display Display window 1 2 3 4 5 6 7 8 L C R LFE LS S RS LINEAR PCM ST TITLE TUNED PROGRAM PBC MHz kHz RDS DSP 9 p Center Unit See pages in the parentheses for details Front Panel 1 STANDBY ON button and STANDBY lamp 10 14 2 AUDIO FM MODE button 28 38 45 3 Multi operation buttons 4 and 7 4 Disc tray 10 12 5 0 open close...

Страница 7: ...MA IN SLEE P SLEE P EFFECT EFFECT PROG RAM PROG RAM RE PE A RE PE AT RE PE A RE PE AT AN GL E AN GL E NT SC P NT SC PA L AL DIG ES T DIG ES T DSPMO DE DSPMO DE SE T UP SE T UP TEST TEST TONE ON E PR PROLOGIC OLOGIC SETTI NG SETTI NG SO UN D SO UN D SLO SLOW 1 2 3 4 5 6 7 8 9 10 ZO OM ZO OM A B A B RM STHA30R DVD CIN EMA SYSTEM PT Y PT Y PTYSEARCH PTYSEARCH PT Y PT Y VC R CO NT RO L F S EARC H B S ...

Страница 8: ...o rain or moisture Locations Install the center unit in a location that is level and protected from moisture The temperature around the center unit must be between 5 C and 35 C 41 F and 95 F Make sure there is good ventilation around the center unit Poor ventilation could cause overheating and damage the center unit Handling the center unit DO NOT touch the power cord with wet hands DO NOT pull on...

Страница 9: ...L terminal as temporary measure Extend the supplied FM antenna horizontally If reception is poor connect an outdoor antenna Before attaching a 75 Ω coaxial cable with a standard type connector disconnect the supplied FM antenna Center unit About the cooling fan A cooling fan is mounted on the rear panel of the center unit to prevent abnormal temperature inside the center unit thus assuring normal ...

Страница 10: ...r To right front speaker To left rear speaker To right rear speaker To subwoofer Left front speaker D I G I T A L S U R R O U N D D I G I T A L COMPACT DIGITAL VIDEO STANDBY AUDIO FM MODE DSP VOLUME SOURCE DVD DIGITAL CINEMA SYSTEM TH A30R STANDBY ON Center unit Y C COMP Center speaker MIN MIN MIN MIN Speaker Layout Diagram ...

Страница 11: ... is non directional you can place a subwoofer wherever you like Normally place it in front of you Left front speaker Right front speaker Right rear speaker Subwoofer Left rear speaker Center speaker If your speakers cannot be placed at the same distance from the listening position You can adjust the delay time of the center speaker and rear speakers For in depth information about adjusting the del...

Страница 12: ...izer between the source component and the center unit the sound output through this system may be distorted Connecting Audio Video Component Turn the power off to all components before connections Connect the other component to the center unit with the audio cord Use the cord supplied with the other component or purchase it at an electric appliance store Audio cord not supplied Y C COMP DBS Tuner ...

Страница 13: ...ideo cord supplied SCART cable not supplied TV connection The S video cord and the SCART cable are not supplied with this system Use the cords or cables supplied with the other component or purchase them at an electric appliance store For using the SCART cable C If S Video Y C separation is equipped for your TV set Y C COMP selector of the center unit to Y C You can get a better picture quality by...

Страница 14: ...Press 3 8 The disc tray closes LOADING appears for a while You can also start playback by closing the disc tray using 0 on the front panel 5 Adjust the Volume To increase the volume press and hold VOLUME To decrease the volume press and hold VOLUME CAUTION Always set the volume to the minimum before starting any source If the volume is set at its high level the sudden blast of sound energy can per...

Страница 15: ... 19 23 and 24 Note Before activating the Surround or DSP mode adjust the speaker setting to bring out the best performance from this system For in depth information about adjusting the speaker setting see Speaker Settings on pages 16 and 17 7 Stop Playback Press 7 twice Playback stops completely and DVD appears on the display The DVD player goes on working for 3 minutes after playback stops This s...

Страница 16: ...sc tray closes LOADING appears for a while You can also start playback by closing the disc tray using 0 on the front panel 5 Adjust the Volume To increase the volume press and hold VOLUME To decrease the volume press and hold VOLUME CAUTION Always set the volume to the minimum before starting any source If the volume is set at its high level the sudden blast of sound energy can permanently damage ...

Страница 17: ...Press 7 twice Playback stops completely and VCD or CD appears on the display The DVD player goes on working for 3 minutes after playback stops This system can memorize the end point even when you press 7 once When you start playback again by pressing 3 8 playback begins from where it has been stopped Resume play To remove the loaded disc Press 0 OPEN appears on the display and the disc tray comes ...

Страница 18: ...e remote control Press and hold TUNING or until the station frequency starts changing continuously on the display The system starts searching for a station On the front panel 1 Press 7 so that MANUAL appears on the display 2 Press and hold or 4 until the station frequency starts changing continuously on the display The system starts searching for a station Notes When a station of sufficient signal...

Страница 19: ...out Pro Logic modes see Creating Realistic Sound Fields on pages 18 and 22 Turning Off the Power with the Timer You can fall asleep while listening to music Sleep Timer From the remote control ONLY Press SLEEP Each time you press the button the shut off time changes as follows When the shut off time comes the system turns off automatically To check or change the time remaining until the shut off t...

Страница 20: ...IC indicator is lit on the display For Dolby Digital or DTS Digital Surround Before you start remember There is a time limit in doing the following steps If the setting is canceled before you finish start from step 1 again 1 Select and play a DVD encoded with Dolby Digital or DTS Digital Surround 2 Press SETTING repeatedly until one of delay time indications with the current setting appears on the...

Страница 21: ... with Dolby Surround 3 Press PRO LOGIC repeatedly on the remote control to select Dolby Pro Logic 4 Press SETTING repeatedly until one of delay time indications with the current setting appears on the display Each time you press the button the indication in the main display changes as follows R DLY Rear delay To register delay time for rear speakers from 15 msec to 30 msec The initial setting for ...

Страница 22: ...0 1 channel Therefore called 5 1 channel Since each channel is completely independent from the other channel signals to avoid interference you can obtain much better sound quality with much stereo and surround effects In addition Dolby Digital enables stereo rear sounds and sets the cutoff frequency of the rear treble at 20 kHz compared to 7 kHz for Dolby Pro Logic These facts enhance the sound mo...

Страница 23: ... analog software or Linear PCM digital software and can give you a real being there feeling When one of the DSP modes is selected the DSP indicator lights up on the display To check the speaker connections and settings using the test tone 1 Select and play a DVD encoded with Dolby Digital or DTS Digital Surround 2 Press TEST on the remote control The test tone comes out from the speakers except su...

Страница 24: ...ments To adjust the output balance for the front speakers go to the next step To adjust the output level for the subwoofer go to step 4 00 F 00 00 R 00 CEN Normal indication canceled SW REAR 00 F 00 00 R 00 CEN Normal indication canceled SW REAR 3 To adjust the output balance for the front speakers 1 Press SOUND repeatedly until the adjustment indication for the front speakers appears on the displ...

Страница 25: ...f you have already changed the setting another value will appear 00 F 00 00 R 00 CEN Normal indication canceled SW REAR SOUND 2 Press 3 or 2 to adjust the output balance 3 Decreases the left speaker output or restores the right speaker output 2 Decreases the right speaker output or restores the left speaker output Each output balance changes from OFF silence 06 most reduction to 00 no reduction 3 ...

Страница 26: ...P DSP MODE SLEEP TEST PRO LOGIC SETTING SOUND CLEAR REPEAT ANGLE SLOW SEARCH A B REPEAT RDS DISPLAY PTY PTY PTY SEARCH 2 3 DSP MODE SOUND PRO LOGIC AUX AUX 3 Press PRO LOGIC repeatedly on the remote control to select Dolby Pro Logic or Dolby 3 Stereo The PRO LOGIC indicator lights up on the display Each time you press the button the indication changes as follows Now you are ready to start adjustme...

Страница 27: ...is recommended that you make adjustments from your actual listening point while listening to reproduced sounds Output balance for the front speakers Output balance for the rear speakers Output level for the rear speakers Output level for the subwoofer DSP modes cannot be used with Dolby Surround Once one of DSP modes is activated Dolby Surround in use will be canceled When you play back a DVD enco...

Страница 28: ...Repeat 1 and 2 for setting the other speakers SOUND 00 F 00 00 R 00 CEN Normal indication canceled SW REAR SOUND ENTER 3 To adjust the output balance for the front speakers and the rear speakers 1 Press SOUND repeatedly until one of the following adjustment indications appears on the display Each time you press the button the adjustment indication on the display changes as follows 00 F Front 00 To...

Страница 29: ... Example 1 For example if a DVD disc contains some movies each movie may have its own title number and it may be further divided into some chapters On the other hand a VCD SVCD or CD consists of Tracks See Example 2 In general each song has its own track number On some discs each track may also be divided by Indexes When playing back a VCD SVCD with Playback Control PBC function you can select wha...

Страница 30: ... on a DVD or track only possible on a CD and VCD directly using the number buttons Pressing the number buttons before or during play allows you to start playing the title track number you want If your TV is turned on the on screen bar is pulled down automatically on the TV screen To select number 1 to 9 press the corresponding number button then press ENTER or wait for 5 seconds To select number 1...

Страница 31: ... the disc See page 28 for more details Showing the On Screen Bar You can show the following information on the TV screen while a disc is loaded From the remote control ONLY Press DISPLAY Each time you press the button the following on screen bar appears in sequence Some DVDs contain several audio languages subtitles and multi angle views When you find the following marks on the DVD or its package ...

Страница 32: ...2 DVD Playback Ex When the disc has 3 selections English French and Spanish Selecting the Subtitles While playing back a DVD containing subtitles in different languages you can select the subtitle to be displayed on the TV screen You can set your favorite subtitle language as the initial language shown on the screen See page 50 From the remote control ONLY Press SUBTITLE The on screen bar appears ...

Страница 33: ...H 1 2 3 4 5 6 7 8 9 0 Checking the Remaining Time While playing back a DVD you can check the remaining time to be played back From the remote control ONLY Press REMAIN The on screen bar and the current play time indication appear on the TV screen for a while Each time you press the button the following indication appears on the screen REMAIN TIME TITLE Select this to show the remaining time of the...

Страница 34: ...the button Repeat mode changes as follows REPEAT CHAPTER Current chapter will be repeated REPEAT TITLE Current title will be repeated REPEAT OFF Repeat play is canceled Normal play is resumed Note When the on screen bar is shown on the TV screen repeat mode indication also changes as follows 7 A B Repeat While playing you can also select a portion you want to repeat A B repeat is not performed bet...

Страница 35: ... player press 3 8 then 7 before going to the next step 2 Press PROGRAM The PROGRAM MENU screen appears on the TV screen PROGRAM appears on the display 3 Press ENTER 4 Press 3 or 2 to select a title number then ENTER 3 Increases the number 2 Decreases the number You can also select a title number using the number buttons 5 Press 3 or 2 to select a chapter number then ENTER 3 Increases the number 2 ...

Страница 36: ... select highlight a program step you want to modify then perform steps 3 to 5 on page 31 Before entering a new number press CLEAR repeatedly until appears on the number entry position To add a step Press or 5 to select highlight an empty program step then perform steps 3 to 5 on page 31 To move program step 11 to program step 10 press 5 when program step 11 is selected highlighted so that PREVIOUS...

Страница 37: ...tion playback while playing a DVD From the remote control ONLY Press SLOW repeatedly during playback or pause Each time you press the button slow motion speed changes as follows 7 Zoom You can zoom in on the picture while playing back a DVD From the remote control ONLY 1 Press ZOOM to zoom in Each time you press the button the picture is enlarged as follows 2 Press 3 2 5 to move the enlarged porti...

Страница 38: ...nother tracks see Basic VCD CD Operations on pages 12 13 and Basic Disc Operations on page 26 Checking the Remaining Time While playing back a VCD or CD you can check the remaining time From the remote control ONLY Press REMAIN The on screen bar appears on the TV screen for a while Each time you press the button the play time indication changes as follows REMAIN TIME TRACK Select this to show the ...

Страница 39: ...CK TIME TIME Moving to a Particular Portion Directly You can move to a particular portion scene on the track directly PBC function is canceled when you use this function From the remote control ONLY 1 Press SEARCH during playback or pause Each time you press the button the following indication appears on the TV screen 1 2 3 4 5 6 7 8 9 0 Disc Menu Driven Playback Only for VCD The Play Back Control...

Страница 40: ...on corresponding to the selected mode appears on your TV Each time you press the button repeat mode changes as follows REPEAT ONE Current track will be repeated REPEAT DISC All the tracks will be repeated REPEAT OFF Repeat play is canceled Normal play is resumed Note When the on screen bar is shown on the screen Repeat mode indication also changes as follows 7 A B Repeat While playing you can also...

Страница 41: ...screen again To stop during play Press 7 or PROGRAM on the remote control The PROGRAM MENU screen appears on the TV screen If you press 3 8 while this screen is shown the system starts program play To exit from program play From the remote control ONLY Press PROGRAM The PROGRAM MENU screen goes off and the opening screen appears The program you made is still kept in memory If you press 3 8 while t...

Страница 42: ...press CLEAR To modify a step press or 5 to select highlight an program step you want to modify then perform steps 3 and 4 Before entering a new number press CLEAR repeatedly until appears on number entry position To add a step press or 5 to select highlight an empty program step then perform steps 3 and 4 To move program step 11 to program step 10 press 5 when program step 11 is selected highlight...

Страница 43: ...w motion playback while playing a VCD From the remote control ONLY Press SLOW repeatedly during playback or pause Each time you press the button slow motion speed changes as follows 7 Zoom You can zoom in on the picture while playing a VCD From the remote control ONLY 1 Press ZOOM to zoom in Each time you press the button the picture is enlarged as follows 2 Press 3 2 5 to move the enlarged portio...

Страница 44: ...corded and played back MP3 files tracks can be recorded in directories or folders in PC terminology During recording the files and directories can be arranged in a way similar to arranging files and folder directories of computer data Root is similar to the root of a tree Every file and directory can be linked to the root In compliance with ISO 9660 the maximum allowable depth of nested directorie...

Страница 45: ... 3 8 again or ENTER To stop during playback Press 7 To remove the disc Press 0 on the front panel The disc tray comes out To close the disc tray press 0 again 1 Disc type DVD VCD SVCD CD MP3 2 Current track file and total number of the tracks on the disc Ex 1st track is playing out of 35 tracks recorded 3 Bit rate Ex Bit rate used for recording the loaded disc is 128 Kbps See the previous page 4 R...

Страница 46: ...M SETUP DSP MODE SLEEP TEST PRO LOGIC SETTING SOUND CLEAR REPEAT ANGLE SLOW SEARCH A B REPEAT 1 2 3 4 5 6 7 8 0 9 RDS DISPLAY PTY PTY PTY SEARCH REPEAT Button ENTER To do Start playback or go into a directory Select a track or directory 5 ENTER 5 5 and ENTER 5 5 5 5 SPRING SPRING1 MP3 SPRING2 MP3 SPRING3 MP3 SPRING4 MP3 SPRING5 MP3 SPRING SPRING1 MP3 SPRING2 MP3 SPRING3 MP3 SPRING4 MP3 SPRING5 MP3...

Страница 47: ...When the on screen bar is shown on the TV screen repeat mode indication also changes as follows REPEAT RANDOM REPEAT ONE REPEAT DIR REPEAT DISC REPEAT OFF Moving to a Particular Track Directly You can move to a particular track on the disc directly From the remote control ONLY 1 Press SEARCH during playback or pause TRACK appears on the TV screen 2 Press the number buttons to select a track number...

Страница 48: ...equency you want TUNING Increases the frequency TUNING Decreases the frequency The system starts searching for stations and stops when a station of sufficient signal strength is tuned in On the front panel 1 Press SOURCE repeatedly until the desired band appears on the display The last received station of the selected band is tuned in Each time you press the button the source changes as follows WA...

Страница 49: ...pears on the display TUNER PRESET UP Increases the preset number TUNER PRESET DOWN Decreases the preset number On the front panel 1 Press SOURCE repeatedly until the desired band appears on the display 2 Press 7 so that PRESET appears on the display Each time you press the button the operation mode of and 4 buttons alternates between PRESET and MANUAL PRESET Select this for using and 4 as the butt...

Страница 50: ...ol can be used for the tuner operation Press RDS DISPLAY while listening to an FM station to show the RDS signals Each time you press the button the display changes to show the following information To check the PTY press PTY SEARCH once so that the current PTY code appears NO PTY appears if no signal is sent About characters shown on the display When the display shows PS NAME RT or CT signals the...

Страница 51: ...peration 1 Press PTY SEARCH while listening to an FM station The currently selected PTY code appears on the display 2 Press PTY or PTY until the PTY code you want appears on the display For details see Description of the PTY codes on page 48 3 Press PTY SEARCH again while the PTY code selected in the previous step is still on the display The system searches FM preset stations stops when it finds t...

Страница 52: ...chamber music etc OTHER M Music not fitting into any of the other categories Classification of the PTY codes for some FM stations may be different from the above list WEATHER Weather reports and forecasts FINANCE Stock Market reports commerce trading etc CHILDREN Programs targeted at a young audience SOCIAL A Programs about sociology history geography psychology and society RELIGION Religious prog...

Страница 53: ...49 FM 1 FM 2 FM 3 FM 4 FM 5 FM 6 FM 7 FM 8 FM 9 FM 10 FM 11 FM 12 FM 13 FM 14 FM 15 AM 1 AM 2 AM 3 AM 4 AM 5 AM 6 AM 7 AM 8 AM 9 AM 10 AM 11 AM 12 AM 13 AM 14 AM 15 MEMO ...

Страница 54: ... menu You can select the following languages separately for each listed item on the menu For OSD LANGUAGE English Chinese Spanish French German Japanese and Korean For AUDIO SUBTITLE and MENU LANGUAGE English Chinese French German Japanese Russian Spanish Portuguese Korean and Original Available only for AUDIO and SUBTITLE When you want to operate the disc or enjoy its playback in the originally r...

Страница 55: ... JAPANESE RUSSIAN indicates the current setting Introducing the DVD Preference System You can set the DVD preference to match it to your usage and operating circumstances On the system setting menu you can set the following TV SCREEN Select the TV screen size for playing back a DVD recorded with 16 9 wide screen video signal 4 3 LB Select 4 3 LB Letter Box when the aspect ratio of your TV is 4 3 W...

Страница 56: ...corded with the video signals of 4 3 aspect ratio this setting does not take effect The pictures are displayed with full 4 3 aspect ratio or with 4 3 Letter Box To erase the Setup menu Press SETUP indicates the current setting SYSTEM LANGUAGES TV SCREEN RATING LEVEL 4 3 LB OFF Move Setup Exit 4 3 LB 4 3 PS 16 9 SETUP SYSTEM LANGUAGES TV SCREEN RATING LEVEL 4 3 LB OFF Move Setup Exit SYSTEM LANGUAG...

Страница 57: ...L 4 3 LB OFF Move Setup Exit SYSTEM LANGUAGES TV SCREEN RATING LEVEL 4 3 LB OFF Move Setup Exit SYSTEM LANGUAGES TV SCREEN ENTER PASSWORD 4 3 LB Move Setup Exit 6 Press or 5 to select highlight the level you want then press ENTER To erase the Setup menu Press SETUP again To change the password 1 Repeat steps 1 to 5 of Setting the Parental Rating Level procedure 2 Press or 5 to select highlight NEW...

Страница 58: ...8 9 0 PTY PTY PTY SEARCH RDS DISPLAY You can perform the following operations on the TV TV Turn on or off the TV TV VOLUME Adjust the volume TV VIDEO Set the input mode either TV or VIDEO TV CHANNEL Change the channels After pressing VCR CONTROL on the remote control you can perform the following operations on the VCR VCR Turn on or off the VCR VCR CHANNEL Change the channels 1 9 0 Select TV chann...

Страница 59: ...tsubishi 02 16 Nokia 23 Nordmende 13 14 24 Panasonic 08 23 27 Philips 02 20 22 Saba 13 14 22 24 Samsung 03 06 32 Sanyo 12 16 Schneider 12 Sharp 10 31 Sony 15 16 Telefunken 14 24 28 Thomson 13 14 24 33 34 Toshiba 07 16 19 21 Manufacturers codes for TV Operating Other Manufacturers TV You can use the remote control to operate other manufactures TV Refer also to the manuals supplied for the other pro...

Страница 60: ...o direct sunlight temperature extremes and moisture To clean the disc Wipe the disc with a soft cloth in a straight line from center to edge Maintenance Cleaning the unit Stains on the unit Should be wiped off with a soft cloth If the unit is heavily stained wipe it with a cloth soaked in water diluted neutral detergent and wrung well then wipe clean with a dry cloth Since the unit may deteriorate...

Страница 61: ...d the TV Initial setup TV screen size was incorrect The received signal is too weak The station is too far away The antenna is not connected correctly Lightning or electronic noise interferes with operation of the microcomputer Immediately after beginning to heat the room the unit was moved to a cold location causing condensation to form inside The remote control is not set for VCR operations The ...

Страница 62: ...W Audio CD Video CD Super Video CD MP3 disc DVD R Video format Power Requirements AC 230 V 50 Hz Power Consumption 120 W at operation 2 W in standby mode Dimensions W H D 350 mm 80 mm 365 mm Mass 6 5 kg Subwoofer SP WA30 Speaker 20 cm Bass reflex Magnetically Shielded Power Handling Capacity 110 W Impedance 4 Ω min Frequency Range 25 Hz to 200 Hz Dimensions W H D 249 mm 404 mm 335 mm Mass 6 5 kg e...

Страница 63: ......

Страница 64: ...VICTOR COMPANY OF JAPAN LIMITED EN 0602KSMMDWSAM J VC ...

Отзывы: