background image

For Customer Use:

Enter below the Model No. and Serial 
No. which are located either on the rear, 
bottom or side of the cabinet. Retain this 
information for future reference.

Model No.

Serial No.

LVT0692-001A

[J]

INSTRUCTIONS

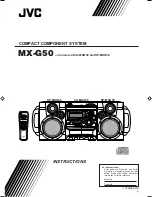
MX-G50

 — 

Consists of CA-MXG50 and SP-MXG50.

COMPACT COMPONENT SYSTEM

SP-MXG50

SP-MXG50

CA-MXG50

CANCEL

/DEMO

PRESET

COMPU PLAY CONTROL

PLAY & EXCHANGE

STANDBY/ON

STANDBY

DISC CHANGE

SOUND

MODE

SUBWOOFER

LEVEL

CD-R

/RW  PLAYBACK

COMPACT

DIGITAL AUDIO

COMPACT COMPONENT SYSTEM

MX-G50

CLOCK
/ TIMER

DISPLAY

PHONES

REPEAT

PROGRAM

REC START

/STOP

CD
REC START

DUBBING

TAPE A

TUNING

SET

TAPE B

RANDOM

EJECT

PLAY

FULL - LOGIC CONTROL

A

EJECT

REC/PLAY

CD SYNCHRO RECORDING

B

DISC SKIP

VOLUME

VOLUME

+

RM–SMXG50A REMOTE CONTROL

STANDBY/ON

1

2

3

4

5

6

7

8

9

10

+10

SLEEP

SUBWOOFER

LEVEL

SOUND

MODE

FM MODE

TAPE A/B

FADE 

MUTING

FM/AM

AUX

/

CD 

TAPE 

MX-G50[J].COVER_f

00.12.22, 5:15 PM

1

Содержание MX-G50

Страница 1: ...EMO PRESET COMPU PLAY CONTROL PLAY EXCHANGE STANDBY ON STANDBY DISC CHANGE SOUND MODE SUBWOOFER LEVEL CD R RW PLAYBACK COMPACT DIGITAL AUDIO COMPACT COMPONENT SYSTEM MX G50 CLOCK TIMER DISPLAY PHONES REPEAT PROGRAM REC START STOP CD REC START DUBBING TAPE A TUNING SET TAPE B RANDOM EJECT PLAY FULL LOGIC CONTROL A EJECT REC PLAY CD SYNCHRO RECORDING B DISC SKIP VOLUME VOLUME RM SMXG50A REMOTE CONTR...

Страница 2: ...NO USER SERVICEABLE PARTS INSIDE REFER SERVICING TO QUALIFIED SERVICE PERSONNEL RISK OF ELECTRIC SHOCK DO NOT OPEN The lightning flash with arrowhead symbol within an equilateral triangle is intended to alert the user to the presence of uninsulated dangerous voltage within the product s enclosure that may be of sufficient magnitude to constitute a risk of electric shock to persons The exclamation ...

Страница 3: ...e Canada THIS DIGITAL APPARATUS DOES NOT EXCEED THE CLASS B LIMITS FOR RADIO NOISE EMISSIONS FROM DIGITAL APPARATUS AS SET OUT INTHE INTERFERENCE CAUSING EQUIPMENT STANDARD ENTITLED DIGITAL APPARATUS ICES 003 OF THE DEPARTMENT OF COMMUNICATIONS CET APPAREIL NUMERIQUE RESPECTE LES LIMITES DE BRUITS RADIOELECTRIQUES APPLICABLES AUX APPAREILS NUMIRIQUES DE CLASSE B PRESCRITES DANS LA NORME SUR LE MAT...

Страница 4: ...unit Leave sufficient distance between the unit and the TV Keep the speakers away from the TV to avoid interference with TV DO NOT install the unit in a location near heat sources or in a place subject to direct sunlight excessive dust or vibration We would like to thank you for purchasing one of our JVC products Before operating this unit read this manual carefully and thoroughly to obtain the be...

Страница 5: ...FM and AM Broadcasts 11 Tuning in a Station 11 Presetting Stations 11 Tuning in a Preset Station 11 Playing Back CDs 12 Loading CDs 12 Playing Back the Entire Discs Continuous Play 12 Basic CD Operations 13 Programming the Playing Order of the Tracks Program Play 13 Playing at Random Random Play 14 Repeating Tracks or CDs Repeat Play 14 Prohibiting Disc Ejection Tray Lock 14 Playing Back Tapes 15 ...

Страница 6: ... MODE SUBWOOFER LEVEL CD R RW PLAYBACK COMPACT DIGITAL AUDIO COMPACT COMPONENT SYSTEM MX G50 CLOCK TIMER DISPLAY PHONES REPEAT PROGRAM REC START STOP CD REC START DUBBING TAPE A TUNING SET TAPE B RANDOM EJECT PLAY FULL LOGIC CONTROL A EJECT REC PLAY CD SYNCHRO RECORDING B 1 6 7 8 9 p q y w e r t 5 CANCEL DEMO PRESET COMPU PLAY CONTROL f d a j h i u o s g 2 3 4 ...

Страница 7: ... these buttons also turns on the unit i DISC CHANGE button 12 13 o Remote sensor SOUND MODE control 10 a PRESET buttons 11 4 reverse search forward search buttons 9 13 18 20 s SUBWOOFER LEVEL control 10 Continued d VOLUME control 10 f TUNING buttons 11 1 fast left fast right buttons 13 15 g TAPE A button 15 TAPE B button 15 h REC START STOP button 16 CD REC START button 17 DUBBING button 17 j Deck...

Страница 8: ...VOLUME button 10 u fast forward forward search button 11 13 15 i 7 stop button 12 17 1 2 7 8 r e w p 9 3 t u i DISC SKIP VOLUME VOLUME RM SMXG50A REMOTE CONTROL STANDBY ON 1 2 3 4 5 6 7 8 9 10 10 SLEEP SUBWOOFER LEVEL SOUND MODE FM MODE TAPE A B FADE MUTING q y FM AM AUX CD TAPE 5 6 4 PLAY EXCHANGE STANDBY ON STANDBY DISC CHANGE SOUND MODE SUBWOOFER LEVEL CD R RW PLAYBACK COMPACT DIGITAL AUDIO COM...

Страница 9: ...atteries together DO NOT expose batteries to heat or flame DO NOT leave the batteries in the battery compartment when you are not going to use the remote control for an extended period of time Otherwise it will be damaged from battery leakage UM 4 AAA IEC R03 Continued 2 Connecting Antennas FM antenna 1 Attach the FM antenna to the FM 75 Ω coaxial terminal 2 Extend the FM antenna 3 Fasten it up in...

Страница 10: ...m metallic parts of the unit connecting cords and the AC power cord AM antenna Vinyl covered wire not supplied AM loop antenna supplied Connecting Speakers Speaker cord red black 2 From left main speaker s terminals Speaker cord red black Speaker cord blue black 1 Press and hold the clamp of the speaker terminal on the rear of the unit 2 Insert the end of the speaker cord into the terminal Match t...

Страница 11: ...he display demonstration press any button on the unit or on the remote control If you press one of the following buttons source buttons 0 CD tray open close button and disc number buttons CD1 CD2 CD3 The unit turns on To start the display demonstration manually Press and hold DEMO on the unit for more than 2 seconds To optical digital input Before connecting the other equipment remove the protecti...

Страница 12: ...e hour digits start flashing again DAILY Canceled ON TIME ON TIME CLOCK REC 3 Press 4 or to adjust the minute then press SET To check the clock time Press DISPLAY while playing any source Each time you press the button the source indication and the clock time alternate on the display To adjust the clock again If you have adjusted the clock before you need to press CLOCK TIMER repeatedly until CLOC...

Страница 13: ...Reinforcing the Bass Sound This function only affects the playback sound but does not affect your recording Turn the SUBWOOFER LEVEL control clockwise to increase the subwoofer sound or counterclockwise to decrease it The subwoofer level can be adjusted in 4 steps LEVEL 1 LEVEL 4 If you turn the control clockwise up to the volume LEVEL 4 MAX flashes on the display for a few seconds When using the ...

Страница 14: ...can preset 30 FM and 15 AM stations In some cases test frequencies have been already memorized for the tuner since the factory examined the tuner preset function before shipment This is not a malfunction You can preset the stations you want into memory by following the presetting method There is a time limit in doing the following steps If the setting is canceled before you finish start from step ...

Страница 15: ...ess DISC CHANGE on the unit or DISC SKIP on the remote control The carrousel rotates by 120 4 Press 0 again The carrousel closes About the disc indicators Each disc indicator corresponds to the disc tray of the same number The disc marker lights up for the disc number you have selected The disc indicator rotates while the corresponding CD is being played The disc indicator goes off when the unit h...

Страница 16: ...ps to the beginning of the next or succeeding tracks If you press and hold 4 on the unit before playing You can change the tracks continuously To go to another track directly using the number buttons Pressing the number button s before or during play allows you to start playing the track number you want Ex For track number 5 press 5 For track number 15 press 10 then 5 For track number 20 press 10 ...

Страница 17: ...ogram other tracks you want To program tracks from the same disc repeat step 4 To program tracks from a different disc repeat steps 3 and 4 6 Press CD 6 The tracks are played in the order you have programed To stop during play press 7 To exit from Program play mode press PROGRAM again before or after play so that the unit enters Continuous play mode The program you have made is stored in memory un...

Страница 18: ... slowly When the tape plays to the end the deck automatically stops The use of the C 120 or thinner tape is not recommended since characteristic deterioration may occur and this tape easily jams in the pinch rollers and the capstans To stop during play press 7 To operate the other deck press TAPE A or TAPE B or TAPE A B on the remote control then TAPE 3 To fast forward the tape press or on the rem...

Страница 19: ...l and the SUBWOOFER LEVEL control Thus during recording you can adjust the sound you are actually listening to without affecting the recording level While recording you can hear sound modes through the speakers or headphones However the sound is recorded without these effects see page 10 If recordings you have made have excessive noise or static the unit may be too close to a TV Place the unit awa...

Страница 20: ...ator lights up on the display Deck B starts recording and the CD player starts playing When the recording is done the CD player and deck B stop To stop during CD Synchro Recording press 7 To remove the cassette press EJECT 0 for deck B Dubbing Tapes On the unit ONLY 1 Press TAPE 3 then 7 2 Put the source cassette in deck A and a recordable cassette into deck B 3 Press DUBBING Dubbing starts DUBBIN...

Страница 21: ... B is lit on the display When using the external component as the source to play Set the timer equipped with the external component at the same time On the unit ONLY 1 Press CLOCK TIMER until DAILY appears on the display indicator lights up and the DAILY daily timer indicator also starts flashing on the display Each time you press the button the timer setting modes change as follows DAILY Canceled...

Страница 22: ...re shown on the display in sequence for your confirmation Using Recording Timer With Recording Timer you can make a tape of a radio broadcast automatically You can set the timer whether the system is on or off How Recording Timer actually works The unit automatically turns on tunes into the specified station sets the volume level to MIN and starts recording when the on time comes the indicator fla...

Страница 23: ...r and Sleep Timer at the same time pay special attention to the shut off time 4 Set the on time you want the unit to turn on 1 Press 4 or to set the hour then press SET 2 Press 4 or to set the minute then press SET OFF TIME appears for 2 seconds then the unit enters off time setting mode 5 Set the off time you want the unit to turn off on standby 1 Press 4 or to set the hour then press SET 2 Press...

Страница 24: ...alified person such as your dealer for service Troubleshooting Symptom No sound is heard Hard to listen to broadcasts because of noise The disc sound is discontinuous The disc tray does not open or close The disc does not play The cassette holders cannot be opened Impossible to record Operations are disabled Unable to operate the unit from the remote control Cause Connections are incorrect or loos...

Страница 25: ...Hz 14 000 Hz Wow and flutter 0 15 WRMS General Power requirement AC 120 V 60 Hz Power consumption 130 W 200 VA at operation 17 W on standby Dimensions approx 270 mm x 317 mm x 447 mm W H D 1011 16 in x 121 2 in x 175 8 in Mass approx 8 9 kg 19 6 lbs Supplied accessories See page 6 Speaker section SP MXG50 Type 3 way bass reflex type Twin Hyper Power Drive Subwoofer Speaker units Subwoofer 13 5 cm ...

Страница 26: ...E CENTER LOCATIONS 10 New Maple Avenue Pine Brook NJ 07058 9641 973 396 1000 5665 Corporate Avenue Cypress CA 90630 0024 714 229 8011 13 Cummings Park Woburn MA 01801 781 376 9100 705 Enterprise Street Aurora IL 60504 8149 630 851 7855 10700 Hammerly Suite 110 Houston TX 77043 713 935 9331 890 Dubuque Avenue South San Francisco CA 94080 1804 650 871 2666 1500 Lakes Parkway Lawrenceville GA 30243 5...

Страница 27: ... attachment not provided with the products or if the model number or serial number has been altered tampered with defaced or removed 2 Initial installation and installation and removal for repair 3 Operational adjustments covered in the Owner s Manual normal maintenance video and audio head cleaning 4 Damage that occurs in shipment due to act of God and cosmetic damage 5 Signal reception problems ...

Страница 28: ...VICTOR COMPANY OF JAPAN LIMITED 1200KSMMDWSAM EN J VC ...

Отзывы:

Похожие инструкции для MX-G50