background image

LCT2389-001A-A

0208KTH-II-IM

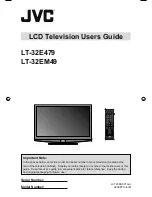
LCD Television Users Guide

Important Note:

In the spaces below, enter the model and serial number of your television (located at the 
rear of the television cabinet).  Staple your sales receipt or invoice to the inside cover of this 
guide.  Keep this user’s guide in a convenient place for future reference.  Keep the carton 
and original packaging for future use.

Model Number:

Serial Number:

LT-32E479
LT-32EM49

LCT2389-001A-A English.indd   1

LCT2389-001A-A English.indd   1

3/25/08   3:31:31 PM

3/25/08   3:31:31 PM

Содержание LT-32EM49

Страница 1: ...rial number of your television located at the rear of the television cabinet Staple your sales receipt or invoice to the inside cover of this guide Keep this user s guide in a convenient place for future reference Keep the carton and original packaging for future use Model Number Serial Number LT 32E479 LT 32EM49 ...

Страница 2: ... Label 26 Photo Viewer 26 Aspect Ratio 28 TV 29 Closed Caption 29 C C Setting 29 Tuner Mode 30 Auto Scan 30 Table of Contents Add Channel 31 Edit Channel 31 V Chip 31 Guide 31 TV V Chip 32 Password 33 MPAA 33 Can Eng 34 Can Fre 35 TVPG 36 Sound 37 MTS 37 Digital Audio ML 37 Surround 37 Sound Status 38 Audio Reset 38 Power 39 Sleep Timer 39 Power Indicator 39 Illumination 39 Setting 40 Plug In Menu...

Страница 3: ...ety To prevent electric shock do not use this polarized plug with an extension cord receptacle or other outlet unless the blades can be fully inserted to prevent blade exposure CAUTION To reduce the risk of electric shock Do not remove cover or back No user serviceable parts inside Refer servicing to qualified service personnel The lightning flash with arrowhead symbol within an equilateral triang...

Страница 4: ...he apparatus When a cart is used use caution when moving the cart apparatus combination to avoid injury from tip over 13 Unplug this apparatus during lightning storms or when unused for long periods of time 14 Refer all servicing to qualified service personnel Servicing is required when the apparatus has been damaged in any way such as power supply cord or plug is damaged liquid has been spilled o...

Страница 5: ...ified installers See the included manual on mounting procedures JVC is not responsible for damages or injuries due to improper mounting Use with other wall mounting unit is capable of resulting in instability or causing possible injury 22 Make enough room for inserting and removing the power plug Place the TV as close to the outlet as possible The main power supply for this TV is controlled by ins...

Страница 6: ... select channels Once you run the Auto Tuner Setup which detects and programs all the channels your TV is receiving through the RF input every channel number available from your cable company will appear in your television s Channel Summary and they will all be marked as available for scanning Even though every channel is detected and appears as available you will only be able to view those that y...

Страница 7: ... NOT rub or scrub the TV harshly Wipe the set gently with a soft cloth The screen is treated with an electrostatic proof coating When it gets dirty wipe it gently with a soft cloth If the screen is very dirty wipe it down with a cloth dipped in a diluted kitchen cleaner and thoroughly wrung out Then wipe immediately after with a clean dry cloth Do not apply alcohol organic solvents like acetone ac...

Страница 8: ...the bottom cover and the screw supplied into the hole 1 Place the TV face down on a soft cloth on a table 2 Remove the five screws from the back of the TV 3 Pull out the stand from the TV Note To re install the stand reverse the procedure from 3 to 1 Precautions ...

Страница 9: ...re correct Place the end in the unit first AA Alkaline AA Alkaline AA Batteries x 2 Television x 1 Remote Control x 1 Package Contents Make sure you have the following Insert the batteries Precautions If this symbol is shown it is only valid in the European Union TV Stand Philips type screws x 5 ...

Страница 10: ...ange channels Change the aspect ratio of the image on your TV screen See page 20 Used to select sub channels Digital channels only See page 21 Listen to a program in stereo mono or another language SAP Depending on availability in the program See page 21 Lets you decide the input channel and select it After pressing the remote 0 9 buttons press TUNE Lets you go back to the previously selected chan...

Страница 11: ... page 22 Save your favorite channels See page 19 Turns the TV volume to 0 Press again to restore the volume Raise or lower the volume Choose different display settings according to personal preferences See page 20 Choose several types of sound frequencies See page 20 Used to navigate through the TV s onscreen menus Go back to a previous onscreen menu or to correct a mistake ...

Страница 12: ...on Some of the connection terminals are color coded for easy connection with the proper cables Front Panel Side Panel INPUT MENU CHANNEL VOLUME OK BACK POWER PHOTO VIEWER TV Basic Controls Power Lamp Remote Control Sensor Input Change the input MENU Used to access the TV s onscreen menus CH Move sequentially through the channels VOL Raises or lowers the volume POWER Turn the TV on or off Photo Vie...

Страница 13: ...PB R R R PR R PR VIDEO Y VIDEO Y AUDIO COMPONENT AUDIO COMPONENT AUDIO OUT INPUT 1 HDMI ANALOG AUDIO INPUT 5 INPUT 4 S VIDEO DIGITALAUDIO OPTICALOUT LC34324 001A INPUT 1 INPUT 2 INPUT 3 75 Ω VHF UHF H Audio System G Game Console Video Camera STB Digital Cable satellite Tuner Box DVD Player C E D For more detailed information see pages 42 46 This is used when you are using HDMI analog audio Antenna...

Страница 14: ...Component Video Audio Component Video Audio INPUT 4 or 5 D S Video Audio S Video Cable Audio Cable INPUT 4 AUDIO Input E Composite Video Audio Composite Video Audio INPUT 4 or 5 F Antenna Cable VHF UHF RF Cable 75Ω VHF UHF Good Best AUDIO G OPTICAL INPUT OPTICAL AUDIO Cable DIGITAL AUDIO OPTICAL OUT H AUDIO INPUT L R Audio Cable AUDIO OUT L R TV Basic Controls ...

Страница 15: ...io L R Analog See page 45 Input Component Analog SD 480i 480p HD 1080i 720p Audio L R Analog See page 43 Input S Video Analog Audio L R Analog Input Composite Analog Audio L R Analog See page 43 ATSC Digital NTSC Analog Clear QAM Digital See page 42 Output Audio L R Digital PCM or Dolby Digital See page 44 Output Audio L R Analog Fixed See page 44 TV Basic Controls ...

Страница 16: ...his setting in the Plug in Menu Setup 1 Turn on the TV 1 Select a language Time Zone Choose the time zone you live in D S T Changes the clock automatically for daylight saving time On Off 1 Change settings 3 Set time attribute Set Time Attribute Atlantic ON Next Time Zone D S T 2 Select an item 4 Move to next menu 3 Select Next 2 Set the language Set Language Langue Idioma English Next 2 Select Ne...

Страница 17: ...ribute Start Scan Exit Set TV Attribute Tuner Mode Air 2 Select an item 4 Start scanning channels 3 Select Start Scan Tuner Mode Choose Air antenna or Cable Initial setup Continued Cable Users After your auto tuner setup is complete you may depending on the type of hookup have only 1 channel usually 2 3 or 4 in the auto tuner memory This is normal ...

Страница 18: ...ive oblique cone speakers provide excellent TV sound quality OmniSurround sound provides you 4 different settings based on the program you are watching The equalizer will fine tune your listening preferences 3 Full connectivity with 3 HDMI 2 Component 1 S video and others The variety of connections are explained on pages 47 to 51 x 3 x 2 x 1 4 Aspect mode will show every pixel you are getting in H...

Страница 19: ... the CH button as you memorize the channel TV Returns to the TV mode as you are watching a video DVD etc Note Press TUNE and RETURN TV buttons This will memorize the current channel to return to while you scan through the other channels To cancel press TUNE and RETURN TV buttons again Allows you to save channels you like so you can view them easily First you must register the channels you like Not...

Страница 20: ... according to personal preferences You can access this feature for each input TV V1 V2 V3 V4 V5 Standard Dynamic Theater Game See page 23 Allows you to adjust the way the image appears on your TV based on the format that is being received Panorama Cinema Full Panorama Zoom Cinema Zoom Regular Slim See page 28 Notes You can select the aspect mode by pressing the ASPECT button You can also access th...

Страница 21: ...there are other languages you can change the language by pressing the ML MTS button Keep the TV in stereo mode to get the best sound quality The sound will work in stereo mode even if a certain broadcast is in mono sound only Choose the mono setting to reduce excessive noise on a certain channel or broadcast MTS is unavailable if your television s Input source is V1 V2 V3 V4 V5 ML MTS will not wor...

Страница 22: ...ange or adjust the setting Picture D Video Status Tint Color Picture Bright Detail Backlight Color Temp Color Management Dynamic Gamma Smart Picture Digital VNR MPEG NR Natural Cinema Video Reset Game 50 25 50 43 94 50 Cool Off On On High On On 0 0 0 0 0 0 100 100 100 100 100 100 Select Change Adjust To enter an item s sub menu Select Enter To the previous screen 4 Close the menu Note Depending on...

Страница 23: ...Resets the picture display to the factory settings Dynamic Gives a vivid picture with better contrast when viewing in a brightly lit room Theater Gives a rich film like look to video when viewing in a dimly lit room Game Used for when you are playing video games connected to your TV Notes Each mode is memorized for each input TV V1 V2 V3 V4 V5 connected to the TV Each video status setting has a se...

Страница 24: ... Detail Allows you to adjust the level of fine detail on your TV Backlight Allows you to adjust the brightness of the internal lamp which effects the overall brightness of the TV Customizing your TV Dynamic Gamma Allows you see more detail in very dark or bright areas so these areas don t appear muddied Normally this feature should be left On for optimum picture quality On Off Color Management All...

Страница 25: ...p or 1080p signal Natural Cinema cannot be selected Natural Cinema is only applied for SD 480i and HD 1080i signals MPEG NR This function effects the block noise removal and mosquito NR Noise Reduction simultaneously Note When you are receiving digital channels block noise removal will have no effect Digital VNR AThis function can be selected to change the effect of Digital VNR Video Noise Reducti...

Страница 26: ...t Operate OK Back BACK Exit MENU VCR DVD PVR D VHS STB SAT AMP GAME CAM DISC Blu ray DVD Default 1 Select 2 Set Photo Viewer Connect your USB Mass Storage Class device to the Photo Viewer terminal on the TV Photo Viewer allows you to enjoy your digital pictures stored on your USB Mass Storage Class devices You can view them on the TV in high quality 1 Choose Slide Show Interval of 5 10 or 20 secon...

Страница 27: ...270º Rotation 360º Rotation Start Slideshow TUNE 4 To go back to main menu press the MENU button Notes Gently pull out your USB device from the Photo Viewer terminal after finishing the Photo Viewer menu Use the supplied USB cable that came with your device Do not use HUB or USB extension cable Photo Viewer cannot be guaranteed to work with all USB Mass Storage Devices It may take some time to dis...

Страница 28: ... Black bars will appear along the picture s sides The picture will be centered within the boundaries of the 16 9 screen Slim This aspect mode shrinks the screen of a 16 9 broadcast to 4 3 There are some programming that is already stretched by mistake at broadcasting companies so this mode corrects it Black side bars will appear Notes Depending on the signal format some aspect modes are unavailabl...

Страница 29: ... CC Setting Tuner Mode Autoscan Add Channel Edit Channel V Chip Guide ON Air Select Operate OK Back BACK Exit MENU C C Setting You can choose between caption or text in MODE to decide how closed captioning will appear 1 Select 2 Adjust Analog CC Digital CC Font Font Size Font Style Text Color Text Opacity BG Color BG Opacity Edge Color Smart Caption CC1 Service1 Default Standard Default Default De...

Страница 30: ...ckground box color for the Closed Captioning text BG Opacity Choose how translucent the background box color for the Closed Captioning text Edge Color Choose the color of the border of the background box color for the Closed Captioning text Smart Caption Will display closed captioning when you press the MUTING button only on channels where the broadcast contains closed captioning Tuner Mode Autosc...

Страница 31: ...the number buttons on the remote Enter the new channel number Please insert scan number or range to Start 1 Select 2 Start 1 Select Set 2 Next Main Channel List 3 2 3 3 5 0 6 0 6 0 11 0 14 0 22 1 36 0 63 0 CH 2 CH 3 CH 1 TV continued V Chip Allows you to block channels or content that you deem inappropriate for children See pages 32 36 Guide You can view program information Digital channels only N...

Страница 32: ...s connected to the TV For Canadian viewers only V CHIP is designed specifically for the US and may not work properly in Canada When entering the password When you try and access the V Chip menu Please input password will appear Press the 0 button four times on your remote to access the V Chip menu for the first time Allows you to block channels or content that you deem inappropriate for children 1...

Страница 33: ...Password Confirm Password OK Clear Please set password first to act Select Operate OK Back BACK Exit MENU Customizing your TV 1 Set a new password Next Enter the four digit number Enter the four digit number 2 Confirm and set Set MPAA Picture Display TV Sound Power Setting Closed Caption CC Setting Tuner Mode Autoscan Add Channel Edit Channel V Chip Guide ON Air Password MPAA Can Eng Can Fre TVPG ...

Страница 34: ... intended for viewers 18 years or younger Viewing Guidelines At the beginning of a program the program will display its rating and the content it contains Except for unrated programming A program can contain any or all of the following V FV VIOLENCE FANTASY VIOLENCE S SEXUAL CONTENT L Strong LANGUAGE D Suggestive DIALOG Customizing your TV Can Eng This setting is based on the Canada ratings system...

Страница 35: ...ontent not appropriate for children 8 13 years old 14 14 Years or Older Parents strongly urged to use their discretion in allowing viewing by persons under 14 18 Adult Intended for viewers 18 years or older Can Fre This feature is the same as V CHIP SET CANADIAN RATINGS ENG but in French Picture Display TV Sound Power Setting Closed Caption CC Setting Tuner Mode Autoscan Add Channel Edit Channel V...

Страница 36: ...riate for older children Intended for children 7 years or older TV G General Audience Suitable for all ages TV PG Parental Guidance Suggested Suitable for all ages with parental guidance TV 14 Parents Strongly Cautioned Intended for viewers 14 years or older TV MA Mature Audiences Only Intended for viewers 18 years or older Viewing Guidelines In addition to the above ratings you can also block or ...

Страница 37: ...tain broadcast is in mono sound only Choose the mono setting to reduce excessive noise on a certain channel or broadcast MTS unavailable if your television s input source is V1 V2 V3 V4 V5 ML MTS will not work when you are using the HDMI Picture Display TV Sound Power Setting 10 10 10 10 10 10 10 10 10 10 MTS Digital Audio ML Surround Sound Status 100Hz 330Hz 1KHz 3 3KHz 10KHz Audio Reset Mono Non...

Страница 38: ...s You can choose several types of sound modes Speech Jazz Classic Rock User Note If you select User you can customize the various sound frequencies Audio Reset Resets all sound adjustments at once to the default settings Sound continued ...

Страница 39: ...and you can change the interval If you don t press the SLEEP button within 60 seconds the TV will turn off Sleep Timer Power Indicator Illumination OFF High Low Picture Display TV Sound Power Setting Select Operate OK Back BACK Exit MENU Power Indicator Allows you adjust the brightness of the blue power indicator light High Light is brightly lit Low Light is dimly lit Off Light is off Illumination...

Страница 40: ... clearly On Off Allows you to change the TV s onscreen menu languages to English French or Spanish Adjust your TV s clock for Daylight Savings On Off Choose the time zone you live in and the clock sets automatically Atlantic Eastern Central Mountain Pacific Alaska Hawaii Plug In Menu Time Zone D S T Language Noise Mute Front Panel Lock Transparency Auto Shut Off System Info Auto Demo Optical Out P...

Страница 41: ...ratories System Info You can confirm the TV s software version Front Panel Lock This allows you to lock the buttons on the side of the TV On Off Auto Demo Auto Demo explains this TV s features to you Notes Please complete the Initial Setup menu first The Auto Demo mode will start automatically when the Initial Setup menu is completed If you press any button on the television or remote with the exc...

Страница 42: ...NPUT 3 75 Ω VHF UHF TV Rear Panel Cable or Antenna Output Connect a Cable Box INPUT 1 INPUT 2 INPUT 3 75 Ω VHF UHF Cable or Antenna Output CABLE BOX IN OUT TV Rear Panel Note To view channels on your cable box make sure your TV s channel is set to 2 3 or 4 depending on the area you live in Connecting Your Devices Notes If you are able to receive ATSC Digital terrestrial signal High Definition HD b...

Страница 43: ... 1 HDMI ANALOG AUDIO INPUT 5 INPUT 4 S VIDEO DIGITALAUDIO OPTICALOUT LC34324 001A DVD Player Y PB PR OUT AUDIO OUT R L Green Blue Red TV Rear Panel INPUT 4 Connect a Camcorder TV Rear Panel INPUT 4 Camcorder L L L PB L PB R R R PR R PR VIDEO Y VIDEO Y AUDIO COMPONENT AUDIO COMPONENT AUDIO OUT INPUT 1 HDMI ANALOG AUDIO INPUT 5 INPUT 4 S VIDEO DIGITALAUDIO OPTICALOUT LC34324 001A Note To watch video...

Страница 44: ... R R PR R PR VIDEO Y VIDEO Y AUDIO COMPONENT AUDIO COMPONENT AUDIO OUT INPUT 1 HDMI ANALOG AUDIO INPUT 5 INPUT 4 S VIDEO DIGITALAUDIO OPTICALOUT LC34324 001A Connect an Amplifier or Home Theater System TV Rear Panel AUDIO OUT Speaker Speaker Amplifier or Home Theater System L L L PB L PB R R R PR R PR VIDEO Y VIDEO Y AUDIO COMPONENT AUDIO COMPONENT AUDIO OUT INPUT 1 HDMI ANALOG AUDIO INPUT 5 INPUT...

Страница 45: ...IO input can only be used with INPUT 1 INPUT 1 INPUT 2 INPUT 3 75 Ω VHF UHF TV Rear Panel INPUT 1 Digital TV Device TV Rear Panel INPUT 1 HDMI ANALOG AUDIO After the connections have been made tighten the screw to secure the cables DIGITAL OUT L R AUDIO OUT L L L PB L PB R R R PR R PR VIDEO Y VIDEO Y AUDIO COMPONENT AUDIO COMPONENT AUDIO OUT INPUT 1 HDMI ANALOG AUDIO INPUT 5 INPUT 4 S VIDEO DIGITA...

Страница 46: ... TV can accept 480i 480p 720p 1080i and 1080p signals via HDMI This JVC television can accept a variety of HD signals including 720 60p 1080 60i and 1080 60p It does not accept a 1080 24p signal Please note that in some cases a Blu ray or HD DVD may only offer the choice of 1080 60i or 1080 24p In this case it is necessary to choose the 1080 60i output Please refer to your Blu ray HD DVD manual fo...

Страница 47: ...are still working and properly installed Make sure the remote has a clear sight path to the TV You may be too far from the TV You must be within 23 feet 7 meters Make sure the set did not become unplugged Perhaps the Auto Shut Off is set See page 41 Check to see if the Sleep Timer was set See page 39 Tint and Color may be improperly adjusted See page 24 The Video Status mode may be turned to the w...

Страница 48: ...r doesn t work properly Screen is 80 black Stereo or bilingual programs can t be heard The Closed Caption Text mode is on Turn it off in the Closed Caption Menu page 29 Make sure the MTS settings are correct See page 37 This OSD appears when the digital channel that you have selected is too weak to receive or no signal is being detected for that channel Weak Signal appears It appears when that cha...

Страница 49: ... FIX FIX 500mVrms 4dBs Low Impedance Input 4 5 Terminal 480i S Input 4 Y 1 Vp p positive 75 ohms negative sync provided C 0 286 Vp p burst signal 75 ohms Video 1 Vp p 75 ohms Audio 500 mVrms 4dBs high impedance Input 4 5 Terminal Component Terminal 1080i 720p 480p 480i Y 1 Vp p positive 75 ohms negative sync provided PB PR 0 7 Vp p 75 ohms Input 1 2 3 Terminal HDMI Input Terminal Video 1080p 1080i...

Страница 50: ...50 ...

Страница 51: ...51 ...

Страница 52: ...JVC COMPANY OF AMERICA Division of JVC Americas Corp 1700 Valley Road Wayne New Jersey 07470 JVC CANADA INC 21 Finchdene Square Scarborough Ontario Canada M1X 1A7 JVC Loves the Earth ...

Отзывы: