background image

7

ESP

A

Ñ

OL

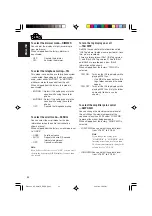
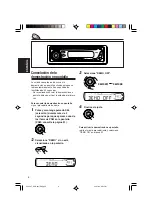
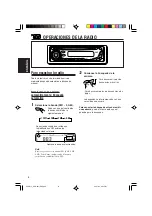
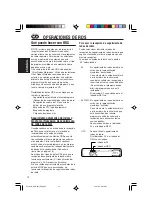
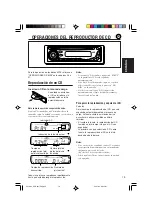
Ajuste del reloj

También podrá ajustar el sistema del reloj ya sea
a 24 horas o 12 horas.

1

Pulse y mantenga pulsado
SEL (selección) durante más de 2
segundos para que aparezca uno de
los ítems de PSM en la pantalla.
(PSM: consulte la página 31).

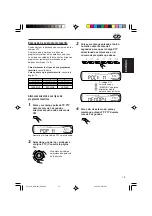
2

Ajuste la hora.

1

Seleccione “CLOCK H” (hora) si no está
visualizado en la pantalla.

2

Ajuste la hora.

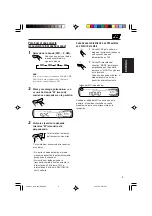
1

2


3

Ajuste los minutos.

1

Seleccione “CLOCK M” (minutos).

2

Ajuste los minutos.

1

2

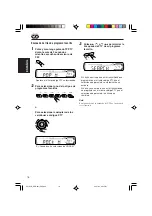
4

Ajuste el sistema de reloj.

1

Seleccione “24H/12H”.

2

Seleccione “24H” o “12H”.

1

2

5

Finalice el ajuste.

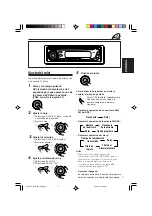
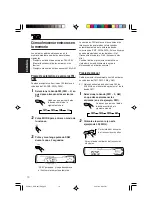
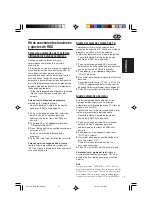
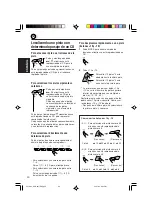
Para verificar la hora actual en el reloj o
cambiar el modo de pantalla

Pulse DISP (pantalla) repetidamente.
Cada vez que pulsa el botón, la
pantalla cambia de la manera
siguiente:

• Durante la operación de una emisora AM y

FM sin RDS:

Durante la operación de la emisora FM RDS:

Durante la operación del disco:

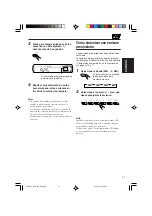
Notas:

• Mientras se está reproduciendo un CD

convencional, aparecerá “NO NAME” para el
título del disco/ejecutante y el título de la pista.

• Para el cambio de indicación durante la

reproducción de un CD Text o un disco MP3,
consulte también las páginas 22 y 25.

Durante el apagado:

La unidad se enciende y la hora del reloj aparece
durante 5 segundos. Luego, la unidad se apaga.

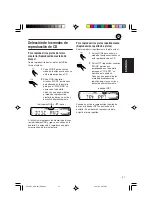
Frecuencia

Reloj

Tiempo de reproducción

transcurrido

Reloj

Título del 

disco/ejecutante

Título de 

la pista

Nombre

de la emisora

Frecuencia

de la emisora

Tipo de programa

Reloj

SP05-07_KD-G401[EU]f.p65

24/11/03, 9:23 PM

7

Содержание KD-G401

Страница 1: ... installation et les raccordements se référer au manuel séparé Montaj ve ba lantΩlar için di er elkitabΩna bakΩn This unit is equipped with the display demonstration To cancel it see page 6 Esta unidad está equipada con la demostración en indicación Para cancelarla consulte la página 6 Cet appareil est équipé d une fonction de démonstration des affichages Pour l annuler référez vous à la page 6 Bu...

Страница 2: ...orks as MO monaural button To use these buttons for original functions again after pressing MODE wait for 5 seconds without pressing any of these buttons until the functions mode is cleared Pressing MODE again also clears the functions mode SEL select standby on attenuator Time countdown indicator IMPORTANT FOR LASER PRODUCTS 1 CLASS 1 LASER PRODUCT 2 CAUTION Do not open the top cover There are no...

Страница 3: ...ohibiting disc ejection 22 MP3 INTRODUCTION 23 What is MP3 23 How are MP3 files recorded and played back 23 MP3 OPERATIONS 24 Playing an MP3 disc 24 Locating a file or a particular portion on a disc 25 Selecting MP3 playback modes 27 SOUND ADJUSTMENTS 28 Selecting preset sound modes C EQ custom equalizer 28 Adjusting the sound 29 OTHER MAIN FUNCTIONS 30 Changing the general settings PSM 30 Detachi...

Страница 4: ...y RPT repeat button u RND random button i MODE button o DISP display button 4 buttons a control panel release button s down button 10 button Display window d Tuner reception indicators MO monaural ST stereo f RDS indicators TP PTY AF REG g MP3 indicator h CD indicator j Playback mode item indicators RND random disc folder RPT repeat k LOUD loudness indicator l EQ equalizer indicator Sound mode C E...

Страница 5: ...olume level press the button briefly again If you turn the control dial you can also restore the sound To turn off the power Press and hold for more than one second SEE YOU appears then the unit turns off If you turn off the power while listening to a disc disc play will start from where playback has been stopped previously next time you turn on the power CAUTION on Volume Setting Discs produce ve...

Страница 6: ...u use the unit for the first time To cancel the display demonstration follow the procedure below 1 Press and hold SEL select for more than 2 seconds so that one of the PSM items appears on the display PSM see page 31 2 Select DEMO if not shown on the display 3 Select DEMO OFF 4 Finish the setting To activate the display demonstration repeat the same procedure and select DEMO ON in step 3 DEMO OFF ...

Страница 7: ...or change the display mode Press DISP display repeatedly Each time you press the button the display changes as follows During AM and FM non RDS station operation During FM RDS Station operation During disc operation Notes While playing a conventional CD NO NAME appears for the disc title performer and the track title For indication change while playing a CD Text or an MP3 disc see also pages 22 an...

Страница 8: ...e FM bands FM1 FM2 FM3 You can use any one of them to listen to an FM broadcast 2 Start searching for a station When a station is received searching stops To stop searching before a station is received press the same button you have pressed for searching To search for stations of lower frequencies To search for stations of higher frequencies Selected band appears Lights up when receiving an FM ste...

Страница 9: ... button the frequency keeps changing in 50 kHz intervals for FM and 9 kHz for AM MW LW until you release the button When an FM stereo broadcast is hard to receive 1 Press MODE to enter the functions mode while listening to an FM stereo broadcast 2 Press MO monaural while MODE is still flashing on the display so that MONO appears on the display Each time you press the button monaural mode turns on ...

Страница 10: ...nds SSM flashes then disappears when automatic preset is over Local FM stations with the strongest signals are searched and stored automatically in the band number you have selected FM1 FM2 or FM3 These stations are preset in the number buttons No 1 lowest frequency to No 6 highest frequency When automatic preset is over the station stored in number button 1 will be automatically tuned in Manual p...

Страница 11: ...uning in to a preset station You can easily tune in to a preset station Remember that you must store stations first If you have not stored them yet see Storing stations in memory on pages 10 and 11 1 Select the band FM1 3 AM Each time you press the button the band changes as follows 2 Select the number 1 6 for the preset station you want Note You can also use the 5 up or down button on the unit to...

Страница 12: ...ramme in its finest reception no matter where you drive See the illustration on page 18 Two types of the RDS data are used to make Network Tracking Reception work correctly PI Programme Identification and AF Alternative Frequency Without receiving these data correctly from the RDS station you are listening to Network Tracking Reception will not operate To use Network Tracking Reception You can sel...

Страница 13: ...ears on the display and this unit automatically tunes in to the station The volume changes to the preset TA volume level see page 17 and the traffic announcement can be heard If the TP indicator flashes TA Standby Reception is not yet activated since the station being received does not provide the signals used for TA Standby Reception To activate TA Standby Reception you need to tune in to another...

Страница 14: ...cator either lights up or flashes If the PTY indicator lights up PTY Standby Reception is activated If a station starts broadcasting the selected PTY programme this unit automatically tunes in to the station If the PTY indicator flashes PTY Standby Reception is not yet activated since the station being received does not provide the signals used for PTY Standby Reception To activate PTY Standby Rec...

Страница 15: ...avorite programme types 1 Press and hold TP PTY for more than 2 seconds while listening to an FM station 2 Select one of the twenty nine PTY codes See page 18 Selected code name appears on the display 3 Press and hold the number button for more than 2 seconds to store the PTY code selected into the preset number you want 4 Press and hold TP PTY for more than 2 seconds to exit from this mode The la...

Страница 16: ...TY code as you selected the station will not change Note In some areas the PTY search will not work correctly To search for your favorite programme type 1 Press and hold TP PTY for more than 2 seconds while listening to an FM station 2 To select one of your favorite programme type or To select any one of the twenty nine PTY codes Ex When ROCK M is selected The last selected PTY code appears EN12 1...

Страница 17: ...rocedure and select ON in step 3 by turning the control dial clockwise Note You must stay tuned to the same station for more than 2 minutes after setting AUTO ADJ to ON Otherwise the clock time will not be adjusted This is because the unit takes up to 2 minutes to capture the CT data in the RDS signal Other convenient RDS functions and adjustments Automatic selection of the station when using the ...

Страница 18: ... any aspect of belief or faith or the nature of existence or ethics PHONE IN Programmes where people can express their views either by phone or in a public forum TRAVEL Programmes about travel destinations package tours and travel ideas and opportunities LEISURE Programmes concerned with recreational activities such as gardening cooking fishing etc JAZZ Jazz music COUNTRY Country music NATION M Cu...

Страница 19: ...rmer and then track title will automatically appear To stop play and eject the CD Press 0 CD play stops and the CD automatically ejects from the loading slot The source changes to the tuner you will hear the last received station If you change the source CD play also stops without ejecting the CD Next time you select CD as the source CD play starts from where playback has been stopped previously N...

Страница 20: ...eginning of the current track Each time you press the button consecutively the beginning of the previous tracks is located and played back To go to a track quickly 10 and 10 buttons 1 Press MODE to enter the functions mode while playing a CD 2 Press 10 or 10 First time you press 10 or 10 button the track skips to the nearest higher or lower track with a track number of multiple ten ex 10th 20th 30...

Страница 21: ...play The current track starts playing repeatedly RPT indicator Selecting CD playback modes To play back tracks at random Disc Random Play You can play back all tracks on the CD at random 1 Press MODE to enter the functions mode while playing a CD 2 Press RND random while MODE is still flashing on the display so that DISC RND appears on the display Each time you press the button disc random play mo...

Страница 22: ...e the CD Text information manually select text display mode while playing a CD Text Press DISP display repeatedly Each time you press the button the display changes as follows Notes The display shows up to 8 characters at one time and scrolls if there are more than 8 characters See also To select the scroll mode SCROLL on page 32 Some characters or symbols will not be shown and be blanked on the d...

Страница 23: ... PC terminology During recording the files and folders can be arranged in a way similar to arranging files and folders of computer data Root is similar to the root of a tree Every file and folder can be linked to and be accessed from the root The illustration below shows an example of how MP3 files are recorded on a CD R or CD RW how they are played back and how they are searched for on this unit ...

Страница 24: ...tion When playback starts folder and file names or ID3 tags will automatically appear See also page 25 If you change the source or turn the power off disc playback stops without ejecting the disc Next time you select the CD player as the source or turn the power on disc play starts from where playback has been stopped previously To stop play and eject the disc Press 0 Playback stops and the disc a...

Страница 25: ...g this operation you can only hear intermittent sounds The elapsed playing time also changes intermittently on the display To skip to the next or previous files Press 4 briefly while playing to skip back to the beginning of the current file Each time you press the button consecutively the beginning of the previous files is located and played back Press and hold 4 while playing a disc to reverse th...

Страница 26: ...r does not contain any MP3 files You cannot directly select a folder with a number greater than 12 To select a particular file in a folder press or 4 after selecting the folder To go to a particular file quickly within the current folder 10 and 10 buttons 1 Press MODE to enter the functions mode while playing a disc 2 Press 10 or 10 First time you press 10 or 10 button the file skips to the neares...

Страница 27: ...t file or all the files in the current folder repeatedly 1 Press MODE to enter the functions mode while playing an MP3 disc 2 Press RPT repeat while MODE is still flashing on the display so that TRK RPT or FLDR RPT appears on the display Each time you press the button the repeat play mode changes as follows Mode Active Plays repeatedly indicator TRK RPT RPT indicator The current or lights up speci...

Страница 28: ...und on page 29 Selecting preset sound modes C EQ custom equalizer You can select a preset sound mode C EQ custom equalizer suitable to the music genre There is a time limit in doing the following procedure If the setting is canceled before you finish start from step 1 again 1 Press MODE to enter the functions mode 2 Select the sound mode you want Each time you press the button the sound modes chan...

Страница 29: ...made is stored for the currently selected sound mode C EQ including USER 2 If you are using a two speaker system set the fader level to 00 3 Normally the control dial works as the volume control So you do not have to select VOL to adjust the volume level 4 Depending on the amplifier gain control setting See page 32 for details 2 Adjust the setting 3 Repeat steps 1 and 2 to adjust the other items T...

Страница 30: ...Press and hold SEL select for more than 2 seconds so that one of the PSM items appears on the display See page 31 2 Select the PSM item you want to adjust 3 Adjust the PSM item selected OTHER MAIN FUNCTIONS 4 Repeat steps 2 and 3 to adjust the other PSM items if necessary 5 Finish the setting Ex When you select DIMMER EN30 33_KD G401 E_EX_EU f p65 26 11 03 2 29 PM 30 ...

Страница 31: ...fier gain control Preferred Setting Mode PSM items For detailed operations of each PSM items refer to the pages listed in the table Indications Selectable values items Factory preset See settings page DEMO ON DEMO OFF DEMO ON 6 00 0 00 OFF OFF ON 32 LOW PWR HIGH PWR HIGH PWR 32 12H 24H OFF ON 24H ON 17 AF AF AF REG OFF 12 13 VOL 00 VOL 30 or 50 VOL 20 OFF ON OFF 17 17 OFF OFF 29 programme types se...

Страница 32: ...ing DISP display for more than one second To turn the tag display on or off TAG DISP An MP3 file can contain file information called ID3 Tag where its album name performer track title etc are recorded There are two versions ID3v1 ID3 Tag version 1 and ID3v2 ID3 Tag version 2 If both ID3v1 and ID3v2 are recorded on a disc ID3v2 information will be shown When shipped from the factory TAG ON is selec...

Страница 33: ... panel out of the unit 3 Put the detached control panel into the provided case Attaching the control panel 1 Insert the left side of the control panel into the groove on the panel holder 2 Press the right side of the control panel to fix it to the panel holder Note on cleaning the connectors If you frequently detach the control panel the connectors will deteriorate To minimize this possibility per...

Страница 34: ...ithium coin battery product number CR2025 USING THE REMOTE CONTROLLER back side back side 3 Return the battery holder Insert again the battery holder by pushing it until you hear a clicking sound WARNING Store the battery in a place where children cannot reach If a child accidentally swallows the battery consult a doctor immediately Do not recharge short disassemble or heat the battery or dispose ...

Страница 35: ...he source changes 7 Functions the same as the control dial on the main unit Note These buttons do not function for the preferred setting mode adjustment KD G402 and KD G401 are equipped with the steering wheel remote control function If your car is equipped with the steering wheel remote controller you can operate the unit using the controller See the Installation Connection Manual separate volume...

Страница 36: ...ctions Insert a CD into the loading slot Insert the CD correctly Causes The volume level is set to the minimum level Connections are incorrect The built in microcomputer may have functioned incorrectly due to noise etc Signals are too weak The aerial is not connected firmly CD is inserted upside down CD R CD RW is not finalized CD is locked The CD player may have functioned incorrectly You are dri...

Страница 37: ... configuration Playback order is determined when the files are recorded This sometimes occurs during play This is caused by how the files are recorded on the disc The current folder does not contain any MP3 file The current disc does not contain any MP3 file This unit can only display alphabets capital A Z numbers and a limited number of symbols Symptoms Disc cannot be played back Noise is generat...

Страница 38: ...ions carefully Use only finalized CD Rs or CD RWs Some CD Rs or CD RWs may not be played back on this unit because of their disc characteristics and for the following reasons Discs are dirty or scratched Moisture condensation on the lens inside the unit The pickup lens inside the unit is dirty CD RWs may require a longer readout time since the reflectance of CD RWs is lower than that of regular CD...

Страница 39: ...Ω Alternate Channel Selectivity 400 kHz 65 dB Frequency Response 40 Hz to 15 000 Hz Stereo Separation 30 dB Capture Ratio 1 5 dB MW Tuner Sensitivity 20 µV Selectivity 35 dB LW Tuner Sensitivity 50 µV CD PLAYER SECTION Type Compact disc player Signal Detection System Non contact optical pickup semiconductor laser Number of channels 2 channels stereo Frequency Response 5 Hz to 20 000 Hz Dynamic Ran...

Страница 40: ...como botón MO monofónico Para volver a usar estos botones para las funciones originales después de pulsar MODE espere durante 5 segundos sin pulsar ninguno de estos botones hasta que se cancele el modo de funciones Pulsado botón MODE otra vez también se cancela el modo de funciones SEL selección en espera encendido atenuador Indicador de cuenta atrás IMPORTANTE PARA PRODUCTOS LÁSER 1 PRODUCTO LÁSE...

Страница 41: ...e demasiado el nivel de volumen pues es muy peligroso conducir si no se escuchan los sonidos exteriores Detenga el automóvil antes de efectuar cualquier operación complicada Temperatura dentro del automóvil Si ha dejado el automóvil estacionado durante largo tiempo en un sitio cálido o frío no opere la unidad hasta que se normalice la temperatura del habitáculo Cómo reposicionar su unidad 2 Cómo u...

Страница 42: ...aleatorio i Botón MODE o Botón DISP pantalla Botones 4 a Botón soltar panel de control s Botón abajo Botón 10 Ventanilla de visualización d Indicadores de recepción del sintonizador MO monofónico ST estéreo f Indicadores RDS TP PTY AF REG g Indicador MP3 h Indicador CD j Indicadores del modo ítem de reproducción RND aleatorio disco carpeta RPT repetición k Indicador LOUD sonoridad l Indicador EQ e...

Страница 43: ... de volumen anterior vuelva a presionar brevemente el botón Si gira el dial de control también se podrá restablecer el sonido Para apagar la unidad Pulse y mantenga pulsado durante más de 1 segundo Aparece SEE YOU y seguidamente la unidad se apaga Si desconecta la alimentación mientras está escuchando un disco cuando vuelva a conectar la alimentación la próxima vez el disco se empezará a reproduci...

Страница 44: ...era vez Para cancelar la demostración en pantalla siga el procedimiento de abajo 1 Pulse y mantenga pulsado SEL selección durante más de 2 segundos para que aparezca uno de los ítems de PSM en la pantalla PSM consulte la página 31 2 Seleccione DEMO si no está visualizado en la pantalla 3 Seleccione DEMO OFF 4 Finalice el ajuste Para activar la demostración en pantalla repita el mismo procedimiento...

Страница 45: ...SP pantalla repetidamente Cada vez que pulsa el botón la pantalla cambia de la manera siguiente Durante la operación de una emisora AM y FM sin RDS Durante la operación de la emisora FM RDS Durante la operación del disco Notas Mientras se está reproduciendo un CD convencional aparecerá NO NAME para el título del disco ejecutante y el título de la pista Para el cambio de indicación durante la repro...

Страница 46: ...FM2 FM3 Podrá usar cualquiera de ellas para escuchar un radiodifusión en FM 2 Comience la búsqueda de la emisora La búsqueda se interrumpe cada vez que se recibe una emisora Para cancelar la búsqueda antes de recibir una emisora pulse el mismo botón que el pulsado para la búsqueda Para buscar emisoras de frecuencias más bajas Para buscar emisoras de frecuencias más altas Aparece la banda seleccion...

Страница 47: ...biará continuamente a intervalos de 50 kHz para FM y a intervalos de 9 kHz para AM OM OL hasta soltarlo Cuando una radiodifusión en FM estéreo sea difícil de recibir 1 Pulse MODE para entrar en modo de funciones mientras se está escuchando una radiodifusión en FM 2 Pulse MO monofónico mientras MODE permanece parpadeando en la pantalla para que el MONO se aparece en la pantalla Cada vez que pulsa e...

Страница 48: ...2 segundos SSM parpadea y luego desaparece al finalizar el preajuste automático Las emisoras FM locales con las señales más intensas serán exploradas y almacenadas automáticamente en el número de banda seleccionado FM1 FM2 o FM3 Estas emisoras quedan preajustadas en los botones No 1 frecuencia más baja a No 6 frecuencia más alta Cuando finalice el preajuste automático se sintonizará automáticament...

Страница 49: ...sora preajustada Las emisoras preajustadas pueden sintonizarse fácilmente Tenga presente que primero deberá almacenar las emisoras Si todavía no lo ha hecho consulte Cómo almacenar emisoras en la memoria en las páginas 10 y 11 1 Seleccione la banda FM1 3 AM Cada vez que pulsa el botón la banda cambia de la siguiente manera 2 Seleccione el número 1 6 en que desea preajustar la emisora Nota También ...

Страница 50: ...l mismo programa en las mejores condiciones de recepción independientemente de dónde esté conduciendo Consulte la ilustración en página 18 Se utilizan dos tipos de datos RDS para que la recepción de seguimiento de redes de radio funcione correctamente PI identificación del programa y AF frecuencia alternativa Si no se reciben correctamente estos datos de la estación RDS que está escuchando no func...

Страница 51: ... pantalla y esta unidad sintonizará automáticamente esa emisora El volumen cambiará al nivel de volumen de TA preestablecido consulte la página 17 y se podrá escuchar el anuncio de tráfico Si el indicador TP parpadea significa que la recepción de espera de TA aun no ha sido activada debido a que la emisora que se está recibiendo no provee las señales utilizadas para la recepción de espera de TA Pa...

Страница 52: ...puede encenderse o parpadea Si el indicador PTY se enciende está activada la recepción de espera de PTY Si una emisora empieza a transmitir el programa PTY seleccionado esta unidad sintonizará automáticamente esa emisora Si el indicador PTY parpadea significa que la recepción de espera de PTY aun no ha sido activada debido a que la emisora que se está recibiendo no provee las señales utilizadas pa...

Страница 53: ...y mantenga pulsado TP PTY durante más de 2 segundos mientras escucha una emisora de FM 2 Seleccione uno de los veintinueve códigos PTY Consulte la página 18 El nombre del código seleccionado aparecerá en la pantalla 3 Pulse y mantenga pulsado el botón numérico durante más de 2 segundos para que el código PTY seleccionado se almacene en el número de preajuste que desea 4 Para salir de este modo pul...

Страница 54: ...ue el seleccionado por usted la emisora no cambiará Nota En algunas áreas la búsqueda de PTY no funcionará correctamente Búsqueda del tipo de programa favorito 1 Pulse y mantenga pulsado TP PTY durante más de 2 segundos mientras escucha una emisora de FM 2 Para seleccionar uno de los tipos de programas favoritos o Para seleccionar cualquiera de los veintinueve códigos PTY Ej Cuando se ha seleccion...

Страница 55: ...ccione ON en el paso 3 girando el dial de control en el sentido horario Nota Después de ajustar AUTO ADJ a ON deberá seguir sintonizando la misma emisora durante más de 2 minutos De lo contrario la hora del reloj no podrá ser ajustada Esto es debido a que la unidad tarda 2 minutos en capturar los datos CT de la señal RDS Otras convenientes funciones y ajustes de RDS Selección automática de la esta...

Страница 56: ...mas que tratan de cualquier aspecto de las creencias o fe o naturaleza de la existencia o ética PHONE IN Programas en los cuales las personas pueden expresar sus opiniones por teléfono o en un foro público TRAVEL Programas acerca de destinos de viaje excursiones e ideas y oportunidades para viajes LEISURE Programas concernientes con actividades recreativas tales como jardinería cocina pesca etc JA...

Страница 57: ...aparecerán automáticamente el título del disco ejecutante y luego el título de la pista Para parar la reproducción y expulsar el CD Pulse 0 Se interrumpe la reproducción del CD que será expulsado automáticamente de la ranura de carga La fuente cambia a sintonizador se escuchará la emisora recibida en último término Si cambia la fuente la reproducción del CD también se interrumpe sin que el CD sea ...

Страница 58: ... mientras se está reproduciendo un CD para regresar al comienzo de la pista actual Cada vez que pulse el botón consecutivamente se localiza al comienzo de las pistas anteriores y se efectuará la reproducción Para desplazarse rápidamente a una pista botones 10 y 10 1 Pulse MODE para entrar en modo de funciones mientras se está reproduciendo un CD 2 Pulse 10 o 10 La primera vez que pulsa el botón 10...

Страница 59: ...a actual de forma repetida Indicador RPT Selección de los modos de reproducción de CD Para reproducir las pistas de forma aleatoria Reproducción aleatoria de discos Podrá reproducir todas las pistas del CD de forma aleatoria 1 Pulse MODE para entrar en modo de funciones mientras se está reproduciendo un CD 2 Pulse RND aleatorio mientras MODE permanece parpadeando en la pantalla para que el DISC RN...

Страница 60: ...n de CD Text seleccione el modo de visualización de texto mientras se reproduce un CD Text Pulse DISP pantalla repetidamente Cada vez que pulsa el botón la pantalla cambia de la manera siguiente Notas En la pantalla se visualizan simultáneamente hasta 8 caracteres efectuándose el desplazamiento secuencial si hay más de 8 Consulte también Para seleccionar el modo de desplazamiento SCROLL en la pági...

Страница 61: ...ue archivos pistas MP3 se pueden grabar en carpetas Durante la grabación la disposición de archivos y carpetas se puede realizar de manera similar a la de archivos y carpetas de datos de ordenador La raíz es similar a la raíz de un árbol Cada uno de archivo y carpeta pueden estar enlazados con la raíz y accederse desde ella En la ilustración de abajo se muestra un ejemplo sobre cómo se graban los ...

Страница 62: ...e la reproducción aparecerán automáticamente los nombres de la carpeta y del archivo o etiquetas ID3 Consulte también la página 25 Se interrumpirá la reproducción sin que el disco sea expulsado si cambia la fuente o desconecta la alimentación La próxima vez que selecciona el reproductor de CD como fuente o se conecta la alimentación la reproducción del disco se iniciará desde el punto en que se de...

Страница 63: ...chará sólo símbolos intermitentes El tiempo de reproducción transcurrido también cambia intermitentemente en la pantalla Para saltar a los archivos siguientes o anteriores Pulse por un tiempo breve 4 durante la reproducción para volver al comienzo del archivo actual Cada vez que pulsa el botón consecutivamente se localiza al comienzo de los archivos anteriores y se efectuará la reproducción Pulse ...

Страница 64: ...no contiene ningún archivo MP3 No podrá seleccionar directamente una carpeta con un número mayor que 12 Para seleccionar un archivo específico en una carpeta pulse o 4 después de seleccionar la carpeta Para desplazarse rápidamente a un determinado archivo dentro de la carpeta actual botones 10 y 10 1 Pulse MODE para entrar en modo de funciones mientras se está reproduciendo un disco 2 Pulse 10 o 1...

Страница 65: ... reproducir repetidamente el archivo actual o todos los archivos de la carpeta actual 1 Pulse MODE para entrar en modo de funciones mientras se está reproduciendo un disco MP3 2 Pulse RPT repetición mientras MODE permanece parpadeando en la pantalla de manera que aparezca TRK RPT o FLDR RPT en la pantalla Cada vez que pulsa el botón el modo de reproducción repetida cambia de la siguiente manera Mo...

Страница 66: ...cción de los modos de sonido preajustados C EQ ecualizador personalizable Puede seleccionar un modo de sonido preajustado C EQ ecualizador personalizable adecuado al género musical Hay un límite de tiempo para realizar los siguientes pasos Si se cancelan los ajustes antes de haber terminado comience otra vez desde el paso 1 1 Pulse MODE para entrar en modo de funciones 2 Seleccione el modo de soni...

Страница 67: ...en el modo de sonido seleccionado C EQ incluyendo USER 2 Si está usando un sistema de dos altavoces ajuste el nivel del desvanecedor a 00 3 El dial de control funciona normalmente como control de volumen Por lo tanto no necesitará seleccionar VOL para ajustar el nivel de volumen 4 Depende del ajuste de control de ganancia del amplificador Para los detalles consulte la página 32 2 Realice el ajuste...

Страница 68: ...ulsado SEL selección durante más de 2 segundos para que aparezca uno de los ítems de PSM en la pantalla Consulte la página 31 2 Seleccione el ítem de PSM que desea ajustar 3 Ajuste el ítem de PSM seleccionado OTRAS FUNCIONES PRINCIPALES 4 Repita los pasos 2 a 3 para ajustar los otros ítems PSM si es necesario 5 Finalice el ajuste Ej Cuando se selecciona DIMMER SP30 33_KD G401 EU f p65 24 11 03 9 2...

Страница 69: ...ganancia del amplificador Los ítems de Modo de ajustes preferidos PSM Para las operaciones detalladas de cada una de las opciones PSM refiérase a las páginas indicadas en la tabla Indicaciones Valores Ajustes de Consulte opciones seleccionables fabrica la página DEMO ON DEMO OFF OFF ON LOW PWR HIGH PWR 12H 24H OFF ON AF AF REG OFF VOL 00 VOL 30 o 50 OFF ON OFF 29 tipos de programa consulte la pági...

Страница 70: ...do DISP pantalla durante más de 1 segundo Para activar o desactivar la visualización de la etiqueta tag TAG DISP Un archivo MP3 puede contener información de archivo denominada ID3 Tag en donde se han grabado el nombre del álbum nombre del artista título de pista etc Existen dos versiones ID3v1 ID3 Tag versión 1 e ID3v2 ID3 Tag versión 2 Si en un disco se encuentran grabadas tanto la ID3v1 como la...

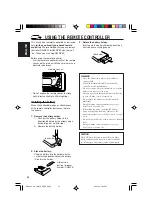
Страница 71: ...l de la unidad 3 Ponga el panel de control desmontado en el estuche suministrado Cómo instalar el panel de control 1 Inserte el lado izquierdo del panel de control en la ranura del portapanel 2 Pulse el lado derecho del panel de control para fijarlo al portapanel Nota sobre la limpieza de los conectores Si acostumbra a desmontar frecuentemente el panel de control se podrán deteriorar los conectore...

Страница 72: ... remoto Pila de litio Número del producto CR2025 UTILIZACIÓN DEL CONTROL REMOTO lado posterior 3 Vuelva a colocar a la portapila Inserte nuevamente a la portapila empujándolo hasta escuchar un chasquido ADVERTENCIA Guarde la pila fuera del alcance de los niños Si llega a ser ingerida acuda inmediatamente al médico No recargue cortocircuite desarme ni caliente la pila ni las arroje al fuego Cualqui...

Страница 73: ...ue el dial de control de la unidad principal Nota Estos botones no funcionan para controlar el modo de ajustes preferidos KD G402 y KD G401 están equipados con la función de control remoto en el volante de dirección En caso de que su automóvil esté equipado con control remoto en el volante de dirección podrá accionar estas unidades utilizando el control En cuanto a las conexiones necesarias para u...

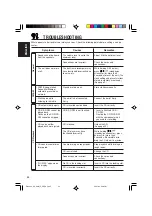
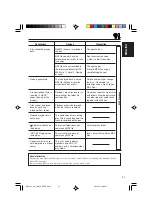
Страница 74: ...onexiones Inserte un CD en la ranura de carga Inserte el CD correctamente Causas El nivel de volumen está ajustado al mínimo Las conexiones son incorrectas El microcomputador incorporado podría haber funcionado incorrectamente debido a los ruidos etc Las señales son muy débiles La antena no está firmemente conectada El CD está insertado boca abajo El CD R CD RW no está finalizado El CD está bloque...

Страница 75: ...eterminado cuando se grabaron los archivos Esto sucede a veces durante la reproducción Depende de cómo los archivos fueron grabados en el disco La carpeta actual no contiene ningún archivo MP3 El disco actual no contiene ningún archivo MP3 Esta unidad puede visualizar únicamente letras del alfabeto mayúsculas A Z números y una cantidad limitada de símbolos Síntomas No se puede reproducir el disco ...

Страница 76: ...o CD RWs no se puedan reproducir en esta unidad debido a las características propias del disco y por los siguientes motivos Discos sucios o rayados Hay condensación de humedad en el lente interior de la unidad Suciedad en el lente captor del interior del reproductor Los CD RWs pueden requerir más tiempo de lectura debido a que la reflectancia de los mismos es menor que la de los CDs comunes Los CD...

Страница 77: ...Hz 65 dB Respuesta de frecuencias 40 Hz a 15 000 Hz Separación estereofónica 30 dB Relación de captura 1 5 dB Sintonizador de OM Sensibilidad 20 µV Selectividad 35 dB Sintonizador de OL Sensibilidad 50 µV SECCIÓN DEL REPRODUCTOR DE CD Tipo Reproductor de discos compactos Sistema de detección de la señal Captor óptico sin contacto láser de semiconductor Número de canales 2 canales estéreo Respuesta...

Страница 78: ...naural Pour utiliser ces touches pour les fonctions originales après avoir appuyé sur MODE attendez 5 secondes avant d appuyer sur une de ces touches de façon que le mode de fonction soit annulé Appuyer de nouveau sur MODE annulé aussi le mode de fonctions SEL sélection attente en service sourdine Indicateur de durée restante IMPORTANT POUR PRODUITS LASER 1 PRODUIT LASER CLASSE 1 2 ATTENTION N ouv...

Страница 79: ...ge 7 FONCTIONNEMENT DE LA RADIO 8 Écoute de la radio 8 Mémorisation des stations 10 Accord d une station présélectionnée 11 FONCTIONNEMENT RDS 12 Présentation du RDS 12 Autres fonctions RDS pratiques et ajustements 17 FONCTIONNEMENT DU LECTEUR CD 19 Lecture d un CD 19 Localisation d une plage ou d un passage particulier sur un CD 20 Sélection des modes de lecture de CD 21 Lecture des CD Text 22 In...

Страница 80: ...Touche RPT répétition u Touche RND aléatoire i Touche MODE o Touche DISP affichage Touches 4 a Touche déblocage du panneau de commande s Touche bas Touche 10 Fenêtre d affichage d Indicateurs de réception du tuner MO monaural ST stéréo f Indicateurs RDS TP PTY AF REG g Indicateur MP3 h Indicateur CD j Indicateurs de mode de lecture élément RND aléatoire disque dossier RPT répétition k Indicateur L...

Страница 81: ...ume précédent appuyez de nouveau brièvement sur la touche Si vous tournez la molette de commande vous pouvez aussi rétablir le son Pour mettre l appareil hors tension Maintenez pressée pendant plus d une seconde SEE YOU apparaît et l appareil se met hors tension Si vous mettez l appareil hors tension lors de l écoute d un disque la lecture du disque débutera à partir de l endroit où elle a été int...

Страница 82: ...r la première fois Pour annuler la démonstration des affichages suivez la procédure ci dessous 1 Maintenez pressée SEL sélection pendant plus de 2 secondes de façon que l un des éléments PSM apparaisse sur l affichage PSM Voir la page 31 2 Choisissez DEMO s il n apparaît pas sur l affichage 3 Choisissez DEMO OFF 4 Terminez le réglage Pour mettre en service la démonstration des affichages répétez l...

Страница 83: ...puyez répétitivement sur DISP affichage Chaque fois que vous appuyez sur la touche l affichage change comme suit Pendant l écoute d une station AM et FM non RDS Pendant l écoute d une station FM RDS Pendant l utilisation d un disque Remarques Pendant la lecture d un CD conventionnel NO NAME apparaît pour le titre du disque interprète et le titre de la plage Pour le changement de l indication lors ...

Страница 84: ...FM3 Vous pouvez utiliser n importe laquelle pour écouter une station FM 2 Commencez la recherche d une station Quand une station est accordée la recherche s arrête Pour arrêter la recherche avant qu une station ne soit accordée appuyez sur la même touche que vous avez utilisée pour la recherche Pour rechercher des stations de fréquences inférieures Pour rechercher des stations de fréquences supéri...

Страница 85: ... par intervalle de 50 kHz pour la bande FM et par intervalle de 9 kHz pour la bande AM PO GO jusqu à ce que vous la relâchiez Quand une émission FM stéréo est difficile à recevoir 1 Appuyez sur MODE pour entrer en mode de fonction pendant l écoute d une station FM 2 Appuyez sur MO monaural pendant que MODE clignote sur l affichage de façon que MONO apparaît sur l affichage Chaque fois que vous app...

Страница 86: ...réréglage automatique est terminé Les stations locales FM avec les signaux les plus forts sont recherchées et mémorisées automatiquement dans le numéro de bande que vous avez choisi FM1 FM2 ou FM3 Ces stations sont mémorisées sur les touches de présélection de station No 1 fréquence la plus basse à No 6 fréquence la plus haute Quand la présélection est terminée la station mémorisée automatiquement...

Страница 87: ...station présélectionnée Vous pouvez accorder facilement une station présélectionnée Rappelez vous que vous devez d abord mémoriser les stations Si vous ne les avez pas encore mémorisées référez vous à Mémorisation des stations à les pages 10 et 11 1 Choisissez la bande FM1 3 AM Chaque fois que vous appuyez sur la touche la bande change comme suit 2 Choisissez le numéro 1 6 de la station présélecti...

Страница 88: ...ignal plus fort De cette façon vous pouvez continuer à écouter le même programme avec la meilleure réception possible où que vous alliez Voir l illustration à la page 18 Deux types de données RDS sont utilisés pour que la réception de suivi de réseau fonctionne correctement les données PI Identification de programme et AF Fréquence alternative Si vous ne recevez pas ces données correctement de la ...

Страница 89: ...FIC apparaît sur l affichage et cet appareil accorde automatiquement la station Le volume change sur le niveau de volume TA préréglé voir la page 17 et vous pouvez écouter les informations routières Si l indicateur TP clignote l attente de réception TA n est pas encore en service car la station reçue actuellement ne fourni pas de signaux utilisés pour l attente de réception TA Pour mettre en servi...

Страница 90: ...l indicateur PTY s allume ou clignote Si l indicateur PTY s allume l attente de réception PTY est en service Si une station commence à diffuser le programme PTY choisi cet appareil accorde automatiquement la station Si l indicateur PTY clignote l attente de réception PTY n est pas encore en service car la station reçue actuellement ne fourni pas de signaux utilisés pour l attente de réception PTY ...

Страница 91: ...émoriser vos types de programme préférée 1 Maintenez pressée sur TP PTY pendant plus de 2 secondes pendant l écoute d une station FM 2 Choisissez l un des vingt neuf codes PTY Voir la page 18 Le nom du code choisi apparaît sur l affichage 3 Maintenez pressée la touche numérique pendant plus de 2 secondes pour mémoriser le code PTY choisi sur le numéro de préréglage souhaité 4 Maintenez pressée sur...

Страница 92: ...s avez choisi la station ne change pas Remarque Dans certaines régions la recherche PTY ne fonctionnera pas correctement Pour rechercher votre type de programme préférée 1 Maintenez pressée sur TP PTY pendant plus de 2 secondes pendant l écoute d une station FM 2 Pour choisir un de vos types de programme préféré ou Pour choisir un des vingt neuf codes PTY Ex Quand ROCK M est choisi Le dernier code...

Страница 93: ...oisissez ON à l étape 3 en tournant la molette de commande dans le sens des aiguilles d une montre Remarque L appareil doit rester accordé sur la même station pendant plus de 2 minutes après le réglage de AUTO ADJ sur ON Sinon l horloge ne sera pas ajustée Cela vient du fait qu il faut 2 minutes à l appareil pour capturer les données CT dans un signal RDS Autres fonctions RDS pratiques et ajusteme...

Страница 94: ...ciales RELIGION Programmes traitant des aspects de la foi ou de la croyance de la nature de la vie ou d éthique PHONE IN Programmes où les gens peuvent exprimer leurs opinions par téléphone ou dans un forum TRAVEL Programmes sur des destinations de voyage des voyages en groupe et des idées et opportunités de voyage LEISURE Programmes concernés par des activités récréatives comme le jardinage la cu...

Страница 95: ...itre du disque interprète et le titre de la plage apparaissent automatiquement Pour arrêter la lecture et éjecter le CD Appuyez sur 0 La lecture du CD s arrête automatiquement et le CD est automatiquement éjecté de la fente d insertion La source change sur le tuner vous entendez la dernière station reçue Si vous changez la source la lecture de CD s arrête aussi sans éjecter le CD La prochaine fois...

Страница 96: ...ébut de la plage actuelle Chaque fois que vous appuyez sur la touche consécutivement le début des plages précédentes est localisé et reproduit Pour aller rapidement à une plage touches 10 et 10 1 Appuyez sur MODE pour entrer en mode de fonction pendant la lecture d un CD 2 Appuyez sur 10 ou 10 La première fois que vous appuyez sur la touche 10 ou 10 l appareil saute à la plage supérieure ou inféri...

Страница 97: ...st reproduite répétitivement Indicateur RPT Sélection des modes de lecture de CD Pour reproduire les plages dans un ordre aléatoire Lecture aléatoire de disque Vous pouvez reproduire toutes les plages du disque dans un ordre aléatoire 1 Appuyez sur MODE pour entrer en mode de fonction pendant la lecture d un CD 2 Appuyez sur RND aléatoire pendant que MODE clignote sur l affichage de façon que DISC...

Страница 98: ...ion de CD Text manuellement choisissez le mode d affichage de texte pendant la lecture d un CD Text Appuyez répétitivement sur DISP affichage Chaque fois que vous appuyez sur la touche l affichage change comme suit Remarques L affichage montre 8 caractères en même temps et défile s il y a plus de 8 caractères Référez vous aussi à Pour choisir le mode de défilement SCROLL à la page 32 Certains cara...

Страница 99: ...es dossiers comme ils sont appelés selon une terminologie informatique Pendant l enregistrement les fichiers et les dossiers peuvent être arrangés d une façon similaire à celle des fichiers et des dossiers sur un ordinateur La racine est similaire à la racine d un arbre Chaque fichier et dossier peuvent être liés et atteint à partir de la racine L illustration ci dessous montre un exemple de la fa...

Страница 100: ...orsque la lecture démarre le non du dossier et du fichier ou les balises ID3 apparaissent automatiquement Voir aussi la page 25 Si vous changez la source ou mettez l appareil hors tension la lecture MP3 s arrête sans que le disque ne soit éjecté La prochaine fois que vous choisissez le lecteur CD comme source ou que vous mettez l appareil sous tension la lecture de disque reprend à partir de l end...

Страница 101: ...ération vous pouvez uniquement entendre des sons intermittents La durée écoulée de lecture change aussi de façon intermittente sur l affichage Pour sauter aux fichiers suivantes ou précédentes Appuyez brièvement sur 4 pendant la lecture pour sauter vers l avant au début du fichier actuel Chaque fois que vous appuyez sur la touche consécutivement le début des fichiers précédentes est localisé et re...

Страница 102: ...er dont le numéro est supérieur à 12 Pour choisir un fichier particulier dans un dossier appuyez sur ou 4 après avoir choisi le dossier Pour aller rapidement à un fichier particulier dans le dossier actuel touches 10 et 10 1 Appuyez sur MODE pour entrer en mode de fonction pendant la lecture d un disque 2 Appuyez sur 10 ou 10 La première fois que vous appuyez sur la touche 10 ou 10 l appareil saut...

Страница 103: ...oduire le fichier actuel ou tous les fichiers du dossier actuel répétitivement 1 Appuyez sur MODE pour entrer en mode de fonction pendant la lecture d un disque MP3 2 Appuyez sur RPT répétition pendant que MODE clignote sur l affichage de façon que TRK RPT ou FLDR RPT apparaisse sur l affichage Chaque fois que vous appuyez sur la touche le mode de lecture répétée change comme suit Mode Indicateur ...

Страница 104: ...lection des modes sonores préréglés C EQ égaliseur personnalisé Vous pouvez choisir un mode sonore préréglé C EQ égaliseur personnalisé convenant à votre genre de musique Il y a un temps limite pour effectuer les étapes suivantes Si le réglage est annulé avant que vous ne terminiez recommencez à partir de l étape 1 1 Appuyez sur MODE pour entrer en mode de fonction 2 Choisissez le mode sonore que ...

Страница 105: ...ore actuellement choisi C EQ y compris USER 2 Si vous utilisez un système à deux enceintes réglez le niveau de fader sur 00 3 Normalement la molette de commande fonctionne comme commande de volume Alors vous n avez pas besoin de choisir VOL pour ajuster le niveau de volume 4 En fonction du réglage de commande du gain de l amplificateur Référez vous à la page 32 pour les détails 2 Ajustez le réglag...

Страница 106: ...SEL sélection pendant plus de 2 secondes de façon que l un des éléments PSM apparaisse sur l affichage Voir la page 31 2 Choisissez l élément PSM que vous souhaitez ajuster 3 Ajustez l élément PSM choisi AUTRES FONCTIONS PRINCIPALES 4 Répétez si nécessaire les étapes 2 et 3 pour ajuster les autres éléments PSM 5 Terminez le réglage Ex Quand DIMMER est choisi FR30 33_KD G401 EU f p65 24 11 03 9 17 ...

Страница 107: ...ificateur Les éléments Preferred Setting Mode Mode de réglage préféré PSM Pour des informations détaillées sur chaque réglage PSM référez vous aux pages données dans le tableau Indications Valeurs réglages Réglages pré Voir sélectionnables réglés à l usine Page DEMO ON DEMO OFF DEMO ON 6 00 0 00 OFF OFF ON 32 LOW PWR HIGH PWR HIGH PWR 32 12H 24H OFF ON 24H ON 17 AF AF AF REG OFF 12 13 VOL 00 VOL 3...

Страница 108: ... d une seconde Pour mettre en ou hors service l affichage des balises TAG DISP Un fichier MP3 peut contenir des informations sur le fichier appelées Balise ID3 où le nom de l album le nom de l interprète le titre de l plage etc sont enregistrés Il y a deux versions ID3v1 Balise ID3 version 1 et ID3v2 Balise ID3 version 2 Si les deux versions de balises ID3v1 et ID3v2 sont enregistrées sur un disqu...

Страница 109: ...e panneau de commande de l appareil 3 Mettez le panneau de commande détaché dans la boîte fournie Comment attacher le panneau de commande 1 Insérez le côté gauche du panneau de commande dans la rainure située du côté droit du porte panneau 2 Appuyez sur le côté droit du panneau de commande pour le fixer au porte panneau Remarque sur le nettoyage des connecteurs Si vous détachez fréquemment le pann...

Страница 110: ...TION DE LA TÉLÉCOMMANDE face arrière 3 Remettez le porte pile en place Insérez le porte pile en le poussant jusqu à ce que vous entendiez un déclic AVERTISSEMENT Conservez la pile hors de la portée des enfants Si un enfant venait à avaler une pile consultez immédiatement un médecin Ne rechargez pas ne court circuitez pas de démontez pas ne chauffez pas la pile et ne les jetez pas dans le feu Le fa...

Страница 111: ...tionne de la même façon que la molette de commande de l appareil principal Remarque Cette touches ne fonctionne pas pour l ajustement du mode de réglage préféré Les KD G402 et KD G401 sont munis d une fonction de télécommande de volant Si votre voiture est muni d un pilote de télécommande de volant vous pouvez commander ces appareils en utilisant ce pilote Référez vous au Manuel d installation rac...

Страница 112: ...es connexions Insérez un CD dans la fente d insertion Insérez le CD correctement Causes Le niveau de volume est réglé au niveau minimum Les connexions sont incorrectes Le micro ordinateur intégré peut fonctionner incorrectement à cause de parasites etc Les signaux sont trop faibles L antenne n est pas connectée fermement Le CD est inséré à l envers Le CD R CD RW n est pas finalisé Le CD est verrou...

Страница 113: ...ecture est déterminé quand les fichiers sont enregistrés Cela se produit quelque fois pendant la lecture C est causé par la façon dont les fichiers ont été enregistrés sur le disque Le dossier actuel ne contient pas de fichiers MP3 Le disque actuel ne contient pas de fichiers MP3 Cet appareil peut uniquement reproduire l alphabet majuscules A Z nombres et un nombre limité de symboles Symptômes Le ...

Страница 114: ...t appareil à cause de leurs caractéristiques et pour les raisons suivantes Les disques sont sales ou rayés De l humidité s est condensée sur la lentille à l intérieur de l appareil La lentille du capteur à l intérieur de l appareil est sale Les CD RW peuvent nécessiter une durée de mise en service plus longue car le facteur de réflexion des CD RW est inférieur à celui des CD ordinaires Les CD R ou...

Страница 115: ...de canal alterné 400 kHz 65 dB Réponse en fréquence 40 Hz à 15 000 Hz Séparation stéréo 30 dB Rapport de synchronisation 1 5 dB Tuner PO Sensibilité 20 µV Sélectivité 35 dB Tuner GO Sensibilité 50 µV SECTION LECTEUR CD Type Lecteur de disque compact Système de détection de signal Capteur sans contact optique semiconducteur laser Nombre de canaux 2 canaux stéréo Réponse en fréquence 5 Hz à 20 000 H...

Страница 116: ... olarak çalΩπtΩ Ωnda MODE tuπuna bastΩktan sonra bu tuπlarΩ yine orijinal iπlevleriyle kullanmak için iπlevler modu devre dΩπΩ kalana kadar 5 saniye hiçbir numara tuπuna basmadan bekleyin MODE tuπuna tekrar basΩlmasΩ da iπlevler modunu devre dΩπΩ bΩrakΩr SEL seç bekleme açΩk zayΩflatΩcΩsΩ Süre gerisayΩm göstergesi LAZER ÜRÜNLER Ç N ÖNEML NOTLAR 1 SINIF 1 LAZER ÜRÜNÜ 2 D KKAT Üst kapa Ω açmayΩn Üni...

Страница 117: ... 6 Saatin ayarlanmasΩ 7 RADYO LEMLER 8 Radyo dinleme 8 stasyonlarΩn belle e kaydedilmesi 10 Önceden ayarlamΩπ bir istasyonu dinlemek 11 RDS LEMLER 12 RDS ile neler yapabilirsiniz 12 Di er uyumlu RDS iπlevleri ve ayarlarΩ 17 CD LEMLER 19 CD çalmak 19 CD üzerinde parça veya parça içinde bir kΩsmΩ bulmak 20 CD çalma modlarΩnΩn seçilmesi 21 Metin çerikli bir CD yi çalmak 22 Disk çΩkartmanΩn yasaklanma...

Страница 118: ...uπu y RPT tekrar tuπu u RND rastgele tuπu i MODE tuπu o DISP ekran tuπu 4 tuπlarΩ a kumanda panosunu çΩkartma tuπu s aπa Ω tuπu 10 tuπu Ekran penceresi d Tüner radyo alΩcΩ göstergeleri MO mono ses ST stereo f RDS göstergeleri TP PTY AF REG g MP3 göstergesi h CD göstergesi j Playback modu ö e göstergeleri RND rastgele disk klasör RPT tekrar k LOUD gürlük göstergesi l EQ equalizer göstergesi Ses mod...

Страница 119: ...eki ses düzeyine dönmek istedi inizde kΩsa bir süre için tekrar aynΩ tuπa basΩn Kumanda dü mesini döndürerek sesi eski seviyesine getirebilirsiniz Üniteyi kapatmak için tuπunu bir saniyeden daha uzun süreyle basΩlΩ tutun SEE YOU sözcükleri görüntülenir ve ardΩndan ünite kapanΩr Üniteyi bir disk dinlerken kapatΩrsanΩz üniteyi tekrar açtΩ ΩnΩzda disk kaldΩ Ω yerden çalmaya devam edecektir Ses AyarΩn...

Страница 120: ...l etmeniz önerilir Ekran tanΩtΩm gösterisini iptal etmek için aπa Ωdaki prosedürü izleyin 1 Ekranda PSM ö elerinin görünmesi için SEL seç tuπunu 2 saniyeden daha uzun süreyle basΩlΩ tutun PSM 31 sayfaya bakΩn 2 Ekranda görüntülenmiyorsa DEMO seçimini yapΩn 3 DEMO OFF seçimini yapΩn 4 AyarΩ bitirin Ekran tanΩtΩm gösterisini etkinleπtirmek için aynΩ prosedürü tekrarlayΩp 3 AdΩmda DEMO ON seçimini ya...

Страница 121: ...irin Yürürlükteki saati kontrol etmek veya ekran modunu de iπtirmek için Arka arkaya DISP ekran tuπuna basΩn Tuπa her bastΩ ΩnΩzda ekran aπa Ωdaki gibi de iπir AM ve RDS yayΩnΩ olmayan FM istasyonlarΩnΩn çalΩπmasΩ sΩrasΩnda FM RDS istasyonunun çalΩπmasΩ sΩrasΩnda Disk çalΩπΩrken Notlar Geleneksel bir CD çalarken disk adΩ sanatçΩ ve parça adΩ için NO NAME ibaresi görüntülenir Bir Metin çerikli CD v...

Страница 122: ... FM2 FM3 Bir FM yayΩnΩ dinlemek için bunlardan herhangi birini kullanabilirsiniz 2 Bir istasyon aramaya baπlayΩn Bir istasyonun sinyali alΩndΩ Ωnda arama durur Bir istasyonun sinyali alΩnmadan aramayΩ durdurmak için arama yapmak üzere bastΩ ΩnΩz tuπa basΩn Daha düπük frekanslΩ istasyonlarΩ aramak için Daha yüksek frekanslΩ istasyonlarΩ aramak için Seçilen bant görüntülenir Yeterli sinyal kuvvetine...

Страница 123: ...utarsanΩz tuπu serbest bΩrakana kadar frekans FM için 50 kHz basamaklarla ve AM OD UD için 9 kHz basamaklarla de iπme e devam eder Stereo FM yayΩnΩ almak zor oldu unda 1 Bir stereo FM yayΩnΩ dinlerken MODE tuπuna basarak iπlevler moduna girin 2 Ekranda MODE ibaresi yanΩp sönerken MO mono ses tuπuna basarak ekranda MONO ibaresinin görünmesini sa layΩn Tuπa her bastΩ ΩnΩzda mono modu sΩrayla devreye...

Страница 124: ...en daha uzun süreyle basΩlΩ tutun Ekranda SSM ibaresi yanΩp söner ve otomatik ön ayar tamamlandΩktan sonra görüntü kaybolur En kuvvetli sinyale sahip yerel FM istasyonlarΩ aranΩr ve seçti iniz banda FM1 FM2 ya da FM3 otomatik olarak kaydedilir Bu istasyonlar No 1 en düπük frekans ila No 6 en yüksek frekans numara tuπlarΩna kurulur Otomatik ön ayarlama tamamlandΩktan sonra radyo otomatik olarak 1 n...

Страница 125: ...onu dinlemek Önceden ayarlamΩπ bir istasyona kolayca gidebilirsiniz UnutmayΩnΩz önce istasyonlarΩ kaydetmeniz πarttΩr Henüz kaydetmediyseniz 10 ila 11 sayfalardaki stasyonlarΩn belle e kaydedilmesi baπlΩklΩ kΩsma baπvurun 1 BandΩ seçin FM1 3 AM Tuπa her bastΩ ΩnΩzda bant aπa Ωdaki gibi de iπir 2 stedi iniz ön ayarlΩ istasyonun numarasΩnΩ seçin 1 6 Not Önceden ayarlanmΩπ bir sonraki veya bir önceki...

Страница 126: ...sayede nerede gidiyor olursanΩz olun aynΩ programΩ en iyi alΩndΩ Ω πekilde dinlemeye devam edebilirsiniz 18 sayfadaki resme bakΩn A zleme Sisteminin do ru çalΩπmasΩnΩ sa lamak için iki tür RDS verisi kullanΩlΩr PI Program Kimli i ve AF Alternatif Frekans Bu veriler dinlemekte oldu unuz RDS istasyonundan do ru bir πekilde alΩnmazsa A zleme Sistemi çalΩπmayacaktΩr A zleme Sistemini kullanmak için Ay...

Страница 127: ...FFIC ibaresi görünür ve bu ünite otomatik olarak o istasyona geçer Ses düzeyi önceden ayarlΩ TA ses düzeyine geçer 17 sayfaya bakΩn ve trafik anonsu duyulabilir TP göstergesi yanΩp sönüyorsa Bekleme Modunda TA Alma iπlevi alΩnan istasyon Bekleme Modunda TA Alma iπlevinin kullandΩ Ω sinyalleri göndermedi i için henüz etkinleπmemiπ demektir Bekleme Modunda TA Alma iπlevini etkinleπtirmek için bu sin...

Страница 128: ...ergesi yanar veya yanΩp söner PTY göstergesi yandΩ Ωnda Bekleme Modunda PTY Alma iπlevi etkinleπir Bir istasyon seçilen PTY programΩnΩ yayΩnlamaya baπladΩ Ωnda bu ünite otomatik olarak o istasyona geçer PTY göstergesi yanΩp sönüyorsa Bekleme Modunda PTY Alma iπlevi alΩnan istasyon Bekleme Modunda PTY Alma iπlevinin kullandΩ Ω sinyalleri göndermedi i için henüz etkinleπmemiπ demektir Bekleme Modund...

Страница 129: ...rlerini kaydetmek için 1 Bir FM istasyonunu dinlerken TP PTY tuπunu 2 saniyeden daha uzun süreyle basΩlΩ tutun 2 Yirmi dokuz PTY kodundan birini seçin 18 sayfaya bakΩn Ekranda seçilen kod adΩ görünür 3 Seçilen PTY kodunu istedi iniz numaraya kaydetmek için numara tuπunu 2 saniyeden daha uzun süreyle basΩlΩ tutun 4 TP PTY tuπunu 2 saniyeden daha uzun süreyle basΩlΩ tutarak bu moddan çΩkΩn En son se...

Страница 130: ...ogram yayΩnlayan bir istasyon bulunamazsa istasyon de iπmez Not BazΩ bölgelerde PTY arama iπlevi do ru çalΩπmayacaktΩr Sevdi iniz program türünü aramak için 1 Bir FM istasyonunu dinlerken TP PTY tuπunu 2 saniyeden daha uzun süreyle basΩlΩ tutun 2 Sevdi iniz program türlerinden birini seçmek için veya Yirmi dokuz PTY kodundan birini seçmek için Örn ROCK M seçildi inde En son seçilen PTY kodu görünü...

Страница 131: ...eπtirmek için aynΩ prosedürü tekrarlayΩp 3 AdΩmda kumanda dü mesini saat yönünde döndürerek ON seçimini yapΩn Not AUTO ADJ ayarΩnΩ ON konumuna getirdikten sonra en az 2 dakika boyunca aynΩ istasyonda kalmalΩsΩnΩz Aksi taktirde saat zamanΩ ayarlanmayacaktΩr Bunun nedeni ünitenin RDS sinyalindeki CT verilerini yakalamak için 2 dakikaya ihtiyaç duymasΩdΩr Di er uyumlu RDS iπlevleri ve ayarlarΩ Numara...

Страница 132: ...ramlar RELIGION nanç veya imanΩn herhangi bir yönüyle ya da varoluπ veya ahlakΩn do asΩ ile ilgili programlar PHONE IN InsanlarΩn görüπlerini telefonla veya açΩk oturumda ifade edebildi i programlar TRAVEL Seyahat destinasyonlarΩ paket turlar ve seyahat fikir ve imkanlarΩ ile ilgili programlar LEISURE BahçΩvanlΩk yemek piπirme balΩk avΩ vb e lence aktiviteleriyle ilgili programlar JAZZ Caz müzi i ...

Страница 133: ... otomatik olarak disk adΩ sanatçΩ ve ardΩndan parça adΩ da görünecektir ÇalmayΩ durdurmak ve CD yi çΩkartmak için 0 tuπuna basΩn CD nin çalΩnmasΩ durdurulur ve CD otomatik olarak yükleme yuvasΩndan dΩπarΩ çΩkartΩlΩr Kaynak tüner radyo olarak de iπir alΩnan son istasyonun yayΩnΩ duyulur Kayna Ω de iπtirdi iniz takdirde de CD nin çalΩnmasΩ CD dΩπarΩ çΩkartΩlmadan durdurulur CD yi daha sonra kaynak o...

Страница 134: ...k için 4 tuπuna kΩsa süreyle basΩn Tuπa arka arkaya bastΩ ΩnΩzda önceki parçalarΩn baπlangΩçlarΩ bulunur ve çalΩnΩr Bir parçaya hΩzlΩ bir πekilde gitmek 10 ve 10 tuπlarΩ 1 CD çalarken MODE tuπuna basarak iπlevler moduna girin 2 10 veya 10 tuπuna basΩn 10 veya 10 tuπuna ilk bastΩ ΩnΩzda parka on rakamΩnΩn katlarΩndan oluπan bir parça numarasΩna sahip en yakΩn sonraki veya önceki parçaya atlar örn 1...

Страница 135: ...rtarda çalmaya baπlar RPT göstergesi CD çalma modlarΩnΩn seçilmesi ParçalarΩ rastgele sΩrayla çalmak Diskteki parçalarΩ Rastgele Çalma için CD üzerindeki tüm parçalarΩ rastgele sΩrayla çalabilirsiniz 1 CD çalarken MODE tuπuna basarak iπlevler moduna girin 2 Ekranda MODE ibaresi yanΩp sönerken RND rastgele tuπuna basarak ekranda DISC RND ibaresinin görünmesini sa layΩn Tuπa her bastΩ ΩnΩzda disktek...

Страница 136: ...nΩzda otomatik olarak gösterilecektir Metin çerikli CD bilgilerini elle de iπtirmek için Metin çerikli bir CD çalarken metin ekranΩ modunu seçin Arka arkaya DISP ekran tuπuna basΩn Tuπa her bastΩ ΩnΩzda ekran aπa Ωdaki gibi de iπir Notlar Ekranda bir defada en fazla 8 karakter görüntülenebilir ve 8 karakterden fazla varsa kaydΩrΩlabilir AyrΩca 32 sayfadaki KaydΩrma modunun seçilmesi SCROLL baπlΩkl...

Страница 137: ...ΩrasΩnda dosya ve klasörler bilgisayar verileri içeren dosya ve klasörlerin düzenlenmesine benzer bir πekilde düzenlenebilir Kök dizin a aç köküne benzerdir Her bir dosya ve klasör kök dizine ba lanabilir ve buradan eriπilebilir Aπa Ωdaki resim MP3 dosyalarΩnΩn bir CD R veya CD RW ye nasΩl kaydedildi ini nasΩl çalΩndΩklarΩnΩ ve bu ünite üzerinde nasΩl arandΩklarΩnΩ gösterir Notlar Bu ünite MP3 dos...

Страница 138: ... gösterir Çalmaya baπlandΩ Ωnda klasör ve dosya adlarΩ veya ID3 imleri otomatik olarak görünecektir AyrΩca 25 sayfaya da bakΩn Kayna Ω de iπtirir veya üniteyi kapatΩrsanΩz disk çalmayΩ durdurur disk çΩkartΩlmaz Daha sonra tekrardan kaynak olarak CD yi seçti inizde ya da üniteyi açtΩ ΩnΩzda disk daha önce çalma iπleminin durdurulmuπ oldu u yerden çalmaya baπlar ÇalmayΩ durdurmak ve diski çΩkartmak ...

Страница 139: ... bölümü bulmak DosyayΩ hΩzlΩ ileri veya geri sarmak için Not Bu iπlem sΩrasΩnda sadece kesik kesik sesler duyabilirsiniz Geçen çalma süresi de ekranda fasΩlalΩ olarak de iπir Önceki veya sonraki dosyalara gitmek için Çalarken çalan dosyanΩn baπΩna gitmek için 4 tuπuna kΩsa süreyle basΩn Tuπa arka arkaya bastΩ ΩnΩzda önceki dosyalarΩn baπlangΩçlarΩ bulunur ve çalΩnΩr Bir diski çalarken dosyayΩ hΩzl...

Страница 140: ... gelir 12 den büyük bir numarasΩ olan bir klasörü do rudan seçemezsiniz Bir klasördeki belirli bir dosyayΩ seçmek için klasörü seçtikten sonra ya da 4 e basΩn Çalan klasördeki belli bir dosyaya hΩzlΩ bir πekilde gitmek 10 ve 10 tuπlarΩ 1 Disk çalarken MODE tuπuna basarak iπlevler moduna girin 2 10 veya 10 tuπuna basΩn 10 veya 10 tuπuna ilk bastΩ ΩnΩzda dosya on rakamΩnΩn katlarΩndan oluπan bir dos...

Страница 141: ...Ω ya da çalan klasördeki bütün dosyalarΩ devamlΩ olarak çalabilirsiniz 1 Bir MP3 diski çalarken MODE tuπuna basarak iπlevler moduna girin 2 Ekranda MODE ibaresi yanΩp sönerken RPT tekrar tuπuna basarak ekranda TRK RPT ya da FLDR RPT ibaresinin görünmesini sa layΩn Tuπa her bastΩ ΩnΩzda tekrar çalma modu aπa Ωdaki gibi de iπir Mod Etkin DevamlΩ olarak göstergesi çalar TRK RPT RPT göstergesi Çalan y...

Страница 142: ...a bakΩn Önceden ayarlΩ ses modlarΩnΩn seçimi C EQ özel equalizer Önceden ayarlΩ bir ses modunu seçebilirsiniz C EQ özel equalizer müzik tarzΩna uygun Aπa Ωdaki prosedürün yapΩlmasΩ için bir süre sΩnΩrΩ vardΩr AyarlarΩnΩzΩ bitirmeden önce iptal edilirse tekrar 1 adΩmdan baπlayΩn 1 MODE tuπuna basarak iπlevler moduna girin 2 stedi iniz ses modunu seçin Tuπa her bastΩ ΩnΩzda ses modlarΩ aπa Ωdaki gib...

Страница 143: ...ses modu C EQ için belle e alΩnΩr 2 ki hoparlörlü bir sistem kullanΩyorsanΩz fader düzeyini 00 a ayarlayΩn 3 Kumanda dü mesi normal olarak ses düzeyi kumandasΩ olarak çalΩπΩr DolayΩsΩyla ses düzeyini ayarlamak için VOL seçimini yapmanΩz gerekmez 4 Amplifikatör kazanç kontrol ayarΩna ba lΩ olarak AyrΩntΩlar için 32 sayfaya baπvurun 2 AyarΩn yapΩlmasΩ 3 Di er ö eleri ayarlamak için gerekirse 1 ve 2 ...

Страница 144: ...1 Ekranda PSM ö elerinin görünmesi için SEL seç tuπunu 2 saniyeden daha uzun süreyle basΩlΩ tutun 31 sayfaya bakΩn 2 Ayarlamak istedi iniz PSM ö esini seçin 3 Seçilen PSM ö esini ayarlayΩn D µER ANA LEVLER 4 Di er PSM ö elerini ayarlamak için gerekirse 2 ve 3 adΩmlarΩ tekrarlayΩn 5 AyarΩ bitirin Örn DIMMER modunu seçti inizde TR30 33_KD G401 EU f p65 21 11 03 9 08 AM 30 ...

Страница 145: ...h Edilen Ayar ModlarΩ PSM ö eleri Her PSM ö esinin ayrΩntΩlΩ iπlemleri için tabloda sΩralanan sayfalara bakΩn Göstergeler Seçilebilir de erler ö eler Fabrika ön ayarlarΩna sayfay getirmek bakΩn DEMO ON DEMO OFF DEMO ON 6 00 0 00 OFF OFF ON 32 LOW PWR HIGH PWR HIGH PWR 32 12H 24H OFF ON 24H ON 17 AF AF AF REG OFF 12 13 VOL 00 VOL 30 ya da 50 VOL 20 OFF ON OFF 17 17 OFF OFF 29 program tipi 18 sayfay...

Страница 146: ...n bir süre basarak ekranΩ kaydΩrabilirsiniz m ekranΩnΩ açΩp kapamak için TAG DISP Bir MP3 dosyasΩnda albüm adΩ sanatçΩ parça adΩ v s nin kaydedildi i ID3 mi adΩ verilen dosya bilgileri bulunabilir ki sürümü bulunmaktadΩr ID3v1 ID3 m sürümü 1 ve ID3v2 ID3 m sürümü 2 Diske hem ID3v1 hem de ID3v2 kaydedilmiπse ID3v2 bilgileri görüntülenecektir Fabrika çΩkΩπΩnda TAG ON seçene i devrededir TAG ON MP3 d...

Страница 147: ...teden dΩπarΩ do ru çekin 3 Söktü ünüz kumanda panosunu üniteyle birlikte gelen kutuya yerleπtirin Kumanda panosunun takΩlmasΩ 1 Kumanda panosunun sol tarafΩnΩ pano tutaca ΩnΩn üzerindeki yuvaya yerleπtirin 2 Kumanda panosunun sa tarafΩna basarak pano tutaca Ωna sabitleπtirin Konektörlerin temizlenmesi hakkΩnda not Kumanda panosunu sΩk sΩk sökerseniz konektörlerin performansΩ düπecektir Bu olasΩlΩ ...

Страница 148: ...nda sensörü Lityum yassΩ pil ürün numarasΩ CR2025 UZAKTAN KUMANDANIN KULLANILMASI arkadan görünüm 3 Pil yuvasΩnΩ yerleπtirin Pil yuvasΩnΩ bir tΩk sesi duyana kadar itmek suretiyle geri takΩn UYARI Pili çocuklarΩn ulaπamayaca Ω bir yerde saklayΩn Bir çocuk bilmeden pili yutarsa hemen bir doktora baπvurun Pili πarj etmeyin kΩsa devre yapmayΩn da ΩtmayΩn ΩsΩtmayΩn ve ateπe atmayΩn Bunlardan herhangi ...

Страница 149: ...Ω πekilde iπ görür Not Bu tuπlar tercih edilen ayar modu ayarlamalarΩ için kullanΩlamaz KD G402 ve KD G401 direksiyon simidi uzaktan kumanda fonksiyonu ile donatΩlmΩπtΩr Otomobiliniz direksiyon simidi uzaktan kumandasΩ ile donatΩlmΩπsa kumandayΩ kullanarak üniteyi çalΩπtΩrabilirsiniz Bu fonksiyonu kullanabilmenizi sa layacak ba lantΩ için Montaj Ba lantΩ ElkitabΩ ayrΩ bir yayΩndΩr bakΩn 1 Ünite ka...

Страница 150: ...yan yollarda CD çalmayΩn CD yi de iπtirin KablolarΩ ve ba lantΩlarΩ kontrol edin Yükleme yuvasΩna bir CD yerleπtirin CD yi do ru yerleπtirin Nedenler Ses düzeyi minimuma ayarlanmΩπtΩr Ba lantΩlar yanlΩπtΩr Ünitenin mikroiπlemcisi parazit vs nedeniyle hatalΩ iπlem yapmΩπtΩr Sinyaller çok zayΩftΩr Antenin ba lantΩsΩ gerekti i gibi de ildir CD ters yerleπtirilmiπtir CD R CD RW kayΩt sΩrasΩnda sonland...

Страница 151: ...Ω olarak farklΩlΩk gösterir Dosyalar kaydedildi inde çalma sΩralamasΩ belirlenir Bazen çalarken bu meydana gelir Bu dosyalarΩn diske kaydediliπ πeklinden kaynaklanΩr Çalan klasör bir MP3 dosyasΩ içermiyor Çalan disk bir MP3 dosyasΩ içermiyor Bu ünite yalnΩzca alfabeleri gösterebilir büyük A Z sayΩlar ve sΩnΩrlΩ sayΩda sembol Belirtiler Disk çalΩnamΩyor Parazit yapΩyor Daha uzun bir okuma süresi is...

Страница 152: ...nlerle bu ünitede çalmayabilir Disk kirli veya çiziktir Ünitenin içindeki mercek üzerinde nem yo unlaπmΩπtΩr Ünitenin içindeki pickup merce i kirlenmiπtir CD RW larΩn yansΩma oranΩ normal CD lerinkinden düπük oldu u için CD RW lar daha uzun bir okuma süresine ihtiyaç duyabilirler CD R lar ya da CD RW lar yüksek sΩcaklΩk ve yüksek neme duyarlΩ oldu undan taπΩtΩnΩzΩn içinde bΩrakmayΩn Aπa Ωdaki CD R...

Страница 153: ...lΩlΩ Ω 16 3 dBf 1 8 µV 75 Ω Alternatif Kanal Seçicili i 400 kHz 65 dB Frekans YanΩtΩ 40 Hz ila 15 000 Hz Stereo AyΩrma 30 dB Yakalama OranΩ 1 5 dB OD Tüner DuyarlΩlΩk 20 µV Seçicilik 35 dB UD Tüner DuyarlΩlΩk 50 µV CD ÇALAR KISMI Tip Yo un disk çalar Sinyal AlgΩlama Sistemi TemassΩz optik algΩlama yarΩiletken lazeri Kanal sayΩsΩ 2 kanal stereo Frekans YanΩtΩ 5 Hz ila 20 000 Hz Dinamik AralΩ Ω 96 d...

Страница 154: ...idad Consulte la páfina de Cómo reposicionar su unidad Vous avez des PROBLÈMES de fonctionnement Réinitialisez votre appareil Référez vous à la page intitulée Comment réinitialiser votre appareil ÇalΩπtΩrmakta GÜÇLÜK mü çekiyorsunuz Lütfen ünitenizi sΩfΩrlayΩn Ünitenizin sΩfΩrlanmasΩ sayfasΩna baπvurun 2004 VICTOR COMPANY OF JAPAN LIMITED Cover004B_KD G401_ff p65 2 16 04 5 18 PM 2 ...

Страница 155: ...Instructions CD RECEIVER KD G402 KD G401 ...

Отзывы: