background image

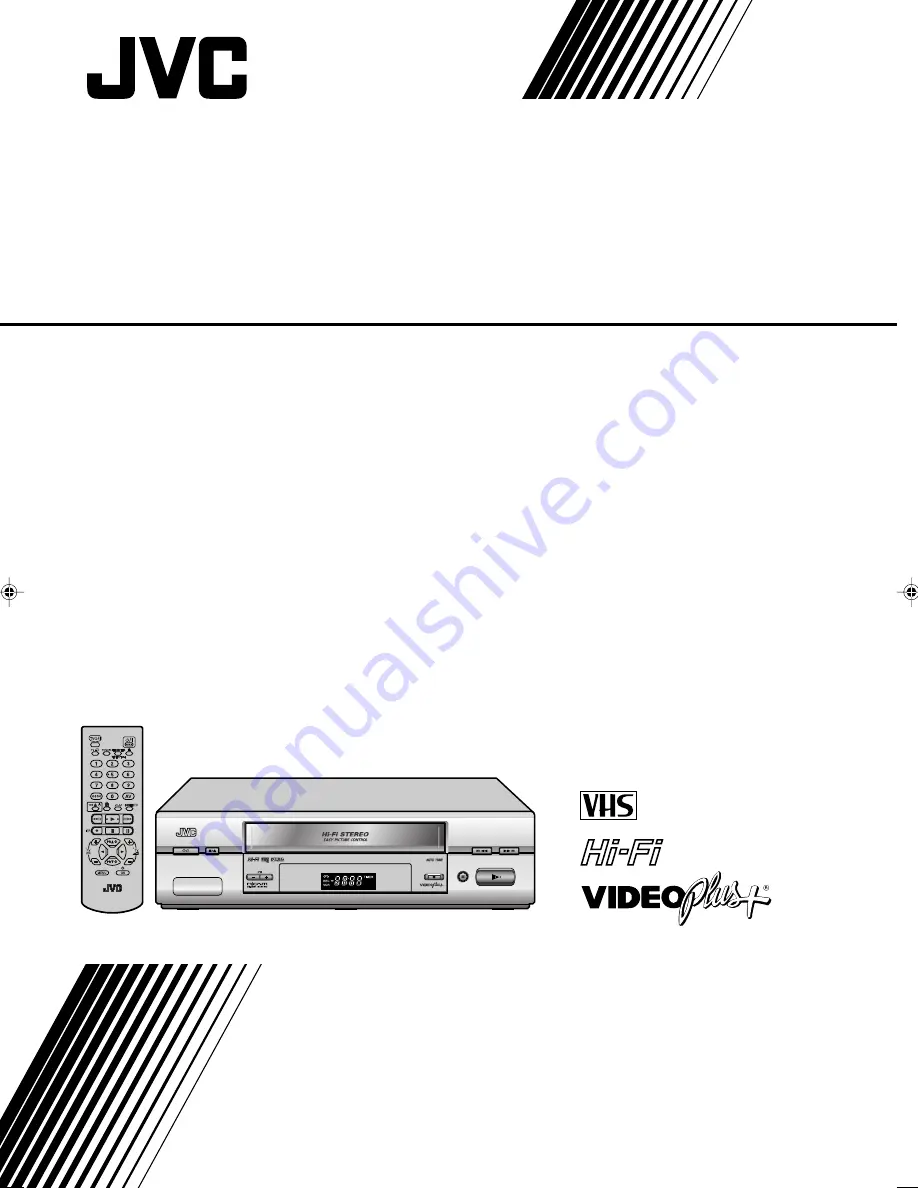
HR-V505EK

VIDEO CASSETTE RECORDER

INSTRUCTIONS

HR-V505EK

LPT0816-001A

PAL

  HR-V505EK-EN/P01_Cover

2/12/03, 6:31 PM

1

Содержание HR-V505EF

Страница 1: ...HR V505EK VIDEO CASSETTE RECORDER INSTRUCTIONS HR V505EK LPT0816 001A PAL ...

Страница 2: ...e mains plug is cut off remove the fuse and dispose of the plug immediasÑ y to avoid a possible shock hazard by inadvertent connection to the mains supply If this product is not supplied fitted with a mains plug then follow the instructions given below DO NOT make any connection to the Larger Terminal coded E or Green The wires in the mains lead are coloured in accordance with the following code B...

Страница 3: ... tainers filled with water or liquids such as cosmetics or medicines flower vases potted plants cups etc on top of this unit 7 DO NOT place any naked flame sources such as lighted candles on the apparatus 8 AVOID violent shocks to the recorder during transport MOISTURE CONDENSATION Moisture in the air will condense on the recorder when you move it from a cold place to a warm place or under extreme...

Страница 4: ...nt switched on when it is unattended unless it is specifically stated that it is designed for unattended operation or has a standby mode Switch off using the switch on the equipment and make sure that your family knows how to do this Special arrangements may need to be made for infirm or handicapped people DON T use equipment such as personal stereos or radios so that you are distracted from the r...

Страница 5: ...Contents Diagrams of Equipment 6 Equipment Key 7 Welcome to JVC 8 Plug Play Setup 10 Initial Settings 13 Basic Features 23 Advanced Features 37 Subsidiary Information 48 List of Terms 52 ...

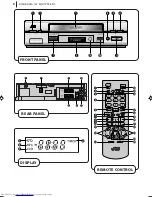
Страница 6: ...diagrams of equipment 6 front panel display rear panel 2 7 6 1 8 3 9 4 0 5 w e q t r remote control ...

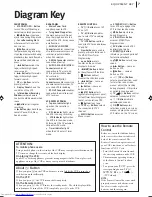
Страница 7: ...rwards tape initiates high speed forward search 7 PR Buttons select a preset position 8 Display Panel shows the condition of the VCR 9 Infrared Beam Receiving Window is where Remote Control should be aimed when in use 10 T Button starts regular recording 11 Button plays back tape cancels Pause Still Slow Search modes 14 STANDBY ON o Button turns VCR on engages the VCR in the standby mode 15 0 Butt...

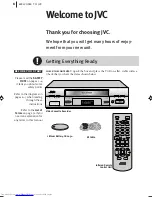
Страница 8: ...Terms on page 52 if you need an explanation for any terms in this manual Video Cassette Recorder Lithium Battery CR 2032 WelcometoJVC Thank you for choosing JVC We hope that you will get many hours of enjoy ment from your new unit Getting Everything Ready check the contents Unpack the box and place the VCR on a flat stable surface Check that you have the items shown below RF Cable Infrared Remote ...

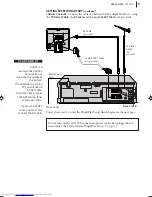
Страница 9: ...connecting to a stereo TV you will need a SCART cable There are several types of SCART cables fully wired and others If you use a SCART cable you must also connect the RF cable You are now ready to start the Plug Play Setup which begins on the next page Do not turn on the VCR When the main power cord is first plugged into a main outlet the VCR performs Plug Play Setup 墌 pg 10 RF Cable provided TV ...

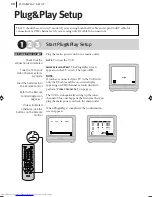
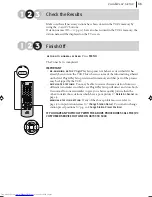
Страница 10: ...e connected your TV to the VCR with only the RF cable and the on screen display appearing on UHF channel 22 looks distorted perform Video Channel Set on page 14 The VCR is automatically setting up the tuner channels This only happens the first time that you plug the main power cord into the main outlet When Plug Play is completed the Confirmation screen appears Plug PlaySetup The TV should be set ...

Страница 11: ... Setup is retained in memory and that part of the process may be skipped by the VCR duplicate stations You may be able to receive the same station from two different transmitters in which case Plug Play Setup will detect and store both It is normal for one transmitter to give you a better quality picture than the other to delete those stations which have a poor picture 墌 Delete A Channel on page 1...

Страница 12: ...plug play setup 12 ...

Страница 13: ...Initial Settings Video Channel Set 14 Clock Set 16 Tuner Set 17 ...

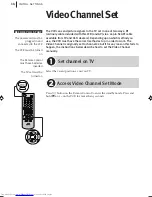
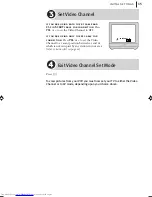
Страница 14: ...V via a 21 pin SCART cable available from TV and Hi Fi dealers Depending upon which method you use the VCR must have the correct method set up in order to work The Video Channel is originally set to channel 22 but if for any reason this fails to happen the instructions below describe how to set the Video Channel manually Set channel on TV Select the vacant position 22 on you TV Access Video Channe...

Страница 15: ... you are using only the rf cable for connection Press PR or to set the Video Channel to a vacant position between 22 and 68 which is not occupied by any station in your area refer to station list on page 22 Exit Video Channel Set Mode Press o To view pictures from your VCR you must now set your TV to either the Video Channel or to AV mode depending upon your choice above ...

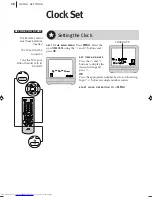
Страница 16: ...ress the and buttons to display the desired setting and press T OR Press the appropriate number keys for each setting Input 0 before any single number entries start clock operation Press MENU TIME DATE MM HH DD YY MM before you start The Remote Control must have batteries inserted The TV set must be turned on Tune the TV to your Video Channel or to its AV mode ...

Страница 17: ...ttons and press OK twice During Auto Channel Set the indica tor on the TV screen moves from left to right When Auto Channel Set is completed the Confirmation screen appears confirmation screen Once Auto Channel Set has completed its search the confirmation screen will appear showing the details Preset Number Channel Number Fine Tuning Condition and Station of the TV stations that the process has f...

Страница 18: ...hannel Number that you want to store and press T OR Press the number keys to input the Channel Number that you want to store Input 0 before any single number entries fine tuning Press Tto select MFT setting Press the and buttons to fine tune the channel input channel id Press Tto select STATION setting and press OK Press the and buttons to select the required ID from the stored list save new chann...

Страница 19: ...racter Press the and buttons to cycle through the characters A Z 0 9 period space and stop when the desired character is indicated then press Tto enter Enter the remaining characters the same way maximum of 5 After entering all characters press OK If you make a mistake press until the incorrect character begins blinking Then enter the correct character by pressing the and buttons check setting Pre...

Страница 20: ...ppears get to the confirmation screen Press MENU select item Press the and buttons on the Remote Control to select the item you want to move then press T select new position Press the and buttons to move the station to the new preset position then press OK close confirmation screen Press MENU Example If you moved the station in position 4 to position 2 the stations originally in positions 2 and 3 ...

Страница 21: ...BC2 BR3 BAYERN3 BRTN BRTN TV1 Belgium CANAL CANAL PLUS CAN5 CANALE5 CNN CNN DR1 DR1 DR2 DR2 DSF DSF EURO EURONEWS FILMN FILM FR2 France2 FR3 France3 HR3 HESSEN3 HRT HRT Croatia ITA 1 ITALIA1 KABEL KABEL1 M6 M6 MDR3 MDR3 MTV MTV MTV3 MTV3 N3 NORD3 STATION NAME ID N TV N TV NDR3 NDR3 NED1 NED1 NED2 NED2 NED3 NED3 NET2 Network 2 Ireland NELON NICKELODEON NRK NRK ORB3 ORB3 ORF1 ORF1 ORF2 ORF2 ORF3 ORF...

Страница 22: ... 32 35 Sutton Coldfield 46 40 43 50 37 The Wrekin 26 33 23 29 35 Waltham 58 64 61 54 35 North Belmont 22 28 25 32 56 Emley Moor 44 51 47 41 37 North West Caldbeck 30 34 28 32 56 Winter Hill 55 62 59 65 48 North East Bilsdale West Moor 33 26 29 23 35 Chatton 39 45 49 42 Pontop Pike 58 64 61 54 68 Scotland Angus 57 63 60 53 Black Hill 40 46 43 50 37 Sandale 22 Caldbeck 34 28 32 56 Creigkelly 31 27 2...

Страница 23: ...Basic Features Playback 24 Playback Features 26 Recording 28 VIDEO Plus Timer Programming 31 Timer Programming 33 ...

Страница 24: ...ing up and the spine label is facing away from the VCR Insert the cassette as shown in the diagram below don t use too much force If the VCR was turned off before you inserted the cassette the power will come on automatically The counter on the TV screen will reset to read 0 00 00 If the record safety tab on the video cassette has been removed playback begins automatically Play If the cassette tha...

Страница 25: ...ou press and hold 1 button or button during rewinding or fast forwarding you can see the picture on the TV screen Releasing it cancels the picture search and resume rewinding and fast forwarding Video Heads Cleaning Use a dry cleaning cassette JVC TCL 2 in the following cases Rough poor picture appears while a tape is played back The picture is unclear or no picture appears ...

Страница 26: ...n move backward or forward from the still picture Press the button on the Remote Control Each time the button is pressed the frame will move forward one frame Press to resume playback Slow Motion This VCR will play your cassette forwards in slow motion During still picture press Ton the Remote Control The picture will return to still when you press again If the slow motion picture on the TV screen...

Страница 27: ... for forward high speed search or the 1 button for reverse high speed search High speed search stops automatically about 3 minutes to protect the heads then normal playback resumes Press to resume playback Skip Search During playback press 3 up to 6 times Each press of the 3 button will cause the VCR to go into fast motion playback for a period of 30 seconds When the specified portion of the tape ...

Страница 28: ...equired tape speed is shown You can choose Standard Play SP or Long Play LP The picture quality on LP record ings will not be as high as on SP recordings but the tape will last longer Start Recording Press T on the VCR or on the Remote Control If the tape reaches its end during recording the VCR stops recording rewinds the tape and ejects the cassette then enters the standby mode automatically Pau...

Страница 29: ...ormation By pressing the OK button repeatedly you can change the TV screen between the clock time and the tape position time counter Resetting the Counter Press the OK button so that the counter display appears on the TV screen While the display is shown press the 0000 button You can reset the counter to 0 00 00 before starting playback or recording Record a Programme While Watching Another If you...

Страница 30: ...TR once If left in this state the VCR will keep recording until the tape runs out engage instant timer recording Press T ITR again This means that the VCR will record for 30 minutes on the programme already selected and then stop automatically increase time Each time T ITR is pressed the time limit is increased by 30 minutes to a maximum of 9 hours ...

Страница 31: ...el and time Up to 7 timer recording programmes within a month can be made Get to the VIDEO Plus Screen Press VIDEO Plus You will see the following TV screen information Press to select ONCE once DAILY Monday Friday or WEEKLY weekly serials Enter the PlusCode Number Press the number keys on the Remote Control to enter the PlusCode number of the programme you wish to record then press OK The program...

Страница 32: ...keys or and buttons change stop time Press Tto select the stop time You can compensate for anticipated changes in schedule using the number keys or and buttons set tape speed Press Tto select the tape speed You can change the tape speed between Standard Play SP Long Play LP and Intelligent Play IP using the and buttons 墌 pg 34 Intelligent LP Recording capacity You can set this VCR to timer record ...

Страница 33: ...ess the number keys to enter the programme required set date Press the number keys to adjust the date To time record daily Monday Friday or weekly serials press Tto select the date setting then press OK Press T then press OK set start time Press the number keys to enter the start time set stop time Press the number keys to enter the stop time set tape speed Press Tto select the tape speed You can ...

Страница 34: ...ow complete recording if there is not enough tape to record the entire programme while timer recording in SP mode For example recording a programme of 210 minutes in length onto a 180 minute tape Approximately 150 minutes Approximately 60 minutes SP mode LP mode Total 210 minutes NOTES If you have programmed the VCR to timer record 2 or more programmes do not use this function but change the tape ...

Страница 35: ...e automatically You can programme the timer recording while a regular recording is in progress the menu screens will not be recorded Check Cancel Change Programmes Press o to disengage the timer mode go to the programme list Press MENU Select the icon REC using the and Tbuttons and press OK cancel a programme Press to select the programme you want to delete Press to cancel a programme change a pro...

Страница 36: ...basic features 36 ...

Страница 37: ...Advanced Features Picture Quality 38 Sound Modes 39 Editing 41 Other Functions 43 Connection to a Stereo System 47 ...

Страница 38: ...djust the tracking manually NOTE When a new tape is inserted the VCR returns to automatic tracking Picture Control This feature allows you to select the most appropriate picture quality according to the type of tape or use of this VCR The default setting is OFF get to the main menu Press MENU Select the icon EPC using the and Tbuttons and press OK select picture control mode Select the desired mod...

Страница 39: ... STEREO 墌 below Soundtrack Selection select bilingual Set AUDIO to LEFT or RIGHT 墌 below Soundtrack Selection select standard To listen to standard monaural audio during a NICAM broadcast set AUDIO to MONO 墌 below Soundtrack Selection Soundtrack Selection This VCR is capable of recording four soundtracks and will play back the one that you select Set AUDIO to the appropriate mode get to the main m...

Страница 40: ... played back in stereo and the normal audio track is played back automatically for tapes which only have normal audio recording If the NICAM stereo signal is poor or unavailable the VCR will automatically record normal audio onto both the Hi Fi and normal audio tracks This will eliminate possible audio interference ...

Страница 41: ... connector to another VCR set recorder input mode The recording VCR mode must be set to AUX If this VCR is the recorder press AV and or PR to select AV1 if you ve used the EURO AV1 AUDIO VIDEO connecter or AV2 if you ve used the EURO AV2 DECODER connecter If this VCR is the player set OSD to OFF 墌 pg 43 start source vcr Engage its PLAY mode start recording vcr Engage its RECORD mode ...

Страница 42: ... connector via an optional cable adapter set input mode Press AV or PR so that AV1 for EURO AV1 AUDIO VIDEO connector or AV2 for EURO AV2 DECODER connector appears in the place of a preset position number start camcorder Engage the camcorder s PLAY mode start recorder Press T Your VCR Audio Video Cable not provided AUDIO OUT Camcorder VIDEO OUT Cable adapter not provided ...

Страница 43: ...ar the on screen display completely press OK again The indications are not recorded even if the VCR is in the recording mode 1 Channel and auxiliary input 2 Clock 3 Tape position 4 Time counter Each time you press OK the display shows clock or tape position and time counter alternatively 5 Current day month year 6 Tape speed 7 VCR operation mode PLAY appears during playback REW appears during rewi...

Страница 44: ...ress 1 then press o REW blinks on the TV screen The VCR enters the standby mode automatically after rewinding the tape Ez Easy Power Off During playback press 10y The VCR stops playback rewinds the tape and ejects the cassette then enters the standby mode automatically ...

Страница 45: ...L NTSC and MESECAM tapes or record PAL and SECAM signals on this VCR Select the appropriate colour system SECAM signals will be recorded as MESECAM on this VCR MESECAM is the designation for tapes with SECAM signals that have been recorded on a MESECAM compatible PAL video cassette recorder get to the main menu Press MENU Select the icon SYSTEM using the and T buttons and press OK select mode Pres...

Страница 46: ...ff on the TV screen when you play back the programme with the 16 9 screen format return to normal screen Press MENU Child Lock You can disable the VCR s operations While the VCR is turned on press on the Remote Control SAFE appears on the TV screen To release the child lock press until the OFF blinks on the display panel If any buttons on the VCR are pressed while the child lock function is activa...

Страница 47: ...onnections Make sure that you connect the L and R speakers in the right order nicam tv If you can receive NICAM TV broadcasts in your area this VCR can record them indepen dently of the TV set and play them back through the stereo volume When listening to sound through the connected stereo turn the TV s volume down to zero dynamic range This VCR has a Hi Fi audio dynamic range of 80 dB Check that ...

Страница 48: ... pause and then resume a recording the end of the recording before the pause is overlapped by the beginning of the continuation of recording Why does this happen A This is normal It reduces distortion at the pause and resume points Q Can the VCR indefinitely remain in the Record Pause mode A No It stops automatically after 5 minutes to protect the heads Q What happens if the tape runs out during r...

Страница 49: ...E MODE The tape is already fully rewound or fast forwarded If you re using only the RF cable for connection the TV s channel selector is not set to the Video Channel the VCR s Video Channel has not been correctly set If you re using both the RF cable and 21 pin SCART cable for connection the TV is not set to the AV mode This is normal The automatic tracking mode is engaged The video heads may be d...

Страница 50: ...s had its record safety tab removed The timer is engaged but there s no cassette loaded Timer recording is in progress The end of the tape was reached during timer recording The VCR s preset positions have been set incorrectly Insert a cassette or using adhesive tape cover the hole where the tab was removed Set to the desired preset Confirm that the source is prop erly connected Confirm that all u...

Страница 51: ... high Those channels have been designated to be skipped Recording is in progress After the manual settings were made Auto Channel Set was performed The TV aerial cable was not connected to the VCR when Plug Play Setup was per formed Position the camcorder so its microphone is away from the TV Turn the TV s volume down If you need the skipped channels restore them Press to pause the recording chang...

Страница 52: ...amming 31 16 9 Compatibility 46 A A A A A Auto Channel Setup 17 C C C C C Change Display Information 29 Change Station Name 19 Change Station Preset Position 20 Check Cancel Change Programmes 35 Child Lock 46 Clock Set 16 Colour System 45 Connection to a Stereo System 47 D D D D D Delete a Channel 19 Display Tape Position Time Counter 29 E E E E E Editing From a Camcorder 42 Editing Using Another ...

Страница 53: ...53 MEMO ...

Страница 54: ...54 MEMO ...

Страница 55: ...55 MEMO ...

Страница 56: ...type colour signal and CCIR monochrome signal 625 lines 50 fields Recording Format PAL I RF reception PAL I RF OUT PAL I RF modulator UHF channels 22 68 Adjustable Input level VIDEO IN SCART type 1 0 Vp p 75 ohm unbalanced Output level VIDEO OUT SCART type 1 0 Vp p 75 ohm unbalanced Signal to noise ratio More than 43 dBm audio Input level AUDIO IN SCART type 6 0 dBm more than 10 kΩ Output level AU...

Отзывы: