background image

1

EN

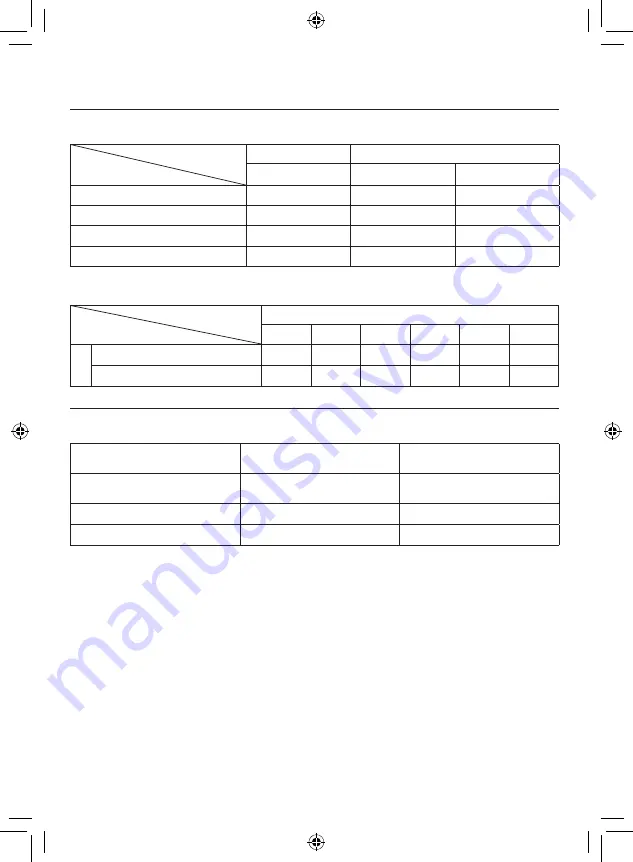
h: hour/m: minute

Approximate recordable time (for video)

Recording medium

Quality

HDD

microSD Card

30 GB 

4 GB

8 GB

ULTRA FINE

7 h 10 m

57 m

1 h 54 m

FINE

10 h 40 m

1 h 25 m

2 h 50 m

NORMAL

14 h 10 m

1 h 53 m

3 h 46 m

ECONOMY

37 h 30 m

4 h 58 m

9 h 56 m

Approximate number of images (for still image)

The HDD can record up to 9999 still images in either mode.

Recording medium

Image size/Quality

microSD Card

256 MB

512 MB

1 GB

2 GB

4 GB 

8 GB 

4:3

832 x 624 / FINE

990

1960

3980

7600

9999

9999

832 x 624 / STANDARD

1490

2940

5970

9999

9999

9999

h: hour/m: minute

Required charging/recording time (approx.)

Battery pack

Charging time

Recording time

BN-VF808U

(Provided)

1 h 50 m

2 h 5 m*

BN-VF815U

2 h 40 m

4 h 15 m*

BN-VF823U

3 h 40 m

6 h 25 m*

*  When the LED light is off and the monitor backlight is set to [STANDARD] mode.

Содержание GZ-MG610

Страница 1: ...EN CAMCORDER ENGLISH Dear Customers Thank you for purchasing this camcorder Before use please read the safety information and precautions contained in pages 6 and 7 to ensure safe use of this product EK GZ MG610 ...

Страница 2: ...tment Adjust the strap and fasten Fasten the strap when you grip the camcorder When carrying the camcorder please be careful not to drop it Grip Strap Fasten Power charge lamp blinks Charging goes out Charging finished Battery Pack AC Adapter To AC Outlet 110V to 240V Open the cover The battery pack is not charged at the time of purchase Access lamp blinks Accessing files Do not remove the AC adap...

Страница 3: ... for at least 2 seconds Touch the sensors with your finger The sensors do not function if you touch them with your finger nail or with gloves on S Select CLOCK SETTING T Select the city closest to the area where you use the camcorder U Select ON if daylight saving time is effective V Set the date and time Slide your finger up and down on the sensor Then touch OK Touch sensor Sets the date and time...

Страница 4: ...S Start recording Press the START STOP button to start recording and press it again to stop Remaining space on the hard disk Video Quality Record standby Recording Q Slide the mode switch to select video mode R Select recording mode The mode changes when you press the button The auto recording indicator appears ...

Страница 5: ... forget to make copies after recording To copy files onto DVD discs Z p 42 To dub files to a VCR DVD recorder Z p 51 To play back a created disc Z p 45 To edit files on your computer Z p 46 Q Select playback mode The mode changes when you press the button R Select the desired file Index screen S Select F Touch OK Playback screen ...

Страница 6: ... to fall resulting in damage CAUTION To avoid electric shock or damage to the unit first firmly insert the small end of the power cord into the AC Adapter until it is no longer wobbly and then plug the larger end of the power cord into an AC outlet IMPORTANT for owners in the U K Connection to the mains supply in the United Kingdom DO NOT cut off the mains plug from this equipment If the plug fitt...

Страница 7: ...ols are only valid in the European Union If you wish to dispose of these items please do so in accordance with applicable national legislation or other rules in your country for the treatment of old electrical and electronic equipment and batteries SOME DO S AND DON TS ON THE SAFE USE OF EQUIPMENT This equipment has been designed and manufactured to meet international safety standards but like any...

Страница 8: ...klight Compensation 28 Manual Setting in Menu 28 USING WITH TV Viewing Files on TV 31 Connection with TV 31 Playback Operation 31 EDITING Managing Files 32 Capturing a Still Image from a Video 32 Deleting Files 32 Protecting Files 34 Viewing File Information 35 Changing the Event Registration 36 Trimming Files 37 Playlists 38 Creating Playlists 38 Playing Back Playlists 39 Other Operations of Play...

Страница 9: ...ther batteries JVC cannot guarantee safety or performance of this product when it is operated by other batteries If the camcorder is subjected to electrostatic discharge turn off the power before using it again If a malfunction occurs stop using the camcorder immediately and consult your nearest JVC dealer Recorded data may be erased while the camcorder is being repaired or inspected Back up all d...

Страница 10: ...N Accessories GETTING STARTED AP V20M BN VF808U AC Adapter Power Cord Battery Pack AV Cable USB Cable CD ROM Core Filter NOTE Make sure to use the provided cables for connections Do not use any other cables ...

Страница 11: ...er to the USB Cable The core filter reduces interference caused when connecting to other devices Connect the end of the cable with the core filter to the camcorder Release the stopper 3 cm Wind once To be connected to the camcorder ...

Страница 12: ...12 EN Index NOTE Be careful not to cover 0 1 and 2 during shooting The LCD monitor can rotate 270 ...

Страница 13: ...de Switch UPLOAD Button Z p 54 TITLE Button Z p 39 EXPORT Button Z p 52 DIRECT DVD Button Z p 43 INFO Button Z p 22 23 35 PLAY REC Button Z p 20 21 24 25 0 LED Light Z p 22 1 Lens 2 Stereo Microphone 3 DC Connector 4 START STOP Button Z p 20 5 AV Connector Z p 31 51 6 USB Connector Z p 42 47 7 Tripod Mounting Socket 8 microSD Card Slot 9 Battery Release Button ...

Страница 14: ...Compensation Indicator Z p 28 1 Brightness Control Indicator Z p 29 Photometry Area Control Indicator Z p 30 2 Shutter Speed Z p 29 During Video Recording Only Mode Indicator EXPORT Mode Indicator Z p 52 Counter Upload Mode Indicator Z p 54 Video Quality B ULTRA FINE C FINE D NORMAL E ECONOMY Z p 57 Remaining Time MREC Appears during recording M Q Appears during record standby mode Digital Image S...

Страница 15: ... Slow Motion The number on the left shows speed Battery Indicator Date Time Z p 16 Volume Level Indicator During Still Image Playback 1 6 5 5 1 11 2009 Mode Indicator Quick Review Indicator Z p 21 Folder File Number Slide Show Playback Indicator Battery Indicator Date Time Z p 16 Switching indication modes on LCD monitor Each time you touch DISPLAY indications on LCD monitor switch as shown below ...

Страница 16: ... time BN VF808U Provided 1 h 50 m BN VF815U 2 h 40 m BN VF823U 3 h 40 m To detach the battery pack NOTE You can also use the camcorder with just the AC adapter The actual recording time may shorten depending on the recording environment such as when recording scenes with fast moving subject Please do not pull or bend the AC adapter plug and cable This may damage the AC adapter Date Time Setting 1 ...

Страница 17: ... performing steps 1 4 Z p 16 5 Select AREA SETTING 6 Select the city closest to the area you are traveling To return to the previous screen Select To quit the screen Select QUIT Language Setting The language on the display can be changed 1 Open the LCD monitor to turn on the camcorder 2 Touch MENU 3 Select DISPLAY SETTINGS 4 Select LANGUAGE 5 Select the desired language To return to the previous s...

Страница 18: ...lease be careful not to drop it Tripod Mounting Align the camcorder stud hole with the tripod stud and the mounting socket with the screw and then rotate the camcorder clockwise to mount it to the tripod NOTE Do not use a tripod on unsteady or unlevel surfaces It could tip over causing serious damage to the camcorder ...

Страница 19: ...ready been recorded MultiMediaCards are not supported Insert a microSD card Preparation Close the LCD monitor to turn off the camcorder 1 Open the microSD card cover 2 Firmly insert the card with its clipped edge first 3 Close the microSD card cover To remove a microSD card Push the microSD card once After the card comes out a little pull it out NOTE Insert and remove the microSD card only while t...

Страница 20: ...cording Press SNAPSHOT Slide the mode switch to select video mode NOTE The video recording mode is automatically selected when you turn off the camcorder and then turn on again If the camcorder is not operated for 5 minutes while the power is on it turns itself off automatically to conserve power Do not move or shake the camcorder suddenly during recording If you do so the driving sound hum of the...

Страница 21: ... Stabilizer does not function during still image recording If the camcorder is not operated for 5 minutes while the power is on it turns itself off automatically to conserve power Still Image Recording To view the last recorded image Select A after shooting Selecting during playback deletes that image To change the image quality Change the settings in IMAGE QUALITY Z p 57 To record still images co...

Страница 22: ...x 5 cm to the subject when the zoom lever is set all the way to W LED Light Preparation Select or mode Select the recording mode 1 Touch MENU 2 Select LIGHT 3 Select the desired setting ON The LED light remains on regardless of the surrounding conditions AUTO The LED light turns on automatically when shooting in insufficient light conditions OFF Deactivates this function Checking the Remaining Bat...

Страница 23: ...ect QUIT Registering Files to Events If you select an event to register the file to before starting recording you can find the file easily at playback Preparation Select mode Select the recording mode 1 Touch MENU 2 Select REGISTER EVENT 3 Select the event The selected event is displayed on the screen To quit the screen Select QUIT To search by event See page 27 NOTE Once you select a certain even...

Страница 24: ... back Some video may not be played back at all To delete a video Select when playback is stopped To change the number of thumbnails 6 thumbnails 20 thumbnails Move the zoom lever to W Operations during Video Playback On screen buttons N Return to the first scene of the file O Go to the first scene of the next file L Return to the index screen J Reverse search during playback E Frame by frame playb...

Страница 25: ...k mode The index screen appears Select the desired file Slide the mode switch to select still image mode Still Image Playback Operations during Still Image Playback On screen buttons P Change playback order of slide show in reverse direction F Change playback order of slide show in forward direction L Return to the index screen N Display the previous file F Start the slide show Q End the slide sho...

Страница 26: ...nails To return to the index screen Select To quit the screen Select QUIT NOTE The contents of the group may be changed depending on the interval of the recording time To change the contents register the event Z p 23 The created groups may not be listed by recording date such as when copying the files to a microSD card Date Index Screen You can search the desired file by the recording date 1 Selec...

Страница 27: ...back To return to the index screen Select To quit the screen Select QUIT To change the event registration of a file See page 36 Playing Back MPG Files MPG files demonstration files etc are stored in the EXTMOV folder Follow the procedure below to play back the MPG files in the EXTMOV folder Preparation Select mode Select the playback mode 1 Touch MENU 2 Select PLAYBACK MPG FILE 3 Select the file y...

Страница 28: ...asing the exposure In the manual recording mode Select To cancel backlight compensation Select again NOTE If the LCD monitor is turned upside down is not displayed Change the setting when the LCD monitor is in the normal position Manual Setting in Menu In the manual recording mode 1 Touch MENU 2 Select MANUAL SETTING 3 Select the desired menu 4 Select the desired setting Depending on the kind of s...

Страница 29: ...zooming the subject will not go out of focus if you adjust the focus at the telephoto T side before zooming to the wide angle W side g ADJUST BRIGHTNESS Adjusts the brightness mode AUTO The brightness is adjusted automatically 3 MANUAL 6 to 6 Corrects the brightness within this range in increments of 1 mode AUTO The brightness is adjusted automatically 3 MANUAL 2 0 to 2 0 EV Corrects the brightnes...

Страница 30: ... in the desired spot when backlight compensation does not work well 6 WHOLE SCREEN Brightness is adjusted automatically for whole screen 7 SPOT Brightness for the specified spot is adjusted automatically w EFFECT Enables you to record videos or still images with special effects 1 OFF No effect is used J SEPIA The image has a brownish tint like old still images K MONOTONE The image becomes black an...

Страница 31: ...e connection with TV is completed 1 Turn on the camcorder and the TV 2 Set the TV to its VIDEO mode 3 Only when connecting the camcorder to the VCR DVD recorder Turn on the VCR DVD recorder and set the VCR DVD recorder to its AUX input mode 4 Start playback on the camcorder Z p 24 25 To display camcorder s on screen display on TV Set DISPLAY ON TV to ON Z p 60 Viewing Files on TV AV Cable DC Conne...

Страница 32: ...k is paused NOTE Captured still images are stored at a resolution of 640 x 360 if the video was recorded in 16 9 or 640 x 480 if the video was recorded in 4 3 The image can be elongated in the horizontal or vertical directions depending on the quality of the source video file The continuous shooting function cannot be used to capture images You cannot capture video during playback Deleting Files P...

Страница 33: ...d file and select The mark appears on the file To select other files repeat this step To check the content of the file select CHECK 5 Select EXEC 6 Select YES To quit the screen Select QUIT Deleting All Files After performing steps 1 2 Z p 32 3 Select DELETE ALL 4 Select YES To quit the screen Select QUIT ...

Страница 34: ...n select the previous or next file by selecting or To quit the screen Select QUIT Protecting Selected Files After performing steps 1 3 4 Select FILE SELECT 5 Select the desired file and select x The x protection mark appears on the file To select other files repeat this step To check the content of the file select CHECK 6 Select QUIT 7 Select YES To release protection Select the protected file in ...

Страница 35: ...n mode Pause the playback Otherwise select the file on the index screen mode Play back the still image Otherwise select the file on the index screen Press INFO FILE File name FOLDER Folder name DATE TIME Date and time of the recording PB TIME mode Playback time length of the file SIZE mode Image size QUALITY Video quality Image quality Z p 57 PROTECT File protection status Z p 34 To turn off the f...

Страница 36: ...er You can select the previous or next file by selecting or 6 Select a new event To cancel the event registration select CANCEL Changing the Event of the Selected Files After performing steps 1 3 4 Select SET RANGE AND CHANGE 5 Select the first file of the range To preview scenes select the file and select CHECK 6 Select the last file of the range 7 Select a new event To cancel the event registrat...

Страница 37: ... recommended to select SET after the pause button is pressed 6 Select SET at the end point It is recommended to select SET after the pause button is pressed To cancel the start point setting select CANCEL 7 Select CAPTURE TRIMMED FILE To set the start end point again select REDEFINE AREA 8 Select YES When copying is finished the copied file is added to the index screen 9 Touch OK To quit the scree...

Страница 38: ...d by group CREATE BY EVENT Search for an event and display the corresponding files listed by recording date 5 Select the file to add to playlist To preview scenes select the file and select CHECK 6 Select the insertion point To add other files repeat steps 5 and 6 To delete a registered scene select the registered file then select CANCEL 7 Select SAVE 8 Select SAVE AND QUIT To quit the screen Sele...

Страница 39: ... previous screen Select To quit the screen Select QUIT Playing Back Playlists 1 Touch MENU 2 Select PLAYBACK PLAYLIST 3 Select the playlist To stop playback Select L To quit the screen Select QUIT To play back from the desired scene 1 In step 3 select CHECK The index screen for playlist appears 2 Select the desired scene NOTE When playing back a playlist with a picture title playback starts after ...

Страница 40: ...w the steps 5 to 8 Z p 38 Deleting Playlist Original files are not deleted even if you delete the playlist After performing steps 1 2 Z p 38 3 Select DELETE 4 Select a playlist you want to delete To delete all playlists at once select DELETE ALL 5 When DELETE PLAYLIST appears select YES Adding a Picture Title to Playlist After performing steps 1 2 Z p 38 3 Select SET TITLE 4 Select the desired pla...

Страница 41: ...g CU VD20 or CU VD40 the recording time may take approx 2 times longer than the time that is described in the instruction manual of DVD burner Copying Moving Files You can copy or move files between the HDD and microSD card mode mode Preparation Select or mode Select the playback mode Make sure that microSD card is inserted in the microSD slot Make sure that enough free space is left in the copy m...

Страница 42: ...STOP 2 When QUIT appears select YES Using a DVD Burner Supported discs 12cm DVD R DVD RW Regarding DVD R discs only unused DVD R discs can be used Regarding DVD RW discs used DVD RW discs can also be used but they need to be formatted before recording Formatting a disc deletes all content recorded on the disc up until that time Dual layer discs cannot be used Regarding finalization after copying T...

Страница 43: ...ate 5 Select EXECUTE The files are copied on the disc When COMPLETED appears touch OK When INSERT NEXT DISC PRESS STOP TO EXIT CREATE appears change the disc Remaining files are copied on the second disc To cancel copying select STOP Copying Video Files that Have Never Been Copied Files that have never been copied to the DVD discs are automatically selected and copied 1 Open the LCD monitor to tur...

Страница 44: ... 2 Select SAVE 3 Select the desired disc number If you select ALL all discs in the list are created To preview scenes select CHECK mark shows that the disc is created already 4 Select YES or NO YES Displays the thumbnails by group NO Displays the thumbnails by date 5 Select EXECUTE The files are copied on the disc When COMPLETED appears touch OK When INSERT NEXT DISC PRESS STOP TO EXIT CREATE appe...

Страница 45: ...le recorded in a same day becomes one chapter in the title Digest Playback You can view a few seconds from the beginning of each video digest in the created DVD Create a DVD using a DVD burner CU VD50 CU VD3 1 Load the created DVD on the DVD player 2 On theTV select DIGEST PLAYBACK You can view the previous or next page by selecting The screen does not appear on the camcorder 3 The digest is playe...

Страница 46: ...M At least 512 MB To check the PC specification Right click on Computer or My Computer in the Start menu and select Properties NOTE Make sure your PC has a recordable DVD drive If your system does not meet the requirements it is recommended to copy files using the DVD burner Z p 42 Macintosh users may use the software included with their Macintosh iMovie 08 iPhoto to copy files to their computer P...

Страница 47: ...r starts on the PC 3 Click All volume in camcorder and click Next 4 Click Start Backup starts To disconnect the camcorder from the PC 1 Right click the icon Safely Remove Hardware on the task bar and select Safely remove USB Mass Storage Device 2 Follow the on screen instructions and make sure that the device can be safely removed 3 Disconnect the USB cable and close the LCD monitor NOTE It takes ...

Страница 48: ...user list Preparation Make backup on the PC 1 Double click the icon and open the calendar 2 Select Movies only 3 Click 4 Input the name of the new user list and click OK 5 Double click the recording date The files recorded on the day are displayed 6 Drag the file and drop into the user list To add other files into the user list repeat steps 5 and 6 Copying Files Continued ...

Страница 49: ...d then go to step 4 3 Drag the file and drop into the part at the bottom and click Next 4 Input the disc name select the top menu style and click Next 5 Click Start NOTE For detail on operating Everio MediaBrowser click Help and refer to MediaBrowser Help Adobe Reader must be installed to read MediaBrowser Help Adobe Reader can be loaded from Adobe s web site http www adobe com For assistance in o...

Страница 50: ...ct matter JVC cannot answer questions regarding basic operation of your PC or questions regarding specifications or performance of the OS other applications or drivers Pixela Region Language Phone USA and Canada English 1 800 458 4029 toll free Europe UK Germany France and Spain English German French Spanish 800 1532 4865 toll free Other Countries in Europe English German French Spanish Italian Du...

Страница 51: ...yed for 5 seconds at the first and the last scene 4 At the point you want to start dubbing start recording on the VCR DVD recorder Refer to the VCR DVD recorder s instruction manual To stop dubbing Stop recording on the VCR DVD recorder To hide the date or icons on the screen Change the settings in DISPLAY ON TV Z p 60 AV Cable DC Connector AC Adapter To AC Outlet AV Connector VCR DVD Recorder AV ...

Страница 52: ...elect mode Select the recording mode Press EXPORT twice To turn off the export mode Press EXPORT twice Changing the Export Setting You can set the recorded videos to the export setting Preparation Select mode Select the playback mode 1 Press EXPORT 2 Select the file and set To check the content of the file select CHECK 3 Select DONE To cancel the export setting Select the file and select again To ...

Страница 53: ...rder to the PC with the USB cable 2 Select EXPORT TO LIBRARY All the files with the export setting turned on are transferred to PC If you cannot export the file to iTunes Refer to Q A Latest Information Download Information etc in Click for Latest Product Info in the help of the provided Everio MediaBrowser software ...

Страница 54: ...ayed on the LCD monitor NOTE The upload mode turns off each time recording is finished Uploading Files to Websites Upload Trimming You can select the necessary part of the video and save it as a new video file ready for uploading Preparation Select mode Select the playback mode 1 Touch MENU 2 Select UPLOAD SETTINGS 3 Select the desired file 4 Select SET at the start point 5 Select SET at the end p...

Страница 55: ...or details on uploading files refer to the operation guide of MediaBrowser in the CD ROM 1 Connect the camcorder to the PC with the USB cable 2 Select UPLOAD If you cannot upload the file to YouTube You need your YouTube account to upload files to YouTube Create your account Refer to Q A Latest Information Download Information etc in Click for Latest Product Info in the help of the provided Everio...

Страница 56: ...It is recommended to attach the camcorder to a tripod and use this function to prevent the vibration after SNAPSHOT is pressed 8 SHUTTER MODE Records still images continuously while SNAPSHOT is pressed RECORD ONE SHOT Records one still image at a time CONTINUOUS SHOOTING Records still images continuously while SNAPSHOT is pressed NOTE The interval between recording still images is approx 0 3 secon...

Страница 57: ...ubject appear bright automatically when you record in dark places However the overall color tones appear grayish mode OFF Deactivates the function AGC Electrically brightens the scene in dark place AUTO Automatically brightens the scene when it is dark Becomes brighter than AGC The motion of a subject may look unnatural if recorded in some condition mode OFF Deactivates the function AGC Electrical...

Страница 58: ...n using the battery pack Y BASIC SETTINGS Select BASIC SETTINGS then select sub menus DEMO MODE Introduces special features of the camcorder when there is no operation for about 3 minutes during recording mode OFF Deactivates the function ON Activates the function NOTE The demonstration only works when the AC adapter is connected not with the battery pack If a microSD card is in the camcorder demo...

Страница 59: ...ION Prevents damage to the HDD by turning off the power automatically when it is detected that the camcorder dropped OFF Deactivates the function ON Activates the function To turn on the camcorder when the drop detection worked close the LCD monitor and open it again NOTE The built in hard disk of the camcorder may not be protected even if the setting is ON When recording playback stops even if th...

Страница 60: ... sub menus DISPLAY ON TV Displays camcorder s on screen display on a TV screen OFF Does not display on TV ON Displays on TV R VIDEO OUTPUT Sets the aspect 16 9 4 3 to the screen of the connected television when outputting videos from the AV connector 4 3 16 9 Changing the Menu Settings Continued ...

Страница 61: ...tected files will be erased by the formatting process FORMAT SD CARD You have to format newly purchased microSD cards with this camcorder before using them This will also ensure stable speeds and operation when accessing the microSD card FILE Initializes all files in the microSD card FILE MANAGEMENT NO Initializes all files and management numbers in the microSD card NOTE Be aware that all files an...

Страница 62: ...be displayed correctly The LCD monitor is difficult to see The LCD monitor may be difficult to see if used in bright areas such as under direct sunlight Before requesting service consult the following chart If the solutions indicated in the chart do not solve the problem consult your nearest JVC dealer or JVC service center for instructions Refer also to the FAQ of new products on JVC s website Th...

Страница 63: ...tal zoom does not work Change ZOOM to 70X DIGITAL or 800X DIGITAL Digital zoom is not available in the still image recording mode The focus is not adjusted automatically Wipe the lens with lens cleaning cloth If you are recording in a dark place or a subject that has no contrast between dark and light adjust the focus manually The color looks strange Too bluish too reddish etc Set WB in MANUAL SET...

Страница 64: ...Search index by date Playback effects When playing back still image Playback effects Other problems The camcorder operates slowly when switching between video mode and still image mode or when switching the power on or off If there are many files such as video in the camcorder it takes time for the camcorder to respond It is recommended that you copy all files from the camcorder onto your computer...

Страница 65: ...ile to iTunes Refer to Q A Latest Information Download Information etc in Click for Latest Product Info in the help of the provided Everio MediaBrowser software If a malfunction occurs in the HDD Perform FORMAT HDD All data is deleted If this does not solve the problem contact the JVC customer service for repairs To reset the camcorder when it does not operate normally Close the LCD monitor and re...

Страница 66: ...nsert the microSD card MultiMediaCard cannot be used Remove any dirt from the microSD card terminals Insert the microSD card before switching the power on Turn off the camcorder and turn it on again CANNOT TAKE MORE STILL IMAGES AT THE MOMENT Stop video recording and then record a still image If an microSD card is removed or inserted during video recording a still image cannot be recorded DROP DET...

Страница 67: ...with another disc Move the files or folder to a PC or other device and then format the HDD of the camcorder or the microSD card Select FILE MANAGEMENT NO in FORMAT HDD or FORMAT SD CARD UPPER LIMIT OF RECORDABLE NUMBER OF FOLDERS FILES HAS BEEN REACHED SCENE QUANTITY LIMIT EXCEEDED PLAYLIST QUANTITY EXCEEDS LIMIT When creating a DVD reduce the number of playlists to be saved Reduce the number of t...

Страница 68: ...AS BEEN ALREADY USED Replace the disc of the DVD burner with another disc FINALIZATION FAILED Replace the disc of the DVD burner with another disc NO FILES Slide the mode switch to select the desired mode or Warning Indications Continued ...

Страница 69: ...ring it out well After wiping with the wet cloth wipe again with a dry cloth To clean the LCD monitor Wipe the LCD monitor gently with a soft cloth Be careful not to damage the LCD monitor To clean the lens Wipe the lens gently with lens cleaning cloth NOTE Avoid using strong cleaning agents such as benzine or alcohol Mold may form if the lens is left dirty When using a cleaner or chemically treat...

Страница 70: ...trix system LED Light Within 1 5 m recommended shooting distance Connectors AV output Video output 1 0 V p p 75 W Audio output 300 mV rms 1 kW USB Mini USB type A and type B USB 2 0 compliant AC Adapter Power requirement AC 110 V to 240 V 50 Hz 60 Hz Output DC 11 V 1 A Still image Format JPEG Image size 832 x 624 Image quality FINE STANDARD Video Signal format PAL standard Recording Playback forma...

Страница 71: ...The HDD can record up to 9999 still images in either mode Recording medium Image size Quality microSD Card 256 MB 512 MB 1 GB 2 GB 4 GB 8 GB 4 3 832 x 624 FINE 990 1960 3980 7600 9999 9999 832 x 624 STANDARD 1490 2940 5970 9999 9999 9999 h hour m minute Required charging recording time approx Battery pack Charging time Recording time BN VF808U Provided 1 h 50 m 2 h 5 m BN VF815U 2 h 40 m 4 h 15 m ...

Страница 72: ...ium Be sure to follow the guidelines below to prevent corruption or damage to your recorded data Do not bend or drop the recording medium or subject it to strong pressure jolts or vibrations Do not splash the recording medium with water Do not use replace or store the recording medium in locations that are exposed to strong static electricity or electrical noise Do not turn off the camcorder power...

Страница 73: ...y high above 80 in direct sunlight in a closed car in summer near a heater in high places such as on a TV Leaving the unit in high places while a cable is connected may result in a malfunction if the cable is caught and the unit falls onto the floor To protect the unit DO NOT allow it to become wet drop the unit or strike it against hard objects subject it to shock or excessive vibration during tr...

Страница 74: ...ave no right to grant a license to use the Program and may not distribute rent lease or transfer the Program to any third party or otherwise let them use the Program 4 LIMITED WARRANTY JVC warrants that any media in which the Program is embodied are free from any defects in materials and workmanship for a period of thirty 30 days from the date of Your purchasing any our products accompanying the P...

Страница 75: ...zed representative of JVC 2 If any part of this Agreement is held invalid by or in conflict with any law having jurisdiction over this Agreement the remaining provisions will remain in full force and effect 3 This Agreement shall be governed by and interpreted under the laws of Japan The Tokyo District Court has jurisdiction over all disputes which may arise with respect to the execution interpret...

Страница 76: ...ard 61 G Gain Up 57 H Hard Disk 72 I Image Quality 57 iTunes 52 L Language Setting 17 LCD Monitor 14 72 LED Light 22 M Manual Recording 28 Menu Settings 56 microSD Card 19 Monitor Backlight 58 Monitor Bright 58 Moving Files 41 N Number of Images 71 O On screen Recording Control 20 On screen Zoom Control 22 Operation Sound 58 P Photometry Area 30 Picture Title 39 Playlists 38 Portable Media Player ...

Отзывы: