background image

ENGLI

S

H

F

RANÇAIS

DLA-G150CLU/ LCT1123-001B

DVI

VIDEO

COMP

Y/C

RM-M160 REMOTE CONTROL UNIT

QUICK

ALIGN.

PC1

PC2

Y/C

HIDE

PRESET

ENTER

EXIT

MENU

FREEZE

SCREEN

OPERATE

DIGITAL

ZOOM

ZOOM

FOCUS

W

W

S

T

W

T

SCREEN

KEYSTONE

W

S

PROJECTOR

MANUEL D’INSTRUCTIONS : PROJECTEUR 

DLA-G150CLU

INSTRUCTIONS

®

DLA-G150CLU

(Lenses are optional)

LCT1123-001B

LCT1123-001B_Cover.fm  Page 1  Thursday, February 21, 2002  2:50 PM

Содержание DLA-G150

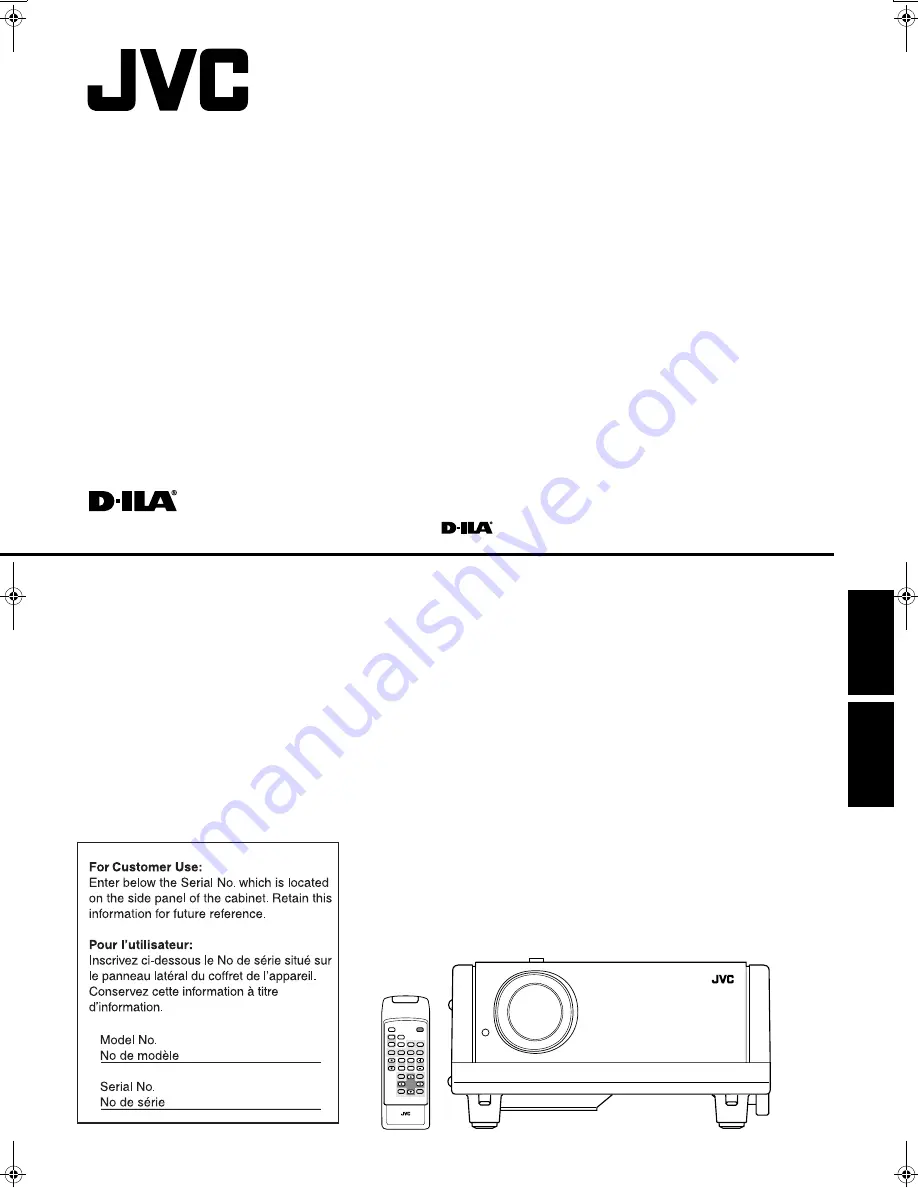
Страница 1: ...ONTROL UNIT QUICK ALIGN PC1 PC2 Y C HIDE PRESET ENTER EXIT MENU FREEZE SCREEN OPERATE DIGITAL ZOOM ZOOM FOCUS W W S T W T SCREEN KEYSTONE W S PROJECTOR MANUEL D INSTRUCTIONS PROJECTEUR DLA G150CLU INSTRUCTIONS DLA G150CLU Lenses are optional LCT1123 001B ...

Страница 2: ......

Страница 3: ...NGLISH FRANÇAIS Thank you for purchasing this projector Before using it read and follow all instructions carefully to take full advantage of the projector s capabilities INSTRUCTIONS PROJECTOR DLA G150CLU ...

Страница 4: ...d by the manufacturer When the product is used on a cart care should be taken to avoid quick stops excessive force and uneven surfaces which may cause the product and cart to overturn damaging equipment or causing possible injury to the operator Slots and openings in the cabinet are provided for ventilation These ensure reliable operation of the product and protect it from overheating These openin...

Страница 5: ... any service or repairs to this product ask the service technician to perform safety checks to determine that the product is in proper operating condition The product should be placed more than one foot away from heat sources such as radiators heat registers stoves and other products including amplifiers that produce heat When connecting other products such as VCR s and personal computers you shou...

Страница 6: ... 31 1 Turning on the Power 32 2 Select the Input source to be Projected 33 3 Adjust the Screen Size Zooming 34 4 Adjust Focus 34 5 Setting the Screen Aspect Ratio 34 Turning off Image HIDE 35 Removing the Trapezoidal Distortion of the Image 35 Quick Alignment Function QUICK ALIGN 36 Displaying a Still Picture FREEZE 37 Zooming a Part of the Image DIGITAL ZOOM T W 37 Menu Operations 38 Basic Menu O...

Страница 7: ...lease contact your dealer Remote control unit RM M160G AA R6 size dry cell battery 2 for checking operation Power cord approx 8 2 ft approx 2 5 m Ferrite core 2 Personal computer connection cable approx 6 56 ft approx 2 m D sub 3 row 15 pin Video cable approx 6 56 ft approx 2 m Conversion adapter for Mac for Macintosh BNC RCA Conversion plug Hex wrench ...

Страница 8: ...his is the main power switch When it is turned on the projector goes into stand by state and the STAND BY indicator on the control panel comes on Refer to page 32 ON The main power turns on OFF The main power turns off 6 Adjustable feet for adjusting the height and angle By extending the feet the projector angle can be adjusted up to 7 For details refer to Adjusting the Inclination of the Projecto...

Страница 9: ...position For details refer to Adjusting the Inclination of the Projector on page 16 w Air inlet This is the air inlet Do not cover or obstruct this slot e Control panel For details refer to Control Panel on the Projector on page 9 r Lens shift knob cap When you have mounted a lens that uses the lens shift function open this cap and rotate the lens shift knob to move the lens position For more info...

Страница 10: ...ling effect causing heat to build up inside which could cause a fire or malfunction y Opening for replacing the light source lamp For replacing the light source lamp refer to Replacing the Light Source Lamp on page 58 u Fixing foot i Position selecting screw for ceiling mounting When using the projector in an upside down ceiling mounted position inverted top to bottom and right to left the positio...

Страница 11: ...en if you press the OPERATE button the projector is not turned on Wait until the projector enters stand by mode STAND BY indicator stays lit 4 PC button Use this button to select a device connected to the PC 1 PC 2 or DVI terminals Each time you press the button the selection alternates among PC 1 PC 2 and DVI PC1 PC2 or DVI will be displayed on the top right of the projected image This function c...

Страница 12: ...e menu items this button only works for the keystone setting screen q KEYSTONE buttons Use these buttons to correct a trapezoidal distortion of the projected image Refer to page 35 w HIDE button Use this button to turn off the image on the screen temporarily Pressing it again restores the image to resume Refer to page 35 e LAMP indicator ON After the light source lamp has been used for more than a...

Страница 13: ...tion of H V signals or Cs signals causes automatic switching to external sync The priority order is H V Cs Note When computer related signals are input the uppermost edge of the image may appear to bow if the sync signal input is composite sync Cs or G on sync signal In this case use separate sync signals for vertical sync V and horizontal sync H 5 Component terminal Component signals Y B Y R Y or...

Страница 14: ...e This function can be disabled by the menu 6 ZOOM T W buttons Use these buttons to adjust the projected screen size T Tele The projected screen size decreases W Wide The projected screen size increases 7 FOCUS buttons Use these buttons to adjust the focus of the projected video image The focus point becomes more distant The focus point becomes nearer 8 MENU button Use this button to enter or exit...

Страница 15: ... W S buttons Changes the projection screen size to 4 3 or 16 9 u QUICK ALIGN Quick Alignment button Use this button to automatically align Horizontal and vertical position Tracking and Phase for the projected image During the automatic alignment Quick Alignment appears on the screen and disappears after alignment is finished Refer to page 36 The Quick Alignment function only works when the signal ...

Страница 16: ...owing Do not mix new and old batteries Do not mix different types of batteries as they differ in characteristics Place batteries so they match the polarities indicated to and to Be sure to put the minus end in first to avoid short circulating Use only designated batteries Remove the batteries if the remote is not to be used for a prolonged period When the batteries are exhausted replace them immed...

Страница 17: ...ndensation Allowable storage temperature range 14 F to 140 F 10 C to 60 C When installing the projector observe the following Do not use the projector placed on its side Avoid using the projector placed on its side This could cause a malfunction Use the projector within the specified angle Do not use the projector inclined 30 horizontally left right This could cause color variation or shorten the ...

Страница 18: ...raise the projector The adjustable feet automatically extend To retract the feet push the levers and lower the projector slowly the projector is fixed at the position where you release the levers Leveling the projector Lift the projector rotate the rear adjustable foot and adjust the horizontal angle until the projector is level Y PB B Y PR R Y REMOTE Y C VIDEO R G B DVI H IN OUT V IN Adjustable f...

Страница 19: ...o correct the trapezoidal distortion of the projected image on the screen To correct this distortion use the KEYSTONE buttons on the projector Refer to Removing the Trapezoidal Distortion of the Image on page 35 Also correction is possible by using the Keystone menu Refer to Setting and Adjusting Other Functions OPTIONS on page 54 LAMP TEMP STAND BY HIDE PC VIDEO MENU KEYSTONE VOLUME PRESET ESCAPE...

Страница 20: ...picture tends to become pale and dim Use a curtain or other means to shield the light Set the projector horizontally on a surface that is within the range of adjustable angles up down adjustment angle 7 horizontal adjustment angle 1 5 If the keystone is adjusted the projected screen becomes smaller When hanging from the ceiling use a dedicated hanging fixture not supplied Optional Lenses This proj...

Страница 21: ...the projector to open it 2 Loosen the SHIFT LOCK fixing bolt Use the hex wrench supplied 3 Rotate the LENS SHIFT knob to adjust the position shift amount of the projected screen Rotate it to the right The lens shifts upward Rotate it to the left The lens shifts downward 4 Tighten the SHIFT LOCK fixing bolt firmly Use the hex wrench supplied 5 Turn the cap to close it Projected screen position imag...

Страница 22: ...l unit toward the remote sensor on the front or the rear of the projector The operable distance of the remote control unit is about 10 m for direct reception The remote control unit can be used by having it reflected on the screen In this case the total distance of A B should be about 10 m or less The operable angles of the remote control unit are 15 right and left and 15 up and down 15 15 15 15 B...

Страница 23: ... counterclockwise To ceiling mount and adjust the projector special expertise and technique are necessary Be sure to ask your dealer or a specialist to perform this work To turn the position selecting screw for ceiling mounting use a Phillips screwdriver with a 30 mm or longer shank The screw is located in the hole shown in the illustration Note When using the projector in a ceiling mounted positi...

Страница 24: ...tput port by reading the instruction book of the computer The video signal output port is generally called as RGB port monitor port or video port If the computer monitor hybrid type or note type is used it may need to prepare for an external output port Also there will be the type to which an external output port cannot be installed DVI input During DVI input depending on the computer settings the...

Страница 25: ...rtical resolu tion Ver Lines Horizontal fre quency H kHz Vertical fre quency V Hz PC system PC98 VESA350 640 350 37 86 84 13 PC AT PC98 640 400 24 83 56 42 DOS V VGA 60Hz 640 480 31 47 59 94 DVI VGA 72Hz 640 480 37 86 72 81 VGA 75Hz 640 480 37 50 75 00 VGA 85Hz 640 480 43 27 85 01 SVGA 56Hz 800 600 35 16 56 25 SVGA 60Hz 800 600 37 88 60 32 SVGA 72Hz 800 600 48 08 72 19 SVGA 75Hz 800 600 46 88 75 0...

Страница 26: ...the ferrite core on page 29 Memo When connecting a video device use a TBC along with it or one which has a built in TBC Use of an extension cable to connect a video device and the projector could cause video degradation When a signal with much jitter is reproduced on a VCR or special effect playback is performed the upper part of the image or the image itself may be erased or distorted Y PB B Y PR...

Страница 27: ...vices and DVD players Note Connect a component signal output device or DTV format signal output device Memo Other devices with component signal output terminals DVD player NTSC etc can be connected DVD Digital Video Disc DTV format signals 480i 480p 720p 1080i can be input For DTV format signals which can be handled refer to Video signals on page 22 Y PB B Y PR R Y IN REMOTE Y C VIDEO R G B H IN O...

Страница 28: ...to be connected Read thoroughly the manual that comes with the device to be connected Use the supplied video cable or the cable supplied with the game device Y PB B Y PR R Y IN REMOTE Y C VIDEO R G B H IN OUT V Cable supplied with the game device or supplied video cable Game device etc To VIDEO BNC RCA conversion plug accessory To AV IN ...

Страница 29: ...s required Use a reverse connection cable For details refer to RS 232C external control on page 74 For further details consult your dealer or an authorized service center Note When connecting the cable to the REMOTE terminal refer to How to attach the ferrite core on page 29 Y PB B Y PR R Y IN REMOTE Y C VIDEO R G B H IN OUT V Desktop type To RS 232C connector To RS 232C connector RS 232C reverse ...

Страница 30: ...lied To monitor connector To B To R To G Notebook type There are some notebook types which do not allow the computer s LCD to work if an external display is connected With such a notebook computer the LCD display and external display output need to be switched RGB output devices Desktop type To monitor connector Separate cable separately available To PC 2 To H Cs To V Laser video disc player etc T...

Страница 31: ... the S video cable or infrared remote sensor extension unit which are sold separately However use a cable that can be wound once 1 Release the stopper at each end and open the ferrite core 2 Wind the cord around the ferrite core Attach the ferrite core about 3 cm from the end of the cord 3 Close the ferrite core with the cord inside until you hear it click shut Note When connecting connect the ter...

Страница 32: ...nal of the projector 2 Insert the main plug of the supplied power cord into a suitable wall outlet CAUTIONS Since the power requirement of the projector is high insert the power plug directly into a wall outlet Use the supplied power cord with the ferrite core only Do not remove the ferrite core from the supplied power cord Otherwise there may be a possibility that a harmful interference occurs Re...

Страница 33: ...TPUT CONTROL MODE LOC 2000 hours These lamp replacement times are only a rough guide as to how long the lamp will last if these modes are used from the beginning These are not guaranteed service lives Notes Although the LIGHT OUTPUT CONTROL MODE LOC and LIGHT POWER CONTROL MODE LPC electrically control the brightness of the lamp and extend the replacement time longer than that for the NORMAL MODE ...

Страница 34: ...l not work for approximately 1 minute from when the light source lamp is turned on Use the button after approximately 1 minute 2 Turn off the MAIN POWER switch after the STAND BY indicator changes to steady on OFF The MAIN POWER switch turns off and the STAND BY indicator goes off CAUTION Do not turn off the MAIN POWER switch during cool down mode the STAND BY indicator blinking Turn it off after ...

Страница 35: ...he side of the unit is projected When there is no signal from the selected input terminal No signal No Input is displayed When selecting a device such as a computer which is connected to the PC1 PC2 or DVI terminal Projector Press PC The input mode changes as follows every time the button is pressed PC1 PC2 DVI Remote control unit Press the PC1 PC2 or DVI button PC1 The image from the PC1 input te...

Страница 36: ...in accordance with the screen aspect ratio that will be used When a screen aspect ratio of 16 9 is used a 4 3 image can be projected within the screen without using the zoom function When using a 16 9 screen Press the W button When using a 4 3 screen Press the S button There is no button on the unit This setting can also be performed from the menu Refer to page 46 When using a screen with a 16 9 a...

Страница 37: ...ected as shown in the figure To cancel correction and restore the original screen press the PRESET button Adjusted value 0 Press the EXIT button to immediately remove the keystone display Notes The trapezoidal distortion keystone can be adjusted from the option menu Refer to page 54 The range of the trapezoidal distortion adjustment is approximately 20 in the vertical direction Interference patter...

Страница 38: ...ls It does not work for the signals input from the AV IN terminal VIDEO Y C or COMP input terminal The quick alignment function is used to automatically adjust the Horizontal and vertical position Phase and Tracking of the projected image When using the quick alignment function to automatically adjust the image use a bright still picture It may not function correctly on a dark or motion picture If...

Страница 39: ...al zoom appears on the screen together with the level bar and magnifying power 1 0 1 2 1 4 1 6 2 0 2 5 3 2 4 0 When 15 sec is displayed in the menu Digital zoom will appear in approximately 15 seconds To zoom up or zoom down press the DIGITAL ZOOM T or W button on the remote control Moving the zoomed image While Digital zoom appears on the screen you can move the zoomed image with the cursor 5 2 3...

Страница 40: ...200 Sleep time min Selectable sleep times If no signal condition continues for the period of selected time Unit Minutes the projector enters the stand by mode 15 30 60 OFF Language Language for on screen display Japanese English German Spanish Italian French Information Input Shows the terminal name selected by the VIDEO or PC button Y C VIDEO COMP PC1 PC2 or DVI Switcher Has no meaning This displ...

Страница 41: ...le High Low Film AUTO Video Yes Image adj All reset No ENTER Position Disp Posi Menu Decoder AUTO NTSC NTSC NTSC4 43 PAL SECAM Menu Image adj Set up Color temp Options Language Information English Deutsch Español Italiano Français Menu Image adj Set up Color temp Options Language Information Input Switcher Source Lamp time PC1 CH 0 NTSC 123 h Language Page 2 Flip H Flip V RS 232C bps Sleep time mi...

Страница 42: ...gnals GREEN Adjusts the green level 0 to 255 the adjustable range varies depending on signals BLUE Adjusts the blue level 0 to 255 the adjustable range varies depending on signals All reset Reset above items to the factory set values Yes No Options Refer to page 54 Options 1 Menu display 15sec Menu disappears in 15 seconds ON Menu stays on Line display 5sec Line display such as VIDEO Y C PC1 or PC...

Страница 43: ...5sec 5sec ENTER ON OFF OFF ENTER ENTER Page 2 Flip H Flip V RS 232C bps Sleep time min Page 1 OFF OFF 9600 ENTER ON ON 19200 15 30 60 OFF Keystone 0 12 12 Set up 1 Tracking Phase Position Resize Clamp 123 12 ENTER ST BP 1 1 Panel Aspect ENTER 1 1 Panel Aspect Lamp control Normal LPC LOC Press 5 to select an item Press 2 3 to set or adjust the value 3 or ENTER Press 5 to select an item Press 2 3 to...

Страница 44: ... display 5sec Line display such as PC1 or PC2 appears on top right of the screen for 5 seconds when the VIDEO or PC button is pressed OFF Line display does not appear Lamp time display ON Displays when the lamp use time reaches 1000 hours when set in the LPC or LOC mode OFF Does not display when the lamp use time reaches 1000 hours when set in the LPC or LOC mode Keystone Press ENTER to enter the ...

Страница 45: ...p 2 is displayed on the screen When you selected Information in step 2 no submenu is available 4 Press the cursor button 5 or to select an item in the submenu When a Language has been selected in step 2 press to set the language 5 Press the cursor button 2 2 2 2 or 3 3 3 3 to set or adjust the value When an item which has the ENTER message has been selected in step 4 press the ENTER button to move...

Страница 46: ... W S T W T RM M160 REMOTE CONTROL UNIT SCREEN KEYSTONE W S MENU button ENTER button Cursor buttons 5 2 3 PRESET button EXIT button LAMP TEMP STAND BY HIDE PC VIDEO MENU KEYSTONE PRESET EXIT ENTER OPERATE MENU button ENTER button Cursor buttons 5 2 3 PRESET button EXIT button Menu Image adj Set up Color temp Options Language Information Contrast Brightness Color Tint Sharpness All reset Image adj C...

Страница 47: ... screen 3 Select Decoder with the cursor button 5 or and press the ENTER button The Decoder submenu appears on the screen Video submenus 4 Set the color system with the cursor button 5 or AUTO Normally set to AUTO Factory set value The color system of a video signal being input is automatically identified and displayed in In B W Black White NTSC NTSC4 43 PAL or SECAM will be displayed It is not al...

Страница 48: ... MENU button The main menu appears on the screen 2 Select Set up with the cursor button 5 or and press 3 3 3 3 or the ENTER button The Set up 1 submenu appears on the screen 3 Select Set up 2 with the cursor button 5 or and press 3 3 3 3 or the ENTER button The Set up 2 submenu appears on the screen 4 Select Screen or HDTV with the cursor button 5 or 5 Adjust the Screen aspect ratio or HDTV format...

Страница 49: ... 3 Select Tracking or Phase with the cursor button 5 or 4 Adjust the tracking or phase with the cursor 2 2 2 2 or 3 3 3 3 Adjust the tracking and phase of the picture image being projected To adjust the phase first check for correct tracking adjustment To adjust multiple items repeat 3 and 4 5 Press the EXIT button to return to the previous menu or press the MENU button to exit the menu mode Note ...

Страница 50: ...s on the screen 3 Select Set up 2 with the cursor button 5 or and press 3 or the ENTER button The Set up 2 submenu appears on the screen 4 Select Deinterlace with the cursor button 5 or 5 Select the Deinterlace function mode with the cursor button 2 or 3 Video When watching images recorded with a video camera Film When watching images recorded on film AUTO The setting is changed automatically 6 Pr...

Страница 51: ... Press the cursor button 2 to select Yes and then press the ENTER button All items in the Image adj submenu are reset to the factory set values and the menu returns to the previous one To exit the All reset submenu without performing All reset select No with the cursor button 3 and press the ENTER button To be continued on the next page Image adj Contrast Brightness Color Tint Sharpness All reset ...

Страница 52: ... becoming blueish 5 Select RED or GREEN or BLUE with the cursor button 5 or 6 Fine adjust the color temperature with the cursor button 2 2 2 2 or 3 3 3 3 To adjust multiple items repeat 5 and 6 To perform All Reset In the Color temp submenu select All reset with the cursor button 5 or and press the ENTER button Then the All reset submenu appears on the screen Press the cursor button 2 to select Ye...

Страница 53: ...splay position can be adjusted Menu The menu position can be adjusted 5 Press the cursor button 5 5 5 5 2 2 2 2 or 3 3 3 3 to move the video screen display or the menu Repeat 4 and 5 to move both video screen display and menu positions Factory set value 6 Press the EXIT button to return to the previous menu or press the MENU button to exit the menu mode Set up 1 Position Gamma Aspect ratio Decoder...

Страница 54: ...utton to return to the previous menu or press the MENU button to exit the menu mode Adjustment item Button Adjustment content Gamma 2 or 3 The image Gamma projected on the screen can be changed Down Suitable for projecting the video programs Cinema Normally use in this mode Up Suitable for projecting the cinema programs Aspect ratio 2 or 3 Sets the vertical to horizontal ratio 4 3 or 16 9 of the v...

Страница 55: ...esize with the cursor button 5 5 5 5 or 4 Choose 1 1 Panel or Aspect with the cursor button 2 2 2 2 or 3 3 3 3 5 Press the EXIT button to return to the previous menu or press the MENU button to exit the menu mode Changing the Clamp pulse position PC Menu Mode Only When the image is too dark or bright or when the image is unstable switching the position may improve the image quality Normally set to...

Страница 56: ...bmenu select Page 2 with the cursor button 5 or and press the ENTER button To return to the Page 1 submenu from the Page 2 submenu select Page 1 with the cursor button 5 or and press the ENTER button To adjust multiple items repeat 3 to 4 To reset the keystone trapezoidal distortion of the picture image to the original setting press the PRESET button when the Keystone submenu appears on the screen...

Страница 57: ...e image to the original setting factory set value 0 press the PRESET button when the Keystone submenu appears on the screen To exit the keystone submenu press the EXIT button Lamp control ENTER Press ENTER to enter the lamp control submenu Normal Used as a normal lamp LPC Automatically controls the power used by the lamp and increases it in steps When this mode is used the brightness starts at app...

Страница 58: ... being used Source Shows the projected image s type of video signal Video menu mode Resolution Shows the resolution of the video signal being received PC menu mode It may not be displayed correctly with some input signals Frequency H Shows the horizontal frequency of the video signal being received PC menu mode Frequency V Shows the vertical frequency of the video signal being received PC menu mod...

Страница 59: ...fire may occur and or the projector may be damaged 1 Turn off the main power switch and disconnect the power cord from both the projector and the wall outlet In stand by state the STAND BY indicator lights on place the MAIN POWER switch of OFF position 2 Loosen the fuse holder to remove it To loosen the fuse holder use a Phillips screwdriver 3 Remove the fuse from the fuse holder you just removed ...

Страница 60: ...ment of the lamp is required as follows Projecting after the lamp has been used for more than 900 hours NORMAL MODE Note If the projector is not put in stand by mode or turned off it can be used until 2010 hours is reached When the lamp use time reaches 900 hours The LAMP indicator lights on the projector When starting to project after 900 hours has been exceeded Lamp replacement appears on the sc...

Страница 61: ...ear please consult your dealer EXIT 1000 h Lamp replacement When the lamp use time reaches 1000 hours 1000h and Lamp replacement appear on the screen The messages will disappear when any button is pressed The time after which the display appears can be set with the OSD menu When the lamp use time exceeds 1900 hours The LAMP indicator blinks on the projector Lamp replacement appears on the screen T...

Страница 62: ...he screws are fitted so that they do not come off the lamp replacement opening cover 2 Loosen the screws raise the handle and pull out the light source lamp Loosen the two screws with a flat end screwdriver Note The screws are fitted so that they do not come off the light source lamp To be continued on the next page Screw Lamp replacement opening cover Be careful not to damage the claw Screw Light...

Страница 63: ...dle a new light source lamp hold it by the plastic part Never touch the metal part or the front glass surface 4 Replace the lamp replacement opening cover and fasten the screws Fasten the two screws with a flat end screwdriver CAUTIONS Install the light source lamp and close the lamp replacement opening cover correctly otherwise a safety switch is activated to prevent the projector from operating ...

Страница 64: ...hin 2 seconds of the previous button When you make a mistake in button operations return to the beginning of the sequence To check the lamp time on the menu press the MENU button and select Information with the cursor button 5 or The lamp use time is indicated in the item Lamp time Video main menu PC main menu CAUTION Reset the lamp use time only when you have replaced with a new light source lamp...

Страница 65: ...dirt etc the projector goes into an warning state the OPERATE and STAND BY indicator blink etc Therefore regularly clean the filter For the warning indication refer to page 67 3 Clean the filter Clean the filter with a neutral detergent wash it in water and then dry it in the shade CAUTIONS Put on rubber gloves when using neutral detergent After you have washed the filter in water make sure the fi...

Страница 66: ...ve any blocking objects and turn on the MAIN POWER switch again 6 7 32 Video image does not appear Is the correct input selected Select the correct input with the VIDEO and PC buttons 9 13 Are devices connected correctly Connect devices correctly 11 22 Are signals being supplied from the connected devices Set connected devices correctly Are input signals scanning frequency etc appropriate Check if...

Страница 67: ...mage is magnified Was the DIGITAL ZOOM T button on the remote control pressed Press the PRESET button to restore the original video screen 12 37 Color is poor or unstable Is picture quality color density etc adjusted correctly Adjust picture quality on the menu 49 Is the correct color system selected Set the color system to AUTO or to the correct dedicated color system 45 Are signals scanning freq...

Страница 68: ...unplug the power cord from the wall outlet 2 Take an action according to the number No 4 Set the filter in place Then leave the projector until it cools down No 5 Check that nothing is blocking the air inlet nor outlet and wait until the inside cools down No 6 Check that nothing is blocking the air inlet nor outlet and wait until the inside cools down No 7 Leave the projector until it cools down 3...

Страница 69: ...t video signal is within the acceptable range other items such as resolution are out of the projector s specifications The selected input mode input terminal name is shown in the first line of the message Input the video signals that satisfies the projector s specifications 22 23 70 When the FREEZE button is pressed this message appears for a few seconds When a button not acceptable is pressed dur...

Страница 70: ...ours and until it reaches 1000 hours The message is cleared by pressing any button Arrange for a new lamp lamp unit or replace the lamp early 44 46 Displayed when the lamp control setting is set to NORMAL MODE When the lamp use time reaches 1000 hours the word Warning blinks on the screen To cancel this message press the EXIT button However the same message will appear every hour If the power is t...

Страница 71: ...e lamp early 44 46 Displayed when the lamp control setting is set to LIGHT OUTPUT CONTROL MODE LOC or LIGHT POWER CONTROL MODE LPC Appears every time the projector is turned on after the lamp use time has exceeded 1900 hours and until it reaches 2000 hours The message is cleared by pressing any button Arrange for a new lamp lamp unit or replace the lamp early 44 46 Displayed when the lamp control ...

Страница 72: ...ll resolution during RGB input 1000 TV lines Horizontal resolution aspect ratio 4 3 during video input Scanning frequency Horizontal frequency 15 kHz 105 kHz Vertical frequency 50 Hz 100 Hz Audio power output 1 W monaural 1 5 8 4 cm round type micro speaker 1 AV IN Y C 1 line mini DIN 4 pin 1 for S video VIDEO 1 line BNC 1 for composite video 1 line BNC 3 for computer DTV or video Y B Y R Y Compon...

Страница 73: ...ernational Business Machines Corporation Macintosh is a registered trademarks of Apple Computer Inc VESA is a trademark of the non profit organization Video Electronics Standards Association All other product names mentioned herein are used for identification purposes only and may be the trademarks or registered trademarks of their respective companies Power requirements 120 V AC 50 60 Hz Power co...

Страница 74: ...h mm 1 Protrusion excluded 2 Lens excluded LAMP TEMP STAND BY HIDE PC VIDEO MENU KEYSTONE PRESET EXIT ENTER OPERATE 5 1 4 133 20 505 1 14 5 8 369 15 1 2 393 2 20 505 1 15 1 2 392 2 1 8 52 2 1 8 53 8 3 8 212 10 1 2 265 15 1 2 393 2 10 1 8 256 2 7 8 70 10 1 2 265 ...

Страница 75: ... 2 Green 10 GND SYNC 3 Blue 11 GND 4 N C 12 N C 5 N C 13 H SYNC 6 GND Red 14 V SYNC 7 GND Green 15 N C 8 GND Blue 1 2 3 4 5 6 7 8 17 9 11 13 15 10 12 14 16 18 19 20 21 22 23 24 Pin number Signal name Pin number Signal name Pin number Signal name 1 T M D S Data2 9 T M D S Data1 17 T M D S Data0 2 T M D S Data2 10 T M D S Data1 18 T M D S Data0 3 T M D S Data2 Shield 11 T M D S Data1 Shield 19 T M D...

Страница 76: ...e the following data format Header Designates the head of data and the kind of data 21h Control command to the projector 3Fh Query to the projector Asking command ID 1 fixed SP Designates the delimiter for ID Command and Parameter 20h CR Designates the terminal of the data 0Dh is not necessary when Asking command 2 2 Response data format from the projector to the computer Upon executing the receiv...

Страница 77: ...ommand table The control commands that can be sent from the computer are as follows Keystone Numeric value can range from FF80 to 0080 Operation mode Only Asking command is possible Character Hex Meaning 0 30 OFF 1 31 ON Character Hex Meaning 0 30 Y C 1 31 VIDEO 2 32 COMP 3 33 PC1 4 34 PC2 5 35 DVI Character Hex Meaning 0000 30h 30h 30h 30h Stand by mode 0001 30h 30h 30h 31h Power on mode 0002 30h...

Страница 78: ...approx 355 6 cm 9 22 2 81 10 04 3 06 150 approx 381 0 cm 9 88 3 01 10 79 3 29 160 approx 406 4 cm 10 56 3 22 11 52 3 51 170 approx 431 8 cm 11 22 3 42 12 24 3 73 180 approx 457 2 cm 11 88 3 62 12 96 3 95 190 approx 482 6 cm 12 57 3 83 13 68 4 17 200 approx 508 0 cm 13 22 4 03 Projection screen size Diagonal length Approximate projection distance unit ft m For 4 3 aspect ratio screens For 16 9 aspe...

Страница 79: ...0 cm 44 09 13 44 48 03 14 64 400 approx 1016 0 cm 50 36 15 35 54 86 16 72 450 approx 1143 0 cm 56 63 17 26 61 65 18 79 470 approx 1193 8 cm 59 12 18 02 64 37 19 62 480 approx 1219 2 cm 60 37 18 40 500 approx 1270 0 cm 62 89 19 17 521 approx 1323 3 cm 65 52 19 97 Projection screen size Diagonal length Approximate projection distance unit ft m For 4 3 aspect ratio screens For 16 9 aspect ration scre...

Страница 80: ...78 ...

Страница 81: ...NÇAIS Merci d avoir acheté ce projecteur Avant de l utiliser lisez et respectez attentivement toutes les instructions pour profiter au maximum des capacités du projecteur MANUEL D INSTRUCTIONS PROJECTEUR DLA G150CLU ...

Страница 82: ...bricant et doit utiliser un support recommandé par le fabricant Quand vous utilisez l appareil sur un chariot faites attention aux arrêts brusques aux forces excessives et aux surfaces accidentées qui pourraient causer un renversement de l appareil risquant de l endommager ou de blesser l opérateur Les fentes et les ouvertures du coffret sont nécessaires pour la ventilation Elles assurent un fonct...

Страница 83: ...reil a subit une réparation ou un entretien demandez au réparateur de réaliser les vérifications de sécurité pour déterminer si l appareil est en état de fonctionnement correct L appareil doit être placé à plus de trente centimètres de sources de chaleur comme un radiateur un accumulateur de chaleur un fourneau ou tout autre appareil amplificateurs inclus produisant de la chaleur Lors d un raccord...

Страница 84: ...de la source d entrée à projeter 33 3 Réglage du format d écran zoom 34 4 Ajustement de la mise au point 34 5 Réglage du format de l écran 34 Coupure de l image HIDE 35 Suppression de la distorsion trapézoïdale de l image 35 Fonction d alignement rapide QUICK ALIGN 36 Affichage d une image fixe FREEZE 37 Zoom sur une partie de l image DIGITAL ZOOM T W 37 Fonctionnement du Menu 38 Fonctionnement du...

Страница 85: ...evendeur Télécommande RM M160G Piles sèches AA R6 2 pour vérifier le fonctionnement Cordon d alimentation environ 8 2 pieds environ 2 5 m Noyau en ferrite 2 Cordon de raccordement à l ordinateur personnel environ 6 56 pieds environ 2 m D sub 15 broches sur 3 rangées Câble vidéo environ 6 56 pieds environ 2 m Adaptateur pour Macintosh Prise de conversion BNC RCA Tournevis à bout hexagonal ...

Страница 86: ...dommagé 5 Interrupteur MAIN POWER C est l interrupteur d alimentation principal Lorsque le projecteur est mis sous tension il se met en mode d attente et le témoin STAND BY sur le panneau de commande s allume Voir page 32 ON L interrupteur d alimentation principal est enclenché OFF L interrupteur d alimentation principal est désenclenché 6 Pieds réglables pour le réglage de la hauteur et de l angl...

Страница 87: ...à Réglage de l inclination du projecteur à la page 16 w Entrée d air Orifice d entrée d air Ne pas le couvrir ou l obstruer e Panneau de commande Pour plus de détails se référez vous à Panneau de commande du projecteur à la page 9 r Volet de protection du bouton de décalage de l objectif Lorsqu un objectif utilisant la fonction de décalage est monté ouvrir ce volet et tourner le bouton de décalage...

Страница 88: ...n risque d incendie ou de mauvais fonctionnement de l appareil y Ouverture pour remplacer la lampe source de lumiére Pour le remplacement de la source de lumière se référer à Remplacement de la lampe de projection à la page 58 u Pied de fixation i Vis de sélection de position pour un montage au plafond Lorsque le projecteur est utilisé en position inversée avec un montage au plafond inversion haut...

Страница 89: ...sur la touche OPERATE le projecteur n est pas mis sous tension Attendre jusqu à ce que le projecteur passe en mode d attente l indicateur STAND BY reste allumé 4 Touche PC Utilisez cette touche pour sélectionner un appareil raccordé à la borne PC1 PC2 ou DVI DV I Chaque fois que vous appuyez sur cette touche la sélection alterne entre PC1 PC2 et DVI PC1 PC2 ou DVI est affiché en haut sur la droite...

Страница 90: ...que pour l écran de réglage de la distorsion q Touches KEYSTONE Utilisez ces touches pour corriger une distorsion trapézoïdale de l image projetée Voir page 35 w Touche HIDE Utilisez cette touche pour couper temporairement l image Une nouvelle pression sur cette touche fait revenir l image Voir page 35 e Indicateur LAMP Allumé Après que la lampe soit de lumière ait été utilisée plus de 900 heures ...

Страница 91: ... détectée La détection des signaux H V ou Cs enclenche la bascule automatique sur la synchronisation externe L ordre de priorité est H V Cs Remarque Lorsque les signaux venant de l ordinateur relié sont entrés le bord supérieur de l image peut apparaître courbé si les signaux de synchronisation entrés sont composite Cs ou sur G Dans ce cas utilisez des signaux de synchronisation séparés pour les s...

Страница 92: ...gler la taille de l écran projeté ces touches ne fonctionnent que si un objectif avec fonction zoom est utilisé T télé La taille de l écran projeté diminue W large La taille de l écran projeté augmente 7 Touches FOCUS Utilisez ces touches pour effectuer la mise au point de l image vidéo projetée La mise au point est se fait plus loin La mise au point se fait plus près 8 Touche MENU Utilisez cette ...

Страница 93: ...on de 4 3 à 16 9 u Touche QUICK ALIGN alignement rapide Utilisez cette touche pour régler automatiquement les positions Horizontale et Verticale Track et la Phase de l image projetée Pendant l alignement automatique Quick Alignment apparaît sur l écran puis disparaît une fois l alignement terminé Voir page 36 La fonction Quick Alignement alignement rapide ne peut être utilisée que lorsque le signa...

Страница 94: ...ce qui suit N utilisez pas en même temps une pile neuve et une vieille pile N utilisez pas en même temps différents types de piles car elles ont des caractéristiques diférentes Placez les piles de façon qu elles respectent les polarités indiquées à et à Assurez vous de mettre la borne moins en premier pour éviter les court circuits Utilisez uniquement les piles indiquées Retirez les piles si elles...

Страница 95: ...empérature de stockage admissible 14 F à 140 F 10 C à 60 C Lors de l installation du projecteur respectez les points suivants N utilisez pas le projecteur couché sur le côté Cela entraînerait un mauvais fonctionnement Utilisez le projecteur à l intérieur de l angle d installation spécifié Ne pas utiliser le projecteur incliné horizontalement de 30 à gauche ou à droite Cela causerait une variation ...

Страница 96: ...automatiquement Pour rentrer les pieds poussez sur les leviers et abaissez lentement le projecteur Le projecteur est maintenu à la hauteur à laquelle vous relâchez les pieds Là où le levier à été relâché Mise à niveau du projecteur Soulevez le projecteur tournez le pied réglable arrière et ajustez l angle horizontal jusqu à ce que le projecteur soit de niveau Y PB B Y PR R Y REMOTE Y C VIDEO R G B...

Страница 97: ...e de l image projetée sur l écran Pour corriger cette distorsion utilisez les touches KEYSTONE sur le projecteur Référez vous à Suppression de la distorsion trapézoïdale de l image à la page 35 Il est également possible d effectuer la correction à l aide du menu Keystone Référez vous à Réglage et ajustement d autres fonctions OPTIONS à la page 54 LAMP TEMP STAND BY HIDE PC VIDEO MENU KEYSTONE VOLU...

Страница 98: ...âle et atténuée Utilisez un rideau etc pour bloquer la lumière Placez le projecteur horizontalement sur une surface comprise à l intérieur de la plage des angles d ajustement angle d ajustement vertical 7 angle d ajustement horizontal 1 5 Si la distorsion est ajustée l écran devient plus petit Lors d un montage au plafond utilisez un système de fixation adapté non fourni Objectifs en option Ce pro...

Страница 99: ...xation SHIFT LOCK Utiliser le tournevis à bout hexagonal fourni 3 Tourner le bouton LENS SHIFT pour régler la position le montant du décalage de l écran projeté Vers la droite Décalage de l objectif vers le haut Vers la gauche Décalage de l objectif vers le bas 4 Bien resserrer le boulon de fixation SHIFT LOCK Utiliser le tournevis à bout hexagonal fourni 5 Tourner le couvercle pour le refermer Po...

Страница 100: ...vant ou arrière de télécommande sur le projecteur La distance de fonctionnement de la télécommande est d environ 10 m en réception directe La télécommande peut être utilisée en reflexion sur l écran Dans ce cas la distance totale de A B doit être d environ 10 m ou moins La télécommande peut fonctionner dans un angle de 15 vers la droite ou la gauche et de 15 vers le haut ou le bas 15 15 15 15 B A ...

Страница 101: ...au plafond Tournez dans le sens inverse des aiguilles d une montre Un montage au plafond et un réglage du projecteur demande une connaissance spécifique et une technique particulière Demandez à votre revendeur ou à un spécialiste d effectuer ce travail Pour tourner vis de sélection de position pour un montage au plafond utilisez un tournevis Philips avec un manche de 30 mm ou plus long Remarque Lo...

Страница 102: ...éo Assurez vous que l ordinateur possède un port de sortie vidéo en lisant la notice d emploi de l ordinateur Le port de sortie du signal vidéo est généralement appelé port RGB port moniteur ou port vidéo Si le moniteur de l ordinateur est de type hybride ou portable il se peut qu un port externe soit nécessaire Il existe également le type pour lequel un port externe ne peut pas être installé Entr...

Страница 103: ...he MENU est actionnée Signal Résolution horizontale Hor Pixels Résolution verticale Ver Lignes Fréquence horizontale H kHz Fréquence verticale V Hz Système PC PC98 VESA350 640 350 37 86 84 13 PC AT PC98 640 400 24 83 56 42 DOS V VGA 60Hz 640 480 31 47 59 94 DVI VGA 72Hz 640 480 37 86 72 81 VGA 75Hz 640 480 37 50 75 00 VGA 85Hz 640 480 43 27 85 01 SVGA 56Hz 800 600 35 16 56 25 SVGA 60Hz 800 600 37 ...

Страница 104: ...ion du noyau en ferrite à la page 29 Mémo Lors du raccordement à un appareil vidéo utilisez un TBC correcteur de base de temps avec ou un appareil ayant un TBC inclu L utilisation d une rallonge pour raccorder un apppareil vidéo et le projecteur peut causer une dégradation vidéo Lorsqu un signal avec beaucoup de parasites est reproduit sur un magnétoscope ou qu une lecture avec effets spéciaux est...

Страница 105: ...un appareil de sortie de signal de composante ou un appareil de sortie de signal au format DTV Mémo D autres appareils avec des prises de sortie de signal de composante lecteur DVD NTSC etc peuvent être raccordés DVD Digital Video Disc Disque vidéo numérique Des signaux au format DTV 480i 480p 720p 1080i peuvent être entrés Pour les signaux de format DTV pouvant être utilisés référez vous à Signau...

Страница 106: ...pareils sont hors tension Bien lire la notice d emploi accompagnant l appareil à raccorder Utilisez le câble vidéo fourni ou le câble fourni avec l appareil de jeu Y PB B Y PR R Y IN REMOTE Y C VIDEO R G B H IN OUT V Câble fourni avec l appareil de jeu ou câble vidéo fourni Appareil de jeu etc A VIDEO A AV IN Prise de conversion BNC RCA accessoire ...

Страница 107: ...ordement inversé Pour plus de détails référez vous à Commande externe RS 232C à la page 74 Pour plus de détails consultez votre revendeur ou un centre de service autorisé Remarque Lors de la connexion du câble à la prise REMOTE consultez le paragraphe Procédure de fixation du noyau en ferrite à la page 29 Y PB B Y PR R Y IN REMOTE Y C VIDEO R G B H IN OUT V Type de bureau Au connecteur RS 232C Au ...

Страница 108: ...u connecteur du moniteur A R A G A B Type portable Il existe certains types de portables qui ne permettent pas un fonctionnement de l écran LCD si un moniteur externe est raccordé Avec ce type d ordinateur il est nécessaire de basculer la sortie du moniteur LCD avec la sortie du moniteur externe Appareils avec sortie RGB Type de bureau Au connecteur du moniteur Câble séparé disponible séparémént A...

Страница 109: ... de l unité d extension de captage infrarouge à distance disponibles en option Cependant utilisez un câble enroulable une seule fois 1 Dégagez les petits crochets à chaque extrémité et ouvrez le noyau en ferrite 2 Enroulez le câble autour du noyau en ferrite Attachez le noyau en ferrite à environ 3 cm de l extrémité du câble 3 Refermez le noyau en ferrite avec le câble à l intérieur jusqu à entend...

Страница 110: ... prise d entrée du projecteur 2 Insérez la prise d alimentation principale dans la prise murale PRECAUTIONS Etant donné que le projecteur consomme beaucoup d électricité branchez directement sa prise d alimentation dans une prise murale Utilisez un cordon d alimentation avec un tore de ferrite uniquement N enlevez pas la tore de ferrite du cordon d alimentation fourni Autrement des interférences d...

Страница 111: ...es 3 MODE DE CONTROLE DE SORTIE LUMINEUSE LOC 2000 heures Ces temps de remplacement de lampe sont approximatifs et établit sur le principe que ces modes ont été utilisés depuis le début de la mise en place de la lampe Ils ne sont pas des durées de vies garanties Remarques Par ailleurs le MODE DE CONTROLE DE SORTIE LUMINEUSE LOC et le MODE DE CONTROLE DE PUISSANCE LUMINEUSE LPC contrôlent électriqu...

Страница 112: ...des Remarque La touche OPERATE ne fonctionnera pas pendant environ 1 minute à partir de l allumage de la lampe de projection Utilisez cette touche après environ 1 minute 2 Couper le commutateur MAIN POWER après que l indicateur STAND BY reste allumé OFF Le commutateur MAIN POWER se coupe et l indicateur STAND BY s éteint PRECAUTION Ne pas couper le commutateur MAIN POWER pendant le mode de refroid...

Страница 113: ... aucun signal sur la prise d entrée sélectionnée Pas de signal le message Aucun signal d image n est entrée est affiché Lors de la sélection d un appareil tel qu un ordinateur raccordé à la prise PC1 PC2 ou DVI Projecteur Appuyez sur PC Le mode d entrée change comme suit à chaque pression sur la touche PC1 PC2 DVI Télécommande Appuyez sur la touche PC1 PC2 ou DVI PC1 L image de la prise d entrée P...

Страница 114: ...sera utilisé Lorsque vous utilisez un format d image 16 9 une image au format 4 3 peut être projetée à l écran sans avoir à utiliser la fonction Zoom Utilisation du format 16 9 Appuyez sur la touche W Utilisation du format 4 3 Appuyez sur la touche S Il n y a aucune touche sur l appareil Ce réglage peut également être effectué à partir du menu Voir page 46 Lors de l utilisation d un écran au forma...

Страница 115: ...figure Pour annuler la correction et revenir à l écran original appuyez sur la touche PRESET valeur ajustée 0 Appuyez sur la touche EXIT pour enlever immédiatement l affichage de la distorsion Remarques La distorsion trapézoïdale Keystone peut être ajustée à partir du menu option Voir page 54 La zone de réglage de la distorsion trapézoïdale est d environ 20 dans la direction verticale Des interfér...

Страница 116: ...x entrés par la prise AV IN prise d entrée VIDEO Y C ou COMP La fonction d alignement rapide est utilisée pour ajuster automatiquement les valeurs de Position horizontale et verticale Phase et Track de l image projetée Lorsque la fonction d alignement rapide est utilisée pour corriger automatiquement une image utilisez une image fixe et lumineuse Cette fonction peut ne pas marcher correctement ave...

Страница 117: ...rique apparaît sur l écran en même temps qu une barre de niveau et un facteur d agrandissement 1 0 1 2 1 4 1 6 2 0 2 5 3 2 4 0 Lorsque 15 sec est affiché dans le menu Zoom numérique apparaît pendant environ 15 seconds Pour effectuer un zoom rentrant ou sortant appuyez sur la touche DIGITAL ZOOM T ou W sur la télécommande Déplacement de l image zoomée Pendant que Zoom numérique est affiché à l écra...

Страница 118: ...e min Durée de veille sélectionnables Si la période sans signal se continue sur une durée sélectionnée unités minutes le projecteur se met en mode d attente 15 30 60 OFF Language Langue affichée sur l écran Japonais Anglais Allemand Espagnol Italien Français Informations Entrée Montre le nom de la prise sélectionnée avec la touche VIDEO ou PC Y C VIDEO COMP PC1 PC2 ou DVI Commutateur Sans signific...

Страница 119: ...ille min Options 1 OFF OFF 9600 ENTER ON ON 19200 15 30 60 OFF Keystone 123 Oui Temp couleur Raz Non Réglage 2 Film Phase Écran HDTV Réglage 1 ENTER 12 4 3 1080i 16 9 1035i AUTO ON OFF Decodeur AUTO NTSC NTSC NTSC4 43 PAL SECAM Oui Qlt image Raz Non 12 12 ENTER Position Pos affi Menu Temp couleur Temp couleur ROUGE VERT BLUE Raz 123 123 123 ENTER Normal Haute Basse Réglage 2 Track Phase Écran HDTV...

Страница 120: ... niveau de bleu 0 à 255 la valeur de réglage dépend des signaux Raz Réinitialise les items du dessus aux réglages par défaut en sortie d usine Oui Non Options Référez vous page 54 Options 1 Affichage des menus 15sec Le menu disparaît après 15 secondes ON Le menu reste affiché Aff source 5sec L affichage de ligne comme VIDEO Y C PC1 ou PC2 apparaît pendant 5 secondes en haut à droite de l écran la ...

Страница 121: ...tone Contrôle lampe Options 2 ON 15sec 5sec ENTER ON OFF OFF ENTER ENTER Réglage Position Redimension Keystone 0 12 12 ENTER 1 1 Panneau Aspect Contrôle lampe Normal LPC LOC Menu principal en Mode Menu PC Actionner 5 pour sélectionner un élément Actionner 2 3 pour régler ou ajuster la valeur Actionner 5 pour sélectionner un élément Actionner 2 3 pour sélectionner Oui ou Non Appuyer alors sur ENTER...

Страница 122: ...ndant 5 secondes lorsque la touche VIDEO ou PC est actionnée OFF L affichage ligne n apparaît pas Affichage temps lampe ON Apparaît quand le temps d utilisation de la lampe atteint les 1000 heures avec un réglage en mode LPC ou LOC OFF N apparaît pas quand le temps d utilisation de la lampe atteint les 1000 heures avec un réglage en mode LPC ou LOC Key stone Appuyez sur ENTER pour entrer dans le s...

Страница 123: ...à l étape 2 est affiché à l écran Lorsque l on séléctionne Informations à l étape 2 aucun sous menu n est disponible 4 Appuyez sur la touche curseur 5 ou pour sélectionner un élément du sous menu Lorsque Language a été séléctionné à l étape 2 appuyez sur cette touche pour spécifier la langue 5 Appuyez sur la touche curseur 2 ou 3 3 3 3 pour régler ou ajuster la valeur Lorsqu un élément avec le mes...

Страница 124: ...N OPERATE DIGITAL ZOOM ZOOM FOCUS W W S T W T RM M160 REMOTE CONTROL UNIT SCREEN KEYSTONE W S Touche MENU Touche ENTER Touches curseur 5 2 3 Touche PRESET Touche EXIT LAMP TEMP STAND BY HIDE PC VIDEO MENU KEYSTONE PRESET EXIT ENTER OPERATE Touche MENU Touche ENTER Touches curseur 5 2 3 Touche PRESET Touche EXIT Menu Qlt image Réglage Temp couleur Options Language Informations Contraste Luminosité ...

Страница 125: ...1 apparaît sur l écran 3 Séléctionnez Decodeur avec la touche curseur 5 ou et appuyez sur la touche ENTER Le sous menu Decodeur apparaît à l écran Sous menu vidéo 4 Réglez le système couleur avec la touche curseur 5 ou AUTO Normalement réglez sur AUTO valeur en sortie d usine Le système couleur pour un signal vidéo entré est automatiquement identifié et affiché en En B W noir et blanc NTSC NTSC4 4...

Страница 126: ...NU Le menu principal apparaît sur l écran 2 Sélectionnez Réglage avec la touche curseur 5 ou et appuyez sur la touche 3 3 3 3 ou ENTER Le sous menu Réglage 1 apparaît sur l écran 3 Sélectionnez Réglage 2 avec la touche curseur 5 ou et appuyez sur la touche 3 3 3 3 ou ENTER Le sous menu Réglage 2 apparaît sur l écran 4 Sélectionnez Écran ou HDTV avec la touche curseur 5 ou 5 Réglez le format d écra...

Страница 127: ...che curseur 5 ou 4 Ajustez l alignement ou la phase avec le curseur 2 2 2 2 ou 3 3 3 3 Ajustez l alignement et la phase pour l image en cours de projection Pour ajuster la phase vérifiez d abord que l alignement est correct Pour ajuster plusieurs éléments répétez les étapes 3 et 4 5 Appuyez sur la touche EXIT pour revenir au menu précédent ou appuyez sur la touche MENU pour sortir du mode menu Rem...

Страница 128: ...l écran 3 Sélectionnez Réglage 2 à l aide de la touche curseur 5 ou puis appuyez sur 3 ou sur la touche ENTER Le sous menu Réglage 2 apparaît à l écran 4 Sélectionnez Film à l aide de la touche curseur 5 ou 5 Sélectionnez le mode de fonction Film à l aide de la touche curseur 5 ou ARRÊT OFF Lors de la visualisation d images enregistrées avec une caméra vidéo MARCHE ON Lors de la visualisation d im...

Страница 129: ...l écran Appuyez sur la touche curseur 2 pour sélectionner Oui et appuyez sur la touche ENTER Tous les éléments du sous menu Qlt image sont réinitialisés aux valeurs réglées en sortie d usine et le menu revient au menu pécédent Pour sortir du sous menu Raz sans effectuer de réinitialisation séléctionnez Non avec la touche curseur 3 et appuyez sur la touche ENTER Suite en page suivante Qlt image Con...

Страница 130: ...érature de couleur augmente l image est plus bleue 5 Sélectionnez ROUGE VERT ou BLUE avec la touche curseur 5 5 5 5 ou 6 Effectuez un réglage fin de la couleur de température avec touche curseur 2 2 2 2 ou 3 3 3 3 Pour régler plusieurs items répétez les étapes 5 et 6 Pour une réinitialisation générale Dans le sous menu de température de couleur sélection Réinit avec touche curseur 5 ou appuyez sur...

Страница 131: ...ition menu peut être ajustée 5 Appuyez sur la touche curseur 5 5 5 5 2 2 2 2 ou 3 3 3 3 pour déplacer l écran vidéo affichage ou le menu Répétez 4 ou 5 mouvements de positions d écran vidéo affichage et de menu Valeur en sortie d usine 6 Appuyez sur la touche EXIT pour revenir au menu précédent ou appuyez sur la touche MENU pour sortir du mode menu Réglage 1 Position Tonalité Chg format Decodeur R...

Страница 132: ...usine 5 Appuyez sur la touche EXIT pour revenir au mode précédent ou sur la touche MENU pour sortir du mode menu Élément d ajustement Touche Contenu de l ajustement Tonalité 2 ou 3 La tonalité de l image projetée sur l écran peut être modifiée TV Recommandé pour la projection de programmes vidéo Normal Utilisé normalement dans ce mode Cinéma Recommandé pour la projection de programmes de cinéma Ch...

Страница 133: ...Choisir 1 1 Panneau ou Aspect avec la touche curseur 2 2 2 2 ou 3 3 3 3 5 Appuyez sur la touche EXIT pour revenir au mode précédent ou sur la touche MENU pour sortir du mode menu Changement de la position de l attache d impulsion mode menu PC uniquement Lorsque l image est trop sombre ou claire ou lorsque l image est instable le fait de basculer la position peut améliorer la qualité de l image Nor...

Страница 134: ...s 2 séléctionnez Options 2 avec la touche curseur 5 ou et appuyez sur la touche ENTER Pour passer au sous menu Options 1 à partir du sous menu Options 2 sélectionnez Options 1 avec la touche curseur 5 ou et appuyez sur la touche ENTER Pour ajuster plusieurs éléments répétez les étapes 3 et 4 Pour réinitialiser la distorsion distorsion trapézoïdale de l image à son réglage en sortie d usine appuyez...

Страница 135: ...eur en sortie d usine 0 appuyez sur la touche PRESET lorsque le sous menu Keystone apparaît à l écran Pour sortir du sous menu de la distorsion appuyez sur la touche EXIT Contrôle lampe 2 ou 3 Appuyez sur la touche ENTER entrée pour entrer le sous menu de contrôle de la lampe Normal Utilisé comme une lampe normale LPC Contrôle automatiquement le courant utilisé par la lampe et l augmente par étape...

Страница 136: ...st généralement affiché pour indiquer qu il n est pas utilisé Source Montre le signal vidéo du type d image projetée mode de menu vidéo Résolution Affiche la résolution du signal vidéo reçu mode menu PC Il peut ne pas être affiché correctement avec certains signaux entrés Fréquence H Affiche la féquence horizontale du signal vidéo reçu mode menu PC Fréquence V Affiche la féquence verticale du sign...

Страница 137: ...rrait se produire et ou le projecteur pourrait être endommagé 1 Coupez l alimentation et déconnectez le cordon d alimentation du projecteur et de la prise murale En mode d attente le témoin STAND BY clignote mettre le sélecteur d alimentation MAIN POWER sur la position OFF O 2 Desserrez le porte fusible pour le déposer Utilisez un tournevis cruciforme pour desserrer le porte fusible 3 Déposez le f...

Страница 138: ... lampe Projection avec une lampe utilisée pendant plus de 900 heures MODE NORMAL Remarque Si le projecteur n est pas mis en mode d attente ni éteint il peut être utilisé jusqu à ce que le temps d utilisation de la lampe atteigne 2010 heures EXIT Remplacement de la lampe Avertissement Remplacement de la lampe EXIT 900 heures 1000 heures 1010 heures Lorsque le temps d utilisation de la lampe est pro...

Страница 139: ...IT Totalisateur d heures d utilisation de la lampe de projection 1000 heures 1900 heures 2010 heures 2000 heures Lorsque le temps d utilisation de la lampe est proche de 1000 heures Les messages 1000 h et Remplacement de la lampe apparaissent sur l écran Ces messages sont annulés en appuyant sur n importe quelle touche Le temps restant après l apparition de l affichage peut être réglé avec le menu...

Страница 140: ... vis sont faites pour ne pas se défaire du couvercle 2 Desserrez les vis soulevez la poignée et sortir l ensemble de la source de lumière Utilisez un tournevis à bout plat pour desserrer les deux vis Remarque Les vis sont faites pour ne pas se défaire de l ensemble de la source de lumière Suite page suivante Vis Couvercle de l orifice de remplacement de l ensemble de la source de lumière Faire att...

Страница 141: ...face en verre 4 Reposez le couvercle de l orifice de remplacement de l ensemble de la source de lumière et serrez les vis Utilisez un tournevis à bout plat pour serrer les deux vis PRECAUTION Installez et fermez le couvercle de l orifice de remplacement de l ensemble de la source de lumière avec soin Dans le cas contraire un sélecteur de sécurité empêchera le projecteur de fonctionner Si la griffe...

Страница 142: ...e frappe sur les touches revenir au début de la séquence Pour vérifier la durée de la lampe avec le menu appuyez sur la touche MENU et séléctionnez Informations avec la touche curseur 5 ou La durée d utilisation de la lampe est indiquée avec l élément Temps lampe Menu principal vidéo Menu principal PC PRECAUTION Ne remettre la durée d utilisation de la lampe sur zéro qu une fois une lampe neuve mi...

Страница 143: ...OPERATE et STAND BY clignotent De ce fait nettoyez régulièrement le filtre Pour une indication de l avertissement référez vous en page 67 3 Nettoyez le filtre du couvercle à filtre Nettoyez le filtre avec du détergent neutre le laver dans l eau puis le sécher à l ombre PRECAUTIONS Mettre des gants en caoutchouc lors de l utilisation du détergent neutre Après avoir lavé le filtre dans l eau assurez...

Страница 144: ...eil étant alimenté le fonctionnement commence puis s arrête après quelques minutes Les prises ou évents d air sont il bloqués Coupez le commutateur MAIN POWER enlevez tout objet qui bloque et réactivez le commutateur MAIN POWER 6 7 32 L image vidéo n apparaît pas L entrée correcte est elle sélectionnée Séléctionnez l entrée correcte avec les touches VIDEO et PC 9 13 Les appareils sont ils correcte...

Страница 145: ...se fige La touche FREEZE de la télécommande est elle actionnée Appuyez sur la touche FREEZE pour arrêter cette action 12 37 Une partie de l image est agrandie La touche DIGITAL ZOOM T de la télécommande est elle active Appuyez sur la touche PRESET pour revenir à l écran vidéo original 12 37 La couleur est pauvre ou instable La qualité de l image densité de couleur etc est elle ajustée correctement...

Страница 146: ... MAIN POWER et débranchez le cordon d alimentation de la prise secteur 2 Effectuez un action en fonction du numéro No 4 Mettre le filtre en place puis laissez le projecteur refroidir No 5 Vérifiez que rien n obstrue les sorties et entrées d air et attendre que la température tombe à l intérieur No 6 Vérifiez que rien n obstrue les sorties et entrées d air et attendre que la température tombe à l i...

Страница 147: ...es éléments comme la résolution sont hors spécifications Le nom du mode d entrée séléctionné prise d entrée apparaît sur la première ligne du message Entrez des signaux vidéo correspondants aux spécifications du projecteur 22 23 70 Lorsque la touche FREEZE est actionnée ce message apparaît pendant quelques secondes Lorsqu une erreur de touche est commise pendant l arrêt de l image ce message appar...

Страница 148: ...es Ce message est annulé en appuyant sur n importe quelle touche Préparez une nouvelle lampe unité de lampe ou remplacez la lampe plus tôt 44 46 Apparaît quand le réglage de contrôle de la lampe est réglé sur MODE NORMAL Lorsque le temps d utilisation de la lampe atteint les 1000 heures l indication Avertissement clignote sur l écran Pour annuler ce message appuyez sur la touche EXIT Toutefois le ...

Страница 149: ... le MODE DE CONTROLE DE SORTIE LUMINEUSE LOC ou le MODE DE CONTROLE DE PUISSANCE LUMINEUSE LPC Apparaît chaque fois que le projecteur est éteint après que le temps d utilisation de la lampe ait dépassé les 1900 heures et jusqu à ce qu il atteigne les 2000 heures Ce message peut être annulé en appuyant sur n importe quelle touche Préparez une lampe neuve unité de lampe ou remplacez la lampe plus tô...

Страница 150: ...t d image de 4 3 pendant une entrée vidéo Fréquence de balayage Fréquence horizontale 15 kHz 105 kHz Fréquence verticale 50 Hz 100 Hz Sortie de puissance audio 1 W monaural haut parleur micro de type rond de 1 5 8 pouces 4 cm 1 VIDEO IN Y C 1 ligne mini DIN 4 broches 1 pour S vidéo VIDEO 1 ligne BNC 1 pour la vidéo composite 1 ligne BNC 3 pour ordinateur DTV ou vidéo Y B Y R Y Signal de composante...

Страница 151: ...nt des marques déposés de International Business Machines Corporation Macintosh est une marque déposée de Apple Computer Inc Tous les autres noms de produits mentionés dans ce mode d emploi sont utilisés dans un but d identification uniquement et peuvent être des marques de commerce ou des marques déposées de leur compagnie respective Alimentation 120 V CA 50 60 Hz Consommation 7 A Température de ...

Страница 152: ...uces mm 1 Protubérances exclues 2 Sans l objectif LAMP TEMP STAND BY HIDE PC VIDEO MENU KEYSTONE PRESET EXIT ENTER OPERATE 5 1 4 133 20 505 1 14 5 8 369 15 1 2 393 2 20 505 1 15 1 2 392 2 1 8 52 2 1 8 53 8 3 8 212 10 1 2 265 15 1 2 393 2 10 1 8 256 2 7 8 70 10 1 2 265 ...

Страница 153: ...SYNC 7 GND Vert 15 N C 8 GND Bleu 1 2 3 4 5 6 7 8 9 10 11 12 13 14 15 Numéro de broche Nom du signal Numéro de broche Nom du signal Numéro de broche Nom du signal 1 T M D S Donnée 2 9 T M D S Donnée 1 17 T M D S Donnée 0 2 T M D S Donnée 2 10 T M D S Donnée 1 18 T M D S Donnée 0 3 T M D S Feuille donnée 2 11 T M D S Feuille donnée 1 19 T M D S Feuille donnée 0 4 Pas raccordé 12 Pas raccordé 20 Pas...

Страница 154: ... format de données suivant Header Désigne le début des données et le type de données 21h Commande de contrôle au projecteur 3Fh Question au projecteur commande de requête ID 1 fixé SP Désigne le délimiteur pour ID Command et Parameter 20h CR Designe la fin des données 0Dh non nécessaire lors d une requête 2 2 Format de réponse des données du projecteur vers l ordinateur À la réception d une comman...

Страница 155: ...es par l ordinateur sont les suivantes Keystone La valeur numérique vas de FF80 à 0080 Mode de fonctionnement Seule les commandes de requêtes sont possibles Caractère Hex Signification 0 30 OFF 1 31 ON Caractère Hex Signification 0 30 Y C 1 31 VIDEO 2 32 COMP 3 33 PC1 4 34 PC2 5 35 DVI Caractère Hex Signification 0000 30h 30h 30h 30h Mode d attente 0001 30h 30h 30h 31h Mode alimenté 0002 30h 30h 3...

Страница 156: ... 60 9 32 2 84 140 approx 355 6 cm 9 22 2 81 10 04 3 06 150 approx 381 0 cm 9 88 3 01 10 79 3 29 160 approx 406 4 cm 10 56 3 22 11 52 3 51 170 approx 431 8 cm 11 22 3 42 12 24 3 73 180 approx 457 2 cm 11 88 3 62 12 96 3 95 190 approx 482 6 cm 12 57 3 83 13 68 4 17 200 approx 508 0 cm 13 22 4 03 Taille d écran de projection Diagonale Distance de projection approximative unité pouces m Format d image...

Страница 157: ...44 48 03 14 64 400 approx 1016 0 cm 50 36 15 35 54 86 16 72 450 approx 1143 0 cm 56 63 17 26 61 65 18 79 470 approx 1193 8 cm 59 12 18 02 64 37 19 62 480 approx 1219 2 cm 60 37 18 40 500 approx 1270 0 cm 62 89 19 17 521 approx 1323 3 cm 65 52 19 97 Taille d écran de projection Diagonale Distance de projection approximative unité pouces m Format d image de 4 3 Format d image de 16 9 Large Télé Larg...

Страница 158: ...78 ...

Страница 159: ......

Страница 160: ...Printed in Japan 0202 Y CR VP 2002 VICTOR COMPANY OF JAPAN LIMITED DLA G150CLU PROJECTOR VICTOR COMPANY OF JAPAN LIMITED ...

Отзывы: