MX-G71R
1-7
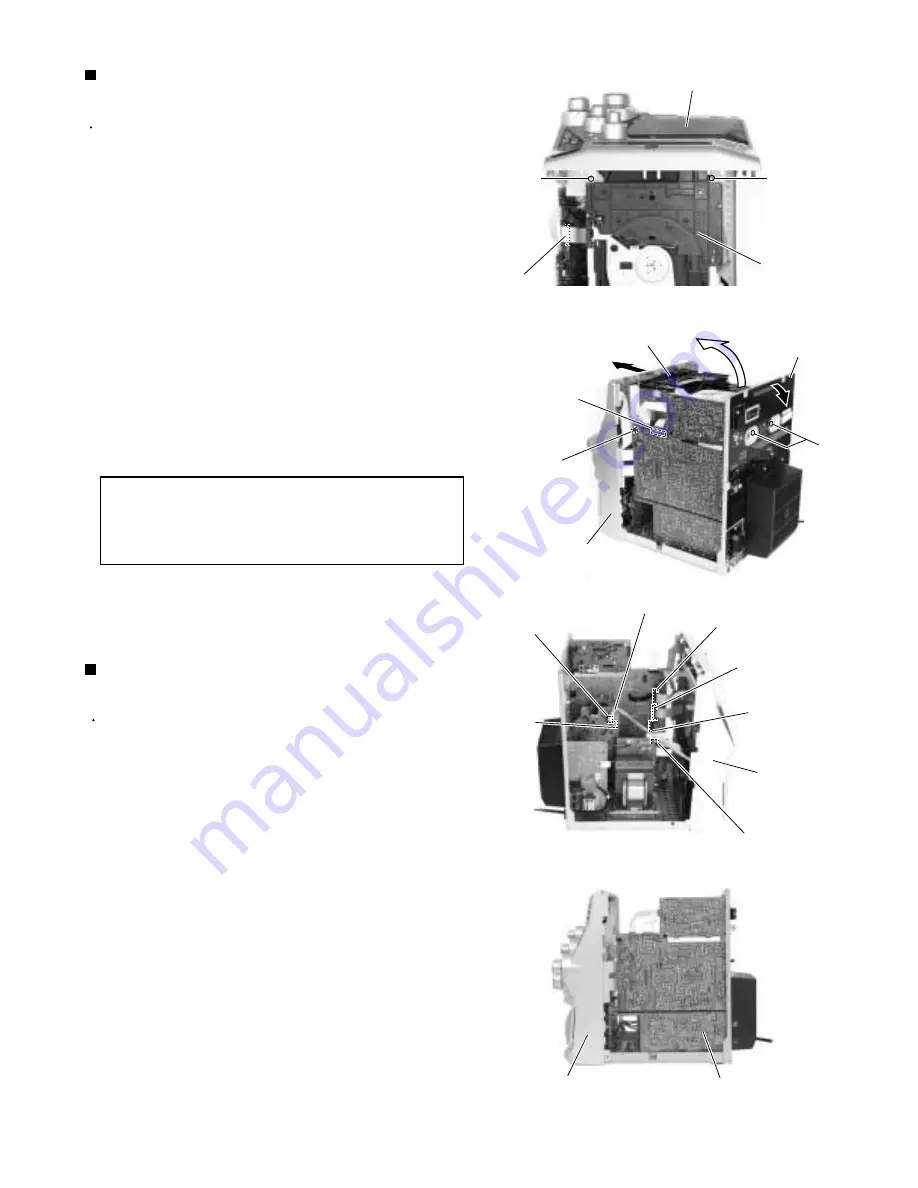
Prior to performing the following procedure, remove
the metal cover.
Disconnect the card wire from connector CN661 on
the Main board.
Remove the two screws C on the upper side of the
body and the two screws D on the back of the rear
panel.
Remove the plastic rivet attaching the main board.
Disconnect the fan connector CN705.
Pull both the rear panel and the front panel assembly
to the outside, then remove the CD changer
mechanism assembly by lifting the rear part of the
assembly.
1.
2.
3.
4.
5.
Removing the CD changer mechanism
assembly (See Fig.4 and 5)
Prior to performing the following procedure, remove
the metal cover and CD changer mechanism
assembly.
Disconnect the card wires from connector CN870,
CN871 and CN315 on the main board respectively.
Remove the tie band and disconnect the wire from
connector CN703 on the amplifier board.
Disconnect the wire from connector CN220 on the
transformer board.
1.
2.
3.
Removing the front panel assembly
(See Fig.6 to 10)
To prevent damage to the CD fitting, be
sure to pull both the rear panel and the
front panel assembly enough to remove
the CD changer mechanism assembly.
CAUTION:
Fig.4
Fig.5
Fig.6
Fig.7
Front panel assembly
C
C
CD changer
mechanism
assembly
Main board
CN661
CD changer mechanism assembly
D
Main board
CN661
Front panel assembly
Plastic rivet
Amplifier board
CN703
Main board
CN870
CN871
CN315
Transformer board
CN220
Front panel
assembly
Front panel assembly
Main board
Rear panel
Fan connector
CN705
Tie band
Содержание CA-MXG71R
Страница 45: ...MX G71R 1 45 M E M O ...
Страница 61: ...MX G71R 3 2 M E M O ...
Страница 70: ...MX G71R 3 11 18 1 20 25 28 26 17 B mecha A mecha Grease point JC 525 UD 24 LEN 320M MOBIL 1 Grease ...


