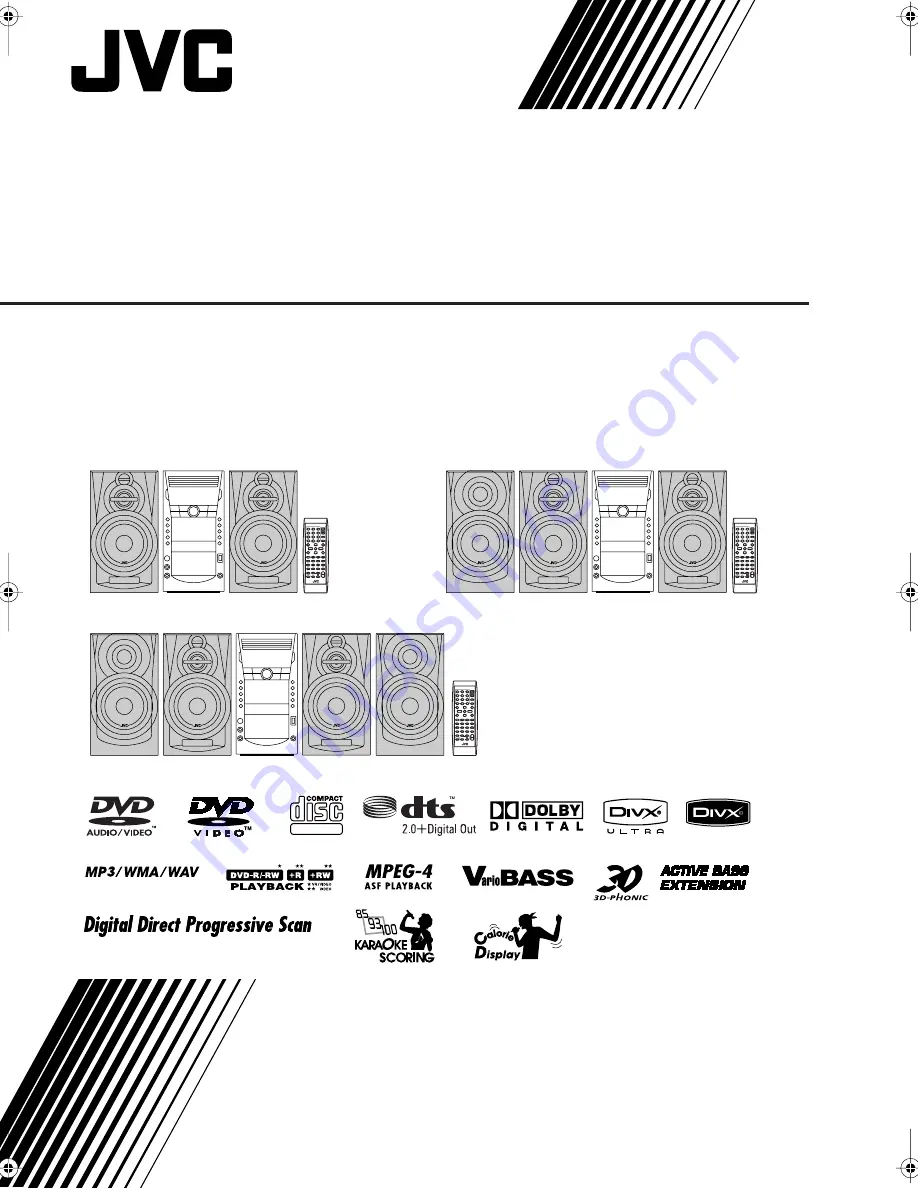
COMPACT COMPONENT SYSTEM
INSTRUCTIONS
GVT0207-001B
[US, UN, UG, UX, A, UW]
SUPER VIDEO
CA-DXJ30
CA-DXJ10/J20
CA-DXJ10
CA-DXJ20
DXJ_Cover[U].fm Page 1 Monday, February 12, 2007 9:57 AM
Страница 1: ...COMPACT COMPONENT SYSTEM INSTRUCTIONS GVT0207 001B US UN UG UX A UW SUPER VIDEO CA DXJ30 CA DXJ10 J20 CA DXJ30 CA DXJ10 CA DXJ20 CA DXJ30 CA DXJ30 CA DXJ20 CA DXJ10 ...
Страница 2: ...holes If the ventilation openings or holes are blocked by a newspaper or cloth etc the heat may not be able to get out Do not place any naked flame sources such as lighted candles on the apparatus When discarding batteries environmental problems must be considered and local rules or laws governing the disposal of these batteries must be followed strictly Do not expose this apparatus to rain moistu...
Страница 3: ...s Top Back No obstructions should be placed in the areas shown by the dimensions below 3 Bottom Place on the level surface Maintain an adequate air path for ventilation by placing on a stand with a height of 10 cm or more 15 cm 10 cm 10 cm 10 cm 10 cm Front view Side view CA DXJ30 CA DXJ20 CA DXJ10 CA DXJ30 CA DXJ20 CA DXJ10 10 cm Wall or obstructions Wall or obstructions ...
Страница 4: ...nels To enjoy multi channel sound connect a compatible decoder or an amplifier with a compatible decoder to the OPTICAL DIGITAL OUTPUT terminal on the rear How to Read This Manual Button and control operations are explained in the table below Some related tips and notes are explained later in the sections Learning More about This System and Troubleshooting but not in the same section explaining th...
Страница 5: ...ly Operations Sound Other Adjustments 13 Adjusting the Speaker Output Balance 13 Reinforcing the Bass Sound 13 Applying an Optimal Bass Sound Effect VARIO BASS 13 Selecting the Sound Modes 14 Creating Your Own Sound Modes User Mode 14 Creating 3 Dimensional Sound Field 3D Phonic 15 Presetting Automatic DVD Video Sound Increase Level 15 Changing the Picture Tone 15 Changing the Display Brightness 1...
Страница 6: ...immediately From AM FM antenna See page 4 Ÿ From the digital input of digital audio component See page 4 From the video input of TV monitor See page 4 CA DXJ10 and CA DXJ20 do not have component jacks From the subwoofers CA DXJ30 only See page 5 From the speakers See page 5 CA DXJ20 has 3 speaker terminals Voltage selector not applicable for Australian models Before plugging in confirm the positio...
Страница 7: ...cord is covered with vinyl on the tip twist and pull the vinyl off to remove For better FM reception Disconnect the supplied FM antenna and connect an outdoor FM antenna using a 75 Ω wire with coaxial type connector IEC or DIN45325 Make sure the antenna conductors do not touch any other terminals connecting cords or the power cord Also keep the antennas away from metallic parts of the System conne...
Страница 8: ...e above instruction If this happens move the speakers away from the TV Auxiliary equipment Voltage selector not applicable for Australian models Power cord Plug the AC power cord to a wall outlet Press and hold Insert Release From front right speaker blue black From front left speaker blue black From left subwoofer red black From right subwoofer red black Fromsubwoofer red black From front right s...
Страница 9: ...an enjoy a high quality picture by selecting progressive scanning mode You can change the setting only while playback is stopped 1 Enter the color system setting mode 2 Select the color system and scanning mode 3 Store the setting When using the remote control point the top of the remote control toward the remote sensor as directly as possible If you operate it from a diagonal position the operati...
Страница 10: ...ator for deck A is available only when the tape is being rewinded REC lights while recording 7 Timer indicators lights when Daily Timer or Recording Timer is on standby is working or being set SLEEP lights when the Sleep Timer is activated DAILY lights when the Daily Timer is on standby flashes while working or being set REC lights when the Recording Timer is on standby flashes while working or be...
Страница 11: ...NTER SET PREV NEXT MENU PL REVERSE MODE FADE MUTING TOP MENU PG RETURN DISC 1 DISC 5 CANCEL 3 FM PLAY MODE 2 GROUP TITLE Number buttons The STANDBY lamp on the main unit lights in red A small amount of power is always consumed even while on standby For private listening Connect a pair of headphones to the PHONES jack on the main unit The sound will no longer come out of the speakers Be sure to tur...
Страница 12: ... FM and 15 AM stations 1 Tune in to a station you want to preset You can also store the monaural reception mode for FM preset stations if selected 2 Activate the preset number entry mode Finish the following process while the indication on the display is flashing To cancel the operation during procedure press CANCEL while holding SHIFT 3 Select a preset number for the station you store Remote cont...
Страница 13: ...s activated press 7 twice To cancel Resume see RESUME on page 38 To select a number see How to select a number on page 8 You can also use 4 buttons IMPORTANT Before playing a disc USB mass storage class device make sure of the following Turn on the TV and select an appropriate input mode on the TV to view the pictures or on screen displays For disc USB mass storage class device playback you can ch...
Страница 14: ...ou press the or button you can skip to a scene of 30 seconds or 5 minutes away depending on the DivX file To return to normal playback press DVD CD 3 or USB MEMORY 3 To select an item directly You can select a title chapter track directly and start playback For DVD Video you can select a title before starting playback while you can select a chapter after starting playback To play back by using the...
Страница 15: ...Tape To insert a tape You can play back type I tapes The use of C 120 or longer tapes is not recommended To change the tape running direction deck B only To reverse the tape automatically deck B only To select a number see How to select a number on page 8 To move to the next or previous page of the current menu To return to the previous menu while holding Push Insert Close To start playback To sto...
Страница 16: ...VE BASS EXT LEVEL CLOCK TIMER BALANCE L R SOUND MODE DVD LEVEL VARIO BASS 3D PHONIC SHIFT CANCEL DIMMER VFP ENTER SET DISPLAY AUTO The System automatically applies TURBO LITE n EASY MOVIE or TECHNO according to the playback source initial setting LITE n EASY Suitable for Karaoke and classical music You can obtain a comfortable bass sound MOVIE Suitable for a video source and playback of external c...
Страница 17: ...l from 3 to 3 Repeat steps 2 and 3 to adjust the other parameters 4 Select one of the User Modes 5 Store the setting You can adjust the SEA pattern temporarily by doing the operation on steps 1 to 3 The adjustment is cleared when you change the sound mode to another mode To create your own Sound Mode with surround effect select DANCE HALL or STADIUM first then go through steps 1 to 5 SEA Sound Eff...
Страница 18: ... USER2 Follow steps 1 and 2 above 2 Select a parameter you want to adjust ACTION Suitable for action movies and sports programs DRAMA Creates natural and warm sound Enjoy movies in a relaxed mood THEATER Enjoy sound effects like in a major theater INFO Remote ONLY 3D PHONIC ACTION 3D PHONIC DRAMA 3D PHONIC THEATER 3D PHONIC OFF On the TV screen Remote ONLY DVD LEVEL1 DVD LEVEL2 DVD LEVEL3 while ho...
Страница 19: ...urn to the previous step 1 Activate clock setting mode If you have already adjusted the clock before press the button repeatedly until the clock time starts flashing 2 Adjust the hour then minute Now the built in clock starts working Changing the display information For DVD CD and USB MEMORY For TAPE TUNER FM TUNER AM and AUX DIMMER 1 Dims the display DIMMER 2 Dims the display more than DIMMER 1 R...
Страница 20: ...ee page 24 While playing DVD Video While playing a DVD Audio DivX While playing a DVD VR SVCD or VCD Example when two multi channel streams are recorded SVCD can have 4 audio channels SVCD usually uses these 4 channels to record two 2 channel recordings ST1 ST2 SHIFT PAGE ZOOM SUB TITLE ANGLE AUDIO MPX ENTER SET DVD CD SLOW SLOW Remote Control Number buttons ST1 ST2 ST To listen to normal stereo 2...
Страница 21: ...gles You can also select the view angle using the on screen bar see page 24 While playing Reviewing the Playback Quickly For DVD Video DVD VR only You can move back the playback position by 10 seconds only within the same title Glance Back While playing Selecting Browsable Still Pictures CA DXJ30 only For DVD Audio only While playing back a track linked to browsable still pictures B S P you can se...
Страница 22: ...ry press 7 Special Picture Playback Pause playback While playing To resume normal playback press DVD CD 3 or USB MEMORY 3 Frame by frame playback 1 While playing 2 Advance the still picture frame by frame To resume normal playback press DVD CD 3 or USB MEMORY 3 Slow motion playback This function is available only for moving picture files except MPEG 1 MPEG 2 ASF DivX 1 While playing 2 Start slow m...
Страница 23: ... Select a disc number 2 For DVDs and Audio files only Select a group title number 3 Select a track chapter number To select a number see How to select a number on page 8 3 Repeat step 2 above until you complete your program 4 Start playback DISC 1 DVD CD Main unit Remote Control SHIFT REPEAT A B REPEAT FM PLAY MODE DVD CD CANCEL Number buttons Playback starts in the order you have programmed Remot...
Страница 24: ... To exit from Random Play Before or after playback To skip To pause To stop Torelease press DVD CD 3 To erase the last step To erase the entire program To add steps in the program Repeat step 2 on page 20 Remote ONLY In the programmed order In the reverse order while holding PROGRAM RANDOM Canceled Playback of the current disc starts in a random order When all chapters tracks on the current disc a...
Страница 25: ... the beginning point A and the ending point B A B Repeat cannot be used for AV files and some DVDs 1 While playing without PBC for SVCD VCD select the start point A 2 Select the end point B You can search for the end point using the button To cancel A B Repeat press REPEAT A B again A B Repeat will also be canceled when you stop play or skip the chapter or track Prohibiting Disc Ejection You can l...
Страница 26: ...torage class device MPEG 1 MPEG 2 ASF DivX file 3 DVD VIDEO TITLE 2 DISC 1 TIME OFF CHAP 1 3 1 3 1 1 TOTAL 1 01 58 CHAP 3 Dolby D 3 2 1ch 1 2 4 OFF TRACK DVD AUDIO GROUP 14 DISC 2 TIME 0 15 58 TRACK 23 PAGE 3 1 2 4 1 3 1 3 LPCM 3 2 1ch TIME 3 DVD VR PG 2 DISC 1 TIME OFF CHAP ST ON TOTAL 0 01 58 CHAP 3 Dolby D 2 0 0ch 1 2 4 3 SVCD TIME OFF ST1 TIME 0 04 58 TRACK 3 1 2 4 4 DISC 3 PROGRAM 3 VCD TIME ...
Страница 27: ...ion Pause Stop 4 Operation icons on the pull down menu Indication Meanings Select to change the time indication see also page 25 Select to repeat playback see also pages 22 Select for time search see also page 26 Select for chapter search see also page 26 Select for track search see also page 26 Select to change the audio language or channel see also page 17 Select to change subtitle language see ...
Страница 28: ...time of the current disc title TIME Elapsed playing time of the current chapter track REM Remaining time of the current chapter track OFF 1 3 1 3 1 3 TIME TITLE 14 TOTAL1 25 58 CHAP 23 DVD VIDEO TITLE 2 TIME OFF CHAP 1 3 1 3 1 1 TOTAL 1 01 58 CHAP 3 DISC 1 Dolby D 3 2 1ch TIME OFF 1 3 1 3 1 3 TIME TITLE 14 TOTAL1 25 58 CHAP 23 DVD VIDEO TITLE 2 TIME OFF CHAP 1 3 1 3 1 1 TOTAL 1 01 58 CHAP 3 OFF DI...
Страница 29: ...DVD Audio Track 1 While playing a disc display the on screen bar with the pull down menu 2 Select or 3 Display the pop up window 4 Enter the desired chapter track number To correct a misentry press the number buttons until the desired number is shown in the pop up window 5 Finish the setting A B Repeat starts The selected portion plays repeatedly Examples To move to a point of 1 hours 02 minutes 0...
Страница 30: ...2 05 07 8ch 17 00 Music Festival 4 26 05 07 L 1 13 19 children 001 5 20 06 07 4ch 22 00 6 25 06 07 L 1 8 23 children 002 T T PLAY LIST No Date Chap Length Title 1 25 05 07 001 1 03 16 My JVC World 2 17 06 07 005 1 35 25 3 20 06 07 003 0 10 23 Favorite music 4 25 06 07 001 0 07 19 children001 002 Ex While playing an MP3 file on a disc 1 Current source FILE Current source is DVD CD USB Current sourc...
Страница 31: ...oom press ZOOM repeatedly until ZOOM OFF appears on the TV screen For JPEG file The selected file still picture is displayed until you change it Slide show playback starts Each file still picture is shown on the screen for a few seconds then changes one after another For the other files Playback starts with the selected chapter file Pressing DVD CD 3 or USB MEMORY 3 also starts playback P 1 Repeat...
Страница 32: ...ss device you can also use Synchronized Recording see page 30 When recording from deck A you can also use Dubbing see Dubbing Tapes on page 30 REC START STOP REVERSE MODE DUBBING USB MEMORY TAPE A DISC 1 5 TAPE B USB DISC REC START Main unit Deck B Deck A IMPORTANT It may be unlawful to record or play back copyrighted material without the consent of the copyright owner Push Insert Close To record ...
Страница 33: ...t the disc number you want to start recording from When recording from the USB mass storage class device For recording desired tracks files from discs You can program tracks files to record in your preferred order Select Program Play and make a program see page 20 before starting playback 4 Start recording When either playback or recording ends both playback and recording stop at the same time To ...
Страница 34: ...crophone 5 Adjust the MIC LEVEL and VOLUME To use microphone only select DVD CD or USB in step 3 but do not start playback To cancel the Mic Mixing REC START STOP KARAOKE SCORING MIC 1 MIC 2 MIC LEVEL VOLUME VOCAL MASKING SHIFT MIC MIX RESERVE KARAOKE SCORING CANCEL AUDIO VOL KARAOKE SETTING KARAOKE SETTING KARAOKE SETTING VOCAL SUPP Remote control Main unit Source selecting buttons Number buttons...
Страница 35: ...starts Adjust echo level and key if you want See To apply an echo to your voice and To adjust the key on page 33 When you press 4 or Karaoke Scoring is canceled and restarts from the selected track file After the song ends playback stops and the score board appears on the TV screen with fanfare When you press 8 Karaoke Scoring is canceled When playback starts again Karaoke Scoring starts If you do...
Страница 36: ... 4 Adjust the key To return to normal key select 0 To change the calculation level You can change the scoring level of Karaoke Scoring This function is available only for disc USB mass storage class device playback 1 Select DVD CD or USB as the source 2 Connect the microphone s not supplied to the MIC 1 and or MIC 2 jack Mic Mixing will be automatically activated If a microphone is already connect...
Страница 37: ...mber buttons to select a song in the following order 6 Start playback Karaoke Reserve screen disappears and playback starts in the order you have programmed For the Karaoke Program Play with Karaoke Scoring Each time the song ends playback stops and the score board appears Press DVD CD 3 to start playback of the next track 7 Sing into the microphone 8 Adjust the MIC LEVEL and VOLUME To check the p...
Страница 38: ...ding Timer Select the playback source TUNER FM TUNER AM or AUX For Daily Timer Select the playback source TUNER FM TUNER AM DISC USB TAPE A TAPE B or AUX When you select AUX as the source you also need to set the timer of the external component 4 Select an item you want to play or record as follows TUNER FM and TUNER AM Preset station DISC Disc group title and track file chapter USB Group and file...
Страница 39: ...mer works only once Recording Timer starts working only when the System is turned off on standby When the on time comes The System turns on tunes in to the specified station sets the volume level to the preset level and starts recording When the off time comes The System stops recording and turns off on standby The timer setting remains in memory until you change it How Daily Timer works Once the ...
Страница 40: ...ide TV is fixed to 16 9 16 9 AUTO 16 9 MULTI AUTO Wide television screen Select this when your TV is an ordinary wide TV 4 3 LB 4 3 MULTI LB Letter Box conversion For a conventional 4 3 TV Displays a wide screen picture to fit the width of the TV screen keeping the aspect ratio 4 3 PS 4 3 MULTI PS Pan Scan conversion For a conventional 4 3 TV The picture is zoomed in to fill the screen vertically ...
Страница 41: ...eo receiver MD player TV etc D RANGE COMPRESSION You can enjoy a powerful sound at a low volume level while playing Dolby Digital software AUTO Select to apply the compression only to multi channel encoded audio except for 1 channel and 2 channel sources ON Select this to always apply the compression OTHERS menu Item Contents RESUME You can select Resume ON The System resumes playback from the pos...
Страница 42: ...ing the remote control supplied for this System SHIFT TV VOL TV VIDEO TV CH TV Remote control To turn on or off the TV To select the input mode either TV or VIDEO To adjust TV volume To select the TV channel while holding while holding while holding ...
Страница 43: ... USB hub You cannot charge any other USB device through the USB MEMORY terminal of this System While playing back a file in a USB mass storage class device do not disconnect the device It may cause a malfunction of both the System and the device JVC bears no responsibility for any loss of data in the USB mass storage class device while using this System When connecting with a USB cable use the cab...
Страница 44: ...tem can play back DivX files with the extension code divx div avi regardless of the letter case upper lower The System does not support GMC Global Motion Compression The file encoded in the interlaced scanning mode may not be played back correctly Daily Operations Sound Other Adjustments see pages 13 to 16 Reinforcing the Bass Sound You cannot adjust the Active Bass level when the headphones are c...
Страница 45: ...rded However while recording onto a tape using USB DISC REC START Key adjustment will not be recorded While the System is turned on connecting a microphone automatically activates Mic Mixing and all the Karaoke related functions While the System is turned off connecting a microphone does not activate Mic Mixing and any other Karaoke related function In this case press MIC MIX while holding SHIFT a...
Страница 46: ...center hole lightly Do not touch the shiny surface of the disc or bend the disc Put the disc back in its case after use to prevent warping Be careful not to scratch the surface of the disc when placing it back in its case Avoid exposure to direct sunlight extreme temperatures and moisture To clean the disc Wipe the disc with a soft cloth in a straight line from center to edge Handling cassette tap...
Страница 47: ... TYPE setting after the System read the disc or the USB mass storage class device In this case reload the disc or disconnect the USB mass storage class device and connect it again The disc sound is discontinuous The disc is scratched or dirty The playback sounds strange Cancel Vocal Masking see page 32 Cancel Key adjustment see page 33 No subtitle appears on the TV screen though you have selected ...
Страница 48: ... kHz 16 20 24 bit Linear PCM 48 kHz 16 bit Linear PCM with 44 1 88 2 176 4 kHz 16 20 24 bit Linear PCM 44 1 kHz 16 bit Linear PCM with Dolby Digital Dolby Digital bitstream 48 kHz 16 bit Linear PCM with DTS DTS bitstream 48 kHz 16 bit Linear PCM DVD R RW in DVD VR format with 48 kHz 16 20 24 bit Linear PCM 48 kHz 16 bit Linear PCM with Dolby Digital Dolby Digital bitstream 48 kHz 16 bit Linear PCM...
Страница 49: ...a LV Latvian Lettish RW Kinyarwanda TO Tonga BH Bihari HI Hindi MG Malagasy SA Sanskrit TR Turkish BI Bislama HR Croatian MI Maori SD Sindhi TS Tsonga BN Bengali Bangla HY Armenian MK Macedonian SG Sangho TT Tatar BO Tibetan IA Interlingua ML Malayalam SH Serbo Croatian TW Twi BR Breton IE Interlingue MN Mongolian SI Singhalese UK Ukrainian CA Catalan IK Inupiak MO Moldavian SL Slovenian UR Urdu C...
Страница 50: ...I 50 Hz 14 000 Hz Wow and flutter 0 15 WRMS General Power requirement AC 110 V AC 127 V AC 220 V AC 230 V AC 240 V adjustable with the voltage selector 50 Hz 60 Hz For Australia AC 240 V 50 Hz Power consumption CA DXJ10 95 W at operation 15 W on standby CA DXJ20 140 W at operation 16 W on standby CA DXJ30 170 W at operation 21 W on standby Dimensions W H D approx 185 mm x 370 mm x 372 mm Mass appr...
Страница 51: ... 3 q 8 10 20 21 28 32 TOP MENU PG 7 11 27 DVD LEVEL 15 TV CH m 39 FADE MUTING b 9 TV VOL n 39 TV VIDEO f 39 FM AM AUX x 8 9 10 USB MEMORY 3 3 3 3 p 8 10 28 32 FM PLAY MODE e 9 20 21 VOCAL MASKING 9 32 GROUP TITLE r 11 VOCAL SUPP f 32 KARAOKE SCORING j 32 VARIO BASS 13 KARAOKE SETTING h 33 34 VFP b 15 ZOOM v 19 28 KARAOKE SETTING 8 33 34 Button Page Button Page 2 8 36 Disc trays 1 11 Display 3 7 DV...
Страница 52: ...ne BEFORE PLUGGING IN do check that your mains AC line voltage corresponds with the position of the voltage selector switch provided on the outside of this equipment and if different reset the voltage selector switch to prevent from a damage or risk of fire electric shock Excluding Australian model CA DXJ30 CA DXJ20 CA DXJ10 COMPACT COMPONENT SYSTEM ...