background image

43

AV-32/28EX5BK / LCT1821-001A-U / ENGLISH

EXT SETTING

Refer to “Setting the TV” (see page 36) for 

details of displaying the menu.

S-IN (S-VIDEO input)

When connecting a device (such as S-VHS 
VCR) which enables an S-VIDEO signal (Y/
C signal) to be output, you can enjoy high-

quality picture of the S-VIDEO signal (Y/C 
signal).

Preparation:

• At first, read the Device Instruction 

Manual and “Additional preparation” on 
page 53 to connect 
the device to the TV 
properly. Second, follow the Device 

Instruction Manual to set the device so 
that an S-VIDEO signal (Y/C signal) can 
be output to the TV.

• Do not set S-IN (S-VIDEO input) to the 

EXT terminal connected to a device 

which cannot output an S-VIDEO (Y/C 
signal). If it is set wrongly, a picture 
cannot appear.

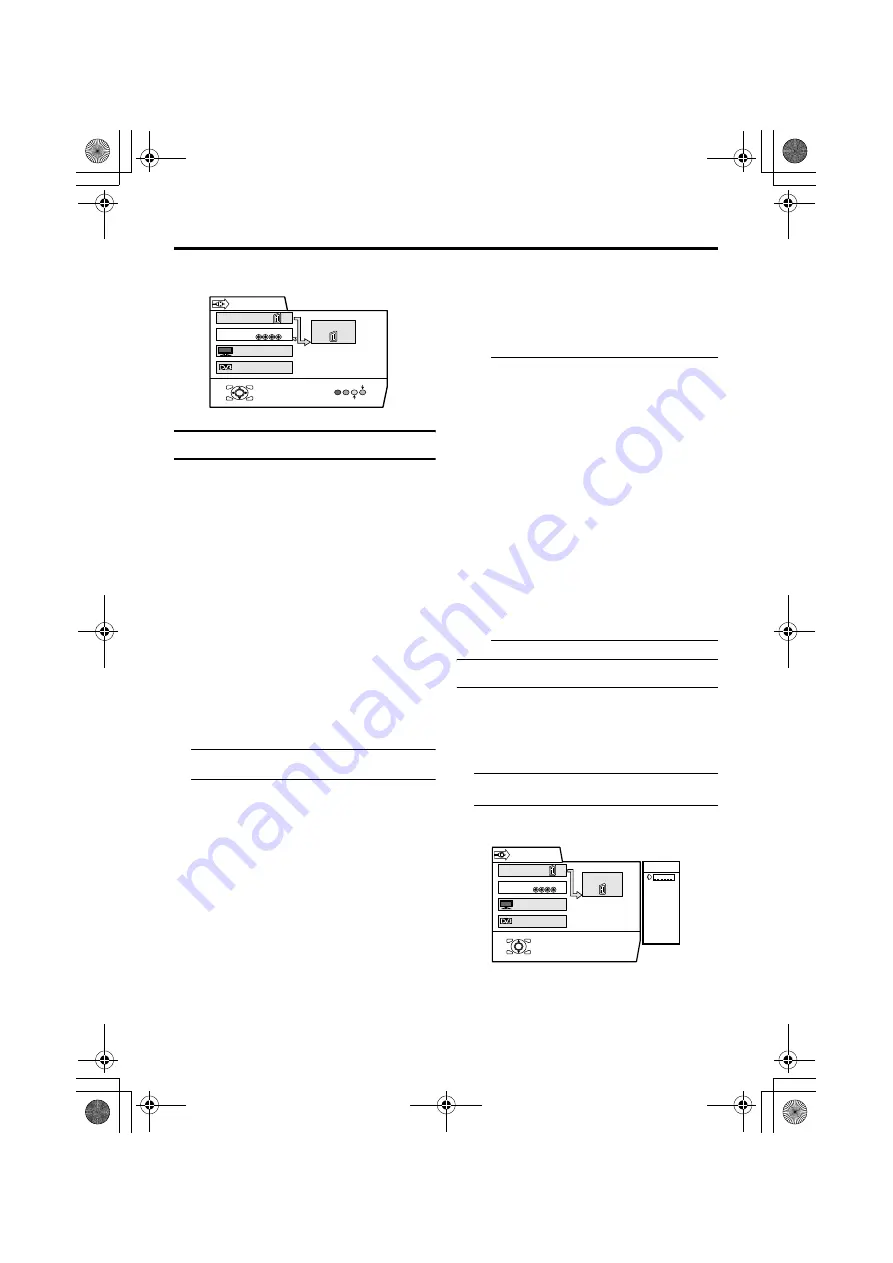
1 Choose an EXT terminal

2 Press the yellow button and set the 

S-IN (S-VIDEO input).

Then press the 

a

 button

An S-IN (S-VIDEO input) mark is 
displayed. You can view an S-VIDEO 

signal (Y/C signal) instead of the regular 
video signal (composite signal).

To cancel the S-IN (S-VIDEO input) 

setting:

Press the yellow button and turn off S-IN 
(S-VIDEO input) mark. The regular video 
signal (composite signal) pictures are 

resumed.

• The EXT-1 terminal does not support 

S-VIDEO signal (Y/C signal) and you 
cannot set S-IN (S-VIDEO input) in 
the EXT-1 terminal.

• Setting S-IN (S-VIDEO input) 

changes the head character from “E” to 

“S”. For example, “E2” is changed to 
“S2”.

• Even a device which enables the S-

VIDEO signal (Y/C signal) to be 
output may output a regular video 

signal (composite signal) depending 
on the device setting. If a picture 
cannot appear because S-IN (S-

VIDEO input) setting has been made, 
read the device Instruction Manual 
carefully again to check for the device 

settings.

ID LIST

You can have a name corresponding to the 
devices connected for each EXT terminal. 
Giving a name to an EXT terminal makes the 

EXT terminal number appear on the screen, 
together with the name.

1 Choose an EXT terminal

2 Press the blue button to display the 

name list (ID LIST)

EXT SETTING

D0020-EN

ID LIST

OK

S-IN

EXT-1

EXT-3

DUBBING
EXT-2

TV

DTV

EXT SETTING

D0021-EN

ID LIST

VHS

S-VHS

DVC

CAM

SAT

STB

GAME

DVD

DVR

OK

EXT-1

DUBBING
EXT-2

EXT-3

TV

DTV

AV-32&28EX5BK_Eng.book  Page 43  Wednesday, April 13, 2005  5:51 PM

Содержание AV-28EX5BK

Страница 1: ...01A U All Cover Cover01 COLOUR TELEVISION INSTRUCTIONS AV 32EX5BK AV 28EX5BK Trade Mark of the DVB Digital Video Broadcasting Project 1991 to 1996 Number 3533 3534 AV 32 28EX5BK_Eng book Page 1 Wednesday April 13 2005 5 51 PM ...

Страница 2: ... taken to ensure optimal results and operational safety Before attempting to use this equipment read the operating instructions thoroughly Ensure that all electrical connections including the mains plug extension leads etc have been made in accordance with the manufacturer s instructions If ever in doubt about the installation operation or safety of this equipment consult your dealer Handle all gl...

Страница 3: ...ISH How to move the TV When moving the TV make sure that it is held by two people as shown in the illustration Be careful not to trap your hands when putting the TV down 1 2 3 AV 32 28EX5BK_Eng book Page 3 Wednesday April 13 2005 5 51 PM ...

Страница 4: ...RE CAUTION Operate only from the power source specified AC 220 240 V 50 Hz on the unit Avoid damaging the AC plug and power cord When you are not using this unit for a long period of time it is recommended that you disconnect the power cord from the main outlet The main power button on the TV does not fully isolate the TV from the AC supply If you are not going to use this TV for a long period of ...

Страница 5: ...e DTV menu 23 Rec Timer 23 Configuration 26 Edit PR List 28 Installation 30 Common Interface 31 Operation while watching analogue TV 32 Information function 32 Analogue teletext function 33 Basic operation 33 Using the List Mode 34 Hold 34 Sub page 34 Reveal 34 Size 35 Index 35 Cancel 35 Setting the TV 36 Basic operation 36 PICTURE SETTING 37 PICTURE MODE 37 Picture Adjustment 37 COLOUR TEMP 37 PI...

Страница 6: ... T reception can suddenly be lost if the signal becomes weak Use a correctly installed high performance antenna When connecting via a device with an antenna terminal such as a VCR depending on the connection method the signal may be weakened If this happens use a booster to increase the signal strength In areas with a lot of radio communication such as near ports or airports noise may be introduce...

Страница 7: ...ard is activated Some CAMs may require the following set up Please set the CAM by entering the DTV menu Common Interface then pressing a button CAM set up menu is not displayed when it is not required To see the viewing contract information press H Select DTV and Press a then Select Common Interface and press a Connecting the power cord to the AC outlet Insert the AC plug on the power cord from th...

Страница 8: ...annels which can be received are automatically registered In some parts of the UK Digital terrestrial broadcasting DVB T cannot be received If you are in these areas continue to step 4 When the Automatic Search has finished the EDIT PR LIST menu appears If you want to you can now edit the programme numbers PR using the EDIT PR LIST function For details see Edit PR List on page 28 If you do not wan...

Страница 9: ...inal Follow the operating procedure Downloading the data to VCR on page 10 to transmit the Programme number PR data Now the initial settings are complete and you can watch the TV The Analogue terrestrial broadcasting channels BBC1 BBC2 ITV Channel 4 and Channel 5 are automatically set to the programme numbers PR1 to PR5 If the TV doesn t receive one of these TV channels that programme number PR wi...

Страница 10: ...llowing features To use T V LINK functions A T V LINK compatible VCR means a JVC video cassette recorder with the T V LINK logo or with one of the following logos However these VCRs may support some or all of the features described earlier For details see your VCR instruction manual Q LINK a trademark of Panasonic Corporation Data Logic a trademark of Metz Corporation Easy Link a trademark of Phil...

Страница 11: ...ording Digital terrestrial broadcasting DVB T If you change channels or perform other operations while a Digital terrestrial broadcasting DVB T channel is being recorded a window appears asking whether to stop the recording Press the a button to stop the recording or the TV DTV button to continue the recording When the VCR is not ready the following messages are displayed Refer to the VCR instruct...

Страница 12: ... power button on the TV does not fully isolate the TV from the AC supply If you are not going to use this TV for a long period of time be sure to disconnect the AC plug from the AC socket Turn the TV on from standby mode Press the P p buttons to turn the TV on from standby mode When the TV is turned on the power lamp changes from red to green Power lamp condition R L MONO S P EXT 3 R L MONO S P EX...

Страница 13: ...ing between Digital terrestrial broadcasting DVB T and Analogue terrestrial broadcasting 1 Press the r Volume button once The volume level indicator appears 2 Press the r Volume button while the volume level indicator is displayed Adjust the volume 1 Press the r Volume button once The volume level indicator appears 2 Press the q buttons while the volume level indicator is displayed AV 32 28EX5BK_E...

Страница 14: ...on 5 TV DTV button 6 7 buttons 7 g Text button 8 p p buttons 9 VCR DVD Teletext control buttons 0 p buttons c button i 3D CINEMA SOUND button Standby button VCR TV DVD switch G button H button a button b button r Volume q buttons GUIDE button SUBTITLE button 9 3 5 8 6 7 0 1 2 4 AV 32 28EX5BK_Eng book Page 14 Wednesday April 13 2005 5 51 PM ...

Страница 15: ...alogue terrestrial broadcasting an EXT terminal can also be chosen Use the AV button Press the AV button to choose an EXT terminal You can choose a video input signal from the S VIDEO signal Y C signal and regular video signal composite signal For details see S IN S VIDEO input on page 43 If you do not have a clear picture or no colour appears change the colour system manually See COLOUR SYSTEM on...

Страница 16: ...e screen size according to the picture aspect ratio Choose the optimum one from the following ZOOM modes AUTO When a WSS Wide Screen Signalling signal which shows the aspect ratio of the picture is included in the broadcast signal or the signal from an external device the TV automatically changes the ZOOM mode to 16 9 ZOOM mode or FULL mode according to the WSS signal If a WSS signal is not includ...

Страница 17: ...hen you use this TV s output signal to record a Digital terrestrial broadcasting DVB T 16 9 broadcast it will be recorded with its picture squeezed into a 4 3 aspect ratio picture Use the FULL mode to restore the picture to its original shape when playing the recording Choose the ZOOM mode 1 Press the c button to display the ZOOM menu 2 Press the 6 buttons to choose a ZOOM mode Then press the a bu...

Страница 18: ...e watching Digital terrestrial broadcasting DVB T 3D CINEMA SOUND function You can enjoy sounds with a wider ambience Press the 3D CINEMA SOUND button to turn the 3D CINEMA SOUND function on or off The 3D CINEMA SOUND effect can be adjusted with the 3D CINEMA SOUND menu see page 42 The 3D CINEMA SOUND function does not work properly with mono sound If the audio is mono sound use HYPER SOUND see pa...

Страница 19: ... screen Press it again to return to the EPG screen D0203 EN Now 13 00 14 00 Steve Scott Next 14 00 14 30 Steve Scott ITV News 13 19 CH61 41 D0204 EN Select PR Electronic Programme Guide 06 02 All GENRE 06 00 09 15 Start your day with all the latest news sport business and weather from the BBC s Breakfast team Includes Reporting Scotland at 25 and 55 minutes past each hour Breakfast 20 10 2005 More...

Страница 20: ...a Digital terrestrial broadcasting DVB T programme with a VCR connected to EXT 2 1 Perform steps 1 3 of the Using the Set Reminder 2 Press the red button The timer setting window appears 3 Proceed to step 2 of the Rec Timer page 23 If Maximum number of timers exceeded is displayed the memory is full When the GUIDE TV DTV H or b buttons are pressed the EPG screen disappears and the normal screen re...

Страница 21: ...he genre Programmes of every genre appears on the Programme column Displaying the Subtitles With Digital terrestrial broadcasting DVB T some programmes are broadcast with subtitles Subtitles can be displayed when watching these programmes Press the SUBTITLE button when watching Digital terrestrial broadcasting DVB T Subtitle ON appears at the top left of the screen and when the programme has subti...

Страница 22: ...sed the TV returns to television broadcasting With Digital terrestrial broadcasting DVB T in addition to digital teletext broadcasting at the same time as normal broadcasting there are also channels with just digital teletext broadcasting The aspect ratio when watching a channel with just digital teletext broadcasting is the same as the aspect ratio of the picture watched previously When you press...

Страница 23: ...l be recorded By using Direct Rec of the T V LINK function the Direct Rec commands are sent from the TV to the VCR to automatically start and end the recording It is not necessary to set the timer on the VCR When your VCR is not T V LINK compatible you also need to set the VCR timer settings to match the TV timer settings The recording may not start and stop at exactly the right times for some pro...

Страница 24: ... Make sure other VCR timer settings do not coincide with the TV timer settings For details see your VCR instruction manual When recording on a T V LINK incompatible VCR 1 Insert the videotape for recording into the VCR and set the recording mode 2 Set the VCR recording timer settings Make the start and end time match that of the TV timer Set the VCR to record the signal from the external input tha...

Страница 25: ...broadcasting DVB T channels while recording Cancelling and resetting the timer setting Cancelling the timer setting Display the TIMER MENU and press the 6 buttons to choose which timer setting to cancel Press the 5 buttons so that Inactive appears in the Mode column Reactivating the cancelled timer setting Display the TIMER MENU and press the 6 buttons to choose which timer setting to reactivate P...

Страница 26: ...ting DVB T a number of subtitles can be broadcast at the same time Choose the subtitle you want to display when watching these broadcasts 1 Press the 6 buttons and choose Subtitle 2 Press the 5 buttons and choose a subtitle language that appears when the SUBTITLE button is pressed The subtitle language changes every time the button is pressed Favourite Mode Enable disable the Edit PR List Favourit...

Страница 27: ...o update the Digital terrestrial broadcasting DVB T software and add new functions Enter PIN code Choose Enter PIN code to change the PIN code for the Edit PR List menu s Lock The PIN code factory setting how it is set when you purchase the television is 0000 1 Press the 6 buttons and choose Enter PIN code then press a button 2 Input the current PIN code When you are making this setting for the fi...

Страница 28: ... 2 Press the 6 buttons and choose a channel and then press the a button The picture of the chosen channel is shown on the quarter screen Deleting a channel 1 Press the 5 buttons and choose Delete on the bar at the bottom of the screen 2 Press the 6 buttons and choose the channel to be deleted and then press the a button The channel deletion confirmation window appears 3 Choose Yes and press the a ...

Страница 29: ... not changed the PIN code in the CONFIGURATION menu s Enter PIN code see page 27 input 0000 If you have changed the PIN code in the CONFIGURATION menu s Enter PIN code see page 27 input the PIN code you chose The lock icon appears next to the channel name in the Edit PR List When a locked channel is chosen the Enter PIN code input window will appear If the correct PIN code is input the picture app...

Страница 30: ...ss the 6 buttons and choose the channel registration method and then press the a button Automatic Search Choose to automatically register the channels that can be received When Automatic Search is chosen and the a button is pressed the confirmation window appears To perform Automatic Search choose Yes and press the a button To cancel choose No and press the a button Manual Search Choose to registe...

Страница 31: ... No and press the a button Common Interface Choose when CAM with the Viewing Card is inserted into the CAM slot on the back of the TV and you want to set the module for pay per view When Common Interface is chosen and the a button is pressed the name of the inserted module appears When the a button is then pressed the module setting menu appears When no module is inserted No CI Module appears Refe...

Страница 32: ...s displayed If the TV has not received a TV channel that has teletext programmes since it was turned on the time display is blank To view the current time choose a TV channel that has teletext programmes An incorrect current time is sometimes displayed when watching videos PR LIST The programme number PR and EXT terminal list is displayed Pressing the a button after choosing the programme number P...

Страница 33: ... buttons number buttons or colour buttons To return to the TV mode Press the TV DTV button or g Text button If you have trouble receiving teletext broadcasts consult your local dealer or the teletext station The ZOOM function will not work in the TV and text mode or Text mode You cannot operate menus when viewing a teletext programme VCR TV DVD switch Number buttons Colour buttons 7 buttons TEXT T...

Страница 34: ...t mode 2 Press a colour button having a stored page To exit the List mode Press the B button again Hold You can hold a teletext page on the screen for as long as you want even while several other teletext pages are being received Press the C Hold button To cancel the Hold function Press C Hold button again Sub page Some teletext pages include sub pages that are automatically displayed 1 Choose a t...

Страница 35: ...hile watching TV 1 Press the number button to enter a page number or press a colour button The TV searches for a teletext page 2 Press H Cancel button The TV programme appears When the TV finds the teletext page its page number appears in the upper left of the screen 3 Press H Cancel button to return to a teletext page when the page number is on the screen The TV mode cannot be resumed by pressing...

Страница 36: ...lowing pages 4 Press the 5 buttons to choose the setting of that function If you want to operate a function which appears only with its name follow the descriptions of that function on the following pages The display appearing at the bottom of a menu shows you a button on the remote control that you can use when you operate a chosen function 5 Press the a button to complete the setting The menu di...

Страница 37: ...stem is NTSC 3 58 NTSC 4 43 See Specifications on page 60 To return to the default settings in each PICTURE MODE Press the blue button This returns the picture settings in the PICTURE MODE mode you have chosen to the default settings and stores them in the PICTURE MODE mode COLOUR TEMP You can select one of three COLOUR TEMP modes three tones of white to adjust the white balance of the picture Sin...

Страница 38: ...ses the latest in digital technology to give you a natural looking picture DigiPure function This function helps to create a natural looking picture by eliminating unnecessary edges from high contrast and crisp images For images with low contrast edges are added to produce a sharper more detailed picture You can choose from the three DigiPure function settings of AUTO MIN and MAX The TV and extern...

Страница 39: ...lour system from the input signal Only when you are viewing a picture from Programme number PR 0 AV or EXT terminal you can choose using the AUTO function The AUTO function may not function properly if you have poor signal quality If the picture is abnormal in the AUTO function choose another colour system manually When in the Programme numbers PR 0 AV to PR 99 you cannot choose NTSC 3 58 or NTSC ...

Страница 40: ...to choose a ZOOM mode Then press the a button PICTURE TILT There are cases where the Earth s magnetic force may make the picture tilt If this happens you can correct the picture tilt 1 Press the 6 buttons to choose PICTURE TILT Then press the a button 2 Press the 6 buttons until the picture becomes level Then press the a button D0017 EN 4 3 AUTO ASPECT PANORAMIC REGULAR 14 9 ZOOM OK D0018 EN PICTU...

Страница 41: ... 2 weaker 3 strong TREBLE You can adjust the high tone of the sound 2 weaker 3 strong BALANCE You can adjust the volume balance between the left and right speaker 2 turn the left speaker s volume level up 3 turn the right speaker s volume level up HYPER SOUND Mono sound is converted to simulated stereo for a more enjoyable audio experience ON This function is turned on OFF This function is turned ...

Страница 42: ...e stereo sound When the audio is mono sound use HYPER SOUND see page 41 SURROUND Adjust the surround effect You can choose HIGH MID or LOW Choosing LOW will reduce the surround effect and choosing HIGH will increase the surround effect BASS BOOST Adjust the bass sound You can choose HIGH MID or LOW Choosing LOW will reduce the bass sound and choosing HIGH will increase the bass sound D0063 EN SURR...

Страница 43: ...IDEO input setting Press the yellow button and turn off S IN S VIDEO input mark The regular video signal composite signal pictures are resumed The EXT 1 terminal does not support S VIDEO signal Y C signal and you cannot set S IN S VIDEO input in the EXT 1 terminal Setting S IN S VIDEO input changes the head character from E to S For example E2 is changed to S2 Even a device which enables the S VID...

Страница 44: ...flow The left side of the arrow denotes a signal source output from the EXT 2 terminal EXT 1 EXT 3 The output signal of the device connected to an EXT terminal passes through the TV and is output from the EXT 2 terminal TV The picture and sound of the TV channel you are currently viewing are output from the EXT 2 terminal DTV The picture and sound of the Digital terrestrial braodcasting DVB T TV c...

Страница 45: ... TIMER function Press the 2 button to set a period of time to OFF BLUE BACK You can set the TV to automatically change to a blue screen and mute the sound if the signal is weak or absent or when there is no input from an external device ON This function is turned on OFF This function is turned off CHILD LOCK When there is a TV channel you wish your children not to watch you can use the CHILD LOCK ...

Страница 46: ... NO input screen appears 3 Press the Number buttons to enter the ID number The lock is temporarily released so you can view the TV channel If you have forgotten the ID number Perform step 1 of To set the CHILD LOCK function After confirming the ID number press the TV DTV button to exit the menu Even if you reset the lock temporarily it does not mean that the CHILD LOCK function set for the TV chan...

Страница 47: ... the EXT 2 terminal you can use this function Caution If you have not connected a Decoder with a T V LINK compatible VCR connected to the EXT 2 terminal setting this function to ON by mistake causes the picture sound of a TV channel you are currently viewing not to be issued AV 32 28EX5BK_Eng book Page 47 Wednesday April 13 2005 5 51 PM ...

Страница 48: ...V LINK compatible VCR connected Press the TV DTV button to exit the T V LINK menu If you have a T V LINK compatible VCR connected to the EXT 2 terminal Follow the operating procedure Downloading the data to VCR on page 10 to transmit the Programme number PR data When your TV can detect the TV channel name from the TV channel broadcast signal it automatically registers the TV channel name ID to the...

Страница 49: ... EXT terminal number does not appear in the Programme numbers PR list The CH number is a number unique to the TV and corresponding to the Channel number between a TV channel For the relationship of a Channel number and a CH number see CH numbers on page 56 2 Follow the operation description of a function you want to use and operate the function MOVE This function changes a Programme number PR of a...

Страница 50: ...Press the 6 buttons to choose a TV channel Every time you press the 6 buttons the Programme number PR is changed over and the picture of the TV channel registered in the Programme number PR appears on the screen 2 Press the red button to start the ID function 3 Press the 6 buttons to choose the first character of a Channel name ID you want to attach to the TV channel 4 Press the blue button to dis...

Страница 51: ... number is a number indicating the broadcast frequency to the TV If the TV cannot detect the TV channel corresponding to the broadcast frequency indicated by the CH number a picture in the no signal state appears DELETE 1 Press the 6 buttons to choose a TV channel Every time you press the 6 buttons the Programme number PR is changed over and the picture of the TV channel registered in the Programm...

Страница 52: ...l you want appears If the TV channel reception is poor Press the blue or yellow button to fine tune the TV channel 5 Press the a button and register the TV channel to a Programme number PR The normal EDIT menu is resumed ATTENUATOR Turn the attenuator ON when noise is introduced into the picture or sound due to strong electric fields Normally use the TV with the attenuator turned OFF AV 32 28EX5BK...

Страница 53: ...nection diagram see the table to choose the best EXT terminal Note that connecting cables are not supplied If the VCR s audio output is in mono connect the VCR s AUDIO OUT audio output terminal and the TV s EXT 3 AUDIO L MONO terminal with an audio cable 1 VCR composite signal 2 VCR composite signal S VIDEO signal 3 T V LINK compatible VCR composite signal S VIDEO signal 4 Decoder 5 DVD player com...

Страница 54: ...s when the headphones are connected and only one screen is displayed Video or sound signal output from the EXT 2 terminal You can change over the output of the video sound signal from the EXT 2 terminal This is useful when you want to dub the video sound from another device onto the VCR connected to the EXT 2 terminal For details on how to do this see DUBBING on page 44 TV output from the EXT 1 te...

Страница 55: ... the VCR TV DVD Switch to the VCR or DVD position VCR When you are operating the VCR set the switch to the VCR position You can turn the VCR on or off with the standby button DVD When you are operating the DVD player set the switch to the DVD position You can turn the DVD player on or off with the standby button You can also press the H or T button and display the DVD disc menu screen and then ope...

Страница 56: ... CH 29 E29 CH 30 E30 CH 31 E31 CH 32 E32 CH 33 E33 CH 34 E34 CH 35 E35 CH 36 E36 CH 37 E37 CH 38 E38 CH 39 E39 CH 40 E40 CH 41 E41 CH 42 E42 CH 43 E43 CH 44 E44 CH 45 E45 CH Channel CH 46 E46 CH 47 E47 CH 48 E48 CH 49 E49 CH 50 E50 CH 51 E51 CH 52 E52 CH 53 E53 CH 54 E54 CH 55 E55 CH 56 E56 CH 57 E57 CH 58 E58 CH 59 E59 CH 60 E60 CH 61 E61 CH 62 E62 CH 63 E63 CH 64 E64 CH 65 E65 CH 66 E66 CH 67 E6...

Страница 57: ...E BACK function will be activated the entire screen becomes blue and the sound is muted If you still want to view the TV channel follow the description BLUE BACK on page 45 to change the BLUE BACK function setting to OFF Poor picture If the Digital terrestrial broadcasting DVB T picture is unnatural press the Main power button on the TV and turn off the main power Try to press the Main power butto...

Страница 58: ...the TV or from more than seven metres away from the TV Use the remote control in front of your TV or from less than seven metres away When you are viewing a teletext programme you cannot operate the menus Press the TV DTV button to return to the ordinary TV programme and then try operating the menus If the TV suddenly stops responding disconnect the power cord of the TV from the AC outlet Connect ...

Страница 59: ...e phenomenon due to the construction of the picture tube It is not a problem with the TV You can rest assured that this static discharge does not have harmful influence over the human body If an error message appears on the screen when viewing Digital terrestrial broadcasting channel and does not disappear because channel from the PR list may have been deleted Try registering all the channels agai...

Страница 60: ...orld Standard System Power requirements 220 240 V AC 50 Hz Power consumption 138 W Standby 2 8 W 134 W Standby 2 8 W Picture tube size Viewable area 76 cm measured diagonally Viewable area 66 cm measured diagonally Audio output Rated Power output 10 W 10 W Speakers 13 cm 6 5 cm oval 2 EXT 1 terminal Euroconnector 21 pin SCART Video input Audio L R inputs and RGB inputs are available TV broadcast o...

Страница 61: ... 2005 Victor Company of Japan Limited AV 32 28EX5BK LCT1821 001A U All Cover Cover04 LCT1821 001A U 0405TKH CR MU AV 32 28EX5BK_Eng book Page 4 Wednesday April 13 2005 5 51 PM ...

Отзывы: