background image

INSTRUCTIONS

GGT0114-001A-H

AV-21MT16  

AV-29MT16

AV-21MT36  

AV-29MT36

AV-25MT16

COLOR  TELEVISION 

EQUALIZER 

 CINEMA SURROUND 

 COMPONENT INPUT

Contents

Knowing your TV’s features .................................................... 3
Remote control buttons and basic functions ........................... 4
TV buttons and functions ......................................................... 6
Setting up your TV ................................................................... 7
Basic setting for picture  .......................................................... 9
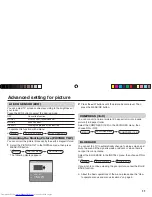
Advanced setting for picture ...................................................11
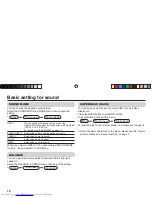
Basic setting for sound .......................................................... 12
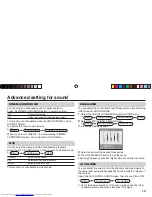
Advanced setting for sound ................................................... 13
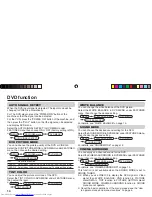
DVD function ......................................................................... 14
Customized setting  ............................................................... 15
TV channel presetting  .......................................................... 17
Additional preparation  .......................................................... 18
Troubleshooting ..................................................................... 20
Speci

fi

 cations ........................................................................ 21

GGT0114-001A-H.indd   1

GGT0114-001A-H.indd   1

23.01.2006   11:10:45 Uhr

23.01.2006   11:10:45 Uhr

Содержание AV-21MT16

Страница 1: ...your TV s features 3 Remote control buttons and basic functions 4 TV buttons and functions 6 Setting up your TV 7 Basic setting for picture 9 Advanced setting for picture 11 Basic setting for sound 12 Advanced setting for sound 13 DVD function 14 Customized setting 15 TV channel presetting 17 Additional preparation 18 Troubleshooting 20 Specifications 21 ...

Страница 2: ...ver 6 The surface of the TV screen is easily damaged Be very careful with it when handling the TV Should the TV screen become soiled wipe it with a soft dry cloth Never rub it forcefully Never use any cleaner or detergent on it 7 This TV can be turned on off power by connecting disconnecting the AC Plug into AC outlet While this TV is being installed enough space should be reserved for connecting ...

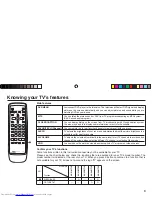
Страница 3: ... press AI ECO TV detects the brightness of your room and automatically adjust the picture brightness to a suitable level for a better eye care AI VOLUME TV adjusts the volume automatically to the same level for all TV channels to avoid sudden change of the volume when selecting different TV channel or selecting Video mode VNR You can reduce the picture noise when viewing noisy TV programs or video...

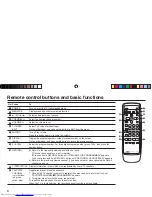
Страница 4: ...gram number For three digits program number press 100 then press the number button RETURN a Return to the frequently view channel with one touch 1 Choose the channel you want to register 2 Press and hold RETURN button until RETURN PLUS PROGRAMMED appears To cancel press and hold RETURN button until RETURN PLUS CANCELED appears b Return to the previously viewed channel if you have not set or have c...

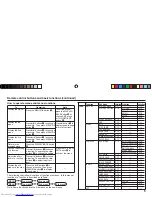
Страница 5: ...2 3 buttons 3 to change the setting Press the TV VIDEO EXIT button 6 to exit from the menu Adjust the effect level of a function Press 5 buttons 3 to choose a function Then press the 2 3 buttons 3 to adjust the effect level Display the sub menu of a function Press the 5 buttons 3 to choose a function Then press MENU OK button 2 to display the sub menu MENU Top menu 2nd menu Top menu 2nd menu 3rd m...

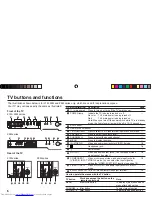
Страница 6: ...f in 10 15 seconds 3 ECO sensor 4 Remote control sensor 5 TV VIDEO EXIT Press to select TV or Video terminal input or exit from menu 6 VOLUME Press to adjust the volume level 7 CHANNEL Press to select the desired channel 8 MENU Press to display the menu 9 IN VIDEO 3 Video and audio input jacks for VIDEO 3 mode 18 Headphone jack 18 Aerial socket 7 OUTPUT Video and audio output jacks The component v...

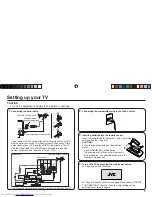
Страница 7: ...ONO Y CB CR V V S OVER L R MONO OUTPUT VIDEO 1 INPUT COMPONENT VIDEO 2 INPUT Rear of TV 29M series VHF UHF outdoor aerial VCR If you connect a VCR connect the aerial output jack of your VCR and the aerial jack on the TV with aerial cable Then connect the output jacks of your VCR and the VIDEO 1 input jacks of the TV with the video cable or S VIDEO cable if available and audio cables For details se...

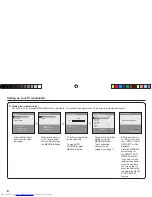
Страница 8: ...age 17 After that when turn on the TV at the next time SETUP TOUR RESTART will be displayed Press the MENU OK button to cancel the SETUP TOUR RESTART function If you want to make initial settings again when the next time you turn on the TV press the Red button to activate the SETUP TOUR RESTART function LANGAUGE CH03 MENU OK DISPLAY BACK TV VIDEO EXIT AUTO PROGRAM MENU OK 10 CHANNEL SUMMARY MENU O...

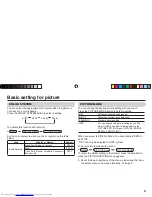
Страница 9: ...ing SOFT Softens contrast and sharpness BRIGHT Heightens contrast and sharpness STANDARD Standard picture setting USER You can change this picture setting as you like Select USER and adjust following items in the PICTURE SETTING menu PICTURE BRIGHT DETAIL COLOR TINT When you select to VIDEO 2 Mode You cannot adjust DETAIL and TINT TINT can only be adjusted in NTSC system To operate this function w...

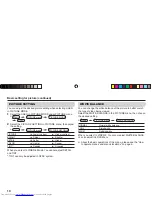
Страница 10: ...TINT TINT can only be adjusted in NTSC system Basic setting for picture continued WHITE BALANCE You can change the white balance of the picture to better match the type of video being viewed Select the WHITE BALANCE in the PICTURE menu then choose the desired setting NORMAL Normal white balance COOL Bluish white WARM Reddish white When you select to VIDEO 2 You cannot adjust WHITE BALANCE You can ...

Страница 11: ...U OK button COMPRESS 16 9 You can convert a normal picture 4 3 aspect ratio into a wide picture 16 9 aspect ratio Select the COMPRESS 16 9 in the FEATURES menu then choose ON or OFF BLUE BACK You can set the TV to automatically change to a blue screen and mute the sound if the signal is weak or absent or when there is no input from an antenna Select the BLUE BACK in the INSTALL menu then choose ON...

Страница 12: ...ODE in SOUND menu then choose the setting USER You can change this sound setting as you like Select USER and adjust the frequencies in EQUALIZER 100 300 1K 3K 8K Hz For details see EQUALIZER on page 13 SOUND TURBO Emphasize on low and high frequency levels THEATER Emphasize on movie sound MUSIC Emphasize on music effect NEWS Emphasize on vocal sound When you select to VIDEO 2 You cannot adjust SOU...

Страница 13: ...D EQUALIZER You can adjust the sound level of each frequencies when selecting USER mode in SOUND MODE 1 Select the USER in SOUND MODE under SOUND menu 2 Select the EQUALIZER in SOUND menu The following display appears 3 Select and adjust the desired frequencies 4 Press the MENU OK button to exit the menu Adjust high frequency will affect higher pitch sound and vice versa AI VOLUME You can adjust t...

Страница 14: ...e of the DVD picture Select the WHITE BALANCE in DVD MENU under FEATURES menu then choose the desired setting For details see WHITE BALANCE on page 10 SOUND MODE You can choose the desired sound setting for the DVD Select the SOUND MODE in DVD MENU under FEATURES menu then choose the desired setting For details see SOUND MODE on page 12 CINEMA SURROUND You can enjoy an enhanced sound for the DVD S...

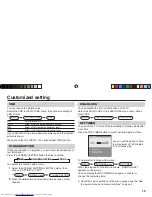
Страница 15: ... button to select the desired caption or text channel MENU PICTURE menu VNR CHILD LOCK You can disable the front control buttons of the TV Select the CHILD LOCK in the FEATURES menu then choose ON or OFF OFF TIMER You can set the TV to turn off automatically to standby mode after a set time Press the OFF TIMER button to select a desired period of time You can set the period of time to a maximum of...

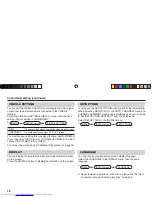
Страница 16: ...G to VIDEO For connecting methods see Additional Preparation on page 18 DISPLAY You can display the program number and video terminal number on the screen Press the DISPLAY button to display the indication on the screen SETUP TOUR You may use the SETUP TOUR function to perform the initial setting When selecting SETUP TOUR the AUTO PROGRAM menu and CHANNEL SUMMARY menu will be displayed as shown on...

Страница 17: ...o be skipped Channels are to be skipped cannot be selected by the CHANNEL button 1 Display the INSTALL menu TV channel presetting MENU INSTALL menu MENU INSTALL menu 2 Choose CHANNEL SUMMARY then press the MENU OK button CHANNEL SUMMARY menu appears 3 Choose the channel which you want to skip The skip can be set to all channels of AIR CH02 CH69 and CABLE CC01 CC125 4 Press the yellow button to ski...

Страница 18: ...input terminal and output terminal IN VIDEO 3 V R L MONO IN VIDEO 3 MENU OK MENU L MONO V R OK Front of TV Headphones 21M 25M series 29M series Camcorder or TV game When you use VIDEO 1 INPUT you should choose to connect S VIDEO or video input If S VIDEO connector and video input are connected at the same time no picture displays on the screen and the message PLEASE DISCONNECT VIDEO 1 CABLE appear...

Страница 19: ...nto the mounting hole on the top of the TV When you mount the unit make sure that the mounting pin fits properly into the mounting hole Otherwise it may slide off the top of the TV This may cause damage or cause unexpected injury CAUTION The Twin Port Bass Blaster Unit is just placed on top of the TV and is not held in place by a screw When using the unit pay attention to the following cautions Ot...

Страница 20: ...n see page 15 Color patches appear at the corner of the screen This may due to the magnetized device such as a speaker near to your TV Keep the device apart from your TV Alternately you can also use the magnetic shielded speaker Picture is tilted This may due to the earth magnetism Refer to PICTURE TILT on page 11 to correct the tilt Image takes a short period to be displayed Image required time t...

Страница 21: ...nts AC 110 to 240 V 50 Hz 60 Hz External input output VIDEO 1 S video input VIDEO input AUDIO L R input VIDEO 2 COMPONENT VIDEO input AUDIO L R input COMPONENT VIDEO Y CB CR input VIDEO 3 VIDEO input AUDIO L R input OUTPUT VIDEO output AUDIO L R output Headphone jack Stereo mini jack 3 5 mm diameter Sound multiplex systems MTS Multi channel Television Sound Design and specifications subject to cha...

Страница 22: ... 2006 Victor Company of Japan Limited 0306 FLE JMT ...

Отзывы: