background image

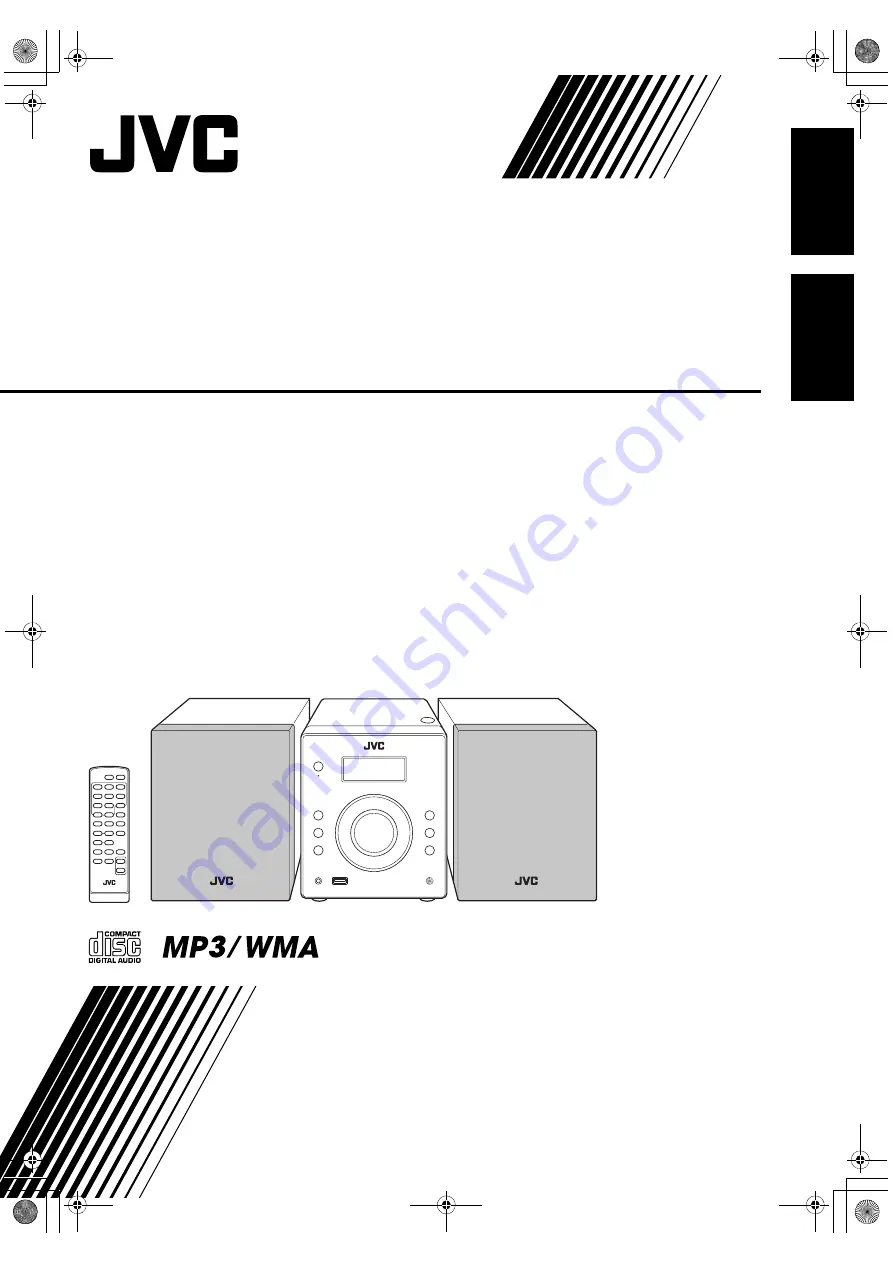
MICRO COMPONENT SYSTEM

SYSTEME DE MICROCOMPOSANTS

UX-G210

—Consists of CA-UXG210 and SP-UXG210
—Composée du CA-UXG210 et du SP-UXG210

INSTRUCTIONS

MANUEL D’INSTRUCTIONS

LVT2071-006A

[C]

E

n

g

li

sh

English

Français

COVER_UX-G210[C].FM  Page 1  Thursday, December 3, 2009  5:44 PM

Содержание 1209YAMMDWMTS

Страница 1: ...E MICROCOMPOSANTS UX G210 Consists of CA UXG210 and SP UXG210 Composée du CA UXG210 et du SP UXG210 INSTRUCTIONS MANUEL D INSTRUCTIONS LVT2071 006A C English English Français COVER_UX G210 C FM Page 1 Thursday December 3 2009 5 44 PM ...

Страница 2: ...rdance with the instructions may cause harmful interference to radio communications However there is no guarantee that interference will not occur in a particular installation If this equipment does cause harmful interference to radio or television reception which can be determined by turning the equipment off and on the user is encouraged to try to correct the interference by one or more of the f...

Страница 3: ...or Canada pour le Canada THIS DIGITAL APPARATUS DOES NOT EXCEED THE CLASS B LIMITS FOR RADIO NOISE EMISSIONS FROM DIGITAL APPARATUS AS SET OUT IN THE INTERFERENCE CAUSING EQUIPMENT STANDARD ENTITLED DIGITAL APPARATUS ICES 003 OF THE DEPARTMENT OF COMMUNICATIONS CET APPAREIL NUMERIQUE RESPECTE LES LIMITES DE BRUITS RADIOELECTRIQUES APPLICABLES AUX APPAREILS NUMERIQUES DE CLASSE B PRESCRITES DANS LA...

Страница 4: ...but des piles N exposez pas cet appareil à la pluie à l humidité à un égouttement ou à des éclaboussures et ne placez pas des objets remplis de liquide tels qu un vase sur l appareil Caution Proper Ventilation To avoid risk of electric shock and fire and to prevent damage locate the apparatus as follows 1 Front No obstructions and open spacing 2 Sides Top Back No obstructions should be placed in t...

Страница 5: ...iles 9 Playing Back an External Device 9 Daily Operations Sound Other Adjustments 10 Adjusting the Volume 10 Adjusting the Sound 10 Setting the Clock 11 Turning Off the Power Automatically Sleep Timer 11 Advanced Disc USB Mass Storage Class Device Operations 12 Programming the Playing Order Program Play 12 Playing at Random Random Play 14 Playing Repeatedly Repeat Play 14 Additional Information 15...

Страница 6: ...erations using the remote control is mainly explained however you can use the buttons and controls on the main unit if they have the same or similar name and marks Some related tips and notes are explained later in the sections Learning More about This System and Troubleshooting but not in the same section explaining the operations If you want to know more about the functions or if you have a doub...

Страница 7: ... Step 2 Prepare the Remote Control Insert the batteries into the remote control by matching the polarity and correctly If the range or effectiveness of the remote control decreases replace both batteries Step 1 Unpack the package and check the accessories Step 2 Prepare the remote control Step 3 Connect the FM antenna and speakers see page 4 Finally plug in the AC power cord Now you can operate th...

Страница 8: ...se the tip of the speaker cords by twisting the vinyl ANTENNA PHONES AC IN SPEAKER 4 8 FM COAXIAL 75 To a wall outlet Plug in the AC power cord only after all connections are complete FM antenna supplied Extend it so that you can obtain the best reception Red Black Turn the power off to all components before connections Left Right This system cannot receive AM broadcast Outdoor FM antenna Disconne...

Страница 9: ...ss storage class device is connected Flashes when it is played back p SLEEP indicator Lights when the Sleep Timer is activated q HBS indicator Lights when HBS Hyper Bass Sound mode is activated w Sound Mode indicators Lights when one of the Sound Modes is activated e FM reception indicator ST Lights while an FM stereo station with sufficient signal strength is tuned in MONO Lights while the FM mon...

Страница 10: ...d even while on standby For private listening Connect a pair of headphones to the PHONES jack on the rear of the main unit The sound will no longer come out of the speakers Be sure to turn down the volume before connecting or putting the headphones Disconnecting the headphones will activate the speakers again DO NOT turn off standby the System with the volume set to an extremely high level otherwi...

Страница 11: ...tions 1 Tune in to the station you want to preset 2 Activate the preset number entry mode Finish the following process while the indication on the display is flashing 3 Select a preset number for the station 4 Store the station To tune in to a preset station 1 Select FM 2 Select the number of the preset station This system cannot receive AM broadcast FM PRE FM MONO A IN FM AUDIO IN AUDIO IN TUNING...

Страница 12: ...lay lights while USB MEMORY is selected Audio CD CD R CD RW Caution for DualDisc playback The Non DVD side of a DualDisc does not comply with the Compact Disc Digital Audio standard Therefore the use of the Non DVD side of a DualDisc on this product may not be recommended Microsoft and Windows Media are either registered trademarks or trademarks of Microsoft Corporation in the United States and or...

Страница 13: ...ice By using a stereo mini plug cord not supplied you can connect a device with analog audio output jacks such as a portable audio player To select AUDIO IN To select a number see How to select numbers on page 6 PRESET Selects the previous track Selects the next track TUNING GROUP Selects the previous group Selects the next group PRESET Fast forwards the track Fast reverses the track Remote ONLY 1...

Страница 14: ...ote control CLOCK SLEEP SOUND MODE FADE MUTING VOLUME HBS Main unit CLOCK SLEEP VOLUME 4 x PRESET 1 y 4 x Remote control Main unit To restore the volume press again or adjust the volume level JAZZ Accented lower frequencies for jazz type music ROCK Boosts low and high frequencies initial setting POP Good for vocal music CLASSIC Good for classical music No indication No sound effects are applied VO...

Страница 15: ...settings and AM 12 00 flashes You need to set the clock again Turning Off the Power Automatically Sleep Timer 1 Activate the sleep timer mode 2 Specify the shut off time in minutes To check the time remaining until the shut off time If you press the button repeatedly you can change the shut off time CLOCK SLEEP 2 sec SLEEP REPEAT1 TRACK WMA GROUP HBS JAZZ PRESET CLOCK SLEEP PRESET CLOCK SLEEP CLOC...

Страница 16: ...lay For audio CD Select a track For MP3 WMA 1 Select a group Remote control CD 6 RANDOM DISPLAY PROGRAM STOP 7 REPEAT Main unit PRESET 1 y 4 x CD 8 STOP 7 4 x USB MEMORY 8 USB MEMORY 6 Number buttons TUNING GROUP K 5 DISPLAY PROGRAM MEMORY USB or STOP CD DISPLAY PROGRAM CD PROG CD PROG For audio CD For MP3 WMA CD PROG Track number Program step PRESET You can also use number buttons to select a tra...

Страница 17: ... PROG Track number PRESET You can also use number buttons to select a track DISPLAY PROGRAM CD PROG Program step Group number MEMORY USB or CD PRESET CD MEMORY USB STOP Edit 1 Press DISPLAY PROGRAM repeatedly until the program step you want to edit is displayed 2 Perform the steps 3 and 4 on pages 12 and 13 To add step in the program 1 Press DISPLAY PROGRAM repeatedly until 00 is displayed 2 Perfo...

Страница 18: ...ay You can play back tracks repeatedly For audio CD For MP3 WMA The GROUP indicator lights up on the display when playback is stopped To skip a track To pause To stop or To release press again Remote ONLY MEMORY USB or STOP CD RANDOM CD MEMORY USB STOP RANDOM REPEAT1 Repeats the current track REPEAT Repeats all the tracks or the program during Program Play REPEAT GROUP Repeats all the tracks in th...

Страница 19: ... Do not use a USB hub Coded or encrypted tracks in a special method cannot be played on the System The USB mass storage class device s battery is charged while the System is turned on This System cannot recognize a USB mass storage class device whose rating exceeds 5 V 500 mA This System is compatible with the USB 2 0 Full Speed You cannot play back a file larger than 2 GB When playing a file whic...

Страница 20: ...erformance of the System keep your discs and the mechanism clean Handling discs When removing the disc from its case hold it at the edge while pressing the center hole lightly Do not touch the shiny surface of the disc or bend the disc Put the disc back in its case after use to prevent warping Be careful not to scratch the surface of the disc Avoid exposure to direct sunlight temperature extremes ...

Страница 21: ... 500 mA Tuner section FM tuning range 87 5 MHz 108 0 MHz CD player section Dynamic range 60 dB Signal to noise ratio 60 dB Wow and flutter Immeasurable General Power requirement AC 120 V 60 Hz Power consumption 25 W at operation 0 7 W on standby Dimensions approx 150 mm 175 mm 211 mm W H D Mass approx 2 1 kg Speakers Type 1 way Bass reflex Speaker units 10 cm cone 1 Impedance 4 Ω Dimensions approx...

Страница 22: ...9 12 14 14 10 6 11 7 9 12 13 6 7 9 6 8 12 13 14 8 12 13 14 10 6 10 10 STANDBY CLOCK SLEEP DISPLAY PROGRAM FM AUDIO IN AUDIO IN MICRO COMPONENT SYSTEM UX G210 VOLUME STOP CD USB MEMORY REMOTE SENSOR Main unit 8 5 11 7 9 12 13 6 8 12 13 6 11 6 8 12 13 9 10 11 12 13 6 10 8 6 7 9 8 12 13 Remote sensor 7 9 12 UX G210 C BOOK Page 18 Monday December 7 2009 3 00 PM ...

Страница 23: ... 9 Opérations quotidiennes Ajustement du son et autres ajustements 10 Ajustement du volume 10 Ajustement du son 10 Réglage de l horloge 11 Mise hors tension automatique de l appareil Minuterie d arrêt 11 Opérations avancées des disques périphériques USB à mémoire de grande capacité 12 Programmation de l ordre de lecture Lecture programmée 12 Lecture dans un ordre aléatoire Lecture aléatoire 14 Rép...

Страница 24: ... vous pouvez utiliser les touches et les commandes de l appareil si elles portent le même nom ou un nom similaire et la même marque Certains conseils et remarques associées sont expliqués plus tard dans les sections Pour en savoir plus sur cette chaîne et Guide de dépannage mais pas dans la section expliquant les opérations Si vous souhaitez avoir plus d informations à propos des fonctions ou si v...

Страница 25: ...aration de la télécommande Insérez les piles dans la télécommande en respectant les polarités et Si la télécommande perd de sa puissance ou de son efficacité remplacez les deux piles Étape 1 Déballage et vérification des accessoires Étape 2 Préparation de la télécommande Étape 3 Connectez l antenne FM et les enceintes voir page 4 Finalement branchez le cordon d alimentation Maintenant vous pouvez ...

Страница 26: ...yle pour mettre à nu l âme des cordons d enceinte en torsadant la partie en vinyle ANTENNA PHONES AC IN SPEAKER 4 8 FM COAXIAL 75 À une prise murale Branchez le cordon d alimentation secteur uniquement après que toutes les connexions sont terminées Antenne FM fournie Étendez la de façon à obtenir la meilleure réception possible Rouge Noir Mettez tous les appareils hors tension avant les connexions...

Страница 27: ...té est en pause 9 Indicateur USB S allume quand un périphérique USB à mémoire de grande capacité est connecté Clignote quand il est reproduit p Indicateur SLEEP S allume quand la minuterie d arrêt est en service q Indicateur HBS S allume quand le mode HBS Hyper Bass Sound en service w Indicateurs de mode sonore S allume quand un des modes sonores est en service e Indicateur de réception FM ST S al...

Страница 28: ...que d écoute à la prise PHONES à l arrière de l appareil principal Plus aucun son ne sort des enceintes Assurez vous de réduire le volume avant de connecter un casque ou de vous le mettre sur les oreilles Déconnecter le casque d écoute met à nouveau en service les enceintes NE METTEZ PAS la chaîne hors tension en attente quand son niveau de volume est réglé extrêmement haut sinon la déflagration s...

Страница 29: ...tez mémoriser 2 Mettez en service le mode d entrée de numéro de préréglage Terminez la procédure suivante pendant que l indication clignote sur l affichage 3 Choisissez un numéro de préréglage pour la station 4 Mémorisez la station Pour accorder une station préréglée 1 Choisissez FM 2 Choisissez le numéro de station préréglée Cette chaîne ne peut pas recevoir les émissions AM FM PRE FM MONO A IN F...

Страница 30: ...fenêtre d affichage pendant que USB MEMORY est choisi CD Audio CD R CD RW Précautions pour la lecture de disques à double face La face non DVD d un disque à DualDisc n est pas compatible avec le standard Compact Disc Digital Audio Par conséquent l utilisation de la face non DVD d un disque à double face sur cet appareil n est pas recommandée Microsoft et Windows Media est une marque déposée ou une...

Страница 31: ... d un appareil extérieur En utilisant un cordon à mini fiche stéréo non fourni vous pouvez connecter un appareil muni de prises de sortie audio analogique tel qu un lecture audio portable Pour choisir AUDIO IN Pour choisir un numéro référez vous à Comment choisir des numéros à la page 6 PRESET Choisit la plage précédente Choisit la plage suivante TUNING GROUP Choisit le groupe précédent Choisit le...

Страница 32: ... 4 x PRESET 1 y 4 x Télécommande Appareil principal Pour rétablir le volume appuyez de nouveau sur la touche ou ajuster le niveau de volume JAZZ Accentuation des basses fréquences pour les musiques telles que le jazz ROCK Accentue les basses et hautes fréquences réglage initial POP Pour la musique vocale CLASSIC Pour la musique classique Pas d indication Aucun effet sonore n est appliqué VOLUME VO...

Страница 33: ...s réglages est AM 12 00 clignote Vous devez régler l horloge à nouveau Mise hors tension automatique de l appareil Minuterie d arrêt 1 Activer le mode Minuterie d arrêt 2 Spécifiez la durée avant la mise hors tension en minutes Pour vérifier la durée restante avant la mise hors tension Si vous appuyez répétitivement sur la touche vous pouvez changer l heure de mise hors tension CLOCK SLEEP 2 sec S...

Страница 34: ... groupe Télécommande CD 6 RANDOM DISPLAY PROGRAM STOP 7 REPEAT Appareil principal PRESET 1 y 4 x CD 8 STOP 7 4 x USB MEMORY 8 USB MEMORY 6 Touches numériques TUNING GROUP K 5 DISPLAY PROGRAM MEMORY USB ou STOP CD DISPLAY PROGRAM CD PROG CD PROG Pour les CD audio Pour les disques MP3 WMA CD PROG Numéro de plage Pas de programme PRESET Vous pouvez aussi utiliser les touches numériques pour choisir u...

Страница 35: ...e plage PRESET Vous pouvez aussi utiliser les touches numériques pour choisir une plage DISPLAY PROGRAM CD PROG Pas de programme Numéro de groupe MEMORY USB ou CD PRESET CD MEMORY USB STOP Modifier 1 Appuyez répétitivement sur DISPLAY PROGRAM jusqu à ce que le pas du programme que vous souhaitez modifier apparaisse 2 Réalisez les étapes 3 et 4 aux pages 12 et 13 Pour ajouter de l étape au programm...

Страница 36: ...e Lecture répétée Vous pouvez reproduire les plages répétitivement Pour les CD audio Pour les disques MP3 WMA L indicateur GROUP est allumé sur l affichage quand la lecture est arrêtée Pour sauter une plage Pour faire une pause Pour arrêter ou Pour reprendre la lecture appuyez de nouveau sur la touche Remote ONLY MEMORY USB ou STOP CD RANDOM CD MEMORY USB STOP RANDOM REPEAT1 Répète la plage actuel...

Страница 37: ...es plages codées ou brouillées avec une méthode spéciale ne peuvent pas être reproduites sur cette chaîne La batterie du périphérique USB à mémoire de grande capacité est chargé pendant que la chaîne est sous tension Cette chaîne ne peut pas reconnaître les périphériques USB à mémoire de grande capacité dont l alimentation dépasse 5 V 500 mA Cette chaîne est compatible avec USB 2 0 Full Speed Vous...

Страница 38: ...pulation des disques Pour retirer les disques de leur boîte tenez les par les côtés et en appuyant légèrement sur le trou central Ne touchez pas la surface brillante du disque ni ne le tordez Remettez les disques dans leur boîte après utilisation pour éviter tout gondolage Faites attention de ne pas rayer la surface du disque Évitez une exposition directe au soleil à des températures extrêmes et à...

Страница 39: ...er Plage d accord FM 87 5 MHz 108 0 MHz Section du lecteur CD Plage dynamique 60 dB Rapport signal sur bruit 60 dB Pleurage et scintillement Non mesurable Général Alimentation CA 120 V 60 Hz Consommation 25 W pendant le fonctionnement 0 7 W en attente Dimensions approx 150 mm 175 mm 211 mm L H P Masse approx 2 1 kg Enceintes Type 1 voie à évent acoustique accordé Haut parleurs cône de 10 cm 1 Impé...

Страница 40: ... 9 12 14 14 10 10 6 11 7 9 12 13 6 7 9 6 8 12 13 14 8 12 13 14 10 6 10 STANDBY CLOCK SLEEP DISPLAY PROGRAM FM AUDIO IN AUDIO IN MICRO COMPONENT SYSTEM UX G210 VOLUME STOP CD USB MEMORY REMOTE SENSOR Appareil principal 8 5 11 7 9 12 13 6 8 12 13 6 11 6 8 12 13 9 10 11 12 13 6 10 8 6 7 9 8 12 13 Capteur de télécommande 7 9 12 FR_UX G210 C _1 BOOK Page 18 Thursday December 3 2009 11 03 AM ...

Страница 41: ...1209YAMMDWMTS EN FR 2009 Victor Company of Japan Limited UX G210 MICRO COMPONENT SYSTEM COVER_UX G210 C FM Page 2 Thursday December 3 2009 5 44 PM ...

Отзывы: