


Mirus for H2 Classic GrainGage
91
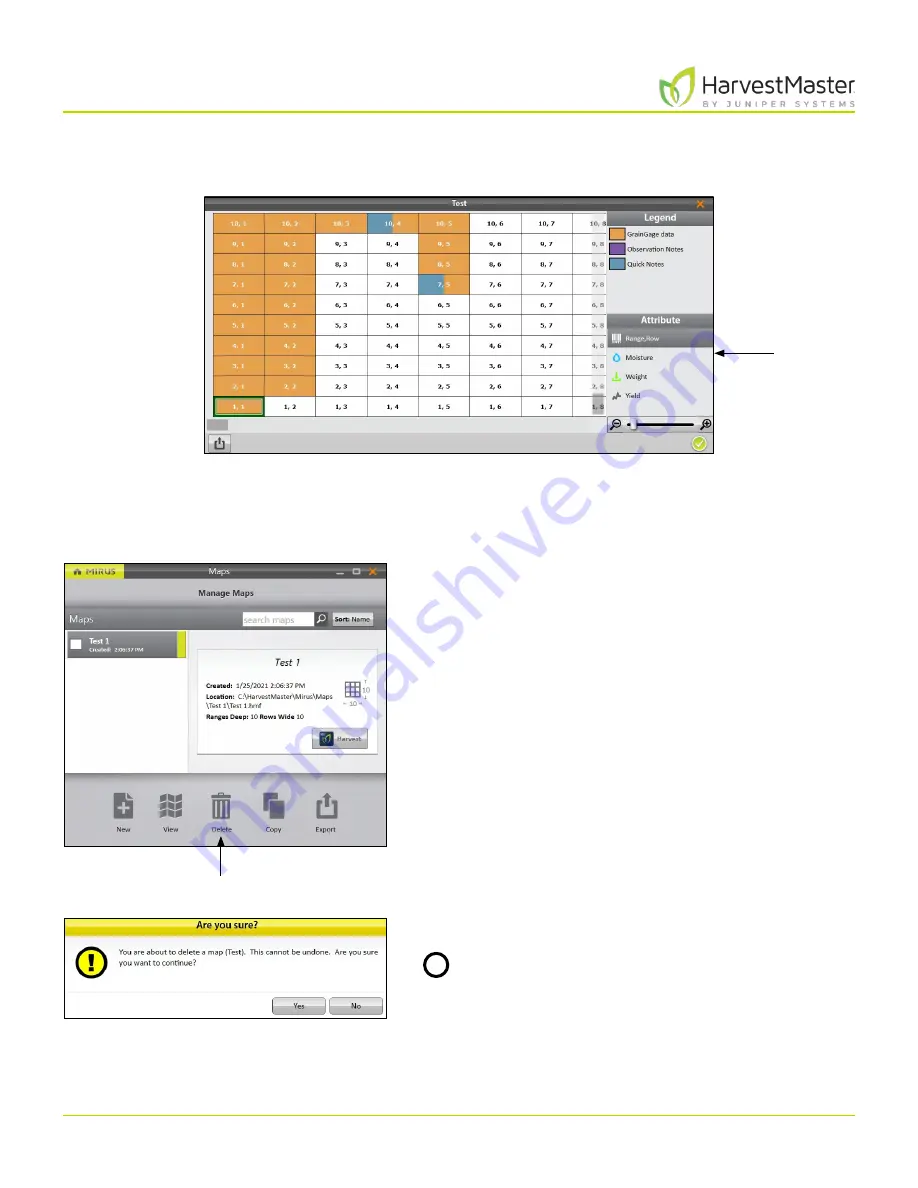
Field Maps
Depending on the attributes in the map and what data has been collected, Map View can be configured to
display different attributes of the grain as shown in the image below:
5 .4 Delete a Map
On the Manage Maps screen,
1. Select the map you want to delete.
2. Tap
Delete
.
Mirus asks if you are sure.
CAUTION: This cannot be undone! You cannot
recover a deleted map.
If you choose to proceed, tap
Yes
.
Mirus deletes the map, and it is no longer available in the list on the Manage Maps screen.
Select an
attribute.
Delete
!
Содержание HarvestMaster mirus H2
Страница 1: ......
Страница 7: ...CHAP TER ONE Mirus Ins tallation...
Страница 11: ...Mirus and GrainGage S etup CHAP TER T WO...
Страница 32: ...H2 Clas sic GrainGage Diagnos tic s and Aler t s CHAP TER THREE...
Страница 42: ...GrainGage Calibration CHAP TER FOUR...
Страница 71: ...Field Maps CHAP TER FIVE...
Страница 98: ...Har ves t Mode CHAP TER SIX...
Страница 111: ...Mirus for H2 Classic GrainGage 111 Harvest Mode 6 3 7 List View In List View you can see the data in the form of a chart...
Страница 120: ...Standard Grain Information APPENDIX A...
Страница 123: ...Troubleshooting APPENDIX B...
Страница 129: ...Limited Warrant y APPENDIX C...


