Connecting AC Power to an ACX5000 Router
The power supply in an ACX5000 router is a hot-removable and hot-insertable field-replaceable unit (FRU).
You can remove and replace it without powering off the router or disrupting routing functions.
Ensure that you have a power cord appropriate for your geographical location available to connect AC
power to the router.
Before you begin connecting AC power to the router:
•
Ensure that you have taken the necessary precautions to prevent electrostatic discharge (ESD) damage
(see
“Prevention of Electrostatic Discharge Damage” on page 196
•
Ensure that you have connected the router chassis to earth ground.
CAUTION:
Before you connect power to the router, a licensed electrician must
attach a cable lug to the grounding and power cables that you supply. A cable with
an incorrectly attached lug can damage the router (for example, by causing a short
circuit).
To meet safety and electromagnetic interference (EMI) requirements and to ensure
proper operation, you must connect the chassis to earth ground before you connect
it to power. For installations that require a separate grounding conductor to the
chassis, use the protective earthing terminal on the router chassis to connect to the
earth ground. For instructions on connecting earth ground, see
ACX5000 Router to Earth Ground” on page 110
. The router gains additional grounding
when you plug the power supply in the router into a grounded AC power outlet by
using the AC power cord appropriate for your geographical location (see
Supply for an ACX5000 Router” on page 65
•
Install the power supply in the chassis. For instructions on installing a power supply in a ACX5000 router,
see
“Installing a Power Supply in an ACX5000 Router” on page 138
NOTE:
Each power supply must be connected to a dedicated power source outlet.
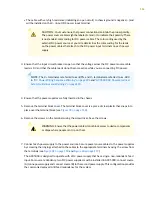
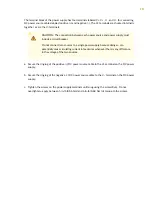
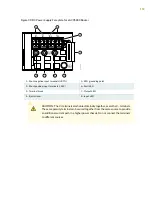
To connect AC power to an ACX5000 router:
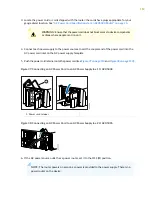
1. Attach the grounding strap to your bare wrist and to a site ESD point.
2. Ensure that the power supplies are fully inserted in the chassis and the latches are secure. If only one
power supply is installed, ensure a that blank cover panel is installed over the second power supply
slot.
112
Содержание ACX5048
Страница 1: ...ACX5048 and ACX5096 Universal Metro Router Hardware Guide Published 2020 12 14 ...
Страница 99: ...NOTE USB flash drives used with the ACX5000 router must support USB 2 0 or later 99 ...
Страница 145: ...5 CHAPTER Troubleshooting Hardware Troubleshooting ACX5048 and ACX5096 146 ...
Страница 148: ...6 CHAPTER Contacting Customer Support Contacting Customer Support and Returning the Chassis or Components 149 ...
Страница 160: ...160 ...
Страница 167: ...Restricted Access Warning 167 ...
Страница 171: ...171 ...
Страница 183: ...Unterminated Fiber Optic Cable Warning 183 ...
Страница 186: ...While performing the maintenance activities for devices observe the following guidelines and warnings 186 ...
Страница 188: ...Jewelry Removal Warning 188 ...
Страница 191: ...Operating Temperature Warning 191 ...
Страница 202: ...DC Power Disconnection Warning 202 ...
Страница 206: ...DC Power Wiring Sequence Warning 206 ...
Страница 209: ...DC Power Wiring Terminations Warning 209 ...

