– 19 –
3-6. Presser foot pressure
WARNING :
Turn OFF the power before starting the work so as to prevent accidents caused by abrupt start of the
sewing machine.
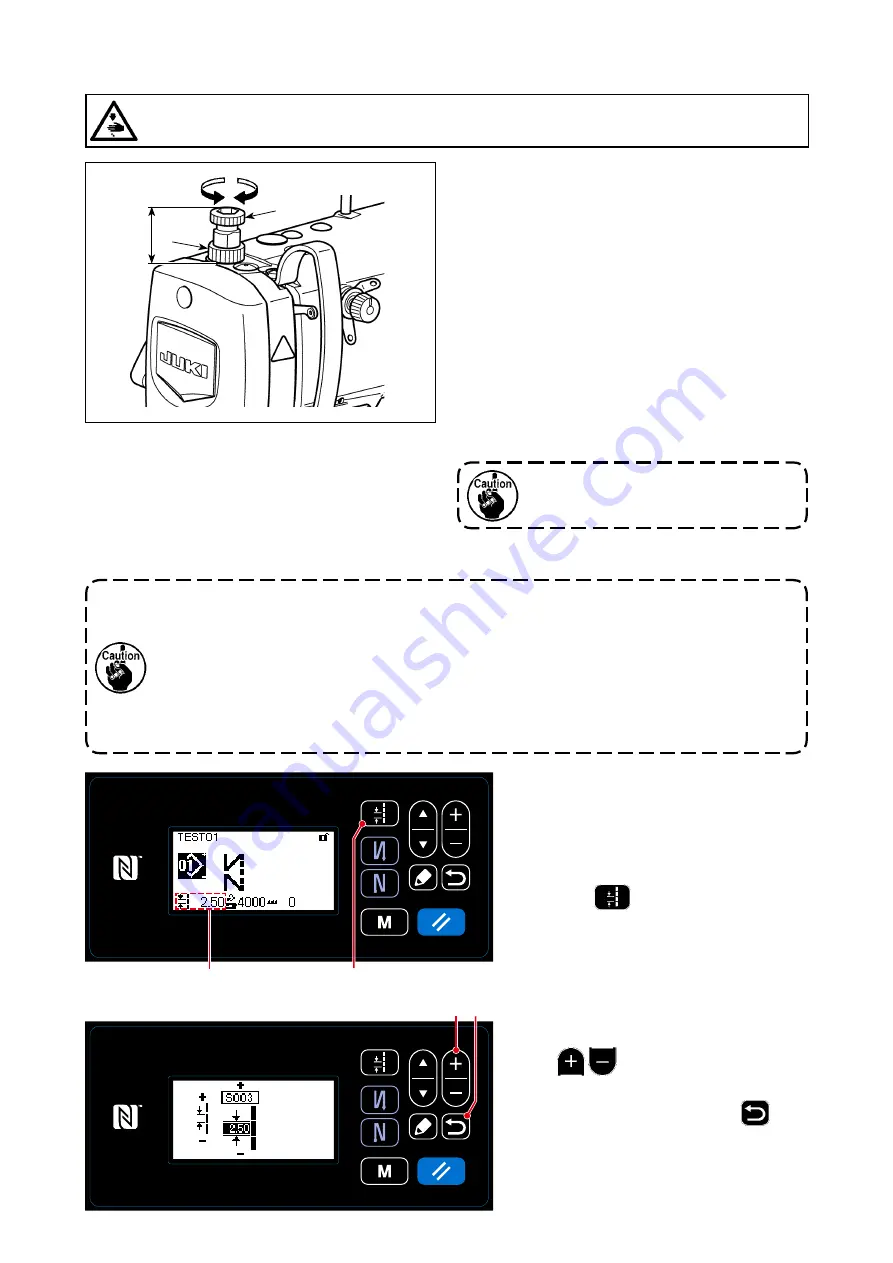
1) Loosen nut
❷
. As you turn presser spring regula-
tor
❶
clockwise (in direction
A
), the presser foot
pressure will be increased.
2) As you turn the presser spring regulator
❶
count-
er-clockwise (in direction
B
), the pressure will be
decreased.
3) After adjustment, tighten nut
❷
.
The standard value of the height
C
of presser spring
regulator
❶
is as follows :
• S type : 31.5 to 29 mm
(approx. 40 to 45 N / 4 to 4.5 kg)
• H type : 31.5 to 28 mm
(approx. 50 to 60 N / 5 to 6 kg)
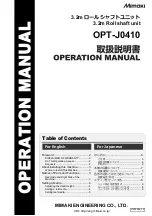
Stitch length is displayed in section
A
on
the panel. (Example of display : 2.50 mm)
[How to adjust]
1) Display the stitch pitch entry screen by
pressing
❼
.
3-7. Adjusting the stitch length
A
B
C
❶
❷
2) The value displayed is changed by press-
ing
❷
. (In increments of 0.05
mm ; Input range : -5.00 to 5.00)
3) Confirm your entry by pressing
❻
.
Then, the sewing screen is displayed.
To avoid personal injury, never put your
fingers under the presser foot.
❷ ❻
A
❼
1. There may be the cases where the feed amount of the operation panel and the actual sewing
pitch are different from each other in case of the use in the state other than the standard
delivery or material used. Compensate the pitch in accordance with the sewing product.
2. Be aware that interference between the throat plate and feed dog can occur depending on
the gauge used. Be sure to check the clearance in the gauge to be used. (The clearance
must be 0.5 mm or more.)
3.
When you have changed the stitch length, feed dog height or feed timing, run the sewing
machine at a low speed to make sure that the gauge does not interfere with the changed part.
Содержание DDL-9000C-S Series
Страница 1: ...DDL 9000C S INSTRUCTION MANUAL ...


