juiced
Link
TM
User’s Manual
DT454 – XLR Adapter / Preamplifier / AGC Disabler
© 2010 juicedLink, LLC.
ENGLISH
All Rights Reserved.
DT454 User Manual: Rev1.10
Страница 1: ...juicedLink TM User s Manual DT454 XLR Adapter Preamplifier AGC Disabler 2010 juicedLink LLC ENGLISH All Rights Reserved DT454 User Manual Rev1 10...
Страница 2: ...al 14 Features Specifications 14 Switch Panel Descriptions and Photos 15 Photos 15 Front Panel Switches 17 Side Back Inputs 18 Bottom Switches 19 Included Items 21 Accessories 21 Block Diagram Basic 2...
Страница 3: ...36 Dynamic Range Performance 36 AGC Disable 37 Tone 38 Safety Mode Noise 39 Metering Setting the Appropriate Gain Trim Levels 41 Headphone Monitoring 43 Playback Headphone Monitoring 43 Advanced Topic...
Страница 4: ...d or possible damage to this device and your other equipment WARNING LOSS OF HEARING This device as well as any device with a headphone amplifier is capable of driving the signal at levels that can be...
Страница 5: ...METER HI setting You can run the DT454 meter a little hot Or you can try and get the DT454 calibration a little bit closer to the 5D 1 click setting NOTE We have posted a video on our website which m...
Страница 6: ...follow any of the post production steps presented in this Manual since there was no need to use any of the AGC disable features of the DT454 Up Return to Contents MagicLantern 3rd Party Firmware Magic...
Страница 7: ...PAN TO L NORM switch to the NORM position Since AGC Disable is not used c Since MagicLantern has its own built and meters you will not be using the METER on the DT454 you ll simply ignore them 2 WHILE...
Страница 8: ...a potentiometer to a pre determined position and signal level Then you will use a small screwdriver to adjust one of the meter potentiometers so the meter is calibrated to that signal level Follow th...
Страница 9: ...roduction Removing Right Track to remove the AGC Disable noise signal from the right recording track to leave you with the clean recorded left track The AGC Disable technique yields very good results...
Страница 10: ...ignal and feed that back to the DT454 input Then you will adjust a potentiometer to a pre determined position and signal level Then you will use a small screwdriver to adjust one of the meter potentio...
Страница 11: ...e LO meter setting and adjust the GAIN and TRIM volume potentiometer settings to keep the peaks below the red LED of the Meter d The other settings phantom power etc operate like any typical mixer 3 P...
Страница 12: ...camera gain as much as possible Because of this you will not use the DT454 AGC disable feature So you also get two tracks for recording Unfortunately have a high analog noisy gain in the front end wh...
Страница 13: ...the GAIN and TRIM volume potentiometer settings to keep the peaks below the red LED of the meter f The other settings phantom power etc operate like any typical mixer 3 POST PRODUCTION a There s no n...
Страница 14: ...is additional gain is very valuable with the new Canon 5D 2 0 4 firmware release as well as MagicLantern users o Headphone amplifier o Playback Monitor o 48V phantom plus 12V phantom power saving mod...
Страница 15: ...Get notified on User Manual and product updates Page 15 Subscribe at http www juicedlink com blog index html Switch Panel Descriptions and Photos Photos...
Страница 16: ...Page 16 Omissions Suggestions Contact Us www juicedLink com Return to Contents...
Страница 17: ...M controls for XLR L and XLR R microphone or line input channels 3 TRIM controls for TIP L and RING R microphone or playback monitor input channels 4 Left L and Right R channel signal level meters 5 O...
Страница 18: ...uded and insert into the bottom of the screw to rotate the screw into the camera threads to mount to camera 2 9V battery tray 3 Audio Inputs XLR L left and XLR R right balanced mic or line inputs unba...
Страница 19: ...Get notified on User Manual and product updates Page 19 Subscribe at http www juicedlink com blog index html Bottom Switches...
Страница 20: ...nd left outputs STEREO leaves the right and left inputs separated and only the corresponding input signal is presented to each the of the right and left outputs 7 PAN TO L combines the right and left...
Страница 21: ...w juicedlink com blog index html Included Items 1 Stereo minijack cable Use to connect mic output of DT454 to the mic input on the camera 2 Hex key USE HEX KEY TO TURN 20 SCREW INTO CAMERA FOR MOUNTIN...
Страница 22: ...Page 22 Omissions Suggestions Contact Us www juicedLink com Block Diagram Basic Return to Contents...
Страница 23: ...html Basic Operation Mounting to Camera Use the 1 8 Hex Key included Insert the Hex Key into the bottom of the 20 mounting screw and rotate the mounting screw into the 20 threads in the base of the c...
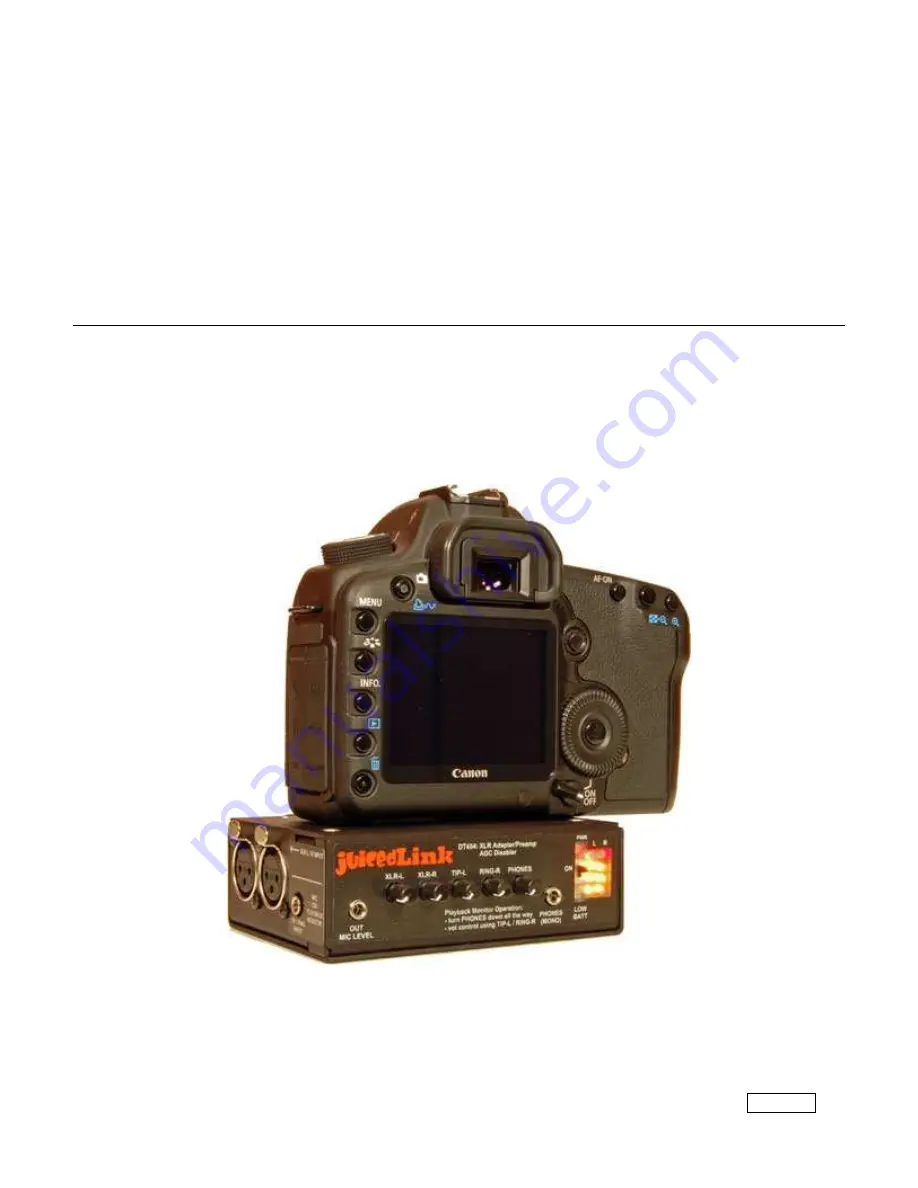
Страница 24: ...e plate first The switch locations of the DT454 were designed such that the most frequently used switches Gain Phantom Power and Panning are most readily available to the user The illustration shows w...
Страница 25: ...tion to Camera Use the included 3 5mm stereo miniplug cable and plug one end into the DT454 OUT jack Then plug the other end into the camera s 3 5mm minijack microphone input Note some cameras may use...
Страница 26: ...ate even though the LED indicators may lead you to believe that it should Alkaline Battery Life Battery life varies and depends on numerous factors Use of phantom power takes up battery resources espe...
Страница 27: ...o the right output channel This is illustrated in the Block Diagram section Multi channel wireless microphone systems with separate microphones on the miniplug ring tip output will interface directly...
Страница 28: ...eless Etc XLR L and XLR R are capable of interfacing with unbalanced sources However the proper XLR connector must be used This XLR connector must connect pin 1 with pin 3 which effectively grounds th...
Страница 29: ...tents Phantom Power Condenser microphones require a voltage to operate Some will take their own battery Others require that a voltage is generated by the mixer that the microphone is plugged into and...
Страница 30: ...the battery making it easer to boom or mount to camera when necessary o Consider a microphone that will work down to 12V phantom power This will considerably extend the battery life of the DT454 Ther...
Страница 31: ...e 31 Subscribe at http www juicedlink com blog index html MIC LINE Switches The LINE position inserts a 40dB attenuator before the preamps in the XLR L and XLR R signal chains For typical microphone u...
Страница 32: ...tput connections of the OUT minijack The MONO switch position combines the right and left signals and presents the combination to both the right and left output connections of the OUT minijack This ca...
Страница 33: ...r to the left channel So PAN TO L is used to route XLR R and RING R to the left channel for recording This is utilized when you are using right channel mics XLR R or RING R and plan on abandoning the...
Страница 34: ...position If you find that the correct level settings see Meter section require use of the TRIM potentiometers volume control knobs near the full counter clockwise position where small changes in the p...
Страница 35: ...If you find that the correct level settings see Meter section require use of the TRIM potentiometers volume control knobs near the full counter clockwise position where small changes in the potentiom...
Страница 36: ...one connected to its input Preamps without the impedance of a microphone connected to their input have a high impedance at the preamp input which results in the preamp generating a lot of noise So tur...
Страница 37: ...ain in the juicedLink low noise preamplifiers This is easily accomplished with cameras having manual control of audio gain see the Low Noise Performance section However some cameras do not have manual...
Страница 38: ...ntinued use of the right recording track depends on the camera s Nyquist Anti Aliasing Low Pass Filter to be working extremely effectively Otherwise the inaudible 20KHz tone can produce aliased artifa...
Страница 39: ...ct may get resampled by a compression algorithm that you don t control YouTube etc and result in an aliased artifact of the tone back in the audio band See the Post Production Removing Tone for more d...
Страница 40: ...ot get activated until the camera begins to RECORD for the first time 2 Until you hit RECORD and activate the microphone input you will hear noise in the DT454 headphones Once you hit RECORD the noise...
Страница 41: ...has been calibrated for a typical camera with its AGC in operation When you want to optimize dynamic range instead of noise performance then you will want to take advantage of the camera s AGC See the...
Страница 42: ...r settings so that when you speak into your microphone the meter peaks splash to the 3rd amber DT454 LED without illuminating the 4th red LED or infrequently doing so 2 Throttle back the camera gain u...
Страница 43: ...ut a mono signal combining both the right and left channels into each of the headphone earcups To use the headphone amplifier for playback monitoring playing back the clip in your camera and using the...
Страница 44: ...ultaneously watch the clip on the camera LCD display If you are putting together a professional grade rig then you will probably be using an external monitor and you will plug your headphones into tha...
Страница 45: ...t tone frequency in your clip i Use your mouse to select the waveform in the right track ii ANALYZE PLOT SPECTRUM will bring up a frequency analysis window of your waveform iii Change the number of sa...
Страница 46: ...Cut Express a Delete the right track i Modify Link to unlink the audio from video ii Modify Stereo Pair to unlink the right and left audio tracks iii Use mouse and select the right track iv Delete th...
Страница 47: ...the video iii MODIFY STEREO PAIR to unline the right and left audio tracks iv Use mouse to select and delete the right track b Pan the left track to center i Select double click the remaining left A1...
Страница 48: ...ixers is uncompromising in quality and performance and utilizes top grade professional components We are proud of our product and are committed to servicing you to make your customer experience positi...