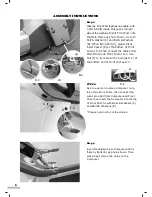
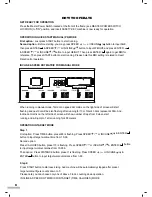


ALIGNING THE RUNNING BELT
Ensure the running belt is centered on your treadmill at all times. Running
style and Non-level surface are two instances which may cause the belt
to drift off center.
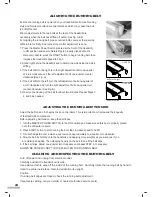
Minor adjustments to the two bolts at the rear of the treadmill are
necessary when the belt has drifted off center. See fig. A & B.
For aligning the running belt, please remove both covers at the rear side
of Main Frame firstly. And recover them after adjustment is done.
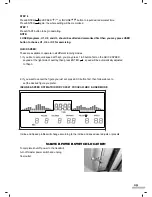
1. Press the Master Power Switch (located at the front of the treadmill)
to ON position and ensure Safety Key is properly placed onto the
computer console, press the START button to begin running belt, then
increase the treadmill's speed to 3 kph.
2. Stand right behind the treadmill and to determine which side the belt is
drifting.
3. If the belt drifts to the right, turn the right adjustment bolt one-quarter
of a turn clockwise and the left adjustment bolt one-quarter counter
clockwise (See Fig. A).
4. If the belt drifts to the left, turn the left adjustment bolt one-quarter of
a turn clockwise and turn the right adjustment bolt one-quarter turn
counter-clockwise (See Fig. B).
5. Observe the tracking of the belt for about two minutes. Repeat Steps 3,
4, and 5 as needed.
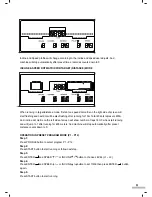
ADJUSTING THE RUNNING BELT TENSION
Adjust the belt tension if it begins to slip on the rollers. This is important as it increased the longevity
of the treadmills components
Before adjusting belt tension, keep the belt loose
1. Turn the MASTER POWER SWITCH to the ON position and make sure safety key is properly placed
onto the computer console.
2. Press START button to start running the belt, then increase speed to 3KPH.
3. Turn both adjustment screws an equal amount, approximately one-quarter turn clockwise.
4. Slow the belt by holding onto the handrails and applying more weights as you walk, (as if you
are walking downhill). Then stepping heavily on the belt to see if the belt slips.
5. If the belt slips, adjust one-quarter turn clockwise and repeat STEP 4 if necessary.
ALWAYS BE CAREFUL NOT TO OVERTIGHTEN THE RUNNING BELT.
FIGURE A
FIGURE B
drifts to the right
drifts to the left
CLEANING AND INSPECTING THE RUNNING BELT
Turn off power and unplug from electrical outlet .
Carefully position the treadmill on its side .
Use a damp cloth to wipe off the inside of the running belt . Carefully rotate the running belt by hand to
clean the entire inside face . Return treadmill to its upright
Position .
If running belt edges are frayed, check the running belt adjustment .
If seams are splitting, call your retailer or nearest authorized service center .
18
Содержание FitLux 665
Страница 1: ...665 MOTORIZED TREADMILL...
Страница 24: ...20160803...