background image

----3D Printer User Guide

1

JGAURORA 3D PRINTER

MODEL: A-4

USER GUIDE

Содержание A-4

Страница 1: ... 3D Printer User Guide 1 JGAURORA 3D PRINTER MODEL A 4 USER GUIDE ...

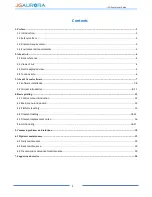
Страница 2: ...ut JGcreat software 7 3 1 Software installation 7 8 3 2 JGcreat introduction 8 11 4 Basic printing 12 4 1 Control menu introduction 12 4 2 Main menu introduction 13 4 3 Platform leveling 13 4 4 Filament loading 14 15 4 5 Filament replacement notes 16 4 6 First printing 16 17 5 Common problems and solutions 18 6 3D printer maintenance 19 6 1 Daily maintenance 19 6 2 Basic maintenance 19 6 3 Transmi...

Страница 3: ... grounded outlet Do not modify A 4 plug 4 When the A 4 continuously work over 96 hours it should be stop for 1 3 hours to restart 5 Do not remove the models with force and we recommend that you should wear protective glasses 1 3 Filament requirements Do not abuse the filament Please make sure you use the JGAURORA filament or the filament from the brands accepted by JGAURORA If you won t use the A ...

Страница 4: ...truder single Z axis positional accuracy 0 0025mm Build volume 150 140 140mm Nozzle temperature room temperature to 250 Platform material special magnetic plate Nozzle diameter 0 4mm LCD display 4 3 color IPS Touch Screen Support material PLA TPU Connectivity USB cable USB stick Software JGcreat Support Formats STL OBJ G Code Filament diameter 1 75mm Machine dimension 432 395 418mm AC Input AC110 ...

Страница 5: ... view 1 Extrusion board 2 Bearing 3 Square fan 4 Driven shaft 5 Squeezing screw 6 Nozzle heating part 7 Extrusion spring 8 Stepper motor 9 Extrusion gear 10 Heat Sink 11 Extruder fixing plate 12 Extruder PCB board fixing plate 13 Extruder PCB board 14 Extruder cover 15 Flexible flat cable 16 Thermocouple 17 Thermistor 18 Flexible flat cable pressing plate 19 Wind guide 20 Turbofan 21 Shifting pres...

Страница 6: ... 3D Printer User Guide 6 2 4 Tool box lists ...

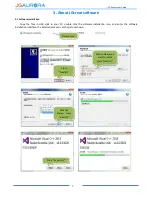
Страница 7: ... files in USB stick to your PC double click the software installation icon and enter the software installation interface the installed process is as the picture shown Double click Press Next N Choose where you want to install press Next N Click the choice press Install I Press Repair R ...

Страница 8: ...r clicking the Finish icon the installation of software is completed 3 2 JGcreat introduction 1 Open the software JGcreat Press Finish Press Next N Press Next N Choose the box as pic press Finish F Double click to open the JGcreat ...

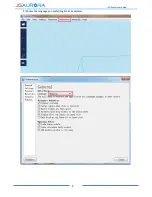
Страница 9: ... 3D Printer User Guide 9 2 Choose the language you prefer English as a example ...

Страница 10: ...oad 3d file and slice it Load a 3d file of stl or obj select the appropriate print quality the lower right corner of the software shows Slicing that is to generate Gcode code choose A 4 then press Add Printer Choose the print quality you prefer ...

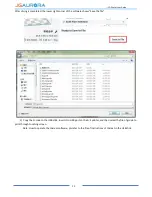
Страница 11: ...he software shows Save the file 5 Copy the G code to the USB stick insert it to USB port on the A 4 printer and then select the file of gcode to print through touching screen Note How to operate the JGcreat software pls refer to the file of Instructions of JGcreat in the USB stick ...

Страница 12: ...le Stop menu Setting menu Out Filament Back CONFIRM CANCEL Extruder temp setting Fan speed setting PLA option Custom extruder temp setting 温度设置 All back home X back home Z back home Y back home X axis go left right Y axis go forward back Z axis go up down E axis feed retract filament Wifi pairing Language Default Back Back Back Back Remove USB Pause Start menu In Filament ...

Страница 13: ...4 2 Main menu introduction 4 3 Platform leveling Press the MOVE button then press All the extruder part moves to home Press All Print menu Move menu Preheat menu Setting menu Extruder temp Firmware Info USB Stick connected WIFI ...

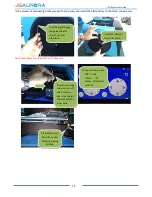
Страница 14: ...A4 paper if the A4 paper is too loose to withdrawal then clockwise the rotary nut if the A4 paper is too tight then anti clockwise it Note Any question pls refer to the video of Platfrom Leveling in SD card 4 4 Filament loading Press the Preheat option enter into Preheat menu select a corresponding material This User Guide take PLA as an example Select PLA 200 Step 1 Move to Right backward Step 2 ...

Страница 15: ...on of clockwise Load filament though the guide tube till stretch out from other end Install the filament tray to the stand Press the pressing screw on the left side of nozzle insert the straight filament with the other hand then insert the nozzle When the temp up to 200 click Move E button till filament spill out Filament spill out from the nozzle Filament loading finished ...

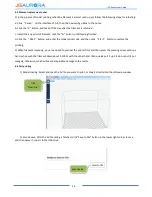
Страница 16: ...e and then click Start button to restore the printing 2 When filament replacing you are adviced to preheat the printer first and then press the pressing screw with one hand while push the filament down about 5 10CM with the other hand then quickly pull it up Pls do not pull it out savagely otherwise which will cause irreparable damage to the nozzle 4 6 First printing 1 Model loading Select and loa...

Страница 17: ... will preheat automatically then the temp of nozzle will reach the printing temperature you setted in the software model printing begin until it is finished Note when printing if the first 1 2 layers can not be attached to the platform please stop printing and re leveling the gap between the platform and the nozzle Click PRINT Select the file you prefer to print ...

Страница 18: ...al with it according to the video in USB stick 2 Slip Filament is too thin Cut the thin filament 3 Temp Is unusual Broken temp sensor Change a new one 4 Different shape as STL Screw is loose Check and Lock the screws 5 The model is warped The hot bed is not at a level Adjust hot bed 6 G code gerating failed Wrong setting or wrong save path Choose the right machine type and change the right path 7 ...

Страница 19: ... calibration process if found the screw nut is loose you should use six angle wrench screwdriver wrench and other tools to tighten it 2 In the printing process of 3D printer not only the design of each print model can not exceed the actual print range of the device but also can not allow the machine to work in the too high temperature and too much load Otherwise it not only can not print the quali...

Страница 20: ...ct the after sale service center or our support team firstly Shenzhen Aurora Technology Co Ltd Headquarter Address 5F Building 1 Longquan Technology Park Tongsheng community Dalang street Longhua district Shenzhen China 518109 Company homepage www jgaurora3d com Tel of after sales service center support team 0755 29735649 66607459 Email of support support zgew3d com or after sales 3derwo com Offic...

Отзывы: